Plate Carriers, Armor and Spalling

Ok, so I have a range trip set in stone a little more than two weeks from now to test phase 2. Barring a freak blizzard i will be at the range.

I picked up two different coatings to try over the tape. Rustoleum LeakSeal flexible rubber coating and DupliColor Bed Armor. Both rattle cans. Both from Advance Auto.

Neoprene sheets arriving from McMaster.com tomorrow. I ordered two different types. I'll inspect when they arrive and update with what part number I settle on.

Plan is to assemble two plates, one using each coating to cover the gorilla tape.

Layering will be:
1 sheet Neoprene
Gorilla tape at 45deg /////
Coat with LeakSeal or Bed Armor 2 light coats, wait 24 hours
1 sheet neoprene
Gorilla tape at 45deg opposite direction \\\\\
Coat with LeakSeal or Bed Armor 2 light coats, wait 24 hours

I will document the assembly with pics and post them up along with total weight added. Shooting will be same as previous test, two shoots of ATI M855 at 50 yards. I will take pics of both after those and if they survive I will shoot up to eight more rounds into each until I see a failure, or reach ten total rounds.

I'm 99% sure this will work. If so, phase 3 is going to be trying 1 layer of neoprene/tape/coating that performs in phase 2 best to compare results. It's possible based on data from this test that I move to 3/8" neoprene for the single layer test.
 
did you guys consider putting an aluminum plate in front of the steel plate? Virgin aluminum is pretty soft, but I really doubt that spalling will be able to go sideways very far in the aluminum. I'd worry about close contact of the Al plate to steel, but otherwise that may work.
 
did you guys consider putting an aluminum plate in front of the steel plate? Virgin aluminum is pretty soft, but I really doubt that spalling will be able to go sideways very far in the aluminum. I'd worry about close contact of the Al plate to steel, but otherwise that may work.

This is something I can easily test. I'll put it on the list. Won't have time to get it done before this next range trip, but i'll try cutting a piece of 1/4 aluminum, form it to the plate and give it a few hits.

My only concern on this would be the weight addition when compared to what I'm currently doing. I got the two different density neoprenes in today and both are pretty light. I think the tape used is going to be heavier than the neoprene sheets.

FYI, I'm going to be using a 1/3 to 1/4 overlap on the taping.
 
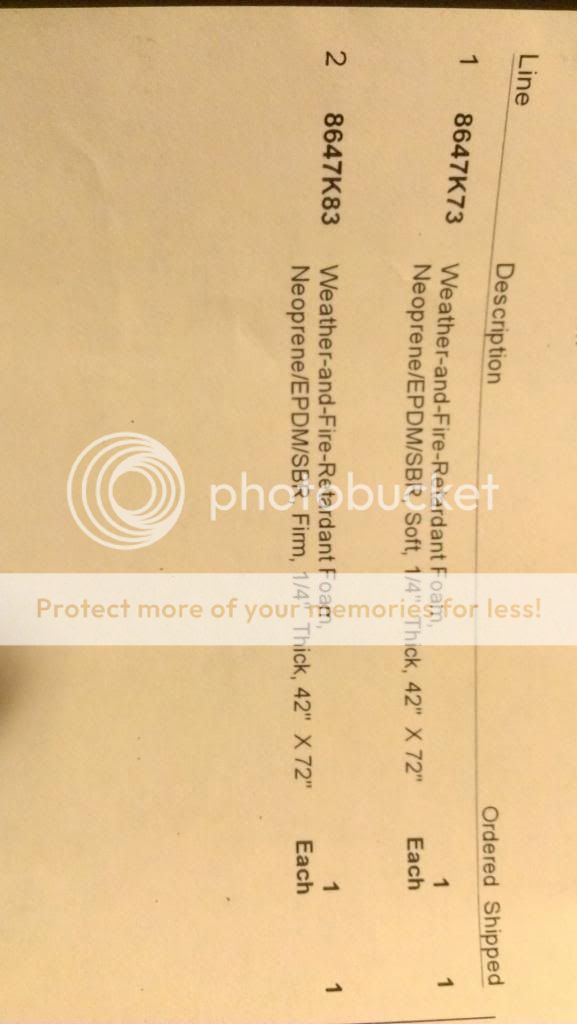
Well, I finally got the neoprene in and the storm has left me with nothing better to do than start making the plates up and document it for all you thread stalkers.

First, I give you the packing slip for the two rolls of Neoprene I bought from McMaster.com. One is "soft" and the other "firm". Each roll is roughly 42" x 72" and cost about $57. Each roll yields 21 layers, so enough for 10 plates. That's 21 plates total for both rolls.

You can buy it 42" widths and by the foot lengths at $12/ft. I would, however, suggest just pulling the specs from the McMaster website and use them to find it locally. I'm sure it can be had for less since McMaster does charge a premium. I only used them because I had a large order of other things I needed for work. Maybe, a bunch of you can start a "Plate Spall Build Party" and all pitch in for a roll or two and dive the cost.

3-McMasterPartNumbersLarge_zps4fb364cb.jpg


After careful examination, I was unable to deduce any significant difference between the two. There is a slight "springyness" difference between the two, but it is low. I hit both sheets several times on a concrete floor with a hammer. The dents did not stay and both sprang back pretty quickly to original flatness. So, my thoughts for this test base on this and my previous results, are to just use the "soft" for the outer (second) layer and the "firm" for the inner first layer. My previous tests clearly showed the first, inner, layer to be taking the abuse. I'm hoping if there is any real difference between the two, the "tougher" one would be the one getting beat on.

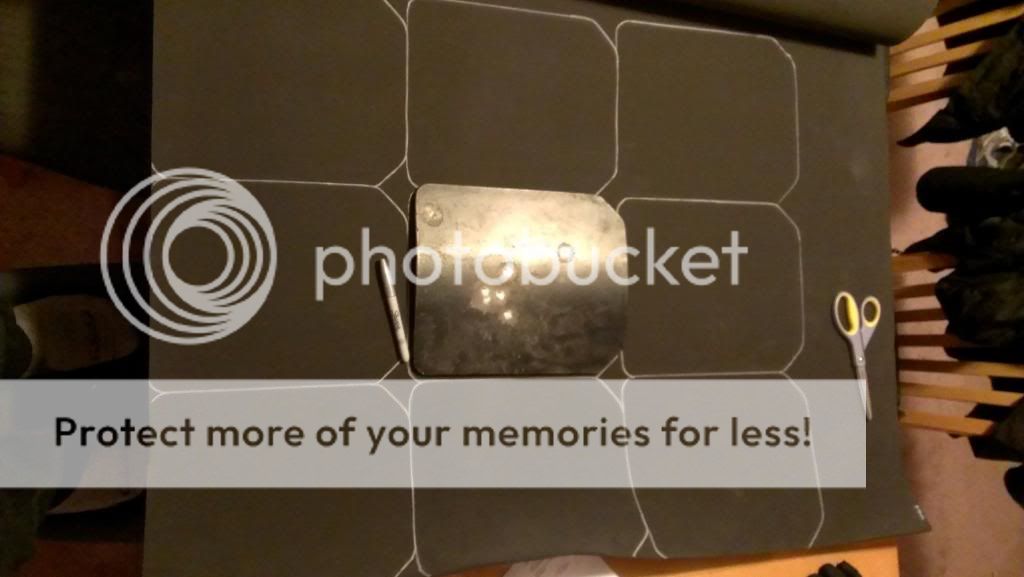
So it's time to break out the silver sharpie and start tracing. Note it's a SILVER sharpie, NOT a gray sharpie. The gray one didn't work, I tried.

2-SheetSilverSharpieLarge_zps45b63d60.jpg


The nest developing:

1-SheetLayoutLarge_zps1831c686.jpg


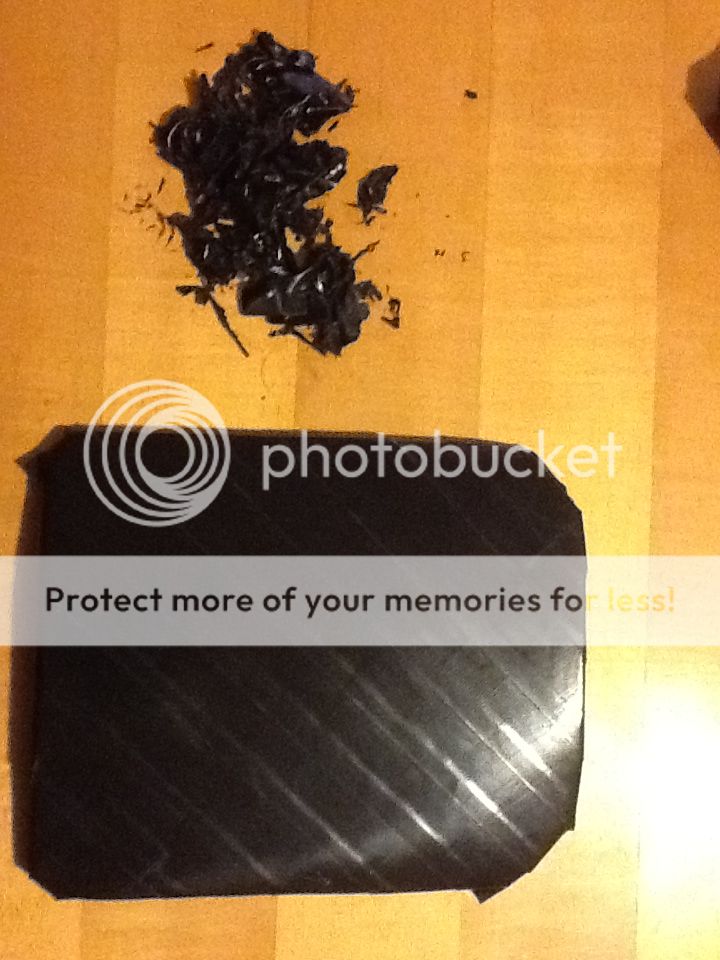
One cut out and shown offset on plate. I cut all 21 and the average weight was .138 lbs per piece:

5-NeopreneandScissorsLarge_zps2f5d5c8d.jpg


Directly on top:

4-FirstNeopreneCoveringLarge_zps438f95e5.jpg


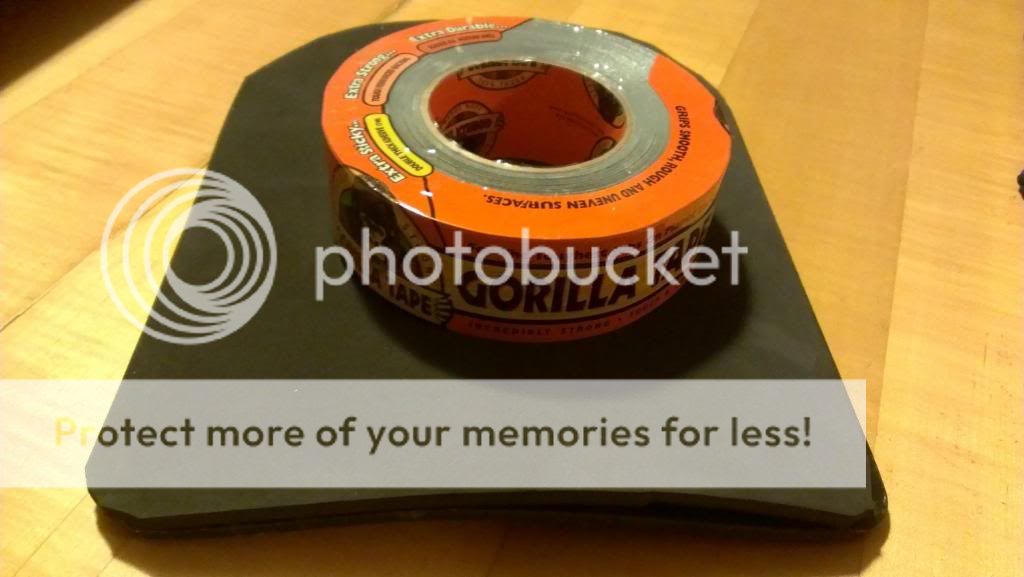
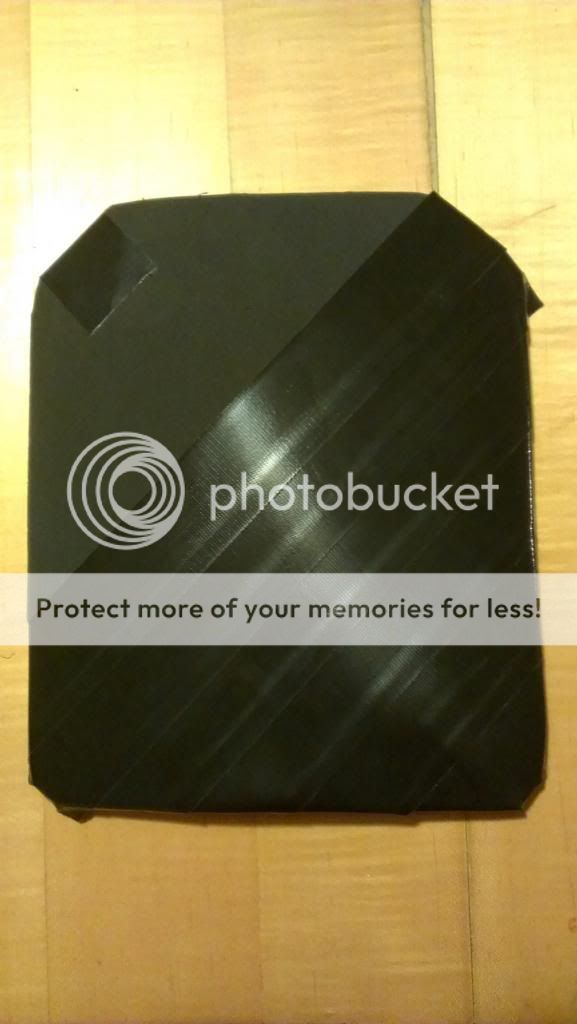
And now we break out Duct Tape's bigger, faster, stronger and better looking brother: Gorilla Tape

6-PlateNeoandGorillaLarge_zps43d8a5e7.jpg


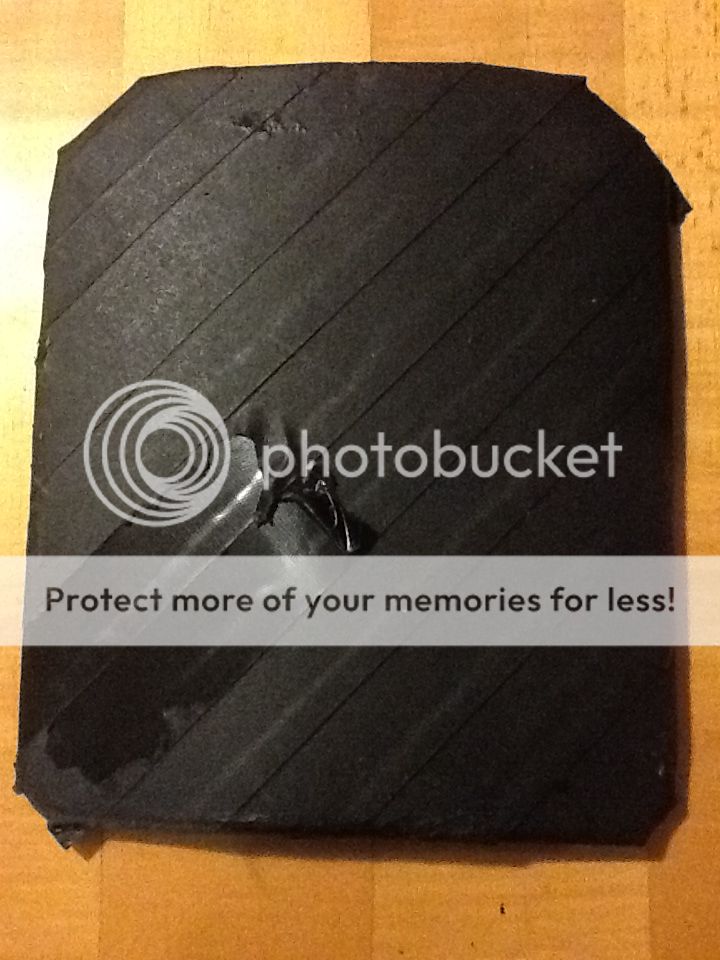
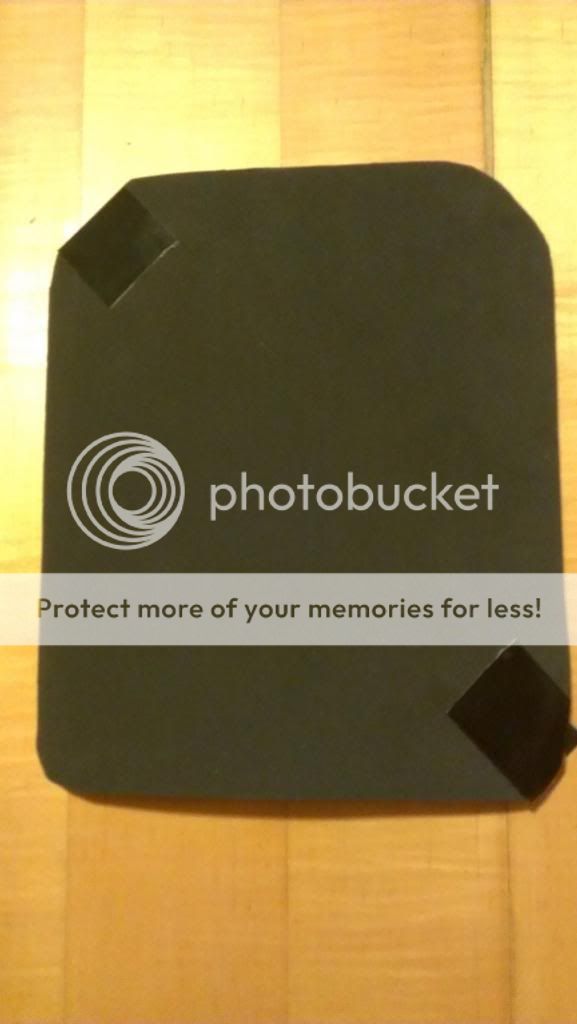
We start by taping the two diagonal corners to prevent weak spots:

7-CornersTapedLarge_zpse5497bd2.jpg


Then we start taping. We're going at 45° for this layer //// and the second layer will be 45° the opposite way \\\\ giving us a bias ply construction. I'm hoping this will completely eliminate the seam bursts we saw in my original test:

8-HalfTapedLarge_zpscd437793.jpg


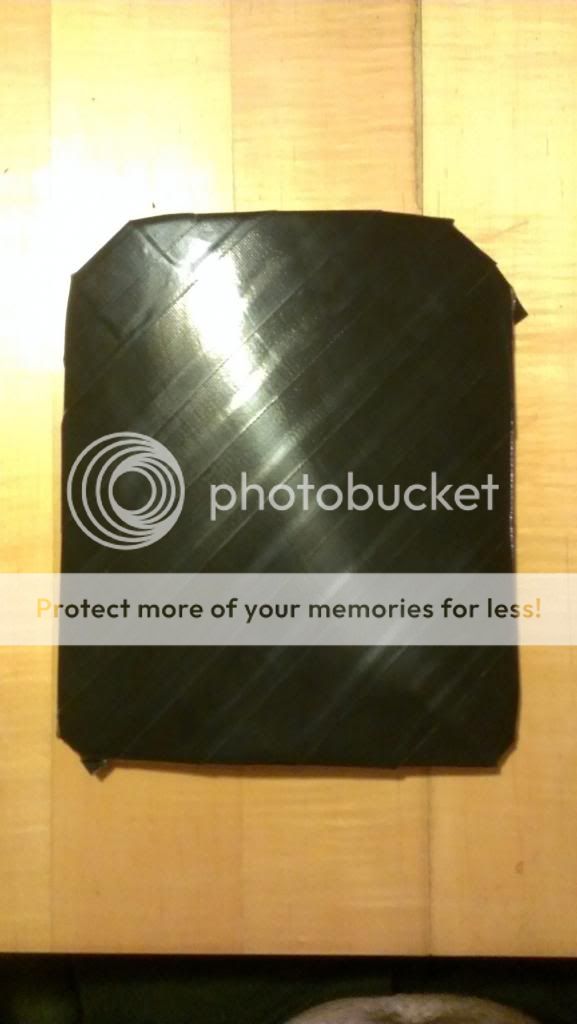
And all done. The tape itself weighs .127lb for the whole layer. You might ask how I know this. Well, because I know one of you knit pickers would ask me, and I like being thorough I went the extra mile. I taped the first layer up entirely, removed the tape and weighed it separately, then re-taped it with new tape. Your welcome.

9-FullTapedLarge_zps4c30ff1d.jpg


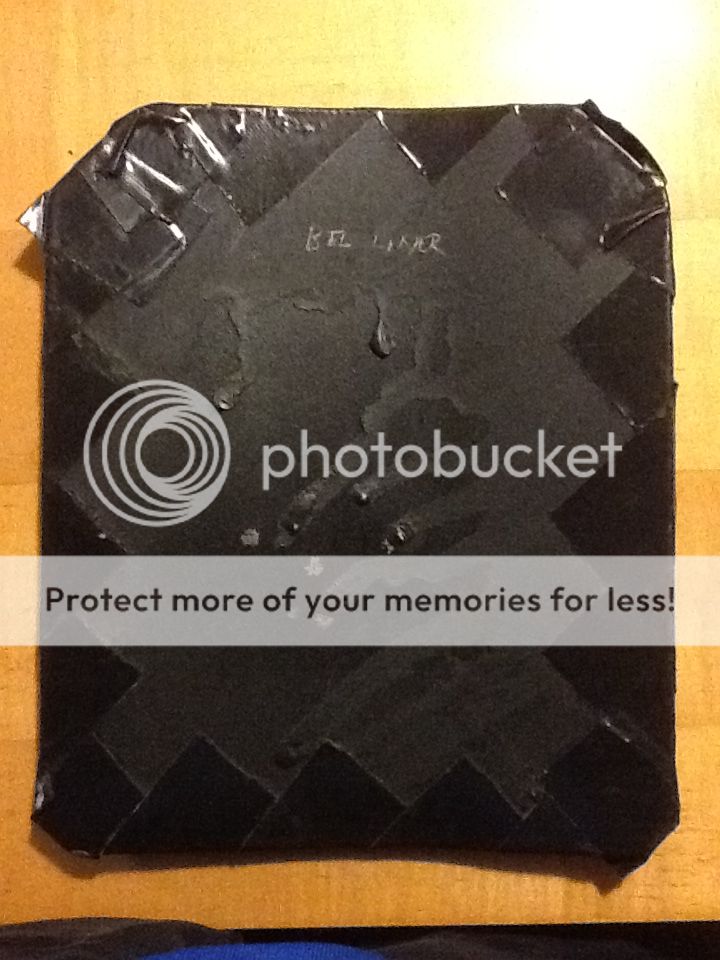
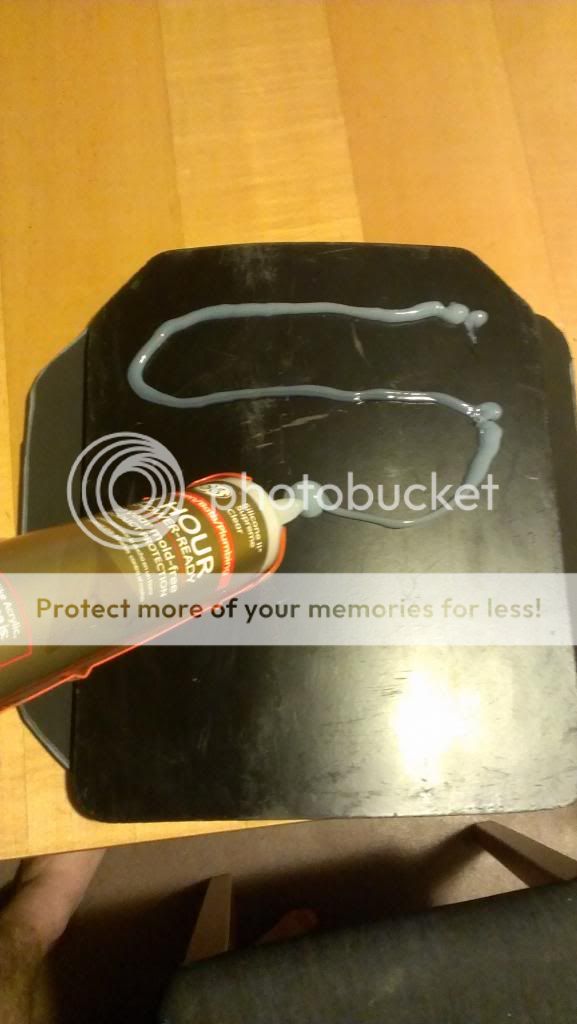
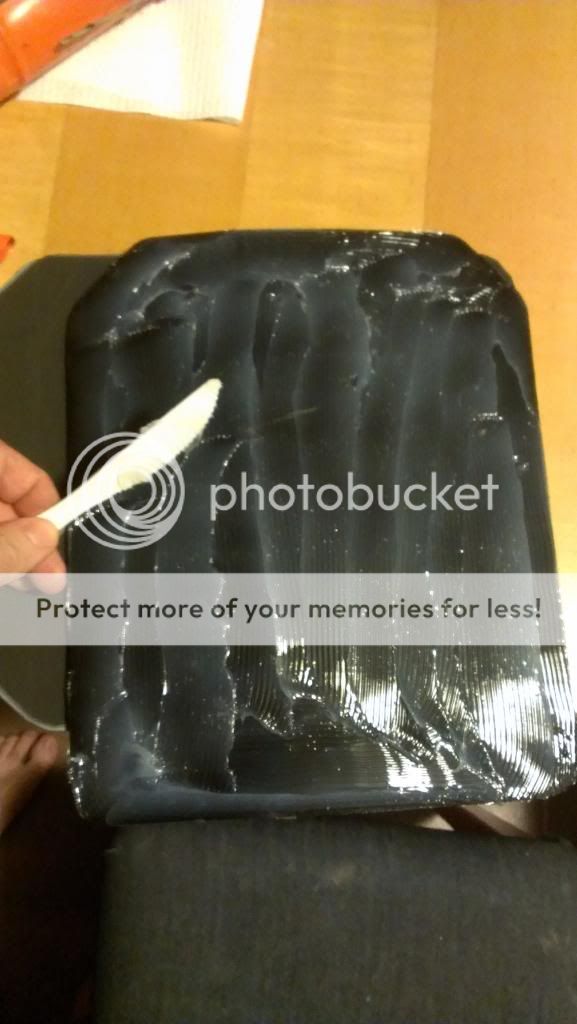
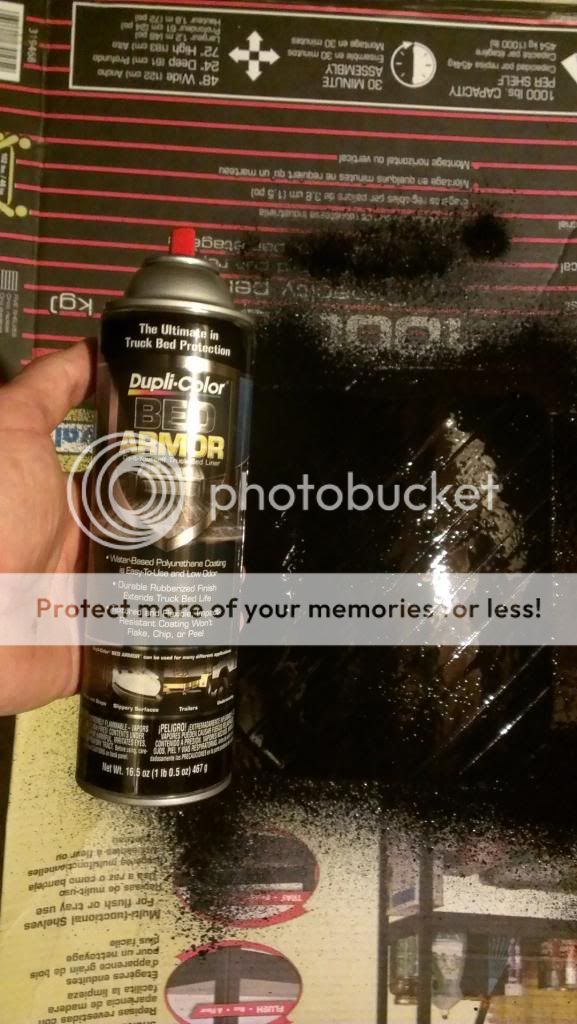
Now we apply the first contestant, Dupli-Color Bed Liner in two layers, 20 minutes apart after shaking the can for exactly 60 seconds each time per the instructions. Pic is the wet second layer:

10-FirstLayerTwoCoatsBedLinerLarge_zps9a6a2487.jpg


And a pic of the can too:

11-FirstlayercoatedwithcanLarge_zps8a9483b5.jpg


I also will be spraying the back, over just the ends of the tape that wrap around. I need to let the top layer dry for at least an hour before I can flip it over. More to come along with final total weight added per plate when the two are all done and dry. Right now we're at .530 lbs per plate addition for two layers of foam and two layers of tape using data above.

Not sure the coating is going to add much, maybe another .1-.2lbs would be my guess. I'm not building up a thickness, really just using it as a tough glue to help the tape resist seam bursting along the edges. It may be plausible to only spray the outer edge as well and not the whole layers. I may add this to the list for a future test.
 
Last edited:
I'd be more worried about the spall traveling between the sheet of neoprene or whatnot and the steel plate. That would be by far a path of least resistance. I'd suggest if possible to coat the steel plate in contact cement than glue the rubber sheet under pressure on top.

Awesome thread, thank you for great pictures and all the hard work, it's greatly appreciated!
 
I'm going this root first because my earlier tests were promising and I didn't want the layers to be permanently attached. If this doesn't work out they do sell the neoprene in adhesive backed sheets which I would probably try first. I have this irrational hatred of contact cement. It's like anti-sieze, in that whenever I use it I can't figure out how the **** it gets all over everything afterwards.
 
As the drying is progressing here, I think the stand out is going to be the rubber sealant, not the bed liner. The bed liner does not appear to be bonding to the surface of the tape. I'll check again in the morning after it's full cured and report back, but my money is on the Rustoleum right now.

Also, I know I said a freak blizzard might cancel my range day, but this one won't. It will however give me a nice foundation to go long range test some of my reloaded 62gr tracer ammo out at my buddies gravel pit [smile]
 
So we encountered a speed bump today. After letting the first layer of each cure for over a day I got this while handling the bed liner plate:

2013-02-10180339_zps3883fbe8.jpg


After about 5 min of just rubbing with my fingers it was all off:

2013-02-10182133_zps1d139230.jpg


It did however bond to the plate's paint like a rock, here's the backside:

2013-02-10182155_zps285d2450.jpg


The LeakSeal has bonded fully to the tape. I could not rub it off. So we're calling an audible on the test. I'm sidelining the bed liner as a failed path. The bed liner plate will now be recoated with LeakSeal, a layer of tape added at 90° and then another two coats of LeakSeal. So we'll have one plate with two layers of neoprene and one plate with one layer, both plates with two layers of tape.
 
Boris, I hate you.

I was rummaging through a cabinet and came across a caulk gun and a tube of bathroom silicone. Of course I then thought of this thread and Boris wanting to see a piece bonded to the plate. So now I have a third plate setup I will be testing. One layer of neoprene bonded to plate with silicone, two layers of tape //// and \\\\ on top. No extra coating. We'll run it with the others and see what happens.

Cleaning off a third steel plate. Normal glass cleaner:

2013-02-10223822_zps3c3ec686.jpg


One tube of GE Silicone II Supreme 1 Hour Cure Shower Ready Caulking:

2013-02-10223849_zps52d79413.jpg


Applying to the surface:

2013-02-10224112_zps1a83928b.jpg


Spread it out with a plastic knife using the ridged side. Gives the nice peak/valley you'd want when tiling floors:

2013-02-10224327_zps436d65a3.jpg


Wiping the excess off the edges after firmly pressing the entire sheet starting center and working way out:

2013-02-10224601_zps3b132b60.jpg


Got to let it cure overnight and then wrap it tomorrow with two layers of tape.
 
Test 2 is complete. I'll do a write up and pics this weekend. Synopsis is cold weather makes neoprene a no go. The results this trip in 10F weather gave a clear demonstration how environmental factors are a critical component. Next test will be reverting to the jean method.
 
I was just wondering, I have two vests and I enjoy wearing them but I don't often see people with them on at clubs. I think its fun to wear the vests and make them all tactical.
 
I was just wondering, I have two vests and I enjoy wearing them but I don't often see people with them on at clubs. I think its fun to wear the vests and make them all tactical.

it should be more about shooting how you intend to be dressed, as a hunter I will zero in wearing my heavy jacket because that is what I will be wearing come November. there are also numerous carbine courses you would want to wear them to so again you are familiar where your weapon might snag and where all your spare magazines are placed
 
Back
Top Bottom