• If you enjoy the forum please consider supporting it by signing up for a NES Membership  The benefits pay for the membership many times over.

3D printing

I just took my stuff out of storage and the filament has been sitting for almost three years so I need to dry stuff out.

Plus… the humidity down here is next level so I am trying a few dry boxes to print from.

@cockpitbob What do you use for Mylar bags? Link?
These are the bags I use to store my spools. Most spools barely fit through the mouth, but they do fit.

Here's the desiccant bags I use.

For drying, check the oven with a thermometer that you trust since most kitchen ovens aren't very inaccurate below 200F. I put foil on the grates. The desiccant bags require higher temperatures to dry, so after the spools are dry I turn up the heat.

If I can't find drying instructions for a filament on the manufacturer's site, here's generic instructions for various materials.
 
She won’t let me use the oven so I bought a food dehydrator lol
140-160 degrees for 5-10 hours is typically what I’ve done in the past, I will look at that 3dfx doc

What I really need to find is an ideal humidity for filament types so I can track it in my google sheet.
 
The bowden tube looks like the blue 1/4" tubing used in filtrayion systems. Usually there was an brass insert that pushed into the tube before installing in the push fitting. Is that the type you speak of? And what is the heat brake? Does it just move the tubing away from the hot end?

View: https://www.youtube.com/watch?v=7tCxO17XZtw


If you have blue tube then someone already changed the tube from the stock garbage - the mod I am talking about is different but uses the better tubing (the blue stuff you have)
 
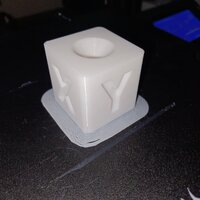
The cube looks good, but I'm thinking your nozzle is too far from the bed based on the brim around that print. There shouldn't be any gaps between the lines, they should be squished together to form a solid brim.
That and he needs to mesh the bed - one side of the brim has the correct squish but the near side is too high.

But he's made massive progress for someone who claims little techie knowledge.
 
Would you enter a toddler in a marathon?
Printing nylon on a pretty much stock hotend is going to trash it fast.

If he wants pain go for some TPU with a stock ender...

Took my Ender 5 Pro and filament out of storage, thought I had way more PA6-GF. Seems I printed most of the 2 KG roll I had. =/

Good news is that there are more options now, going to see how Taulman prints. I've heard good things. Dry box options have also improved.

But first... need to fix some things to get it up and running. And find the rest of my stuff, missing the bulk of my small part supply. May relocate the main board out of the enclosure, I'm afraid of burning it out if its constantly at 50-60 Celsius.

Edit. Found the nylon, an entire tote worth of 2kg rolls and assorted cf & kevlar. Sweeet
 
Last edited:
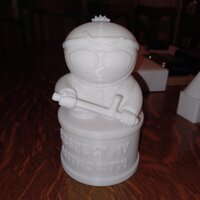
I am using raft for adhesion. Preheat for 15min and it prints nicely and comes off the bed easily. Pulling the support is a bit tricky still. The first attempt at Cartman was aborted but rotating the model to 9 o'clock fixed it. My kid is going to paint the models. Before removing any supoort it would be wise for me to look at the slicer preview again to prevent any stupid moves from breaking things. 20240313_200118.jpg
 
Last edited:
I am using raft for adhesion. Preheat for 15min and it prints nicely and comes off the bed easily. Pulling the support is a bit tricky still. The first attempt at Cartman was aborted but rotating the model to 9 o'clock fixed it. My kid is going to paint the models. Before removing any supoort it would be wise for me to look at the slicer preview again to prevent any stupid moves from breaking things. View attachment 861136

That's pretty damn good for a guy printing for what, a week? Maybe two? lol well done.

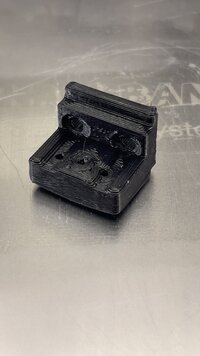
I printed my first PC part tonight, a Mosquito adapter for the Ender. Not a difficult part but my first foray into PC and I’m pretty happy w how it turned out.

IMG_2777.jpeg
 
Last edited:
That's pretty damn good for a guy printing for what, a week? Maybe two? lol well done.

I printed my first PC part tonight, a Mosquito adapter for the Ender. Not a difficult part but my first foray into PC and I’m pretty happy w how it turned out.

View attachment 861201
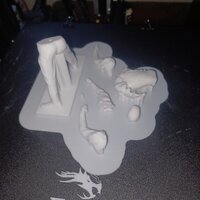
You are laying down some thick layers to save time I assume? I cracked some of the underside when removing the support and hot glue is going to make an appearance tomorrow. I will test it on the raft piece to make sure it doesn't melt the pla.
I have lots of files to slice but first need to replace the Y motor. I broke a gear and it is really loud. The bad motor will be disassembled to see the damage but suspect it has three gears and I assume one or two teeth are missing some material.
Still have to put the box together as well and the old dell laptop that us dedicated to the printer is so slow it is not funny.
 
That is with a 0.6 nozzle. The thick layers are for part strength and time. A lot of the difficult filaments don’t do well with 0.4 nozzles, like the CF & GF stuff. Generally for filaments over 250, I start with a 0.6 nozzle and adjust from there.
 
You are laying down some thick layers to save time I assume?
Faster, plus higher layer height can, depending on choice of plastic, improve strength (fewer shear points). Particularly with a 0.6mm nozzle

To get the best of both worlds, use adaptive layer height so areas with fine details are printed with thinner layers.
 
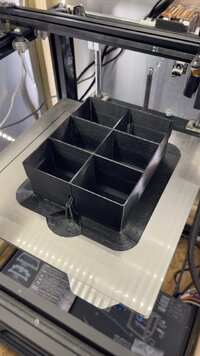
I’m not sure that this akro divider in polycarbonate could have come out any better.

IMG_2783.jpeg

My chamber is passively getting to 55 C so I don’t see the need for an active heater, though the electronics can’t be loving the heat.
 
Last edited:
Replacing my z axis screw and print bed seemed to fix most of my ender 3 issues. Im thinking I should probably add a 2nd z axis motor/screw now too
 
Back
Top Bottom