• If you enjoy the forum please consider supporting it by signing up for a NES Membership  The benefits pay for the membership many times over.

3D printing

I didn’t know that was a thing?

Now I have to google

EDIT: Quick search found this Ender™ Extender Dual Z Upgrade Kit for the Ender 5

Only one motor, uses a belt to ties them together.

Barring any better ideas, which I can’t seem to find in kit form, I can’t fan my own solution and I just don’t have the time to part it out so think I will give this a go.

Bed support is a big weakness in the E5Pro

I also bought a bed heater upgrade so I will swap it all at the same time.
 
Last edited:
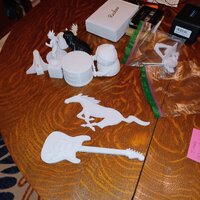
Not gun related but IDGAF. Learning is fun.View attachment 862680

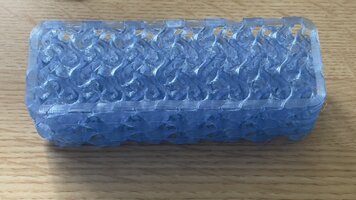
One of my first prints was a rat. Well, a mouse sized rat. But the print failed so it's really half a rat, but I liked the effect, and it earned a place on the tchotchke shelf.

eta I'm not saying any of your prints failed, just that they don't ALL have to be guns (just most of my own). Although you should try a Liberator print just for fun.
 
Last edited:
Having a printer means you can help out a neighbor and gag-gift them at the same time
Neighbor picked up an older JD 1 series with backhoe - the previous owners dog chewed up the outrigger control knobs so I printed new ones in TPU with left/right handed pictograms so he doesn't get the controls mixed up [banana]

JD Backhoe Handle.png
 
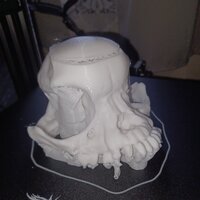
Since the cr touch firmware was installed, auto home is in the wrong zip code. But other than that I am digging it. If a print fails I try rotating the model a little bit. It worked a couple times so far but on the skull I am printing I should have used triangular supoort. That is the weak link on this one.
 
Don’t suppose anyone has a Marlin build for the Ender 5 Pro?

Gdamn, I hate Marlin. You’d think after all these years it would have been figured out but I can’t get it to compile for the life of me

EDIT Two days of trying to compile 2.1.x, holy eff that. went back to 2.0.97 and it compiled juuuust effing fine. I almost cried tears of joy.

(All to install a PT1000 and update some speed max settings, OOF)
 
Last edited:
Got pissed off at the stock extruder bc apparently I wore it out with CF & GF filament.

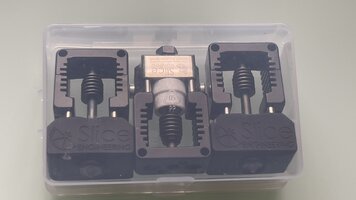
Upgraded to a Slice Mosquito with DDX extruder. Holy WOW, the print quality is the best I’ve been able to squeeze out of this Ender. By far. The first temp tower was perfect for the first four levels, I had a hard time choosing so just went with the lowest temp.

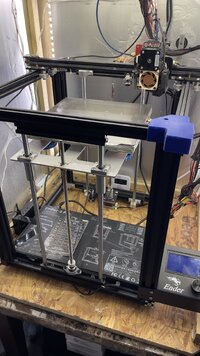
New bed & second z screw should go in this weekend, that will help with the big wide prints. Wish the Z’s were on the sides but I’m not rebuilding the entire printer to do that.

Will add pics when I get home tonight.
 
Don’t suppose anyone has a Marlin build for the Ender 5 Pro?

Gdamn, I hate Marlin. You’d think after all these years it would have been figured out but I can’t get it to compile for the life of me

EDIT Two days of trying to compile 2.1.x, holy eff that. went back to 2.0.97 and it compiled juuuust effing fine. I almost cried tears of joy.

(All to install a PT1000 and update some speed max settings, OOF)
Dump marlin
Pick up a Libre Sweet Potato ($35) and go klipper.

I'd help with a Marlin build but I haven't updated my build environment in at least a year.
 
Dump marlin
Pick up a Libre Sweet Potato ($35) and go klipper.

I'd help with a Marlin build but I haven't updated my build environment in at least a year.

1. Assume that would replace the pi & octa? Or does that replace the main board?
2. What is the advantage of Klipper? I haven’t read favorable reviews for its usability.
3. How much time would that involve all in, between hardware, software, & learning curve?
 
1. Assume that would replace the pi & octa? Or does that replace the main board?
2. What is the advantage of Klipper? I haven’t read favorable reviews for its usability.
3. How much time would that involve all in, between hardware, software, & learning curve?
1 - if you have a pi already you don't need the potato (the sweet potato is a cheap pi alternative)

2 - klipper off loads the gcode interpretation and management from the step signal generation resulting in better control of the motors. It also adds the feature that everything is defined in config files and scripts so no need to compile and flash unless there is a major klipper update.

3 - if you have a common printer in a somewhat stock configuration the setup is a couple of hours to get printing. If you understand modifying Marlin and building then klipper won't be a hard learning curve

There is no hardware change if you are running octo print on a PI connected to the printer.

flash your PI's SD with basic OS build. Grab kiauh to automate Klipper install and follow the directions.
Quick search shows ender 5 configuration for klipper at github so the baseline already exists.

I did it with a Tronxy X5SA Pro that I had put a Creality Sprite extruder and a BLTouch on - zero baselines in the wild. Took some work to get working since I hadn't used klipper and was creating setups from scratch.
 
Last edited:
Would it be worth upgrading a five year old pi to newer hardware if it’s going to be doing real time processing? Will a Le Potato Renegade w 4gb RAM work? Or is there something better for future proofing? Raspberry Pi 4 looks sufficient for $100.

If I’m going to upgrade, let’s just do it and not screw around worrying about the price difference between $35 & $150.

And about the only thing stock on this Ender is the stepper motors… speaking of which, I’m looking at the Endorphin corexy conversion.

EDIT After quite a bit of research and reading, thinking I will go with the Mercury One.1 given how much support and detailed documentation it has, on both the hard and software sides.
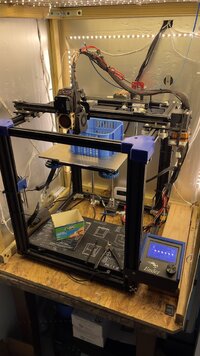
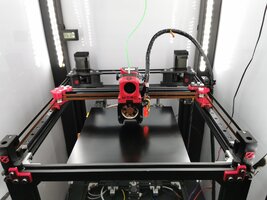
So I will end up with an Ender 5 Pro that has dual z axis, silicone heated cast aluminum bed, Mosquito hot end, BMG extruder, CR Touch, enclosure, coreXY, and Klipper. That should be a very capable printer. Just in time to buy an X1C if they expand the build volume lol
 
Last edited:
I find my potato which is a pi 3 equivalent is fine running my tronxy at 250mm/s print speeds while serving a webcam. And it's a backup PiHole DNS reserver at the same time.
More power won't hurt but it's not likely needed - by the time you run out of HP on the PI 3, you'll be able to get 5x the power for the same price.

That upgrade looks awesome
My Tronxy is fast - I have to be careful with my travel speed because it is fast enough to break the filament instead of pull it off the reel.
Looks like the that upgrade would be faster - make sure you have solid table because it will shake pretty much anything.

I don't know if that kit includes an accelerometer for resonance tuning but you'll likely need to do it if you're going to run 600+ travel speeds with accelerations in the 6000+ range
The caution with those accelerations is to never reach in while printing because the printhead can snap to a new position faster than your reflexes - it's simply in a different league than your normal Cartesian machines slow accelerations.
 
good pointers for sure on the speed. I have it on 3/4” plywood on a marble table but I’m thinking that clamping or attaching it to the plywood would be smart.

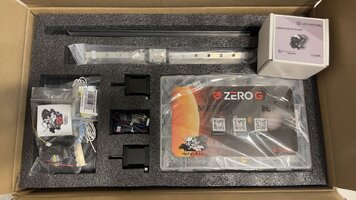
Going to order the kit with all the hardware, I started going thru and checking vendors last night and it’s a nightmare to source it all yourself. Also will switch back to PC once this PETG print is done and start printing parts for the conversion.

IMG_2833.jpeg

I have two extra unused, virgin Slice Mosquitos but I’m going to keep one. If someone is interested, it’s one of the best hot ends available. Lmk


IMG_2834.jpeg
 
Last edited:
Step one in the books: Dual z screws, cast aluminum bed, and full silicone heating.

IMG_2838.jpeg

The sad part is that I will likely upgrade to a larger bed when I finish Mercury One.1 so won’t need this after all. =\

I ordered it before I realized that Mercury One expands the printing area significantly. Guess I will have some stuff for eBay unless someone here wants them but nobody is interested in the Mosquito so idk

In other news, I’ve tried four different filament dryers in the past month: dehydrator, Creality, Sovol, & Sunlu. In that order of preference.
 
Last edited:
Started setting up klipper on the Pi4b last night. And this morning. And… I have everything connected, camera going, crtouch, Cura setup, Moonraker, Mainsail, etc. need to test print and then actually get printing again. It homes properly and I calculated the extruder rotations so…

Goal is to use Klipper with Mercury One so I wanted it working before tackling the corexy conversion so I can just change settings at that point not tackle both at the same time.

Next step is printing parts.
I have no idea what these words mean but it sure sounds good
 
In other news, I’ve tried four different filament dryers in the past month: dehydrator, Creality, Sovol, & Sunlu. In that order of preference.
I have a Sunlu - it's marginal at best since its limited to 55°C
Need to build one that goes to 85°C with controlled air exchange.
 
I have a Sunlu - it's marginal at best since its limited to 55°C
Need to build one that goes to 85°C with controlled air exchange.

The Creality goes high enough for Nylon and has much better rollers with better UI. I returned the Sunlu. The Sovol is also limited to 50 C but it holds two spools so really only useful for storage or printing.

For actually drying anything, the dehydrator is the best option.
 
Basically Klipper is the OS and everything else listed are the programs that make it work. Ish

Mercury kit comes today. For reference, this is Mercury One on an Ender 5:

View attachment 866249
Looks a lot like the setup for my Tronxy X5sa Pro (except for the quality linear rails..).
You will love the performance as long as you don't stick your hand in it during a 600mm/s move - doesn't break anything but scares the crap out of you.
 
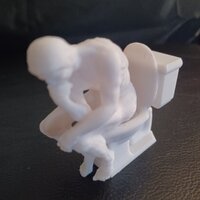
I have done a few upgrades and am at the limit for this printer. I will run it as long as practicle then get into a better unit. Messing around with temps to see what is best for the pla I am using. The pug skull file has issues but everything else runs fine.

20240324_211948.jpg 20240319_132906.jpg 20240321_170744.jpg
 

Yeah, not a great upgrade path with that but it can do a fair job for the money.

I guess I should say that it’s got more of a hard cap than something like say, and Ender 5 that would allow you to build off that 2020 frame.
 
Last edited:
Yeah, not a great upgrade path with that but it can do a fair job for the money.

I guess I should say that it’s got more of a hard cap than something like say, and Ender 5 that would allow you to build off that 2020 frame.
If it was taller I would be printing some things at 100% as this seems small now but we are getting our moneys worth.
And the magnetic bed is friggin awesome. I wear gloves to pull the part and it stays clean.
 
Back
Top Bottom