DROs Mounted to my Mini Mill ( Pix per Request)

Thanks for the heads up 7.62. I will check it out... Please PM me with what you feel would be a fair offer for the unit.

Are there any good magazines to subscribe to for an entry level machinists that you would recommend?

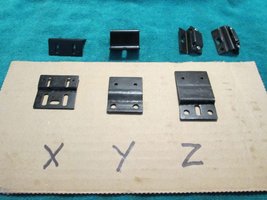
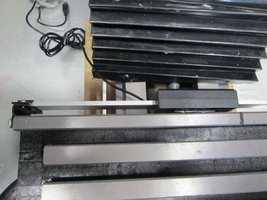
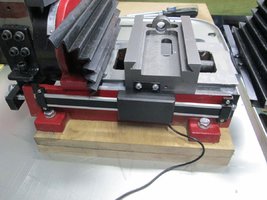
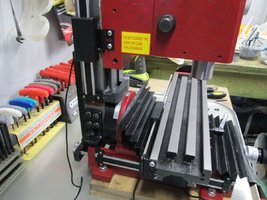
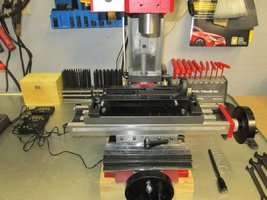
Now that I have a couple new toys, I want to learn how to use them. [smile]

LMS has a library full of stuff available. Videos, Books & Seminars - LittleMachineShop.com


You can also rent with option to buy DVDs from swarfrat himself.
http://www.swarfrat.com/
 
After doing some more machining on my 0% (able to do the buffer tube hole and tap the threads) the Y travel of the mill became a real issue (The lack of , I had to remount the angle block a few extra times) but with the z travel mods I had made I was able to do it. (I put the longer rack gear on the column. so it gives me an extra 2" of z travel)
I am thinking of making LMS happy and ordering one of these- Mini Mill Large Table Assembly - LittleMachineShop.com
 
Buying one of these is not really like buying a mill, more like buying a kit from which a mill can be built. lol


Wow, after ripping my mill apart right out of the box it now resembles 7.62's mill too. I can not imagine anyone unpacking a mill and putting it to immediate use. There was not a nut, bolt or screw that was more than finger tight, except for the one column bolt which was tight.

Don't know how this mill would not just fall apart after several hours of use. Need to find someplace that carries purple locktite. I think blue would be too difficult to remove the bolts if necessary.
 
Last edited:
ATTN ATTN the DRO power setup I posted seems like it has issues. If you do it make sure the scale doesn't jump, mine did by .400 twice on me.

You may want to hold off on the power setup, I was just doing some milling (heavy.313 cuts in aluminum) and the dro I did the mod on jumped .40 (so I made a cut in the wrong place thankfully it was just a jig for the 0% lower not the lower itself) I reset it and it did it again while cutting but this time I caught it. so I am back to batts for now. I will bring a Oscope home this weekend and see what I can figure out.

I found some more info on converting these to 110v. About 3/4 of the way down the page.
Snailworks RFMill
 
I found some more info on converting these to 110v. About 3/4 of the way down the page.
Snailworks RFMill

7.62 You are THE MAN... Awesome computer search skills - Finding these obscure facts we need to complete this project... [bow]
Thank You...

Looking at this design, using the LD33V voltage regulator, you are able to keep the IC / Cap circuit out of the battery compartment. That was something I was hoping to do. Awesome find !!!

I also noticed that there is an enclosed, X axis DRO, front mount, on the same link which looks good..
 
Last edited:
I just ordered 10 sets of the components we will need, (both caps and the Vreg) it comes out to $1.90 a set to my door.
I can throw them in an envelope to whoever wants a set. I can assemble them for a fee if you want (with wire pigtails you have to connect to the 12v source and wire to the dro's.)
Glenn

we can get them cheaper at digikey- LD1117V33 STMicroelectronics | 497-1491-5-ND | DigiKey I can order or you can. If you do might as well order the caps etc from them unless you have them.

I will take a set. It will keep me from ordering them myself.

Thanks

Malodave
 
I just ordered 10 sets of the components we will need, (both caps and the Vreg) it comes out to $1.90 a set to my door.
I can throw them in an envelope to whoever wants a set. I can assemble them for a fee if you want (with wire pigtails you have to connect to the 12v source and wire to the dro's.)
Glenn

we can get them cheaper at digikey- LD1117V33 STMicroelectronics | 497-1491-5-ND | DigiKey I can order or you can. If you do might as well order the caps etc from them unless you have them.

I'm in for a set.
 
I would like to be in for two sets. Not trying to be greedy. Need to setup my lathe with DRO's next. [smile]

Will gladly pay for parts & postage. Thank you for doing this Glenn !!!
 
No problem, I figured I would be able to get rid of the parts. however many you want no problems. I just ordered 10 of each to get the price break. (I always do that for work. so I have spares. ) This way we will get all the components for the price of the voltage regulator LOL.
 
I got mine finished up over the weekend.
I was able to make all the brackets required by reshaping the universal brackets that cam with the DROs All that's left to do is make a bracket to mount the displays

- - - Updated - - -

Ready to make some swarf.
 

Attachments

  • dro bat 008.jpg
    dro bat 008.jpg
    61.9 KB · Views: 23
  • X DRO.jpg
    X DRO.jpg
    136.9 KB · Views: 24
  • Y DRO 1.jpg
    Y DRO 1.jpg
    132.2 KB · Views: 23
  • Z DRO 1.jpg
    Z DRO 1.jpg
    153.9 KB · Views: 25
  • mill 2.jpg
    mill 2.jpg
    147.9 KB · Views: 24
Last edited:
Lookin' Good!

Malodave


I got mine finished up over the weekend.
I was able to make all the brackets required by reshaping the universal brackets that cam with the DROs All that's left to do is make a bracket to mount the displays

- - - Updated - - -

Ready to make some swarf.
 
Very Nice job...


I got mine finished up over the weekend.
I was able to make all the brackets required by reshaping the universal brackets that cam with the DROs All that's left to do is make a bracket to mount the displays

- - - Updated - - -

Ready to make some swarf.
 
Do not make the same mistake I made.
As you see in pic 1, I had the whole mill assembled and bolted to the bench. You may have also noted that the motor control boxes have no yet been re-installed. Bad mistake. The side box is obviously no problem, but mounting the rear one was a huge pain in the ass. I had to install it using a mirror and working backwards. For you guys that have been in there, you know how tiny and well hidden the mounting screws are and the one with the two ground wires attached to it was especially fun to get started. It took me at least an hour to get it mounted. On the plus side, I think I now have the skills to become a dental hygienist. LOL
 
7.62 Thank You... Great tips. I would have probably done the same thing now that you mention it. I notice that you left off the left side of the milling table. Is something else going there in it's place or is it not really required.

With all the added supports & adjustments how easy and quick is it tramming the mill.

The plate doesn't really do anything. I left it off figuring that it would be easier to clean the swarf out out of the table. I ran out of time (family Easter obligations) so I did not get to tram it yet. That's next on my list.
 
If you leave off the left side you can get a little more travel out of it. I usually have the power drive mounted on min there. (soon to go back on, I have missed it during the zeroing setup passes. )

Got the invoice from Digi-key, shipping is less than I thought. so it will be $1.85 a kit for the caps and the Vreg. (plus the postage to you guys.) I for one will be happy to have them powered. half way through an operation yesterday my Y dro starts blinking (and gained .200) sure enough the batts where dead. put in a spare set and re-zero'ed in that axis.
Thankfully I didn't screw up. (got the Magwell done) onto the firecontrol pocket.
 
If you leave off the left side you can get a little more travel out of it. I usually have the power drive mounted on min there. (soon to go back on, I have missed it during the zeroing setup passes. )

Hey Glenn, I checked out a link you mentioned a while back. It was for the MicroFlow Coolant System.

MicroFlow Coolant System

To use this system would I need to re-install the left side plate, and drill a drain hole in the table to better control the coolant flow and not flood the DRO's?
 
I think you would definitely want to be able capture the coolant somehow or it's going to make quite a mess. Setting up some sort of a recycling system would be cool. Collecting it somehow and sending it back to the container with a small aquarium pump or something. It would probably be best to have at least a rudimentary filter of some sort to keep the chips from croaking the pumps.
 
7.62 I agree with the filter idea is a must have. Did you check out the link ? Go to the "View Instructions" tab. This kit comes with a recovery tank, pump, etc. Looks like a pretty cool system.
 
I did check the link, but I hadn't seen the instructions. I see a supply tank and primary pump but nothing about a recovery tank or pump. They say just let a towel soak it up. If it pumps that little liquid, maybe recovery is not necessary. Still sounds a little messy to me though. I'ts definitely a bargain at the prices I've seen on coolant systems though, for that kind of money it's probably worth a shot.
 
Yea I like how it gets the coolent just where you need it, a flood coolant system would require a drip pan under the mill.
7.62 I have a batt eliminator rigged up just have to find time to test before I ship to to you. I will try to get it tested today. (On a deadline for a motorcycle build so very busy)

After looking over the instructions it is not a recovery tank just a supply tank. I think it is ment as a total loss.
I am sure you could rig something up.
 
Last edited:
7.62 I have a batt eliminator rigged up just have to find time to test before I ship to to you. I will try to get it tested today. (On a deadline for a motorcycle build so very busy)

No problem Glenn. It is not a pressing issue, when it's done, it's done.
 
Today's Acomplishment

Here is what I did today on my Mini Lathe:

I made Two BIG Brass Nuts for the rear of my Truck. They measure 2.5 inches across the flats.
I have not tapped them yet, but I did get a 1-1/4 NPT tap at the flea market for $3 to do it if I want.
Now I need to hang them from my truck. So now my truck will have some Brass Nuts for everyone to see.

Malodave
 

Attachments

  • BigBrassNuts_web.jpg
    BigBrassNuts_web.jpg
    49 KB · Views: 20
Here is what I did today on my Mini Lathe:

I made Two BIG Brass Nuts for the rear of my Truck. They measure 2.5 inches across the flats.
I have not tapped them yet, but I did get a 1-1/4 NPT tap at the flea market for $3 to do it if I want.
Now I need to hang them from my truck. So now my truck will have some Brass Nuts for everyone to see.

Malodave

Going to be interesting to see how they sound...
 
Back
Top Bottom