CMP M1 Garand where to begin?

Joined
Jan 19, 2013
Messages
898
Likes
468
Feedback: 2 / 0 / 0
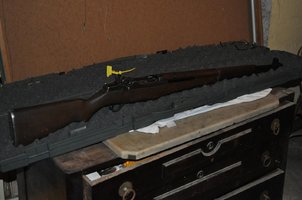
OK I've finally gotten around to feild stripping my Garand. Between Christmas, work and building my first AR I slacked on the Garand. Anyways as I just did a field strip and checked out the trigger and barrel assembly I didn't see much cosmoline? I did give the some exposed surfaces a wipe down with some Simple Green where I saw what appeared to be some caked on gunk (probably cosmoline?) After which I rubbed on some light gun oil. I should have taken before and after pics but I only have after.
So the questions are, Is that all I have to do or should I completely break the rifle down to individual parts clean and reassemble?
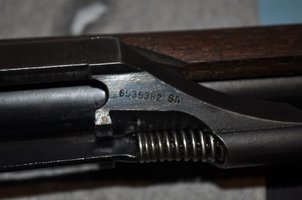
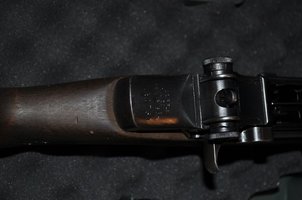
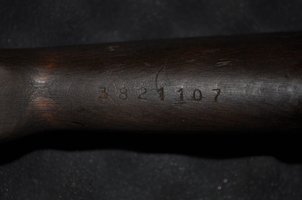
How important is it to try and get the cosmoline out of the wood? I couldn't find many markings on the parts or the stock besides the serial numbers. If there is something else I should get a picture of let me know and I'll add it.

Please take it easy on me. This is my first mil surp and I just want to make sure I do everything right before heading to the range. Thanks
Mark
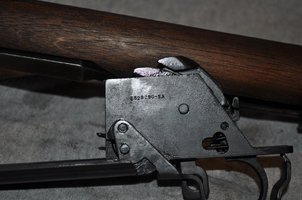
Garand 015.jpg Garand 005.jpg Garand 008.jpg Garand 016.jpg Garand 009.jpg
 
didn't chase those links, but if they didin't mention it look into orion7 springs (kit). It is short money and may help out your old rifle. It helped mine with the short stroking problem I had. The kit was a piece of cake to put in.
Good luck
 
I recommend doing a full detail strip and cleaning. The guts of the M1 are fascinating, for one, and it's also best to inspect each part to clean all that decades old grime off, and add a good coat of oil. CMP rifles being delivered with broken parts, though not common, is common enough that you are going to want to check it out.

Unless you are comfortable disassembling the trigger group, it can be left intact, but cleaning it up best you can is a good idea. The bolt should be completely detail stripped, inspect the firing pin and spring, and dunk the entire bolt in mineral spirits and scrub the channel until you are completely satisfied that it is clear and clean. Also thoroughly clean inside the op-rod, making sure there's no build-up or pieces of old spring in there.

I think it's important to get a new op-rod spring. Having a strong op-rod spring is very important to the function of the rifle. The Orion7 springs have a good reputation. Grease is also important to the function of the rifle. I use mobil1 synthetic with satisfactory results. When you grease the op-rod spring, you can apply the grease liberally. It likes grease.

From your pics it looks like your stock is a foreign replacement. A USGI stock should have a "circle p" stamp behind the trigger guard and DOD acceptance stamp on the left side of the stock. Cosmoline is easy enough to get out of the wood, but it takes patience. Do a search on here, lots of good info on that.

Awesome rifle, enjoy it!
 
Once you have it out of the stock, take it a set tub, turn on the hot water and let it melt and flush any remaining cosmo out. Oil it lightly and apply wheel bearing grease to the areas shown here,http://pnwbands.com/m1garand/greasepoints.html. The Garand has a free floting firing pin. Make sure it slides free and doesn' get stuck protruding from the bolt. Only shoot M2 ball, or M1 compatible ammo in it. Also don't get too attached to your AR. The M1's have a way of making them seem like toys. Enjoy.
 
1. The Orion spring kit is a good thing. The bolt can be tough but not impossible.
2. The wood need not been "decosmolined"
3. Here are some primary links to get you going.
Wood care. Section 9 and 10 are a good starting point. http://www.odcmp.com/Sales/askarmoreranswerwood_cleaning_article.htm
4. A good detail strip is not hard and takes little skill or tools JCG 's design genus.
http://www.civilianmarksmanship.com/detailstrip.html
5. Garand gear has a good lube guide.
Go slow and stop and ask before you proceed.

I got bold on a rack grade and tried removing the barrel with out proper tools.(beyound the scope of detail strip) well lets say I have since purchased the action wrench and barrel vise so I don't crack another reciever!
 
btw, I found Krud Kutter available at home depot/lowes works great at cleaning and degreasing. Eats up cosmo and every other kind of oil/grease I've used it on. I use it at full strength, spray it on parts and let them soak in it for 15-30 mins depending on how cruddy they are. Doesn't smell bad or anything, very little smell at all.
 
Thanks for info everyone. The first time I pulled the trigger on an M1 I knew I had to have one. Now that the winter is settling in I think I'll follow everyone's advice and do a full detail strip. It will be worth the wait. I already got 2 cans of ammo from CMP, maybe need to grab a couple more once the holiday spending has been paid off.
Happy New Year. Thanks again
 
Heck bring in the new year. Field strip and clean and go shooting tomorrow!

Gotta spend some quality time with the wife this evening taking down the Xmas decorations. Hopefully it will happen this weekend. Afterall the Pats arent playing so I have a Sunday free.
 
QUOTE=shiprec13;3647823]Gotta spend some quality time with the wife this evening taking down the Xmas decorations. Hopefully it will happen this weekend. Afterall the Pats arent playing so I have a Sunday free.[/QUOTE]
Make wife breakfast and bring her shooting! Screw football go shooting
Other than a Allen head for the front sight there's really not much needed for tools. Screw driver. A 1/4 " drive extension and ratchet work well for gas cylender screw. I have the spec manual if you need to know any Max/min parts measurements....
 
Well its done. I decided to get the Orion spring kit so I waited until that came in (last wed) to brake her down and replace the springs. I did everything but the trigger group. The only problem I had was getting the ejector pin/spring back in place. While compressing the pin and trying to get the extractor in the punch slipped and the pin and spring went flying, separately. Thankfully I didn't lose an eye or the pin and spring. Is it a problem that the pin and spring separated? I just pushed the pin back into the spring and managed to get the bolt back together without further indecent.
I didnt worry about the stock for now thats a project for another day.

Thank you all for the great advice. Now I just need to find some time to get to the range. Maybe next weekend.......

mark
 
The spring and pin you are referring to are two pieces so they come apart.
Stripping the trigger group isn't that hard. Just make sure you have a good grip on the hammer/spring assembly. Get it in place and squeeze everything together. Then start the retaining pin after that you can wiggle/squeeze it all in place.
One note: I never take the clip latch spring off 1. because it's a pita to put back and 2. because there is no need to unless you need to replace it.

the two best links to assembly and disassembly.

http://www.civilianmarksmanship.com/striphtml/detailtriggergroup4.html

http://www.civilianmarksmanship.com/reassembly.html
 
The trigger group look good. No signs of any cosmo, everything greased up nice so it wasn't even a thought to take it apart. I'll leave it as is for now.
Thanks for the links.


The spring and pin you are referring to are two pieces so they come apart.
Stripping the trigger group isn't that hard. Just make sure you have a good grip on the hammer/spring assembly. Get it in place and squeeze everything together. Then start the retaining pin after that you can wiggle/squeeze it all in place.
One note: I never take the clip latch spring off 1. because it's a pita to put back and 2. because there is no need to unless you need to replace it.

the two best links to assembly and disassembly.

http://www.civilianmarksmanship.com/striphtml/detailtriggergroup4.html

http://www.civilianmarksmanship.com/reassembly.html
 
I just did this spring replacement on mine and the trigger group was a b*tch! That hammer spring was way stronger than the one it was replacing as was the safety spring. I found a clamp helped with the hammer spring/trigger re-install. The clip latch spring was a piece of cake though. No trouble at all with that. The bolt was probably right behind the hammer spring in re-assembly difficulty.
 
The hammer spring isn't hard if you do it the right way. The grip and hand position make it easy or difficult. The bolt might be the simplest but it also depends on how you do it.

Here is the easiest way possible.

 
Last edited by a moderator:
The hammer spring isn't hard if you do it the right way. The grip and hand position make it easy or difficult. The bolt might be the simplest but it also depends on how you do it.

Here is the easiest way possible.


I've always found the stock cleaning kit (I forget the actual designation for the tool) was easiest and safest way for me to strip my bolt.
 
Last edited by a moderator:
I got 2 bolts back together no problem using essentially that method but with the new springs installed it was much more difficult. I ended up using the Garand tool I got from Tim in the xmas karma and put it together in the gun.
 
The bolt tools work great if your going to be doing more than one.
Another way is to take a once fired 8mm Mauser caseput it in the chamber and you can work on the bolt in the gun
 
Once a Garand has been detail-stripped, what are the key things that should be replaced as a matter of course? And tools that every self-respecting Garand owner should own?

Here's what I've gathered so far for basics:

Operating rod spring
Many here have recommended Orion 7 springs. At $7.50 each they seem to be a good deal and have a lifetime warranty. How do they compare with Midway Tubbs op rod & hammer springs combo @ $21.99? Or from Fulton Armory for $8.95?
Or from GarandGear for $6.75 (also with a lifetime warranty)?

Hammer spring
There seems to be little variability in these

Other Stuff
Is there any reason to replace as a matter of course any of the other springs?
Is it worth also replacing the lower band roll pin while it is detail stripped?


And some have recommended:

Adjustable or ported gas plug
Under what circumstances would you replace the gas plug?
GarandGear has a ported gas plug that they claim "delays the operating rod for several microseconds and lowers the peak gas cylinder pressure"
The Schuster adjustable port looks interesting @ $35.99. With adjustment, it allows hunting loads to be shot in the Garand.


Tools:
Gas cylinder wrench
Although I was able to easily remove the gas cylinder I am leery of the possibility of stripping the splines during reassembly. Of the following, is one any different/better than the other?
Sadlak (Midway) $22.99
Fulton Armory (Brownells) $15.99 (or $9.95 directly from Fulton Armory [laugh])
Angled @ GarandGear for $20

M3A1 combination tool (anyone have a good source for these?)
It looks like Orion 7 has new reproductions for $26.50.

Upper handguard clip pliers
Seem handy, although there have been some great descriptions of using ring pliers or narrow gauge wire looped around the holes in each arm
Clip Pliers from Brownells for $28.99, from Midway for $22.99, or from Fulton for $29.95 (the Fulton ones seem to grab the edge of the clip, rather than the hole?)

Are gas cylinder gage pins worth considering?
 
Once a Garand has been detail-stripped, what are the key things that should be replaced as a matter of course? And tools that every self-respecting Garand owner should own?

Here's what I've gathered so far for basics:

Operating rod spring
Many here have recommended Orion 7 springs. At $7.50 each they seem to be a good deal and have a lifetime warranty. How do uthey compare with Midway Tubbs op rod & hammer springs combo @ $21.99? Or from Fulton Armory for $8.95?
Or from GarandGear for $6.75 (also with a lifetime warranty)?

Hammer spring
There seems to be little variability in these

Other Stuff
Is there any reason to replace as a matter of course any of the other springs?
Is it worth also replacing the lower band roll pin while it is detail stripped?


And some have recommended:

Adjustable or ported gas plug
Under what circumstances would you replace the gas plug?
GarandGear has a ported gas plug that they claim "delays the operating rod for several microseconds and lowers the peak gas cylinder pressure"
The Schuster adjustable port looks interesting @ $35.99. With adjustment, it allows hunting loads to be shot in the Garand.


Tools:
Gas cylinder wrench
Although I was able to easily remove the gas cylinder I am leery of the possibility of stripping the splines during reassembly. Of the following, is one any different/better than the other?
Sadlak (Midway) $22.99
Fulton Armory (Brownells) $15.99 (or $9.95 directly from Fulton Armory [laugh])
Angled @ GarandGear for $20

M3A1 combination tool (anyone have a good source for these?)
It looks like Orion 7 has new reproductions for $26.50.

Upper handguard clip pliers
Seem handy, although there have been some great descriptions of using ring pliers or narrow gauge wire looped around the holes in each arm
Clip Pliers from Brownells for $28.99, from Midway for $22.99, or from Fulton for $29.95 (the Fulton ones seem to grab the edge of the clip, rather than the hole?)

Are gas cylinder gage pins worth considering?


SPRINGS: I would get a complete spring kit from Orion 7. If you plan on shooting any cmp matches or a good amount of shooting a bolt rebuild kit is good also.
I will go as far as saying that they all get their springs from one of two major spring manufactures in CT.

LOWER BAND PIN. I really don't see a need to take this apart. If it happens to have the solid pin still staked in place leave it be. If not when removing see how loose it is. Consider a new pin on reassembly.

As for "tools" they are nice but unless you plan on working on several most are more or less not needed.
The gas cylinder wrench is nice to get some leverage when tightening loosening the gas plug/screw. A nice strap wrench comes in handy for a lot of things.
Same with any guages or specialty tools money better spent on ammo or another garand!.

GAS PLUGS: I have no input on garand gears plug. The adjustable one was a pita. Wasted ammo adjusting it and when shooting anything but M1 safe ammo had to adjust it to almost every change in ammo type.

The M1 combo tool is about all you need to service your M1. Works to do just about everything the "tools" do.

UPPER HANDGARD BAND TOOL. Remember this it to remove the clip from the wood. Not the gard from the rifle. Again good to have if you plan on removing a lot of clips from wood.

So if you plan on doing many M1s the tools and guages are helpful especially if you are repairing them also.

To me the money spent to buy these things would be better spent o. Ammo and spare parts.

A 4" long 1/4 drive extension with a 1/4 drive ratchet works well on the gas plug.
 
IMO you don't need the gas cylinder wrench. Unless you're doing something really dumb (or maybe if things are really stuck) I can't see you stripping the splines. Just don't force things and it should be fine.

For springs, I got this kit just recently and its got all of them including some NOS parts. I was very happy with it: http://www.ebay.com/itm/380650474250?ssPageName=STRK:MEWNX:IT&_trksid=p3984.m1497.l2649

Forgive me but I don't see why you are worried about stripping g the splines?
To strip the splines you would need to rotate the gas cylinder
GAS CYLINDER LOCK: is not "tightened " I suck at describing things. You want the gas port to be in the middle of the port on the cylinder.
As you tighten the cylinder lock ideally it will bottom out almost snug to lining up with cylinder to install the ga cylinder lock screw/ gas plug.
GAS CYL LOCK SCREW/Gasplug is what needs to be tight I use a modified pair of slip joint pliers. Ground the teeth flat and smooth and rounded the edges.
I hold the gas lock and tighten the gas screw with 1/4" drive extension and ratchet.
Now the key is to not remove the gas cylinder unless absolutely needed. Also no need to remove action from stock to often. There's no need to clean them spotless after every range trip.
 
Back
Top Bottom