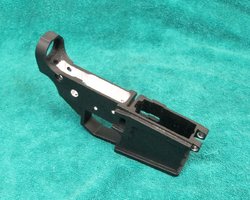
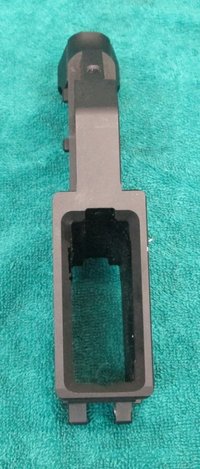
Building an AR from an 80% Lower with Crap Tools

If you do not have access to a mill, using a router based jig is your best bet. knfmn is absolutely correct, drill presses were not designed to, nor do they like to, cut latterly. They are designed strictly for vertical cutting. Even if you do manage to get though it, it will not be pretty.

Using a router based jig, like this http://www.northeastshooters.com/vb...s-AR-15-Jig-plus-80-Lower-Receiver-for-199-99
Will give you the results of a mill at a fraction of the cost.
 
Yeah, I tried using a super cheap X-Y vise with my drill press, and all it did was make the chuck fall out. Muscling it around bare-handed worked better for me.

Since this post, I have managed to finish about 5 lowers of increasingly better quality. I've replaced all of my 'store bought' lowers. I have bled quite a bit in the process, and wouldn't recommend it. I'm just stubborn.

bleeding is good. Did you smear your blood over the aluminum receivers and put some cosmoline on them, to make sure that scars don't go away! [laugh] Sometimes doing it the hard way gives you the appreciation of using better tools ... or you get into S&M.
 
anything ever happen with that group buy mentioned before

There were two. One on lowers and one on jigs.
The one for lowers had a lot of response and went though as planned. The one for the jigs did not hit the number we were looking for, for an actual GB, so modulus gave a flat 10% off to everyone who was interested and they just each ordered their own.
 
Tomorrow I will be posting pics of what I was working on today. A brand new 80% receiver that you have never seen before. Only two of them exist and I've got one of them. Stay Tuned.
 
with bits. Not end mills though]

Have you ever seen an AR lower that was finished on a drill only jig? I'm guessing no or you wouldn't be recommending that piece of junk.
If you insist on a drill only jig at least buy a decent one that locates off the pivot pin. You'll still end up with a crappy looking lower, but at least it will be a functioning crappy looking lower.
You are right 7.62, a little Google check from AR15.com shows a post were a guys trigger pin hole was off and the safety didn't work. It was such a deal though but I guess there are no shortcuts with good machine work.
 
You are right 7.62, a little Google check from AR15.com shows a post were a guys trigger pin hole was off and the safety didn't work. It was such a deal though but I guess there are no shortcuts with good machine work.

One look will tell you that particular jig had no shot at being accurate. There are three legit points of reference on an 80% lower, the pivot pin, the takedown pin and the buffer tube mount. You must to be tied into at least two of them to guarantee that the jig is squared up on the receiver. That thing only tied into the take down pin.
 
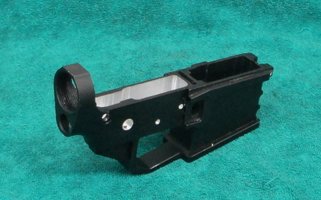
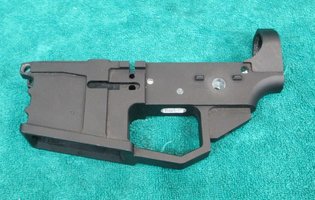
OK guys as promised a sneak preview of Modulus arms newest product.

It is a 6061-T6 Billet aluminum 80% AR-15 receiver. This is one of only two that exist and the only one finished 100%. They will be available for purchase in 4-6 weeks

Features include.

6061-T6 Aluminum alloy for extreme strength as well as ease of finishing
Over-sized Integrated trigger guard for extra room
Extra large flared magazine well for easier removal and installation of magazines
Threaded pin for bolt catch instead of need for roll pin
Threaded hole for takedown pin Detent spring for use with AR-15 Pistols
Ergonomic finger slots in front of magazine well for gripping
Aesthetic and aggressive design to go with your AR-15 accessories

IMG_0626.jpg

IMG_0632.jpg

IMG_0630.jpg

IMG_0633.jpg
 
A drill press, a good jig, an x, y vise, WD-40 and care with feed rates and speeds have finished many an 80% lower with ease. I've seen results looking very nearly as good as a milling machine.
 
A drill press, a good jig, an x, y vise, WD-40 and care with feed rates and speeds have finished many an 80% lower with ease. I've seen results looking very nearly as good as a milling machine.

Really? I'd like to see some pics of them.
I've seen quite a few and I would say that the OP of this thread had better than average results. I'm not knocking it and I applaud his effort and building a functioning AR. But let's face it, it is never going to be confused with a lower done on a mill or with a router.

There is just no way to get a smooth finish with a drill press. There is just too much movement in the chuck/quill/spindle. A drill press is just not designed to cut laterally.
 
very nice. do you work for modulus arms?
OK guys as promised a sneak preview of Modulus arms newest product.

It is a 6061-T6 Billet aluminum 80% AR-15 receiver. This is one of only two that exist and the only one finished 100%. They will be available for purchase in 4-6 weeks

Features include.

6061-T6 Aluminum alloy for extreme strength as well as ease of finishing
Over-sized Integrated trigger guard for extra room
Extra large flared magazine well for easier removal and installation of magazines
Threaded pin for bolt catch instead of need for roll pin
Threaded hole for takedown pin Detent spring for use with AR-15 Pistols
Ergonomic finger slots in front of magazine well for gripping
Aesthetic and aggressive design to go with your AR-15 accessories

View attachment 134733

View attachment 134734

View attachment 134735

View attachment 134736
 
very nice. do you work for modulus arms?

I doubt it, they are in CA, not sure if that was meant as a knock on him, but 7.62 has always provided sound advice and has been a great help to builders and what he says about the drill press is 100% true. People can take their chances with a drill press and learn from their mistakes or heed advice of someone who has been around the building scene when most people were in diapers.
 
I doubt it, they are in CA, not sure if that was meant as a knock on him, but 7.62 has always provided sound advice and has been a great help to builders and what he says about the drill press is 100% true. People can take their chances with a drill press and learn from their mistakes or heed advice of someone who has been around the building scene when most people were in diapers.

Thank you for the kind words, they mean a lot coming from a guy who's building talents I really respect. In fact the only thing that rivals your building skills is your sense of humor. You have posted some real gems that have had me LMAO.

PS see the link above. Never underestimate the power of the net. lol
 
Max, I've looked at what you said about using fixed points for the accuracy of the jig and I'm convinced this would be the best way to have a problem free job. Are the jigs at Modulas made to fit forged and billet and do they fit most manufacturers ? And I got the feeling you might have a connection with M.A., but with your past build expieriance and machinist skills it's a non issue. Is there a cheap router that can do the job ?
 
Last edited:
Max, I've looked at what you said about using fixed points for the accuracy of the jig and I'm convinced this would be the best way to have a problem free job. Are the jigs at Modulas made to fit forged and billet and do they fit most manufacturers ?

Yes and Yes.

Because the modulus jig mounts by the buffer tube (as well as the pivot pin) instead of just clamping on to the sides like other jigs do, the make/style of the lower does not matter.
 
Max, I've looked at what you said about using fixed points for the accuracy of the jig and I'm convinced this would be the best way to have a problem free job. Are the jigs at Modulas made to fit forged and billet and do they fit most manufacturers ? And I got the feeling you might have a connection with M.A., but with your past build expieriance and machinist skills it's a non issue. Is there a cheap router that can do the job ?


It looks like you were editing while I was replying. To answer what you added.

What tipped you off to my connection to MA? Was it the announcement that I made in the Modulus forum a month ago or the link to it that I posted above when replying to pochito413 LOL

As for the router, hands down the Ridgid R24012.
I didn't see that thread but in past posts you have described the failings of the common jigs on the market as being unreliable because of the single positive anchor point that they reley on. You have stated the Modulas jig uses two reference points making the machine work accurate and using the router will give it a more polished finished look. You are pretty familiar with what's out there and your high praise of this platform sounded like a good sales pitch. No offense intended as I see your points and agree.
 
I've been a fan a lot longer than I've been an employee. I've been using a modulus jig for 8-9 months. I've only been working for them for about a month or so.

If you look at a print of an AR lower, every dimension is based off of the pivot pin or buffer tube mount. There are no dimensions given for wall thickness or OD of the receiver, it can be whatever the mfg wants it to be. This isn't as big of a deal on forged lowers as they mostly come from a handful of forges and they're all similar.
Once you move on to billet, the width and contours are all over the place. Everybody is finishing theirs off a little different, just to be different. Basing a jig off of a variable limits it usefulness and accuracy.
 
Since I started this thread a while back, I thought I would follow up with a sequel - using a rattle can to finish your crap lower finished with crap tools.

I've got half a safe full of ARs built on 80% lowers now, and most of them are still raw aluminum. I've been meaning to look into Durakote, Cerakote, anodizing, etc... but I am just too cheap and lazy. I have tried a couple of different rattle can paint jobs on some of my crappier guns, BBQ paint, etc..., and it chips off just from looking at it.

I think I have finally found an $8 can of paint that can be used on raw aluminum with fairly decent results:

http://www.autozone.com/paint-and-b...oss-black-all-weather-epoxy-paint/465690_0_0/

I grabbed a can of this stuff at Autozone. I used brake cleaner to remove an abortion of a paint job from this frankengun, and I repainted it with the VHT spray can epoxy. I can already tell that it is way more durable than the BBQ paint or engine paint that I tried before. It went on a little glossy for my taste, so I rubbed it down after about half an hour, and it dulled out somewhat.

Anyway, I am not presenting this gun as something I am particularly proud of. It is something I put together with spare parts I had from other builds. I just thought somebody might be interested in how this paint might work.


I think one reason paint does not adhere to aluminum is it is so smooth and there is nothing to bite into. Maybe a light blast to put some tooth on the surface. Also a lot of AK builders really like the epoxy paint on their rifles.
 
Back
Top Bottom