beaker
NES Member
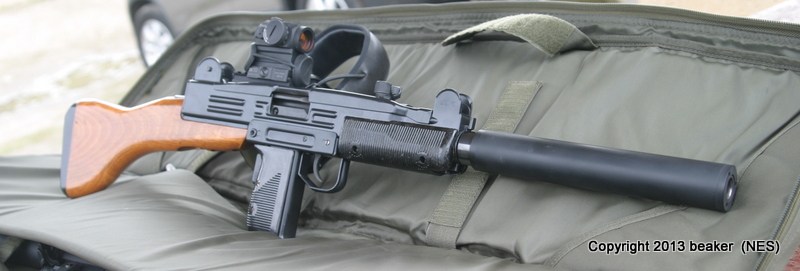
I'll be building this - UZI Carbine, 9mm, 16" barrel with a permanently attached Type 4 wood stock:

Final Result
Some History: *UZI
I've been wanting a 9mm pistol carbine for some time, but none of the available options were very appealing to me. I would really like an H&K, but can't really afford one. A few months ago I started doing research on UZI's and found that there are currently parts kits available, and there are very high quality brand new receivers to build on. Building an UZI from a parts kit will probably cost as much (or more depending on options you choose) than buying a new Vector Arms UZI, but what is the fun in that?![[wink]](/xen/styles/default/xenforo/smilies.vb/002.gif "Wink [wink]") This is my kind of recycling. Some of the other reasons for building an UZI - cheap pre-ban high-cap magazines, 45 ACP conversion options are quick and easy (but not cheap), solid, reliable design, and everyone recognizes the iconic UZI. There are a decent number of parts kits floating around, mostly high quality IMI manufactured stuff from Israel and Germany so get 'em while the getting is good. As I understand it there will be no additional kits imported from IMI so this won't last forever. Currently you can pick up lots of IMI manufactured spare parts on the cheap. And of course, Chuck Norris likes 'em so they must be awesome!
This is my kind of recycling. Some of the other reasons for building an UZI - cheap pre-ban high-cap magazines, 45 ACP conversion options are quick and easy (but not cheap), solid, reliable design, and everyone recognizes the iconic UZI. There are a decent number of parts kits floating around, mostly high quality IMI manufactured stuff from Israel and Germany so get 'em while the getting is good. As I understand it there will be no additional kits imported from IMI so this won't last forever. Currently you can pick up lots of IMI manufactured spare parts on the cheap. And of course, Chuck Norris likes 'em so they must be awesome! ![[smile]](/xen/styles/default/xenforo/smilies.vb/001.gif "Smile [smile]")
When doing research I didn't find a complete "this is how you do it" resource, but there is a lot of information out there. I'll try and put everything I learn about the build here for others who are interested. This is going to take a couple of months, I'll update the first post as I go along.
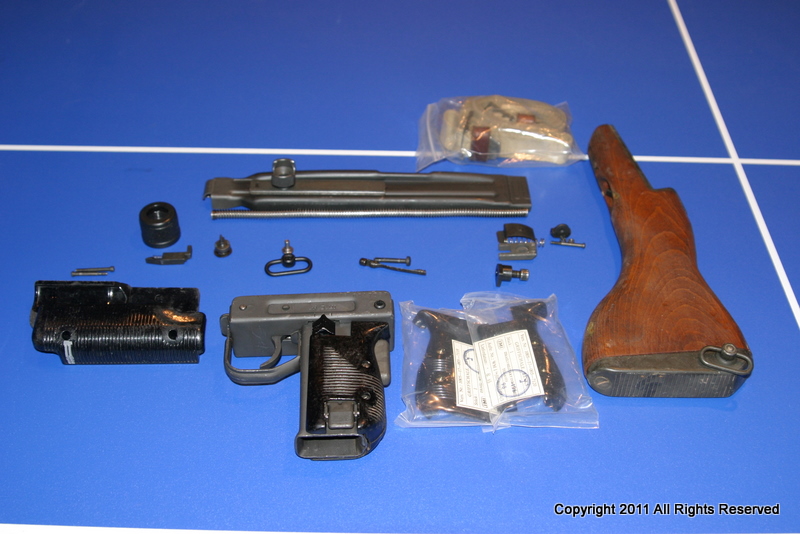
Here is what you can use from the SMG parts kit:
1. Pistol Grip Assy (modified, if it is a semi kit you are all set)
2. Front and Rear Sight assemblies
3. Top Cover Assembly (modified, if it is a semi kit you are all set)
4. Top Cover Catch and Spring
5. Barrel Nut Lock and Spring
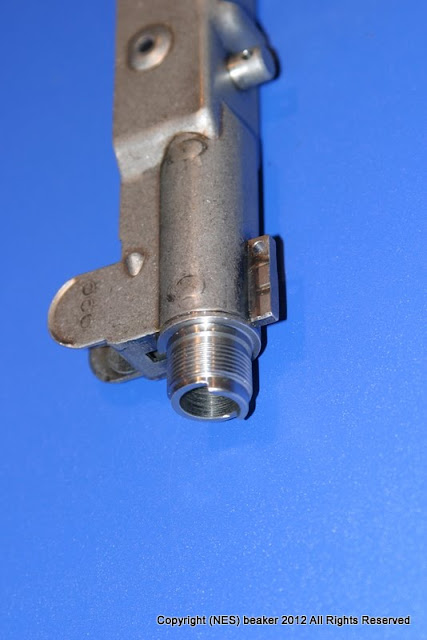
6. Barrel Nut
7. Bolt Recoil Spring Assembly (remove the fiber flap)
8. Mounting Lug (nut) and Screw for stock (modified lug and stock)
9. Pistol and handguard grips (maybe or replace with US made grips for 922r compliance)
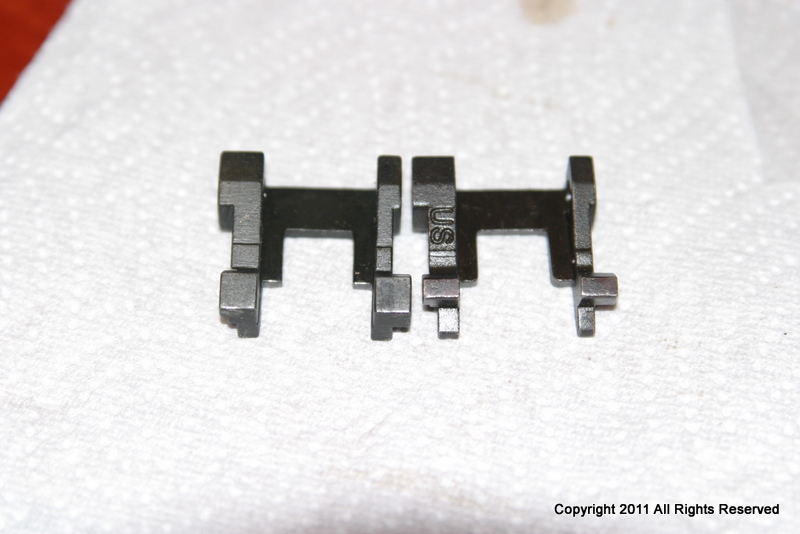
10. Sear (modified or replace with US made Semi-auto sear for 922r compliance)
NOTE: You will probably need a forward sling swivel and rivet pin which typically don't come with the kits.
You could remove some of the other parts (like the trunnion and extractor) but US made parts are readily available and not that expensive so I don't see much of a point unless you need an FA trunnion to repair a registered FA gun.
ERRORS OR INCORRECT DATA: I am trying to put a good resource together - If I get a technical detail or data related to the legalities wrong, please PM ME and I'll correct it! This is a build thread, if you want to publicly beat on something buy a cat. (just kidding cat lovers!)
Some important facts about building these from kits (just to answer the simple questions):
* STOCKS - You must modify the stock so it is permanently attached to the gun. Most of the stocks available are quick release type stocks, the stock must be permanently attached to the rifle - i.e., you need tools to remove the stock. This looks pretty easy, lots of people have already figured this out and I'll post details and pics when I get to that point.
* Folding Stock in Massachusetts - YOU CAN'T DO IT! You can't use a folding stock unless it is a pre-ban rifle. This uses a new receiver and is considered a new gun, fixed stocks only.
* 922r compliance - you have to comply so you need to swap out enough foreign made parts to meet the requirement of 10 MAX foreign made parts from "the list". I will post a table here with what I think, if there are any issues with my assumptions, PM me and we will get it corrected. It looks to me like there are 15 recognized 922r Parts so I need to replace 5 of them to bring the total down to 10.
Correction: According to the latest word from BATF, the UZI has 13 922(r) parts from the "list of 20". So you need only swap out three (3) of the 922(r) parts. The welded receiver and trunnion count for two, and the barrel counts for one so you are done at that point if you want to keep the rest.
I am replacing the following with US made parts - this brings my total parts compliance well under the maximum 10
(1) Frames, receivers, receiver castings, forgings, or stampings
(2) Barrels
(4) Mounting blocks (trunnions)
(6) Bolts
-------------------You can stop there if you want. I'll also be swapping out the following for US made parts. You can't use the SMG bolt anyway.
(13) Sears <<< you can modify the SMG sear to work with a semi-auto receiver if you want, it's OK due to the parts count.
Which brings the total number of foreign parts to eight (8), two less then the maximum 10.
Remaining Foreign Parts from the list of 20.
(8) Operating rods
(10) Trigger housings
(11) Triggers
(14) Disconnectors
(15) Buttstocks
(16) Pistol grips
(18) Magazine bodies
(19) Followers
(20) Floorplates
Uzi Talk Article Regarding 922r Compliance for a Norinco Uzi NOTE: The Norinco conversion is different than building with a US made receiver.
* FULL AUTO PARTS - if you get the full auto SMG bolt or SMG barrel in your parts kit you can't use them. Period. You can't modify it unless you want to be a felon. Just trade it in (DandD sales and other uzi parts dealers will give you a credit for the SMG bolt, or SMG Barrel if you get one) You also can't use the SMG trunnion from the parts kit. The BATF won't like you if you do that.
* Short Barrel - it is easy to swap out barrels on an UZI. Unless your gun is a registered SBR, you can't install a short operational barrel, don't even think about it!
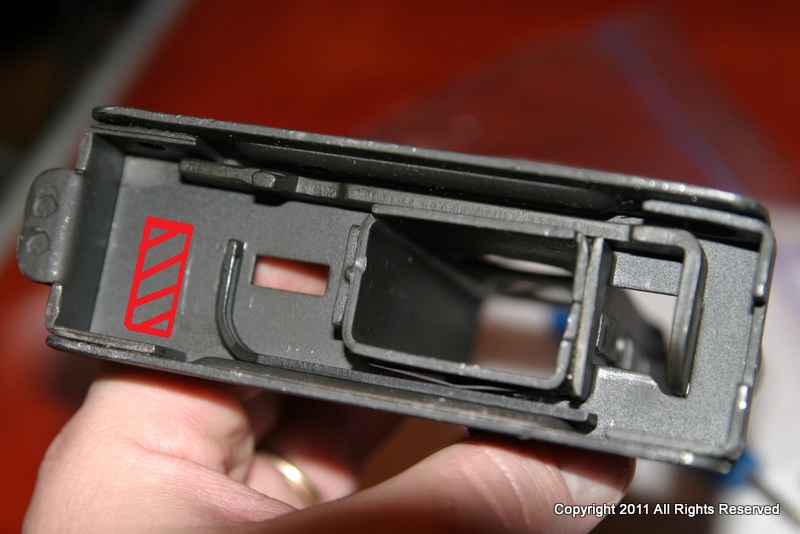
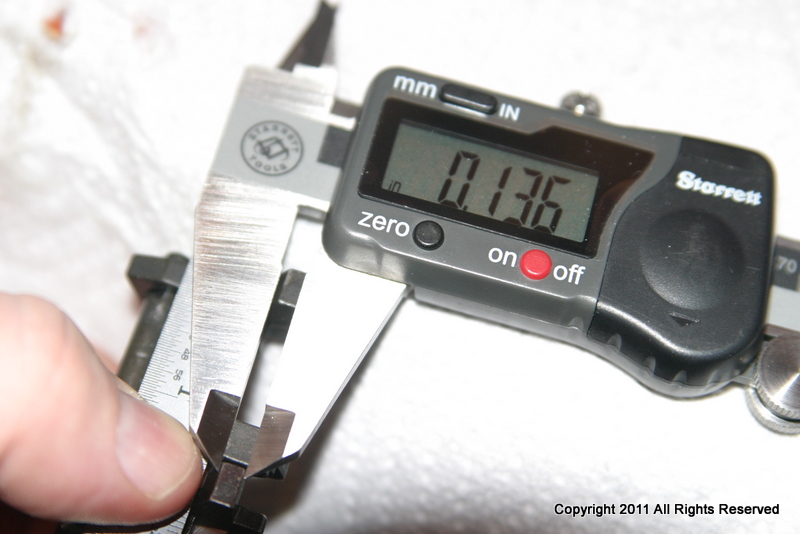
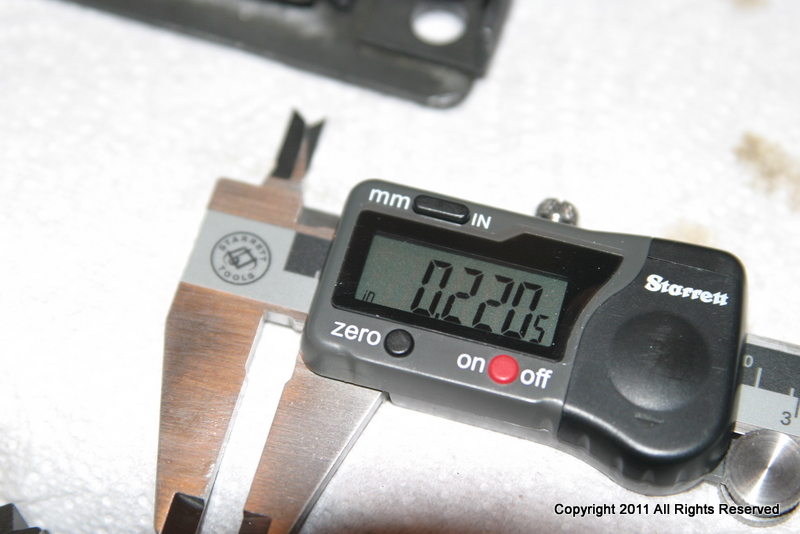
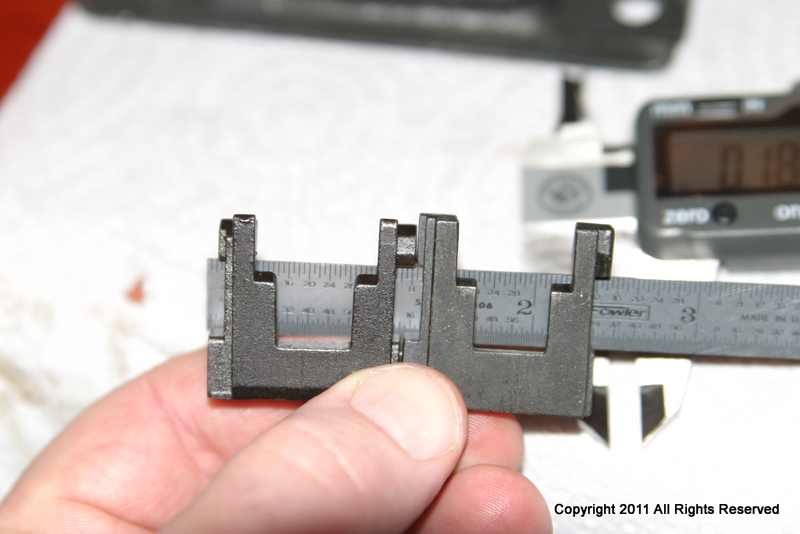
* Lug Attachment Pin - The UZI SMG uses an 8mm lug attachment pin. The Semi-Auto versions use a 9mm lug attachment pin. This is so the Semi-auto pistol grip will not fit an SMG receiver. The SMG parts kits have giggle switches, so unless you really want a stint in prison on your resume, you need to block the selector switch from going to the full auto position. You weld a small steel plate ~0.050-0.070" thick in the lower that lets you slide the selector to the semi position, but it can't go to auto. I'll show pictures later.
* Nodak Spud Receiver - I am using the pre-welded receiver. A non-welded receiver is $100, and the weld parts are $100. The jig welded receiver is $220 so the risk of effing it up isn't worth it to me. If I had one to reference I would give it a shot, but I don't so I am pressing the easy button.
This is going to take a couple of months so I'll keep updating the original post as I go along.
Part 1 - lets get started...
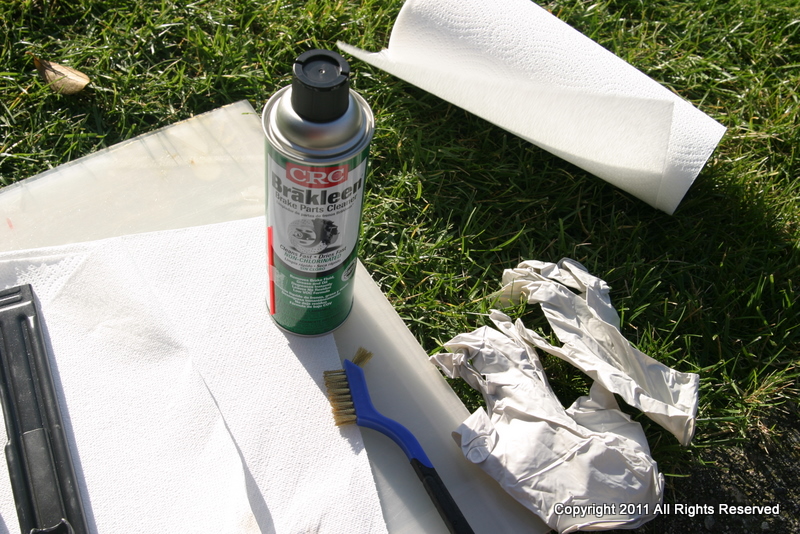
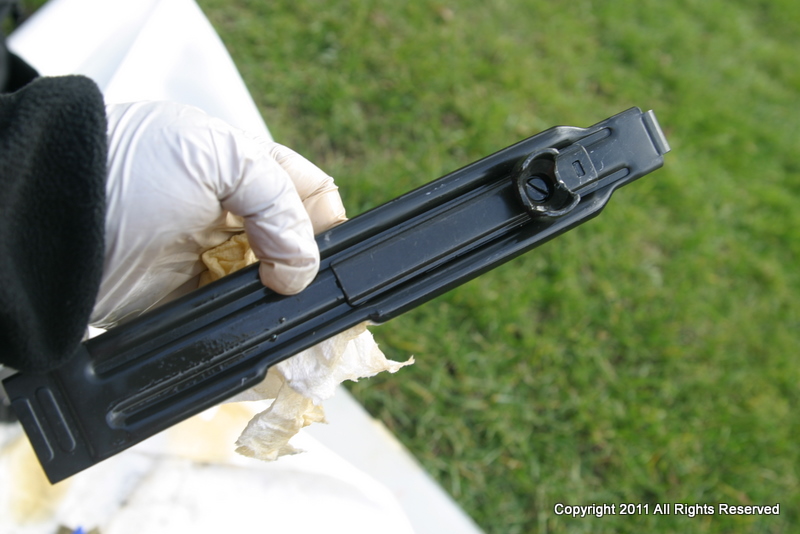
The kit was full of crud from the torching and some type of mystery oil.
I cleaned it using Brake cleaner and a brush. This type of brake cleaner is safe for the plastic handguards, not all of it is friendly to plastic so beware.
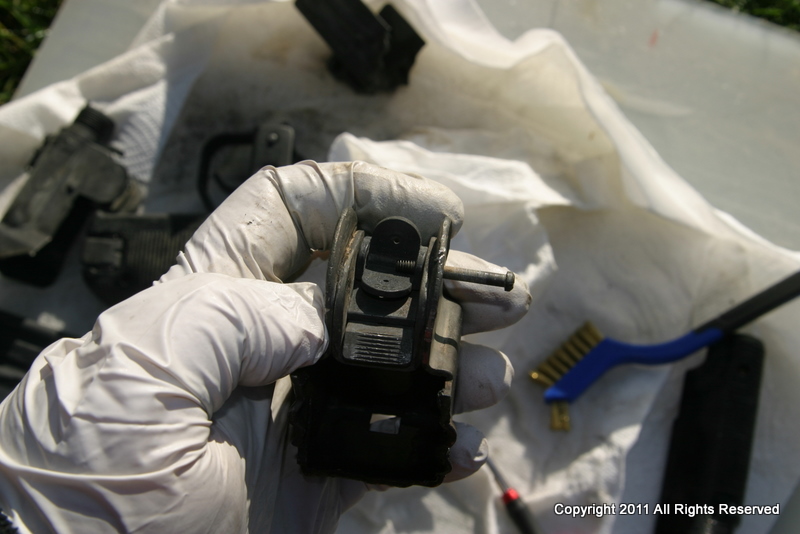
Time to remove the rear sights you just need a small screwdriver. It unscrews and comes right off.
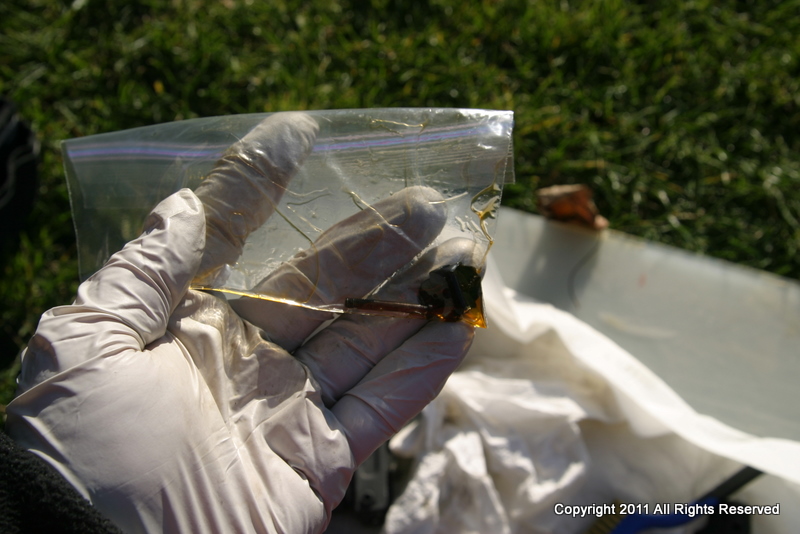
I put it in a baggie with some oil to keep it safe.
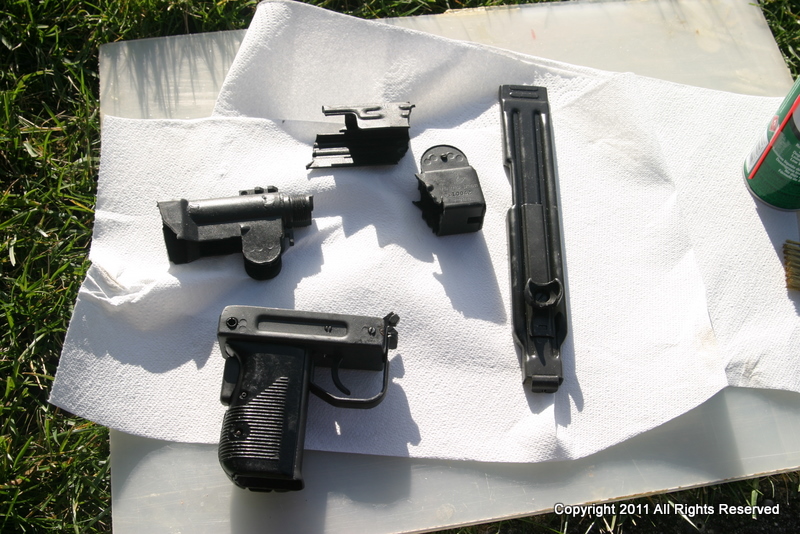
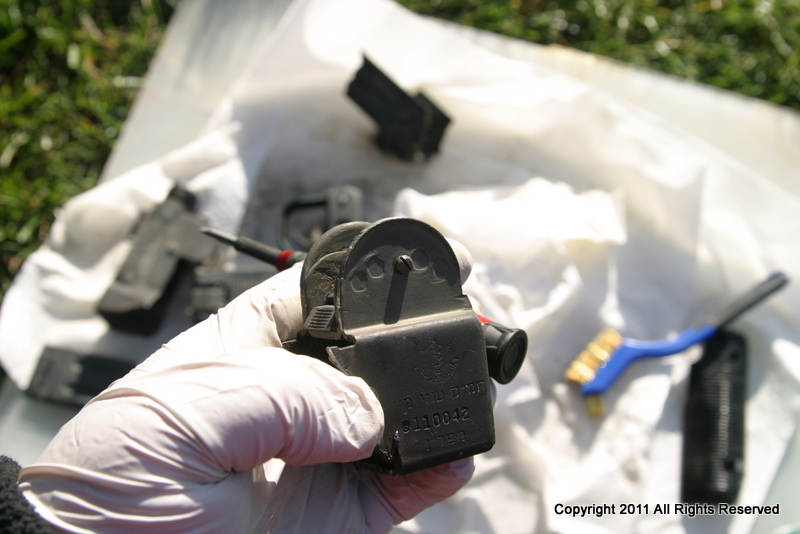
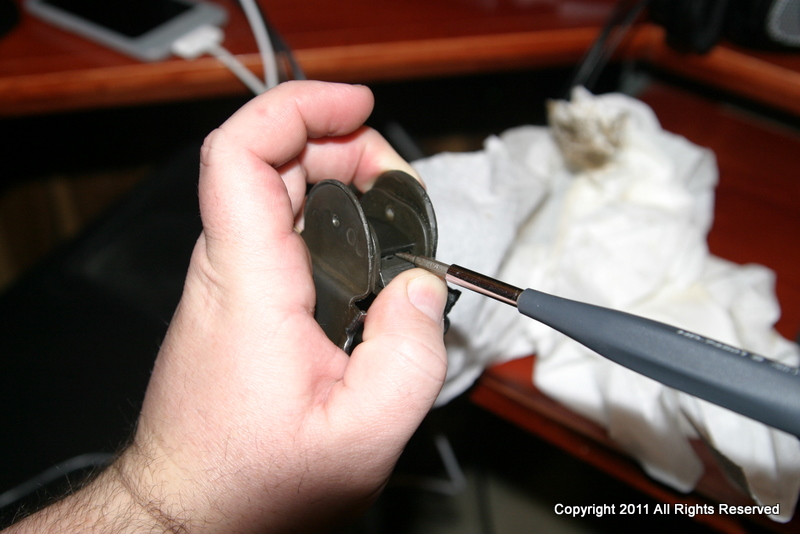
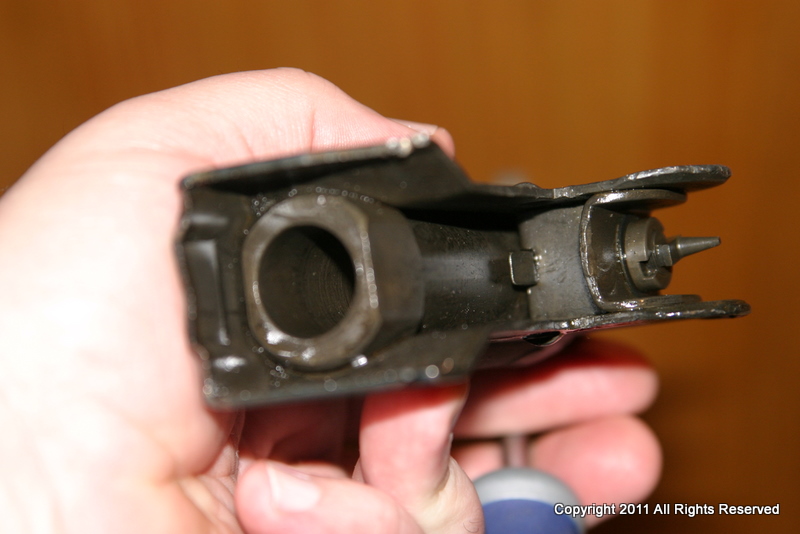
Now to remove the paw (ratchet) from the cocking lug. Remove the spring from the cocking lug (underneath) and let it hang, it just lifts out of an angled slot. Remove the screw and the whole thing comes apart.
Here is the cocking lug. The paw pops right out. I took it out then put it back and I think it is on there backwards, but you get the idea. Once you have the paw out, take out the spring, it just unwraps and with a twist it comes right out.

Here are the removed parts. Easy as pie.
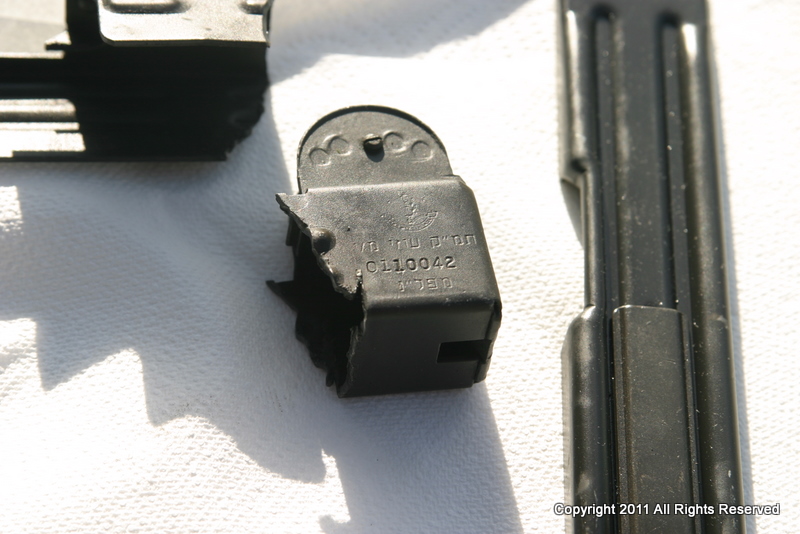
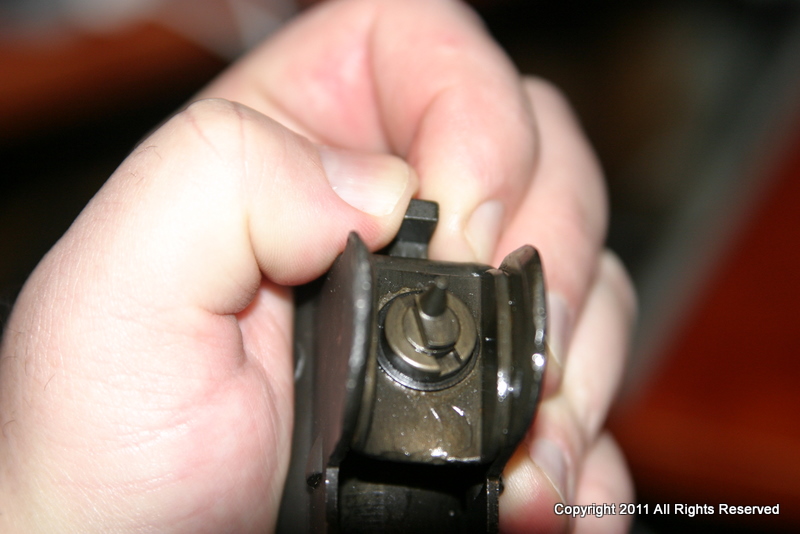
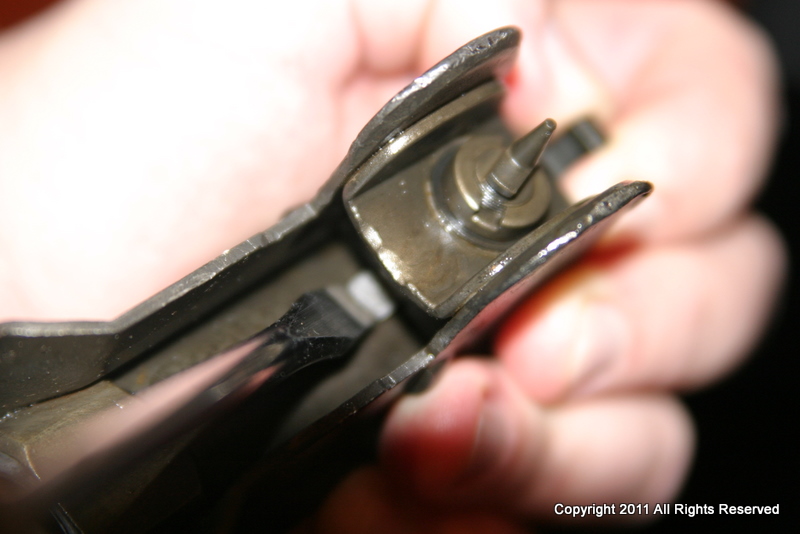
The cocking lug sans paw and spring. Now put it back together.
What it looks like from underneath with the spring back on.
Top view after reassembly.
I sprayed all the cleaned parts with oil and wiped them down to protect them from rusting until I work on them again.
Stay tuned, more to come...
PART 2
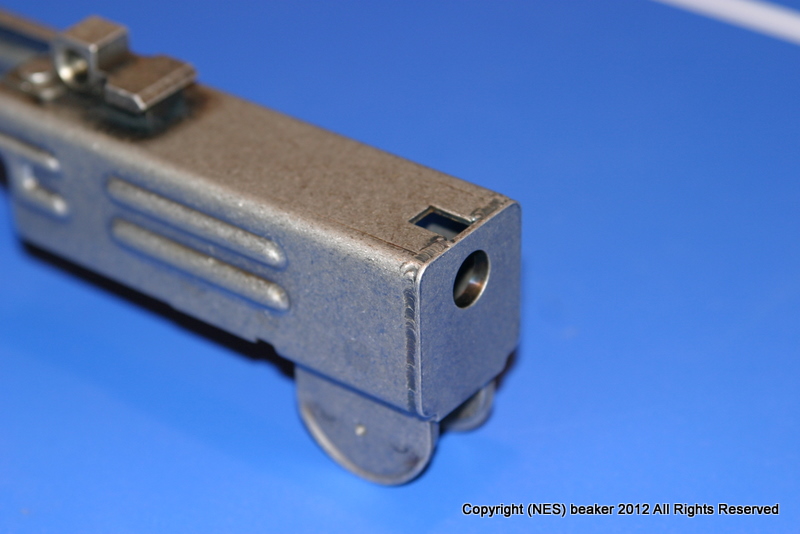
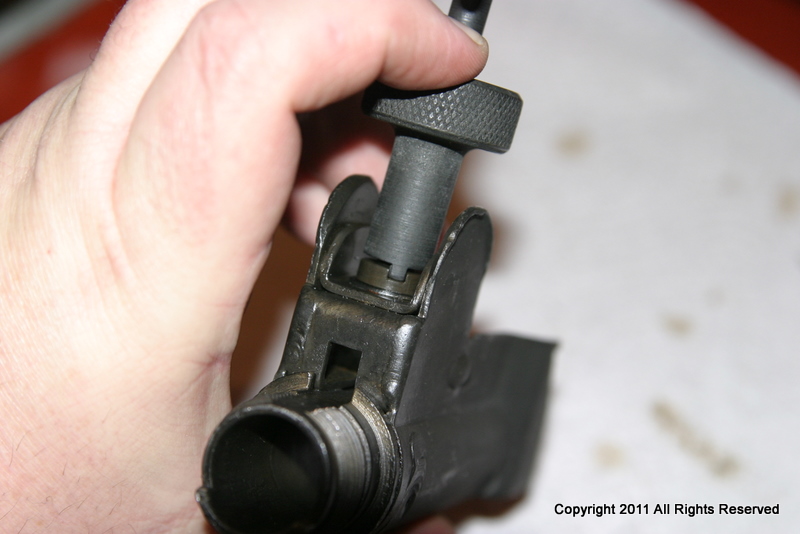
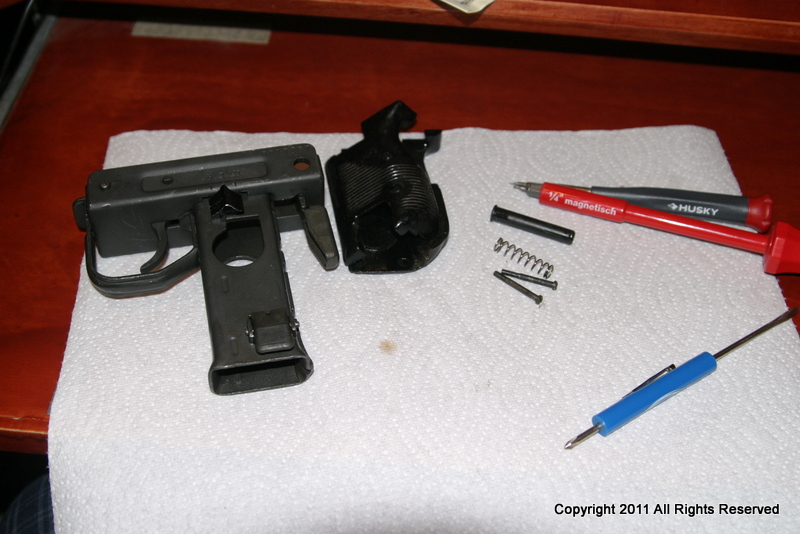
Time for more, tonight we remove the top cover catch and the barrel nut lock!
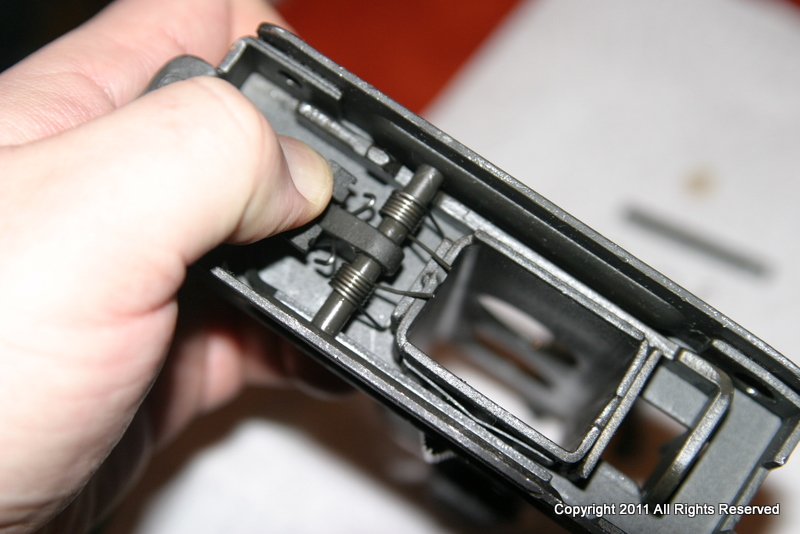
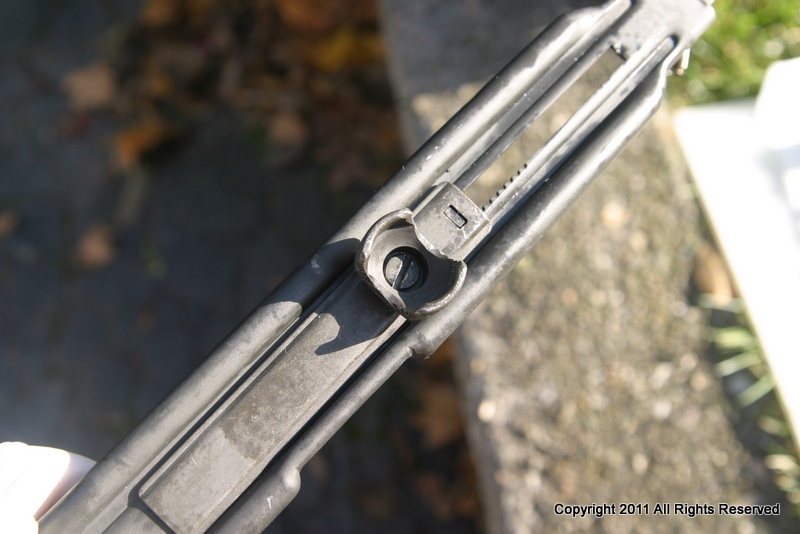
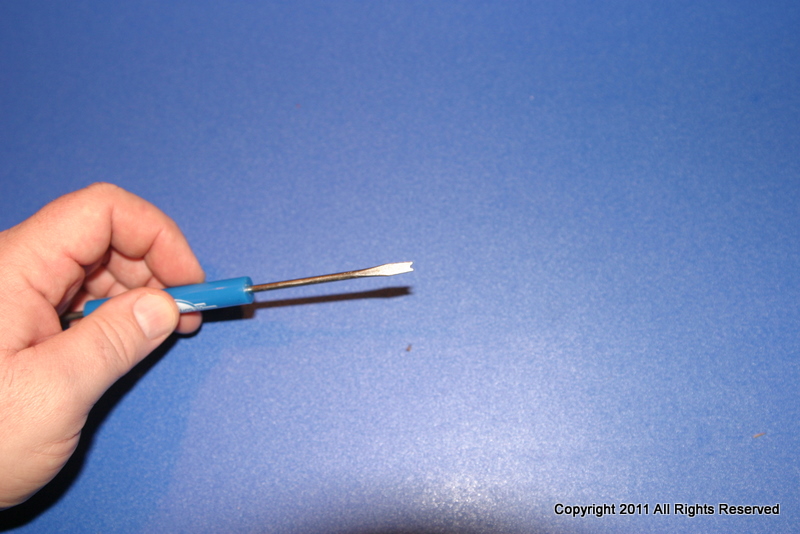
You will need a small flat head screwdriver. Grab the stub from behind, with your weak hand and put your fingers on top of the leaf spring so when you pry it up it doesn't go flying and you lose the spring. depress the catch with your weak hand thumb while you slowly pry up one corner of the leaf as shown. It should come up and then you can remove the leaf spring, coil spring, and top cover catch. Easy when you see pictures!
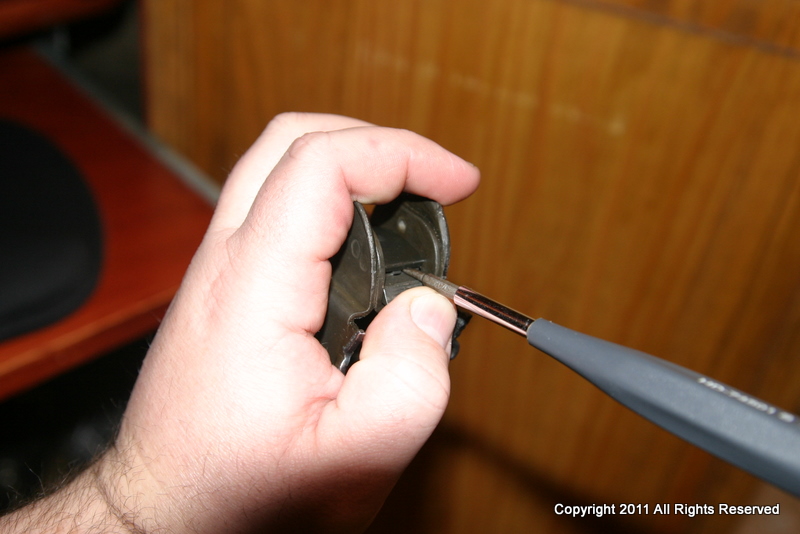
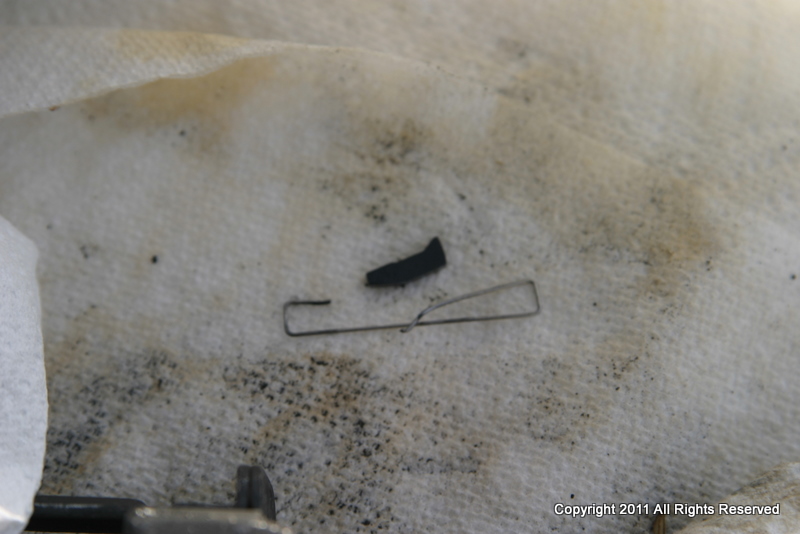
That wasn't too hard was it? I keep small baggies handy to put the pieces into when they come off since there are a number of very small pieces. I would recommend doing something similar.
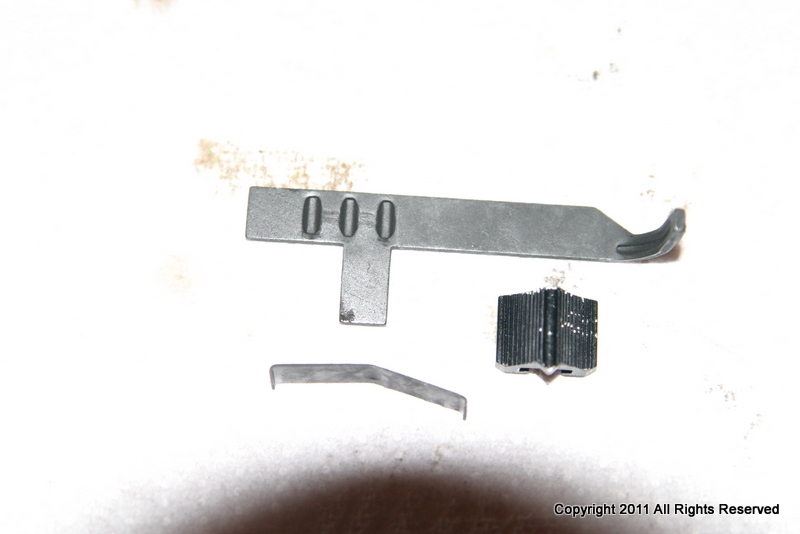
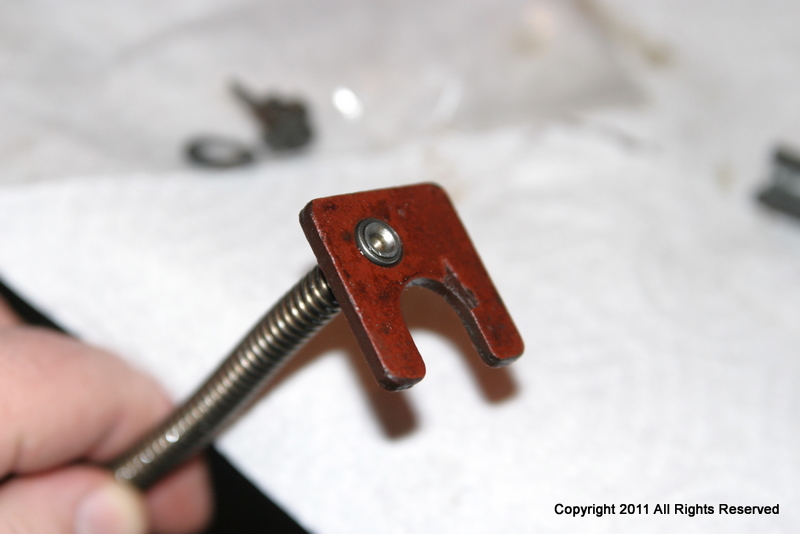
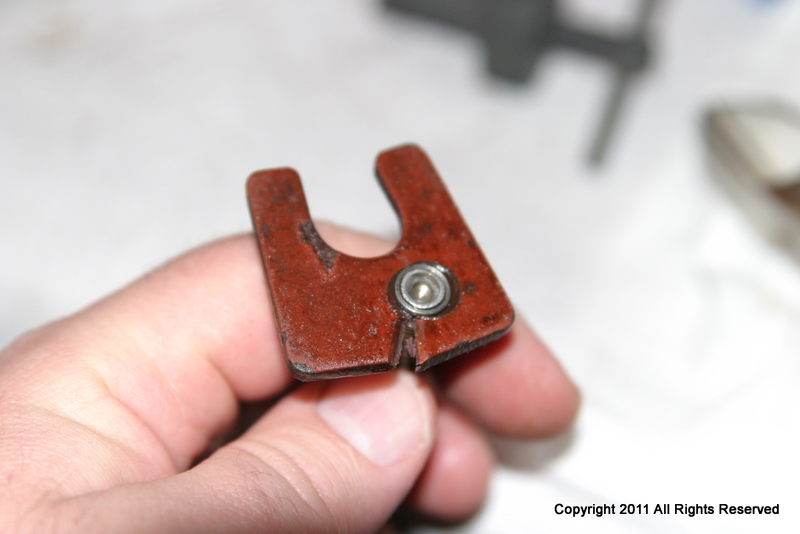
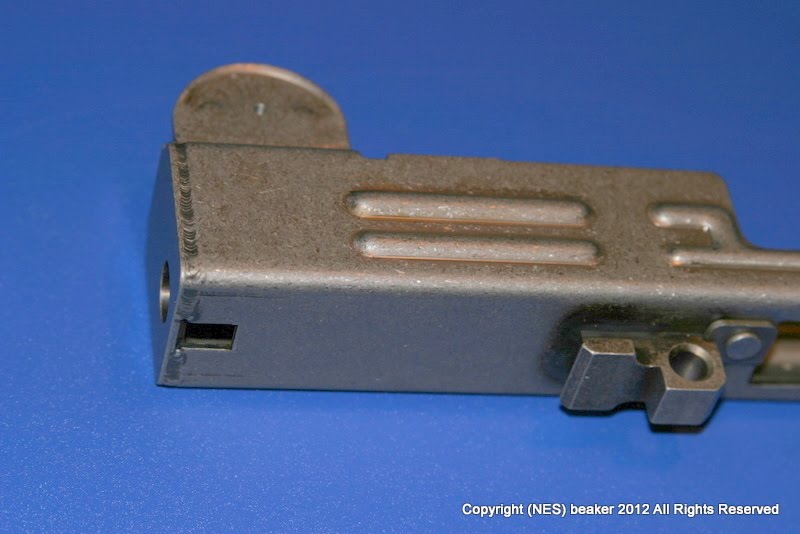
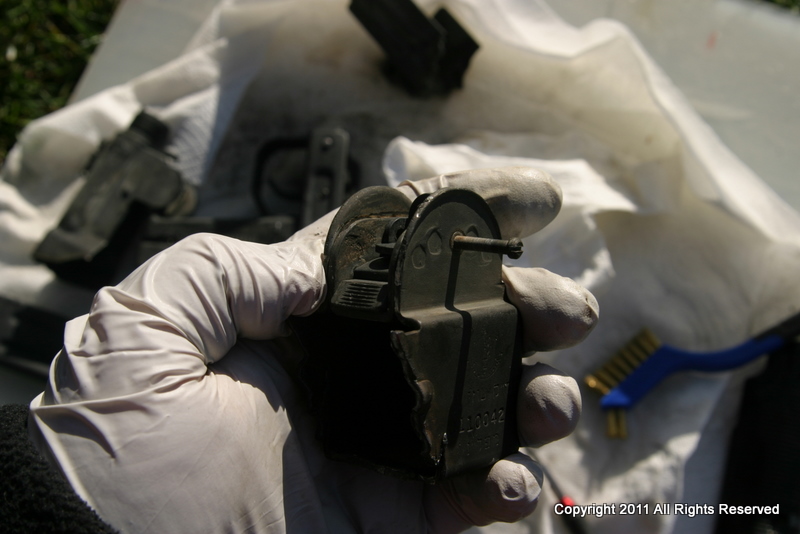
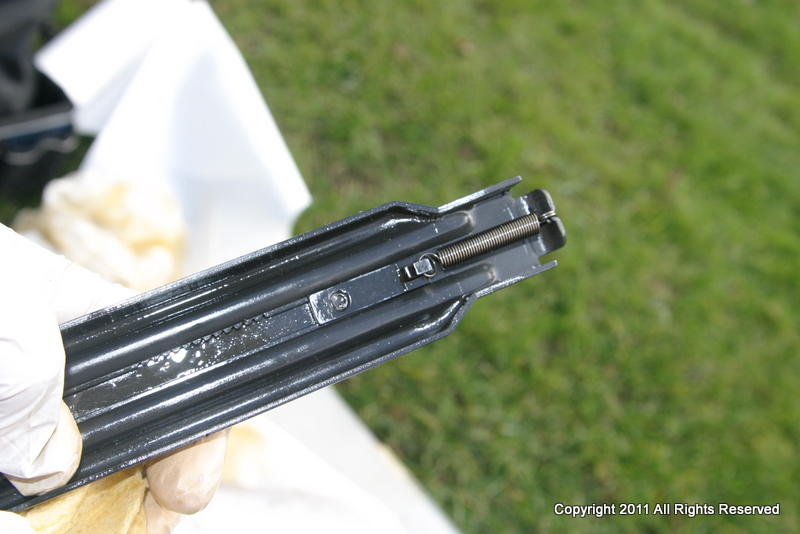
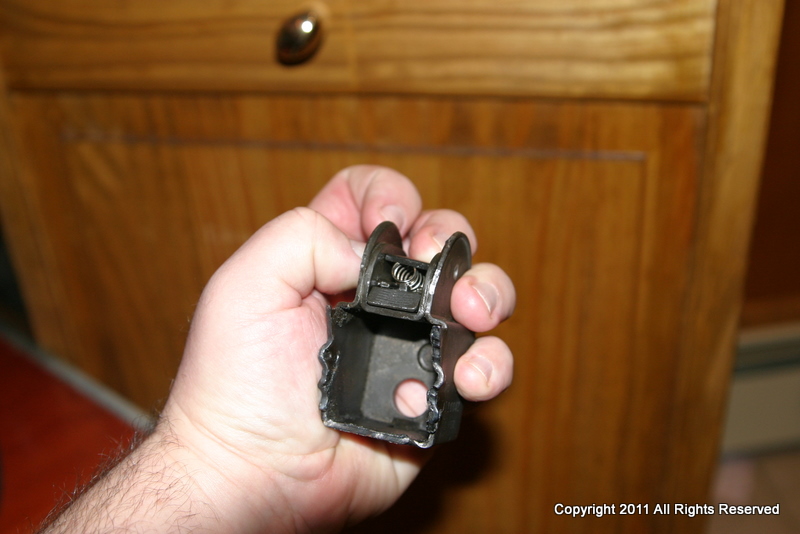
Now to remove the barrel nut lock from under the front sight. This looks like it was put there prior to welding, and there is no way to get it out, but fret not! It comes out! Many people apparently break the spring so be careful.
It consists of the lock and a small coil spring. Using your weak hand, hold the front stub in your palm and pinch the front of the lock so you can pull it while pushing down firmly on the rear spring lock with a medium sized flat head screwdriver. Push the lock down to get it under the slot in the front sight, while pushing it forward and out with the screwdriver. Maintain the pinch grip and pull it slowly out making sure not to lose the small spring. Put it in a baggie.
Cleaning everything well with brake cleaner then hosing it down with penetrating oil was a good move since it was a lot neater to work with, and the moving parts all seem to move a lot better.
I ordered a front sight tool since I don't want to hack up the front sights, and you need it to reinstall them. Removal of the bits is going well so far!
Tune in next time for more exciting UZI fun!
Part 2
Part 3
Part 4
Part 5 - Receiver arrives
Part 6 - Welding the FA Blocking Bar
Part 7 - Bolt
Part 8 - Wooden Stock Disassembly and Refinish
Part 9 - Permanently Attach Wooden Stock / Mods
Part 10 - StormWerkz Rail Installation (Aimpoint)
Test Fire
Finishing - Grit Blast, Parkerize, Gunkote - Final Assembly
Final Result
Some History: *UZI
I've been wanting a 9mm pistol carbine for some time, but none of the available options were very appealing to me. I would really like an H&K, but can't really afford one. A few months ago I started doing research on UZI's and found that there are currently parts kits available, and there are very high quality brand new receivers to build on. Building an UZI from a parts kit will probably cost as much (or more depending on options you choose) than buying a new Vector Arms UZI, but what is the fun in that?
This is my kind of recycling. Some of the other reasons for building an UZI - cheap pre-ban high-cap magazines, 45 ACP conversion options are quick and easy (but not cheap), solid, reliable design, and everyone recognizes the iconic UZI. There are a decent number of parts kits floating around, mostly high quality IMI manufactured stuff from Israel and Germany so get 'em while the getting is good. As I understand it there will be no additional kits imported from IMI so this won't last forever. Currently you can pick up lots of IMI manufactured spare parts on the cheap. And of course, Chuck Norris likes 'em so they must be awesome! When doing research I didn't find a complete "this is how you do it" resource, but there is a lot of information out there. I'll try and put everything I learn about the build here for others who are interested. This is going to take a couple of months, I'll update the first post as I go along.
Here is what you can use from the SMG parts kit:
1. Pistol Grip Assy (modified, if it is a semi kit you are all set)
2. Front and Rear Sight assemblies
3. Top Cover Assembly (modified, if it is a semi kit you are all set)
4. Top Cover Catch and Spring
5. Barrel Nut Lock and Spring
6. Barrel Nut
7. Bolt Recoil Spring Assembly (remove the fiber flap)
8. Mounting Lug (nut) and Screw for stock (modified lug and stock)
9. Pistol and handguard grips (maybe or replace with US made grips for 922r compliance)
10. Sear (modified or replace with US made Semi-auto sear for 922r compliance)
NOTE: You will probably need a forward sling swivel and rivet pin which typically don't come with the kits.
You could remove some of the other parts (like the trunnion and extractor) but US made parts are readily available and not that expensive so I don't see much of a point unless you need an FA trunnion to repair a registered FA gun.
ERRORS OR INCORRECT DATA: I am trying to put a good resource together - If I get a technical detail or data related to the legalities wrong, please PM ME and I'll correct it! This is a build thread, if you want to publicly beat on something buy a cat. (just kidding cat lovers!)
Some important facts about building these from kits (just to answer the simple questions):
* STOCKS - You must modify the stock so it is permanently attached to the gun. Most of the stocks available are quick release type stocks, the stock must be permanently attached to the rifle - i.e., you need tools to remove the stock. This looks pretty easy, lots of people have already figured this out and I'll post details and pics when I get to that point.
* Folding Stock in Massachusetts - YOU CAN'T DO IT! You can't use a folding stock unless it is a pre-ban rifle. This uses a new receiver and is considered a new gun, fixed stocks only.
* 922r compliance - you have to comply so you need to swap out enough foreign made parts to meet the requirement of 10 MAX foreign made parts from "the list". I will post a table here with what I think, if there are any issues with my assumptions, PM me and we will get it corrected. It looks to me like there are 15 recognized 922r Parts so I need to replace 5 of them to bring the total down to 10.
Correction: According to the latest word from BATF, the UZI has 13 922(r) parts from the "list of 20". So you need only swap out three (3) of the 922(r) parts. The welded receiver and trunnion count for two, and the barrel counts for one so you are done at that point if you want to keep the rest.
I am replacing the following with US made parts - this brings my total parts compliance well under the maximum 10
(1) Frames, receivers, receiver castings, forgings, or stampings
(2) Barrels
(4) Mounting blocks (trunnions)
(6) Bolts
-------------------You can stop there if you want. I'll also be swapping out the following for US made parts. You can't use the SMG bolt anyway.
(13) Sears <<< you can modify the SMG sear to work with a semi-auto receiver if you want, it's OK due to the parts count.
Which brings the total number of foreign parts to eight (8), two less then the maximum 10.
Remaining Foreign Parts from the list of 20.
(8) Operating rods
(10) Trigger housings
(11) Triggers
(14) Disconnectors
(15) Buttstocks
(16) Pistol grips
(18) Magazine bodies
(19) Followers
(20) Floorplates
Uzi Talk Article Regarding 922r Compliance for a Norinco Uzi NOTE: The Norinco conversion is different than building with a US made receiver.
* FULL AUTO PARTS - if you get the full auto SMG bolt or SMG barrel in your parts kit you can't use them. Period. You can't modify it unless you want to be a felon. Just trade it in (DandD sales and other uzi parts dealers will give you a credit for the SMG bolt, or SMG Barrel if you get one) You also can't use the SMG trunnion from the parts kit. The BATF won't like you if you do that.
* Short Barrel - it is easy to swap out barrels on an UZI. Unless your gun is a registered SBR, you can't install a short operational barrel, don't even think about it!
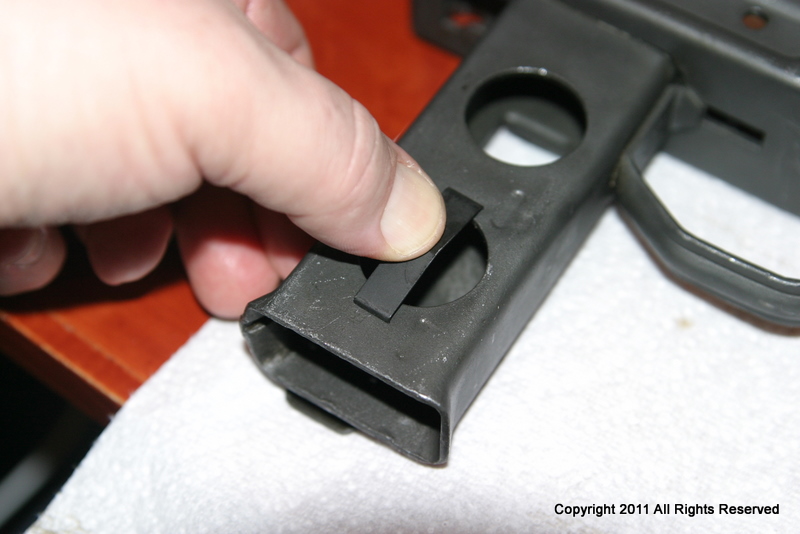
* Lug Attachment Pin - The UZI SMG uses an 8mm lug attachment pin. The Semi-Auto versions use a 9mm lug attachment pin. This is so the Semi-auto pistol grip will not fit an SMG receiver. The SMG parts kits have giggle switches, so unless you really want a stint in prison on your resume, you need to block the selector switch from going to the full auto position. You weld a small steel plate ~0.050-0.070" thick in the lower that lets you slide the selector to the semi position, but it can't go to auto. I'll show pictures later.
* Nodak Spud Receiver - I am using the pre-welded receiver. A non-welded receiver is $100, and the weld parts are $100. The jig welded receiver is $220 so the risk of effing it up isn't worth it to me. If I had one to reference I would give it a shot, but I don't so I am pressing the easy button.
This is going to take a couple of months so I'll keep updating the original post as I go along.
Part 1 - lets get started...
The kit was full of crud from the torching and some type of mystery oil.
I cleaned it using Brake cleaner and a brush. This type of brake cleaner is safe for the plastic handguards, not all of it is friendly to plastic so beware.
Time to remove the rear sights you just need a small screwdriver. It unscrews and comes right off.
I put it in a baggie with some oil to keep it safe.
Now to remove the paw (ratchet) from the cocking lug. Remove the spring from the cocking lug (underneath) and let it hang, it just lifts out of an angled slot. Remove the screw and the whole thing comes apart.
Here is the cocking lug. The paw pops right out. I took it out then put it back and I think it is on there backwards, but you get the idea. Once you have the paw out, take out the spring, it just unwraps and with a twist it comes right out.
Here are the removed parts. Easy as pie.
The cocking lug sans paw and spring. Now put it back together.
What it looks like from underneath with the spring back on.
Top view after reassembly.
I sprayed all the cleaned parts with oil and wiped them down to protect them from rusting until I work on them again.
Stay tuned, more to come...
PART 2
Time for more, tonight we remove the top cover catch and the barrel nut lock!
You will need a small flat head screwdriver. Grab the stub from behind, with your weak hand and put your fingers on top of the leaf spring so when you pry it up it doesn't go flying and you lose the spring. depress the catch with your weak hand thumb while you slowly pry up one corner of the leaf as shown. It should come up and then you can remove the leaf spring, coil spring, and top cover catch. Easy when you see pictures!
That wasn't too hard was it? I keep small baggies handy to put the pieces into when they come off since there are a number of very small pieces. I would recommend doing something similar.
Now to remove the barrel nut lock from under the front sight. This looks like it was put there prior to welding, and there is no way to get it out, but fret not! It comes out! Many people apparently break the spring so be careful.
It consists of the lock and a small coil spring. Using your weak hand, hold the front stub in your palm and pinch the front of the lock so you can pull it while pushing down firmly on the rear spring lock with a medium sized flat head screwdriver. Push the lock down to get it under the slot in the front sight, while pushing it forward and out with the screwdriver. Maintain the pinch grip and pull it slowly out making sure not to lose the small spring. Put it in a baggie.
Cleaning everything well with brake cleaner then hosing it down with penetrating oil was a good move since it was a lot neater to work with, and the moving parts all seem to move a lot better.
I ordered a front sight tool since I don't want to hack up the front sights, and you need it to reinstall them. Removal of the bits is going well so far!
Tune in next time for more exciting UZI fun!
Part 2
Part 3
Part 4
Part 5 - Receiver arrives
Part 6 - Welding the FA Blocking Bar
Part 7 - Bolt
Part 8 - Wooden Stock Disassembly and Refinish
Part 9 - Permanently Attach Wooden Stock / Mods
Part 10 - StormWerkz Rail Installation (Aimpoint)
Test Fire
Finishing - Grit Blast, Parkerize, Gunkote - Final Assembly
Last edited:
![[thumbsup]](/xen/styles/default/xenforo/smilies.vb/044.gif "Thumbs Up [thumbsup]") Looking forward to the end result!!
Looking forward to the end result!!![[laugh]](/xen/styles/default/xenforo/smilies.vb/012.gif "Laugh [laugh]")
![[thinking]](/xen/styles/default/xenforo/smilies.vb/010.gif "Thinking [thinking]")


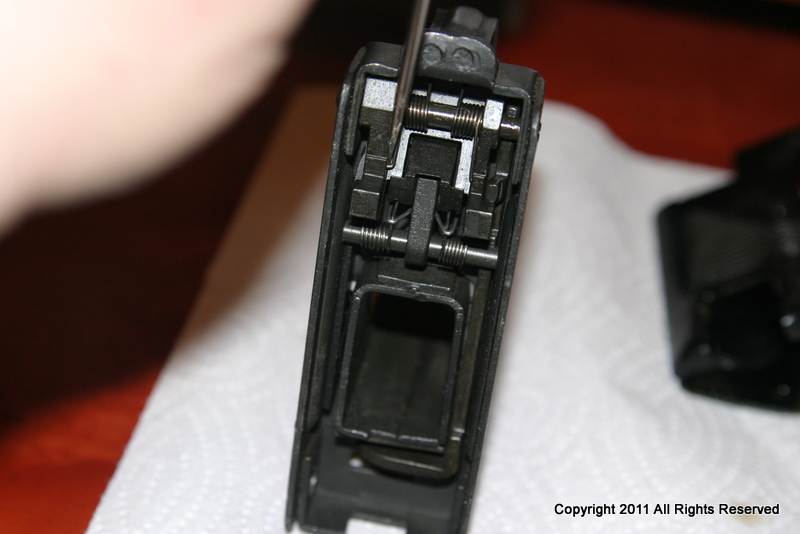
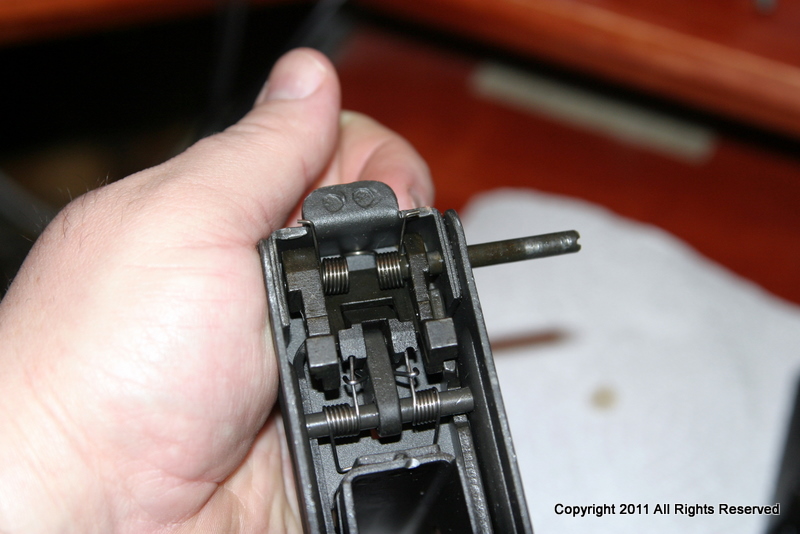
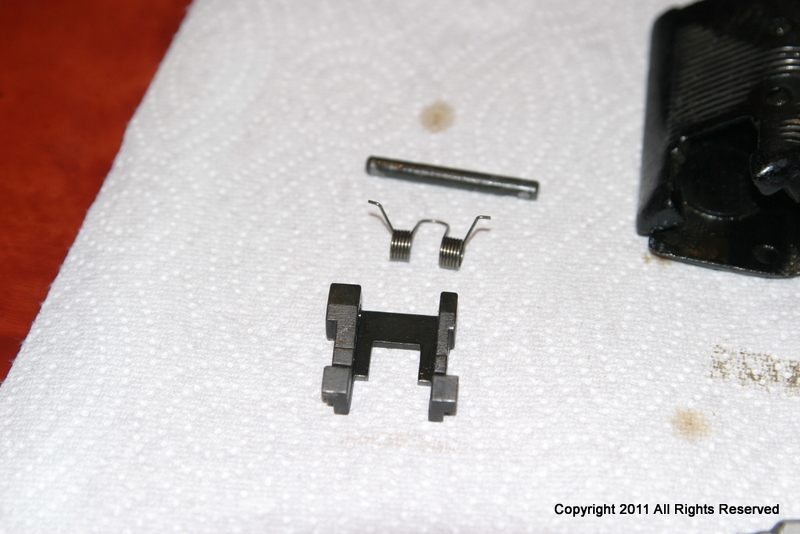
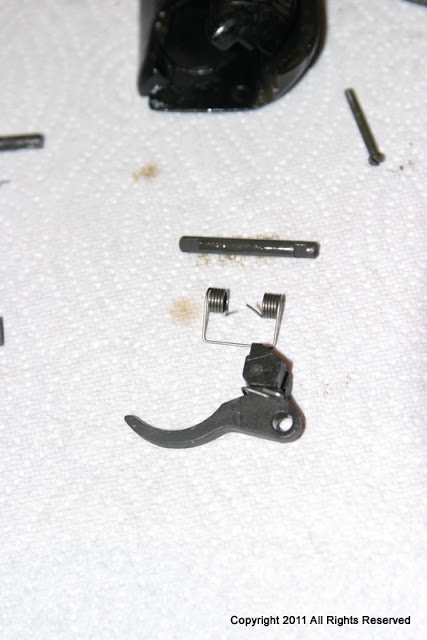
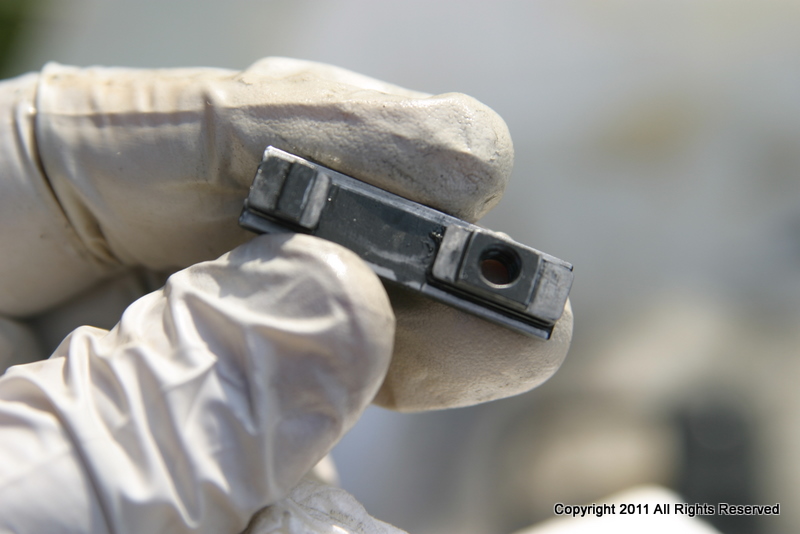
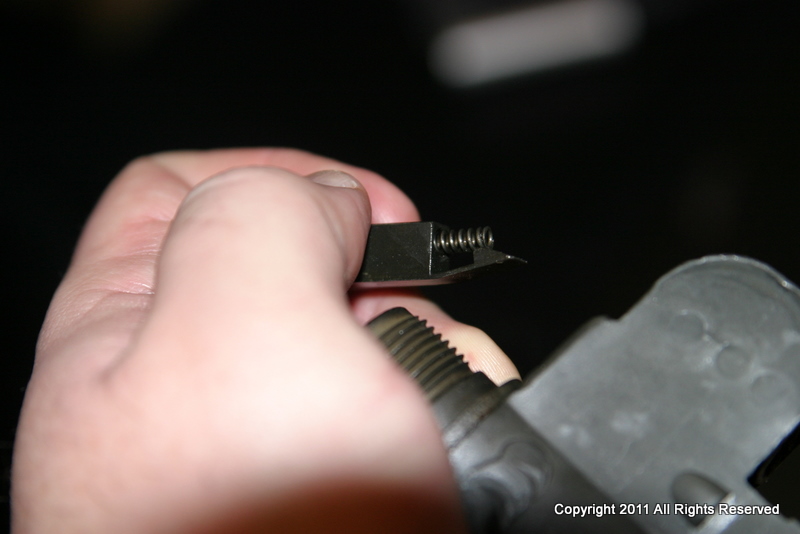
![[shocked]](/xen/styles/default/xenforo/smilies.vb/007.gif "Shocked [shocked]") ? Well, the original pic was so blurry I took it again after I put everything back together because you have to push down on the spring arms on the side of the "keeper" spring on the disconnector exactly as indicated or you can't get them out. Push down and to the side to release the spring arms.
? Well, the original pic was so blurry I took it again after I put everything back together because you have to push down on the spring arms on the side of the "keeper" spring on the disconnector exactly as indicated or you can't get them out. Push down and to the side to release the spring arms.