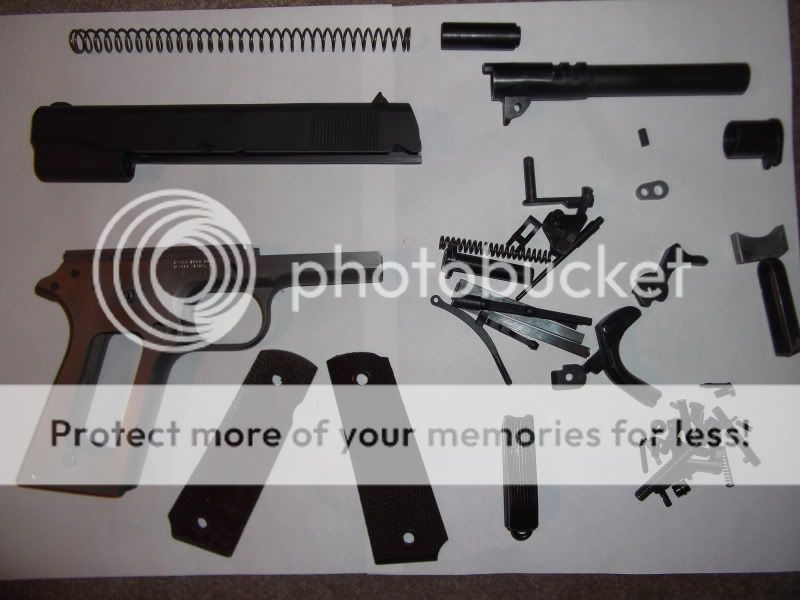
Ok this is a pretty common topic, how do I find a 1911 cheap or can I build one cheap....The answer to both these questions can or maybe can not be found in numerous threads in the archives. Lately we had a thread going for a build party in April that also sparked lots of discussion on price quality etc.. Well I set out to "just do it" I decided on an impossible budget of $400 and also to build a very good (not excellent) shooter. This means a good trigger and accuracy, at least as good as any production gun. In order to keep costs down I decided to build a standard GI type pistol. So first hurdle was to find a frame, after exhaustive search I found my prize. A used Essex standard frame on gunbroker or at least thats what it was supposed to be....After a winning bid of $147 and $25 shipping and another $25 for transfer into MA I had my frame. For those of you keeping track yes I had already blown half my budget...Well the frame came in and low and behold it may not have been new but it damn sure had never been used. A pristine shiny not a scratch on it STAINLESS STEEL frame!!! I didn't even know Essex made a stainless frame! Ok so now the rest of the parts....I purchased a complete kit from SXXXXX $210 and free shipping! which came with everything but the frame (ok ok I am over budget by $10 sue me). There are lost of stories as to the quality of these kits, I myself have bulit two previous 1911 with them and found the quality not the best, but adequate. In both those guns I ended up replacing a lot of parts. This kit however was noticably better in fact it was very good. I did replace one part and that was the leaf spring. Not because there was a problem with the supplied spring, but because I prefer the 4 pronged ones and think they make for a better trigger pull (plus I had one in my junk drawer..). Ok we are at $410 add to that $17 for Duracote, $20 for a Holster and $10 for a set of wood grips (hate the plastic ones that came in the kit) and we have a grand total of $457.00
A word or two on the build.......
First off do not try this at home unless you are A. a professional or B. You have played one on TV..... The manifesto below is not a detailed set of instructions, but rather just a general essay on how I built mine just to give the idea. If you are serious and want help building one PM me and I will be more than happy to help.
Fitting parts...First is to fit the slide to the frame, I will not go into detail other than I got lucky and the slide was on the small side. After about 10 hours of work I had a very tight and smooth fit. The toughest part of the build is fitting the barrel to the slide. This is not a beginner job although there are a few youtube videos that show how to do it. The kit comes with a Roto barrel that is supposed to be drop in. It isn't....The hood fit pretty well, but I did have to file and fit the rear upper lug a bit. The real difficulty was the lower lugs and link. The supplied link was too long for my setup. Luckily i had one in the bottom of my junk drawer that was smaller and worked well. The lugs were not close and had to be machined to the new link. I used an old trick I learned years ago for this. You blue the side of the lower lugs and then trace the ID of the link as you swivel it through its travel. This will give you a nice curved line on the lugs that corresponds to where the slide stop pin will ride when assembled. then simply file the lugs down to the scribe making sure both are even and parallel. Next up is to modify the barrel chamber so it will feed any ammo not just round nose. This requires filing a small ramp at the bottom of the barrel ID that smooths into the feed ramp on the frame. I used a small sanding drum on the dremel for this and it works great. Again not for the beginer as the barrel support s the case so grinding too much here can lead to big problems..A quick word on the barrel bushing and fit, to me this is the most important issue affecting accuracy (other than the nut behind the trigger). Normally you would buy an undersize bushing and turn the barrel down to fit. This requires a lathe and some skill. Oddly enough the the bushing that came with the kit matched up pretty well to the barrel and the subsequent accuracy is a testament to it. Not bad for a budget setup for sure.
Ok so now the hard part is done and up next is the trigger and sear. I use an Ed Brown sear jig for this and have done many super smooth trigger jobs that rival any professional one with it. The jig is pretty inexpensive and worth every penny if you ask me. The safety needed only a small amount of fitting and the slide stop dropped right in Hallelujah!!
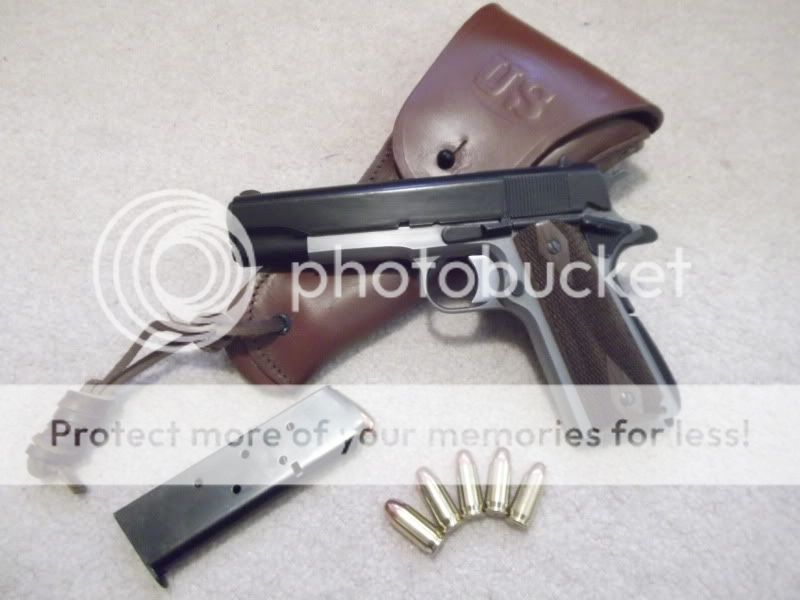
OK I am sure I have bored you all enough... here are the pictures and the range report. Gun shoots like a dream after 250 rounds of a mix of FMJ, LRN and SWC rounds not one FTF or FTE. Accuracy was way better than expected with 5 shot groups as tight as 1.5" at 50' (average was closer to 2").
Before:
After:
A word or two on the build.......
First off do not try this at home unless you are A. a professional or B. You have played one on TV..... The manifesto below is not a detailed set of instructions, but rather just a general essay on how I built mine just to give the idea. If you are serious and want help building one PM me and I will be more than happy to help.
Fitting parts...First is to fit the slide to the frame, I will not go into detail other than I got lucky and the slide was on the small side. After about 10 hours of work I had a very tight and smooth fit. The toughest part of the build is fitting the barrel to the slide. This is not a beginner job although there are a few youtube videos that show how to do it. The kit comes with a Roto barrel that is supposed to be drop in. It isn't....The hood fit pretty well, but I did have to file and fit the rear upper lug a bit. The real difficulty was the lower lugs and link. The supplied link was too long for my setup. Luckily i had one in the bottom of my junk drawer that was smaller and worked well. The lugs were not close and had to be machined to the new link. I used an old trick I learned years ago for this. You blue the side of the lower lugs and then trace the ID of the link as you swivel it through its travel. This will give you a nice curved line on the lugs that corresponds to where the slide stop pin will ride when assembled. then simply file the lugs down to the scribe making sure both are even and parallel. Next up is to modify the barrel chamber so it will feed any ammo not just round nose. This requires filing a small ramp at the bottom of the barrel ID that smooths into the feed ramp on the frame. I used a small sanding drum on the dremel for this and it works great. Again not for the beginer as the barrel support s the case so grinding too much here can lead to big problems..A quick word on the barrel bushing and fit, to me this is the most important issue affecting accuracy (other than the nut behind the trigger). Normally you would buy an undersize bushing and turn the barrel down to fit. This requires a lathe and some skill. Oddly enough the the bushing that came with the kit matched up pretty well to the barrel and the subsequent accuracy is a testament to it. Not bad for a budget setup for sure.
Ok so now the hard part is done and up next is the trigger and sear. I use an Ed Brown sear jig for this and have done many super smooth trigger jobs that rival any professional one with it. The jig is pretty inexpensive and worth every penny if you ask me. The safety needed only a small amount of fitting and the slide stop dropped right in Hallelujah!!
OK I am sure I have bored you all enough... here are the pictures and the range report. Gun shoots like a dream after 250 rounds of a mix of FMJ, LRN and SWC rounds not one FTF or FTE. Accuracy was way better than expected with 5 shot groups as tight as 1.5" at 50' (average was closer to 2").
Before:
After:
![[smile]](/xen/styles/default/xenforo/smilies.vb/001.gif "Smile [smile]")