I've posted this one other gun forums and I figured that this would go well here. This is my "primitive" fire making write up. This is split up in two posts as it was too long for one. Enjoy.
Fire making: the Bow & Drill by Kenelm
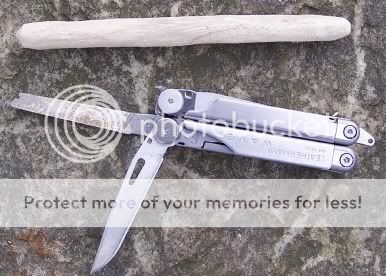
Material…
Fireboard:
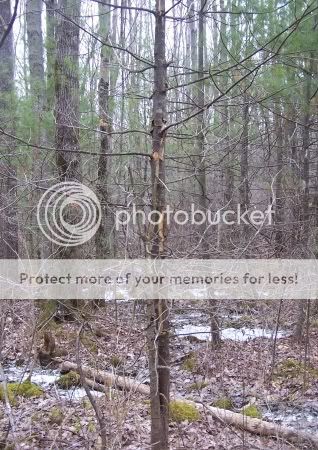
1. Locate a dry/dead softwood stick/branch. I like using Quaking Aspen, Bigtooth Aspen and White Pine as both work well and are quite common here in the NE.
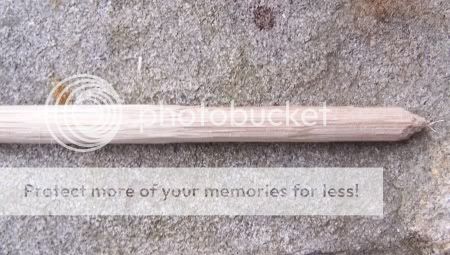
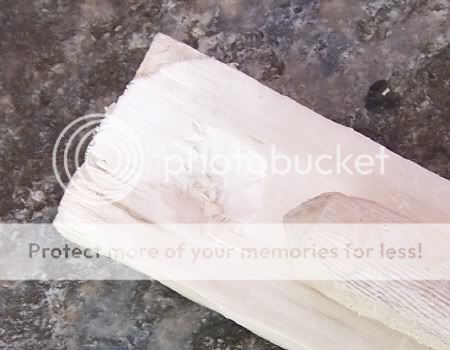
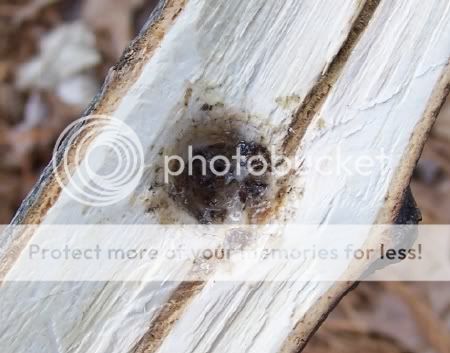
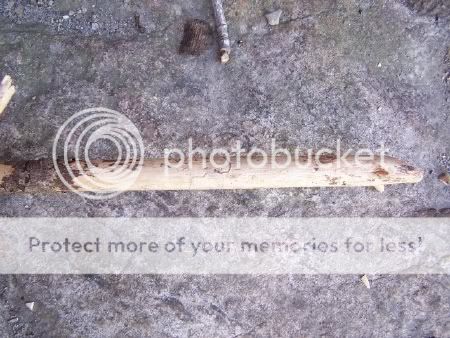
2. Split/shape, finished your fireboard should measure approximately 1 1/2 inches wide (+/-), around a 1/2 inch thick, and around 4 + inches long. Then carve out a shallow crater for the drill (note pic #2).
Quaking Aspen fireboards, notice the different stages...
Crater carved out for the drill on a Quaking Aspen fireboard, note tip of drill pointing towards the crater...
A dry/dead White Pine, perfect for fireboards and drills...
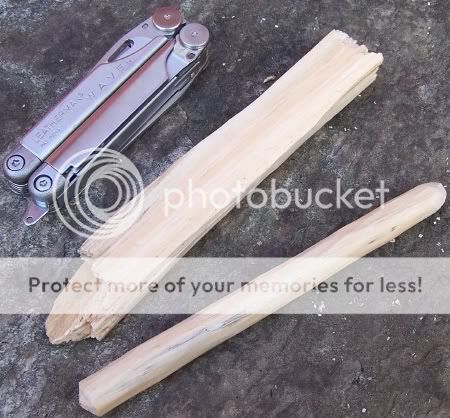
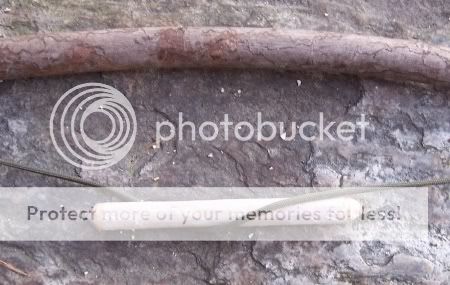
Drill:
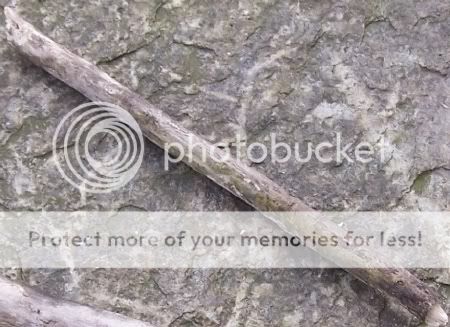
1. Locate a dry/dead softwood or softer hardwood stick/branch.
2. Try to find a piece that doesn't need much shaping (some cases you may have to carve out your drill from a chunk of wood or a larger stick/branch)
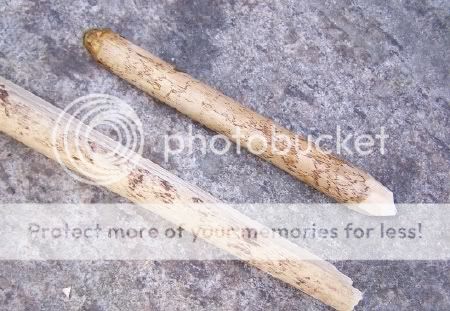
3. The end result should be anywhere from 6-10 inches long, straight, and about a half of an inch thick +/-, one end should be rounded for the socket and the other should be carved to a low blunt tip for the fireboard. I re-use my drills until they get below 4 1/2 inches, when they get below 6 inches is when I have to take my boot off so the size doesn't interfere with my drilling.
Quaking Aspen Drills, note dead limbs...
It doesn't get any better, one of the pieces recovered before finishing...
The above piece finished...
White Pine drill and fireboard before and after...
Socket:
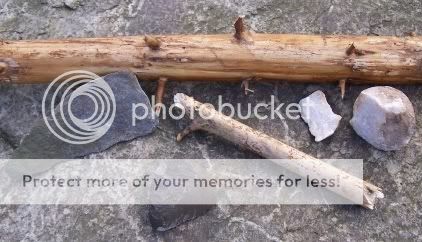
1. Any dead or green hardwood (you can use a piece of bone or stone, just chip out a crater in the middle for the drill end) branch that’s around 2 inches thick
2. Split the branch down the middle, cut the length to size (4 inches long +/), and then carve out a half inch crater directly in the middle
Maple socket, approx. 5 inches long...

You should use some type of lubrication to put in the socket hole. Lubrication in the socket makes drilling/producing an ember much easier, it also helps preserve the life of your socket. Pine sap works THE BEST. If you do not have access to Pine sap, you can use soap, other "thick" saps from some plants/trees, greases, etc. - lubricating isn't necessary but I advise ALL beginners to start out using some sort of lubrication.
Here I used sap from a White Pine...
Bow:
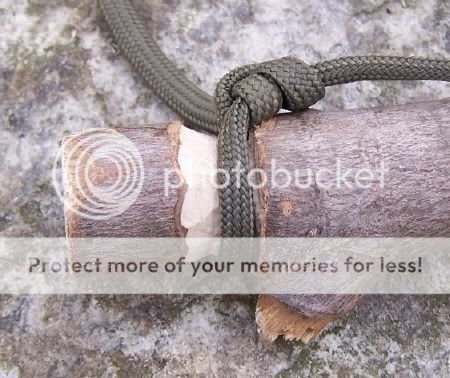
1. Almost any "strung bow" shaped piece of green or dead wood will work (the less durable the string, the more flex the bow should have)
2. The bow itself should be anywhere from 2-3 feet long and around 3/4 of an inch thick /- some
3. Notches should be carved out at each end for the bow string
Maple bow, note natural curve, bow is approx. 2 1/2 feet long and 3/4 of an inch thick. Note the left side, the "handle", para cord is wrapped around the handle so I can adjust tension while drilling with my thumb.
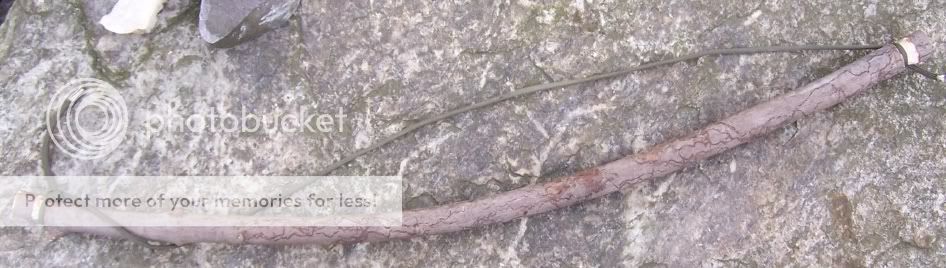
Notches...

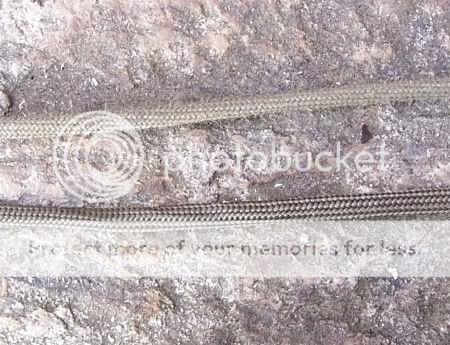
Bow String:
1. Keep it simple, start out using 550 cord. After you have mastered your technique, you can move on to handmaking cordage from natural sources, such as the inner bark from Basswood.
Top: wear on 550 cord after 50 + fires; Bottom: new, unused 550 cord...
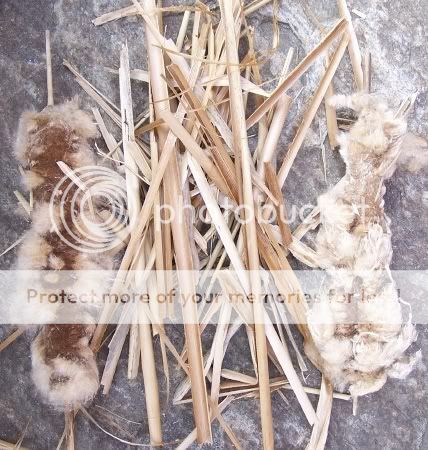
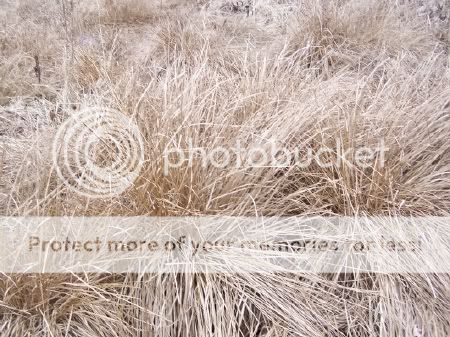
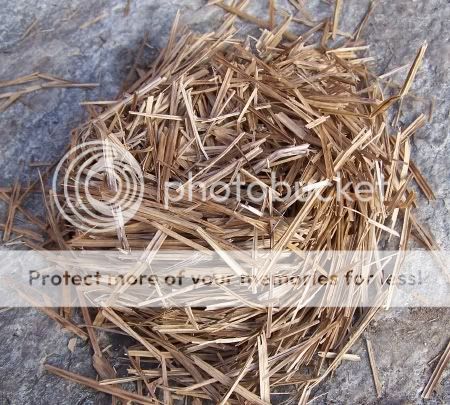
Tinder...
1. Lots of options here, dry/dead grasses; strips of dead Cedar, Juniper, and Milkweed bark, etc.
2. After enough has been collected, you will have to form the tinder into a "birds nest" type shape. The "birds nest" should be somewhat compacted into a semi-tight "ball".
A Marshland is a great place to look for dry/dead tinder in the winter months...
Before shaping...

After...
Fire plate...
If you will be drilling on the wet ground, you will need a “fire plate” to protect the fireboard from absorbing moisture. A fire plate also can make it easier/safer to handle your ember. I typically use a piece of Gray Birch bark if drilling on the ground. I like to drill on a rock if possible, though sometimes the rock may be wet as well all depending on the conditions. No matter where you drill, make sure that the fireboard is on solid ground and doesn't move around while you are drilling.
Drilling position/set up...
Left foot on the fireboard semi close to the hole, right knee on the ground, left hand holding socket, wrist rested snug against your left leg, bow hand holding the bow near the end of either side (note bow section pics, I hold the left end), socket down on the drill (straight, not crooked), drill in long/constant strokes while applying pressure on the socket/drill.
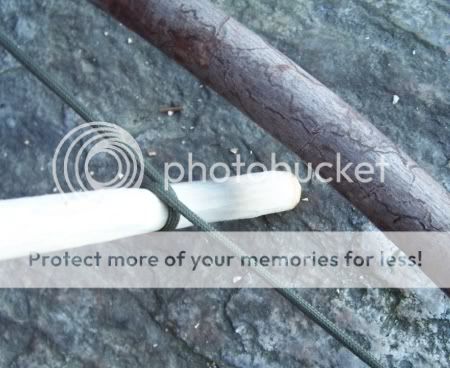
Twisting the drill into the string...
Now it's time to get drilling...
1. The first step is to bed the drill into the fireboard. Take it easy when bedding the drill, save your energy for producing an ember
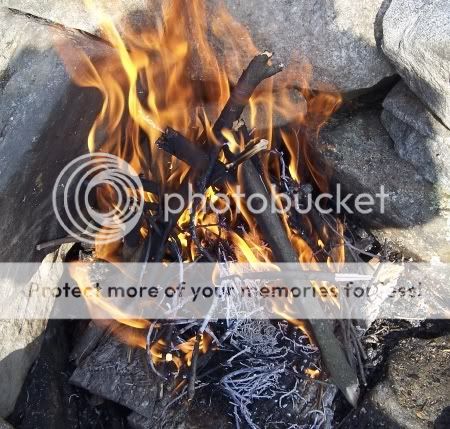
Here I used a White Pine drill/fireboard. It took me less than a minute to bed...
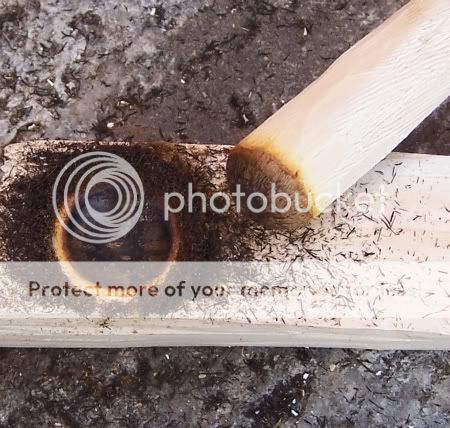
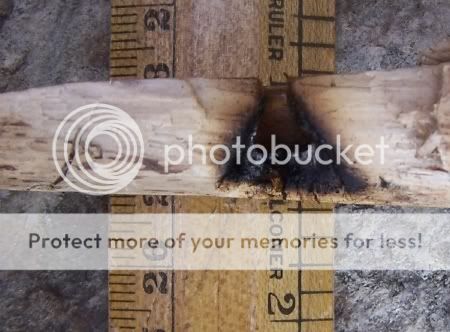
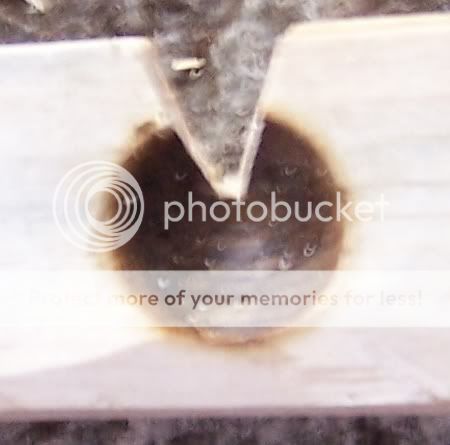
2. After bedding, stop to carve out the v notch in the fireboard & add more lubrication to your socket.
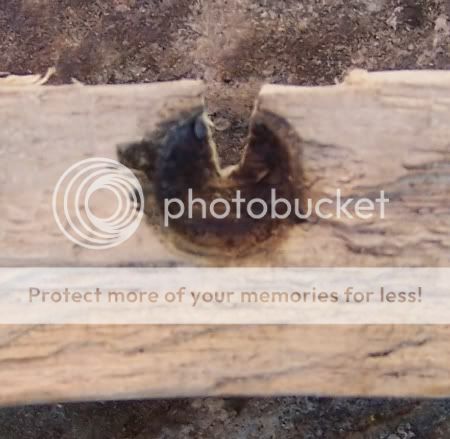
Here's a great example of the "perfect" notch, notice that the point of the v doesn't quite reach the center of the hole...
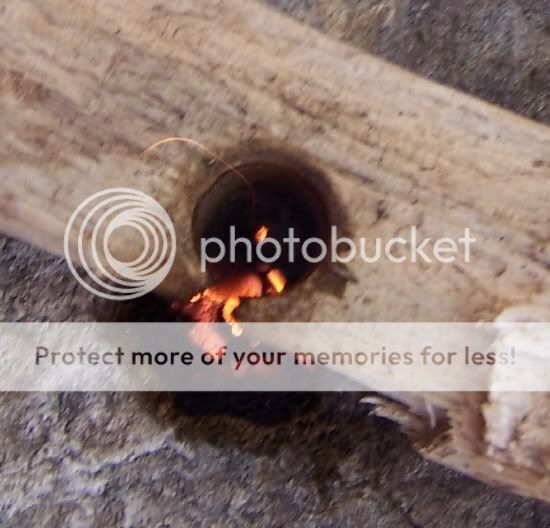
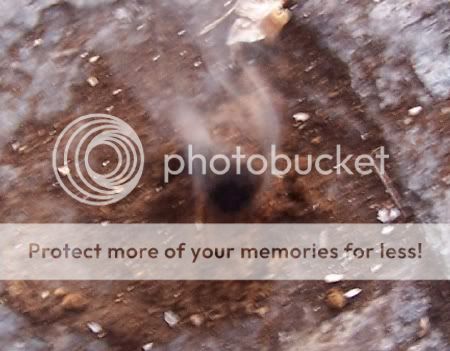
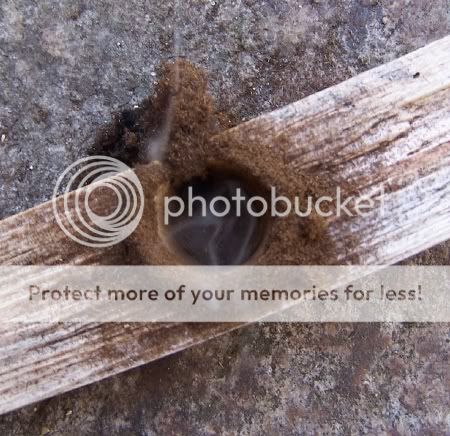
3. Now you can begin drilling again, this time for an ember.
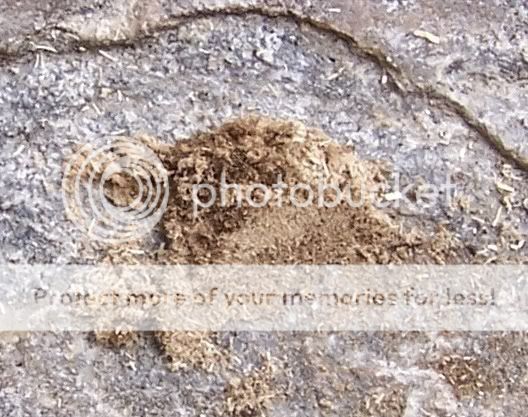
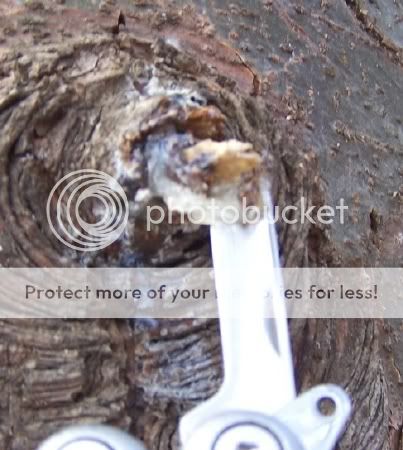
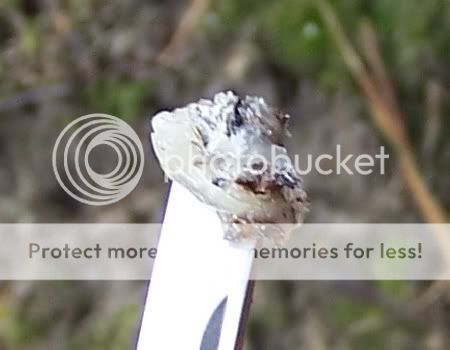
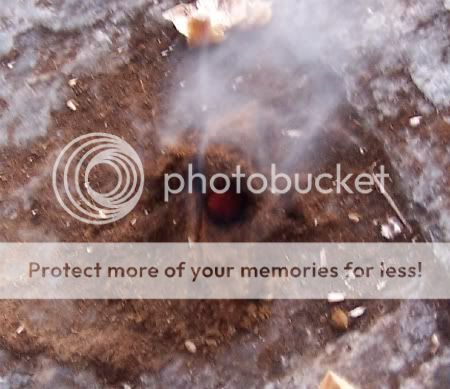
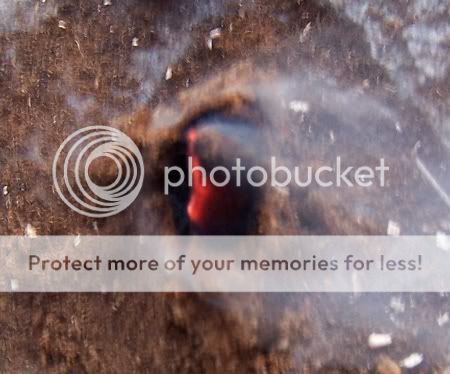
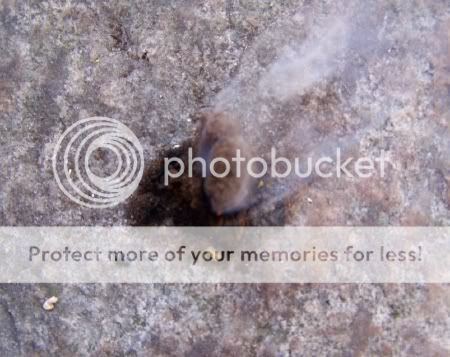
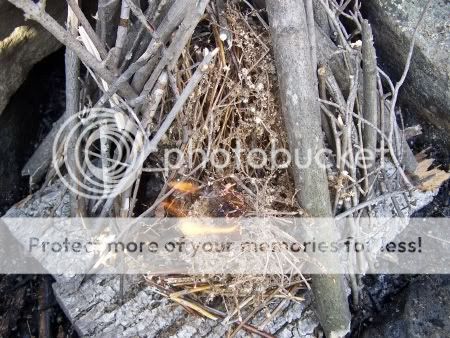
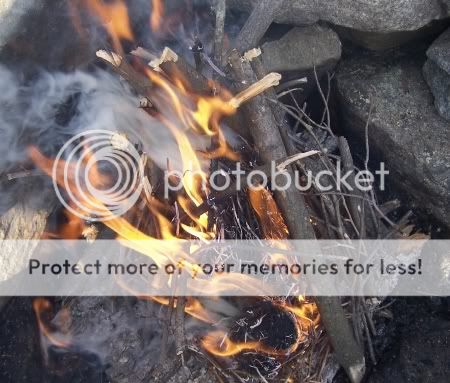
After less than a minute of drilling, I noticed a nice amount of smoke (note pic) coming from just outside the notch in the pile of powder gathered from the friction - I have an ember. Total drilling time from bed to ember, not more than 2/3 minutes. Drilling time can vary depending on the conditions and what quality material you are using. One of the biggest mistakes people make is stopping too soon, make sure you have a useable ember before you stop drilling.
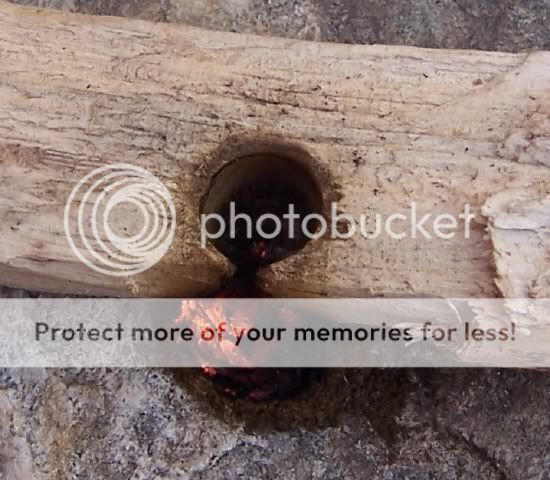
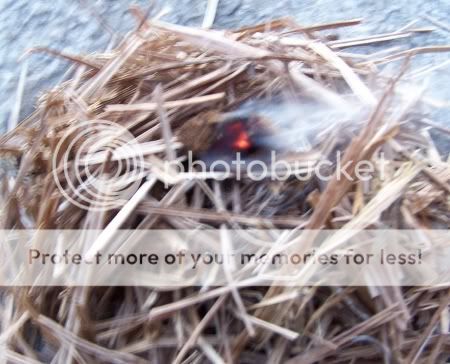
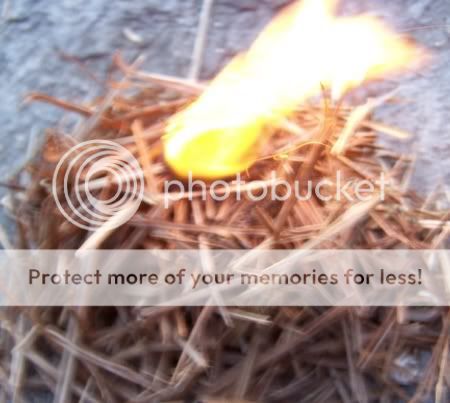
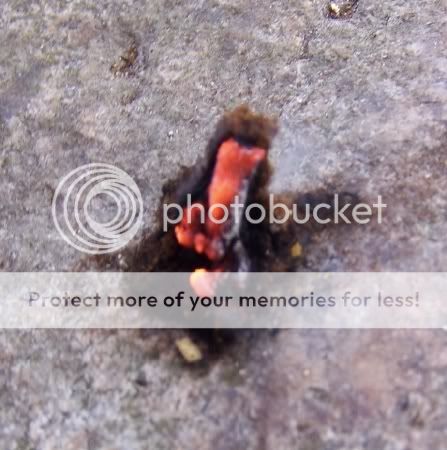
4. Now begin to blow on the pile for a few seconds, then use your knife blade and hand to pick up the ember and place it on your birds nest and carefully blow on the ember until ignition...

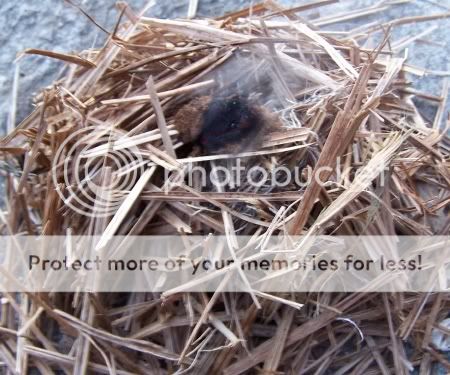

Not much longer, FIRE…
Having trouble?
Hits/tips...
Bow string/drill slippage:
- tighten/loosen your string
- lube up the end of your drill/socket
- rough up the drill (socket end) and/or socket hole with your knife or a stone
Drill popping out of the fireboard/socket:
- hole drilled too close to edge/v notch
- hole in socket not deep enough
I'd suggest anyone new to this method to try exactly as above. You don't have to be as "neat", but it can be easier for beginners. Here's an example of a "quick" bow and drill, not as pretty, but it works...
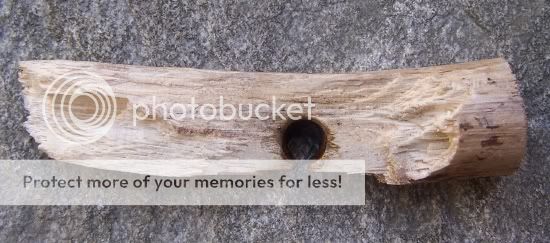
The below was all from one dead White Pine branch.
Drill, bark can be easily hand picked off...
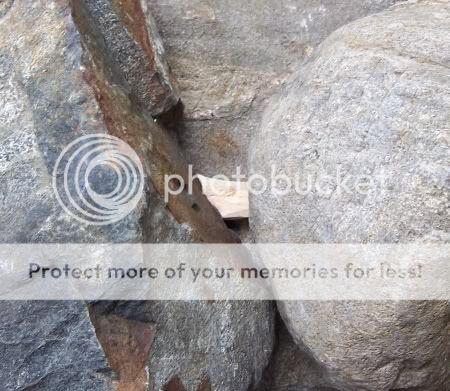
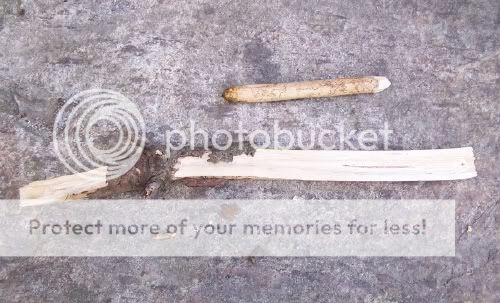
Drill and Fireboard, notice how they are left as is, fireboard was hand split with the help of a piece of stone and the other end left rounded. Drill isn't the straightest but it'll work. The drill is also a little short, so I had to hold the fireboard barefoot when drilling.
Ember...
Basic Fire Set Up for Flint/Steel, Bow and Drill/Hand Drill, etc...
I typically use a tepee fire, this set up works very well. I use it with flint and steel, bow and drill, and hand drill and other methods.
The first step is collecting tinder, kindling, and larger sticks/branches for the fire. Make sure you collect enough material to keep your firing going, you don't want to be scrambling to feed the fire when you are trying to cook/boil water, build/set up camp, etc.
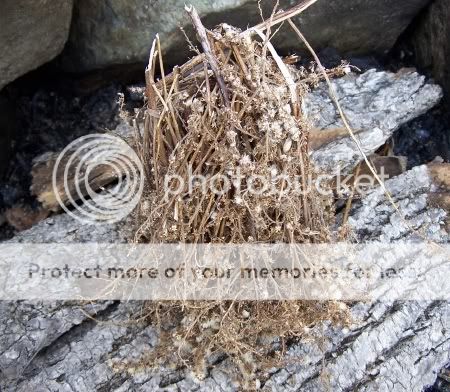
Here I used dead Goldenrod seed heads and stalks for my tinder (inner) and strictly seed heads for the outer...

Once the tinder has been collected, form it into a tepee type shape and place it in your fire pit. It rained the night before so I collected some strips of bark from a dead Ash tree and placed them in the fire pit to use as a "fire plate" to help prevent the tinder from absorbing moisture from the wet ground...
Then take three larger sticks and form the tepee frame, larger sticks are used so the frame doesn't burn down/collapse prior to the 2nd stage of kindling...
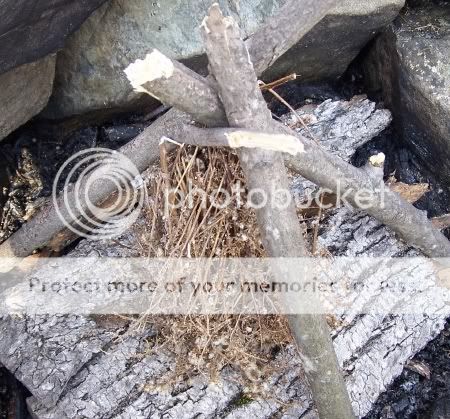
Then fill in the sides with small twigs leaving an opening on one side...
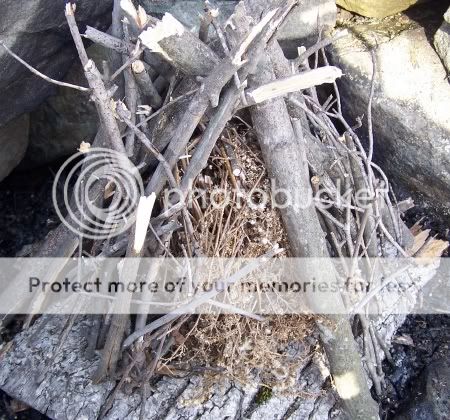
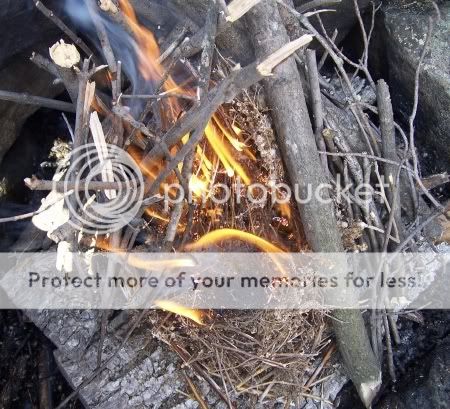
Now place a good size tinder ball right at the entrance touching the tinder inside the tepee. If you are using flint and steel, make sure to take some extra tinder and break it up real fine right on the already well broken up pile.
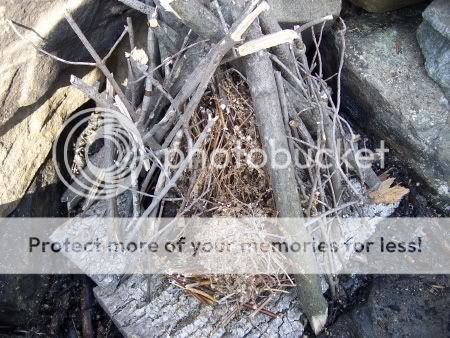
Now you can strike your Flint/Steel (or place your ember on the outer tinder ball if using fire by friction and blow until ignition), directing spark to the outer tinder ball until ignition...
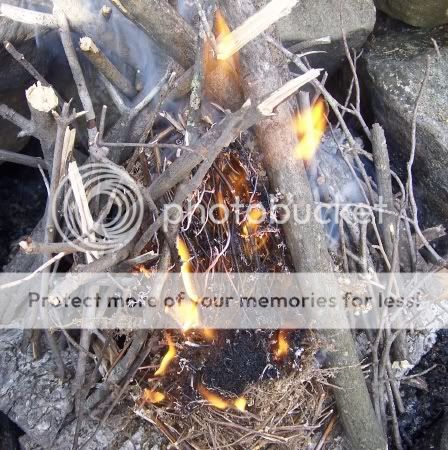
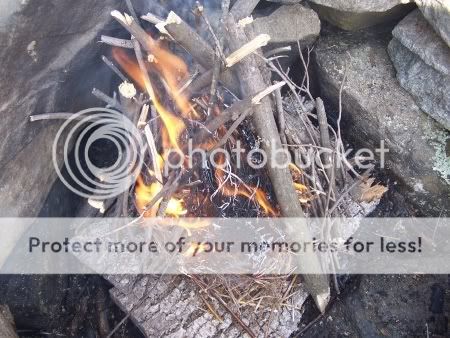
Prior to this stage is when you want to begin adding more kindling then slowly larger sticks...
Fire making: the Bow & Drill by Kenelm
Material…
Fireboard:
1. Locate a dry/dead softwood stick/branch. I like using Quaking Aspen, Bigtooth Aspen and White Pine as both work well and are quite common here in the NE.
2. Split/shape, finished your fireboard should measure approximately 1 1/2 inches wide (+/-), around a 1/2 inch thick, and around 4 + inches long. Then carve out a shallow crater for the drill (note pic #2).
Quaking Aspen fireboards, notice the different stages...
Crater carved out for the drill on a Quaking Aspen fireboard, note tip of drill pointing towards the crater...
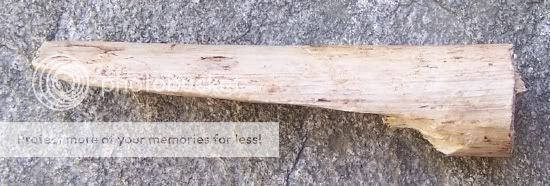
A dry/dead White Pine, perfect for fireboards and drills...
Drill:
1. Locate a dry/dead softwood or softer hardwood stick/branch.
2. Try to find a piece that doesn't need much shaping (some cases you may have to carve out your drill from a chunk of wood or a larger stick/branch)
3. The end result should be anywhere from 6-10 inches long, straight, and about a half of an inch thick +/-, one end should be rounded for the socket and the other should be carved to a low blunt tip for the fireboard. I re-use my drills until they get below 4 1/2 inches, when they get below 6 inches is when I have to take my boot off so the size doesn't interfere with my drilling.
Quaking Aspen Drills, note dead limbs...
It doesn't get any better, one of the pieces recovered before finishing...
The above piece finished...
White Pine drill and fireboard before and after...
Socket:
1. Any dead or green hardwood (you can use a piece of bone or stone, just chip out a crater in the middle for the drill end) branch that’s around 2 inches thick
2. Split the branch down the middle, cut the length to size (4 inches long +/), and then carve out a half inch crater directly in the middle
Maple socket, approx. 5 inches long...
You should use some type of lubrication to put in the socket hole. Lubrication in the socket makes drilling/producing an ember much easier, it also helps preserve the life of your socket. Pine sap works THE BEST. If you do not have access to Pine sap, you can use soap, other "thick" saps from some plants/trees, greases, etc. - lubricating isn't necessary but I advise ALL beginners to start out using some sort of lubrication.
Here I used sap from a White Pine...
Bow:
1. Almost any "strung bow" shaped piece of green or dead wood will work (the less durable the string, the more flex the bow should have)
2. The bow itself should be anywhere from 2-3 feet long and around 3/4 of an inch thick /- some
3. Notches should be carved out at each end for the bow string
Maple bow, note natural curve, bow is approx. 2 1/2 feet long and 3/4 of an inch thick. Note the left side, the "handle", para cord is wrapped around the handle so I can adjust tension while drilling with my thumb.
Notches...
Bow String:
1. Keep it simple, start out using 550 cord. After you have mastered your technique, you can move on to handmaking cordage from natural sources, such as the inner bark from Basswood.
Top: wear on 550 cord after 50 + fires; Bottom: new, unused 550 cord...
Tinder...
1. Lots of options here, dry/dead grasses; strips of dead Cedar, Juniper, and Milkweed bark, etc.
2. After enough has been collected, you will have to form the tinder into a "birds nest" type shape. The "birds nest" should be somewhat compacted into a semi-tight "ball".
A Marshland is a great place to look for dry/dead tinder in the winter months...
Before shaping...
After...
Fire plate...
If you will be drilling on the wet ground, you will need a “fire plate” to protect the fireboard from absorbing moisture. A fire plate also can make it easier/safer to handle your ember. I typically use a piece of Gray Birch bark if drilling on the ground. I like to drill on a rock if possible, though sometimes the rock may be wet as well all depending on the conditions. No matter where you drill, make sure that the fireboard is on solid ground and doesn't move around while you are drilling.
Drilling position/set up...
Left foot on the fireboard semi close to the hole, right knee on the ground, left hand holding socket, wrist rested snug against your left leg, bow hand holding the bow near the end of either side (note bow section pics, I hold the left end), socket down on the drill (straight, not crooked), drill in long/constant strokes while applying pressure on the socket/drill.
Twisting the drill into the string...
Now it's time to get drilling...
1. The first step is to bed the drill into the fireboard. Take it easy when bedding the drill, save your energy for producing an ember
Here I used a White Pine drill/fireboard. It took me less than a minute to bed...
2. After bedding, stop to carve out the v notch in the fireboard & add more lubrication to your socket.
Here's a great example of the "perfect" notch, notice that the point of the v doesn't quite reach the center of the hole...
3. Now you can begin drilling again, this time for an ember.
After less than a minute of drilling, I noticed a nice amount of smoke (note pic) coming from just outside the notch in the pile of powder gathered from the friction - I have an ember. Total drilling time from bed to ember, not more than 2/3 minutes. Drilling time can vary depending on the conditions and what quality material you are using. One of the biggest mistakes people make is stopping too soon, make sure you have a useable ember before you stop drilling.
4. Now begin to blow on the pile for a few seconds, then use your knife blade and hand to pick up the ember and place it on your birds nest and carefully blow on the ember until ignition...
Not much longer, FIRE…
Having trouble?
Hits/tips...
Bow string/drill slippage:
- tighten/loosen your string
- lube up the end of your drill/socket
- rough up the drill (socket end) and/or socket hole with your knife or a stone
Drill popping out of the fireboard/socket:
- hole drilled too close to edge/v notch
- hole in socket not deep enough
I'd suggest anyone new to this method to try exactly as above. You don't have to be as "neat", but it can be easier for beginners. Here's an example of a "quick" bow and drill, not as pretty, but it works...
The below was all from one dead White Pine branch.
Drill, bark can be easily hand picked off...
Drill and Fireboard, notice how they are left as is, fireboard was hand split with the help of a piece of stone and the other end left rounded. Drill isn't the straightest but it'll work. The drill is also a little short, so I had to hold the fireboard barefoot when drilling.
Ember...
Basic Fire Set Up for Flint/Steel, Bow and Drill/Hand Drill, etc...
I typically use a tepee fire, this set up works very well. I use it with flint and steel, bow and drill, and hand drill and other methods.
The first step is collecting tinder, kindling, and larger sticks/branches for the fire. Make sure you collect enough material to keep your firing going, you don't want to be scrambling to feed the fire when you are trying to cook/boil water, build/set up camp, etc.
Here I used dead Goldenrod seed heads and stalks for my tinder (inner) and strictly seed heads for the outer...
Once the tinder has been collected, form it into a tepee type shape and place it in your fire pit. It rained the night before so I collected some strips of bark from a dead Ash tree and placed them in the fire pit to use as a "fire plate" to help prevent the tinder from absorbing moisture from the wet ground...
Then take three larger sticks and form the tepee frame, larger sticks are used so the frame doesn't burn down/collapse prior to the 2nd stage of kindling...
Then fill in the sides with small twigs leaving an opening on one side...
Now place a good size tinder ball right at the entrance touching the tinder inside the tepee. If you are using flint and steel, make sure to take some extra tinder and break it up real fine right on the already well broken up pile.
Now you can strike your Flint/Steel (or place your ember on the outer tinder ball if using fire by friction and blow until ignition), directing spark to the outer tinder ball until ignition...
Prior to this stage is when you want to begin adding more kindling then slowly larger sticks...
Last edited: