One guys exploration into casting bullets...

Cool. I’ll stick with the WW for now to see how this source works out. If not I’ll pick up another couple hundred pounds of clean lead that I paid a 1.50 a pound shipped for. With it getting dark so early I’ve found some spare time.
Even though “lead” is hard to come by in the wild especially cheap or free , its out there. Keep looking and asking.

also there does not seem to be a shortage of alloy if you buy it. Some prices are better than others.

as long as your not factoring your free or hobby time its still cheap to but alloy and cast your own
 
New project:
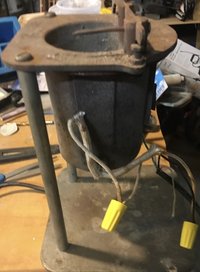
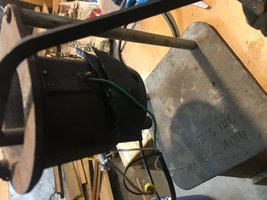
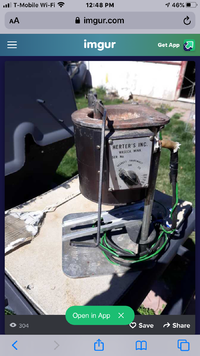
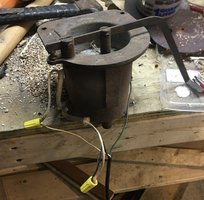
I got a non working bottom spout casing pot from the late 60’s early 70s. I hooked it up w a new cord and it does work. I heated it up and poured the existing lead that was in it into ingot molds to be analyzed later. But the previous owner took the temperature control rheostat off and wired it straight to the wall cord.
So I want to build this into a PID controlled working unit. First I need to find a power cord that is built to withstand heat and the white insulation sleaves that goes around the wires. Then I need to decide if I want to make the controller external.
Any thoughts/suggestions from the group?
389A1827-6FC8-43B5-939A-3537F3F4CA5A.jpeg

3DCA9F6F-FB38-49B1-929C-15775363D2AA.jpeg
2062C42C-9662-43D5-8C2D-DB735EF37630.jpeg

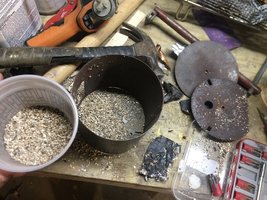
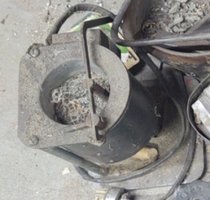
here are the guts. That’s that crap in cup is from the good mine, I can tell. Is that the insulation product that is in today’s lead pots?
FFF72DA9-BF74-40BC-9B65-361B9DD2E6FE.jpeg

and a photo I found from castboolits that has the original set up w the rheostat. Link to that short thread identifying the pot ( Old Herters pot ... )


original photo pre disassembly from seller:
C5B7D139-2D3E-4C80-9EB5-3D3674118687.jpeg ED88F06A-967F-49CA-AEE6-33200396E8B2.png
 
Last edited:
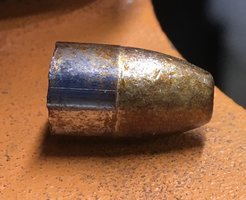
I sized a batch of bullets today and I think my first coat of the hi Tek didn’t work out right. Do I need to start over w recoating these or recycle them back to the pour pot?
Please remind me of the shaking procedure when applying it. The seminar was very specific about the magic touch of Hi-Tek application, but I’m not sure I remember it all in sequence.
2F2B8CC9-8364-4BC4-BEA1-4245D7A8BB63.jpeg
6ACFA006-3816-4439-8F68-30DD3D0DF91B.jpeg
 
New project:
I got a non working bottom spout casing pot from the late 60’s early 70s. I hooked it up w a new cord and it does work. I heated it up and poured the existing lead that was in it into ingot molds to be analyzed later. But the previous owner took the temperature control rheostat off and wired it straight to the wall cord.
So I want to build this into a PID controlled working unit. First I need to find a power cord that is built to withstand heat and the white insulation sleaves that goes around the wires. Then I need to decide if I want to make the controller external.
Any thoughts/suggestions from the group?
View attachment 413060

View attachment 413061
View attachment 413062

here are the guts. That’s that crap in cup is from the good mine, I can tell. Is that the insulation product that is in today’s lead pots?
View attachment 413063

and a photo I found from castboolits that has the original set up w the rheostat. Link to that short thread identifying the pot ( Old Herters pot ... )


original photo pre disassembly from seller:
View attachment 413068View attachment 413065
Cool, good pid project
 
I sized a batch of bullets today and I think my first coat of the hi Tek didn’t work out right. Do I need to start over w recoating these or recycle them back to the pour pot?
Please remind me of the shaking procedure when applying it. The seminar was very specific about the magic touch of Hi-Tek application, but I’m not sure I remember it all in sequence.
View attachment 413253
View attachment 413254
Yeah first coast failed. It almost doesn’t look like it was baked properly.
There are plenty of videos out there but if you follow the directions word for word it works perfect every time.

This video is a little older and he shakes longer than I would (due to his big batch size and more acetone) but it’s one of the better ones. Too many rednecks on there mumbling their way through the process.


View: https://youtu.be/k6MoF8u4rHk
 
Coating - splotchy coating looks like the acetone flashed off too fast on the first coat or something contaminated the coating or bullets. Also looks like too heavy of a first coat - 1ml per pound for the first coat. Remelt and try again.
What is your source for acetone? Home depot acetone is fine but it needs to be kept very clean - only pour into a smaller container never pour pack into the can.
In order to get an even first coat, i mix in a closed container for 30-45 seconds before opening the mixing until it flashes off.
1 bullets into container
2 shake coating to mix well
3 draw out the coating with a 10ml syringe
4 squirt coating on to the bullets and immediately close the container
5 mix for 30-45 seconds, uncover and mix until the acetone flashed.
6 warm the bullets on top of your toaster oven for 10-15 minutes before baking

For the PID controller - I have a couple of ATX cases that I was experimenting with. They have all of the cut outs done to mount the controls. If you want one lete on now.
 
Those look good - wipe test? Smash test
They wiped and smashed well.


I’d love one of those boxes. What I d really like is to learn how to make one so I can then make a few for my two bottom pots and the the toaster oven. Thanks for the offer @pastera

what’s your source for 10ml syringes? The ones I use for epoxy are the type they use to clear a IV line w saline. I don’t think I have one that’s that small to measure 1ml at a time and even if I did, I think the hole at the end might be too small to draw the glitter in the solution through it

@Michael J. Spangler The video was informative. My method was to shake for 15 seconds, flip it over and shake for 3 seconds and then take the cover off and swirl around for another 5-10 seconds and then dump them on the tray. Not once have I had them join in a bunch, so I guess I’m either doing it right or stopping the mixing prematurely, which may leave my bullets under coated or unevenly coated. Maybe....
I do wish I could stop getting that toasted browned look. Maybe I cook too long. 11 mins at 400F. The Lyman thermometer won’t go above 350F in oven and the laser thermometer shot at a small AR 500 target I keep around as a plate says 430F in there. If you look closely in that video above, even this guy seems to have gotten the toasted look. I wonder if more time and less temperature could still cure the coating.
The darker color is definitely the temp. You want 400* for 10 minutes roughly. 430 will give a dark color for sure.
Stop at Luzo restaurant supply and grab an oven thermometer to leave in the oven.
My Lyman thermometer is off by about 12 degrees. It says water boils at 200*
My dial thermometer from NOE can be calibrated and I regularly check it in boiling water and then toss it in my coating oven to make sure things are running properly.
 
I concur, the darker color is from too hot and/or too long. I do 385 for 10 minutes and get good results.

Are you guys really this concerned with measuring the hitek? I have a 1/2tsp (2.5ml) spoon. First coat I do 3/4 full, second coat I do full. I use bottles like these to mix and pour hitek.

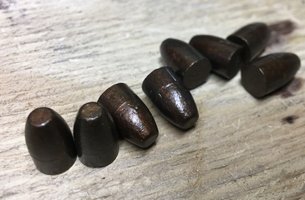
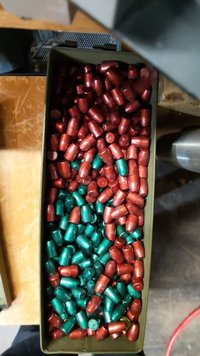
Here's my Christmas bullets I coated and sized yesterday!

bullets.jpg
 
I concur, the darker color is from too hot and/or too long. I do 385 for 10 minutes and get good results.

Are you guys really this concerned with measuring the hitek? I have a 1/2tsp (2.5ml) spoon. First coat I do 3/4 full, second coat I do full. I use bottles like these to mix and pour hitek.

Here's my Christmas bullets I coated and sized yesterday!

View attachment 413371
Looking good!

I think measuring is something you should do when you first start.
I’m sure you have one or two certain size containers you always use and do about the same size batches all the time right? So you get used to exactly how much to splash on there.
You see the same thing in the commercial casters videos on YouTube.

That way you can work out any variables and understand what a first coat should look like.
You’ve obviously got this part down.

From all of my reading on the castboolits thread the biggest issue with this coating is people using too much and not allowing a proper drying time before curing it. Measuring should cut down on the problems a newbie runs into when coating.
Which color is that green bullet? It looks awesome.
 
Nice. I want to order more powder for new colors but I have enough to last me a few more years.

When I first started coating with hitek I tried color coordinating my bullets to identify what they were, traded with a few people to get various colors. Then I didn't coat anything for a while and it all dried up and was junk. Now I just do it all one color, when it runs out I switch to another color. I have a couple of the 1# jars, green and red, so I'll be good for a while with those two.
 
When I first started coating with hitek I tried color coordinating my bullets to identify what they were, traded with a few people to get various colors. Then I didn't coat anything for a while and it all dried up and was junk. Now I just do it all one color, when it runs out I switch to another color. I have a couple of the 1# jars, green and red, so I'll be good for a while with those two.
I did the same thing. Color code for alloy.
Then you mix up the wrong color and coat the wrong batch. It’s all out the window 😂

Back to labels in the bins.
 
They wiped and smashed well.


I’d love one of those boxes. What I d really like is to learn how to make one so I can then make a few for my two bottom pots and the the toaster oven. Thanks for the offer @pastera

what’s your source for 10ml syringes? The ones I use for epoxy are the type they use to clear a IV line w saline. I don’t think I have one that’s that small to measure 1ml at a time and even if I did, I think the hole at the end might be too small to draw the glitter in the solution through it
I had a few left over from my kids chemistry lab (they were home schooled) but these are pretty close:
Amazon product ASIN B013WWFJX0View: https://www.amazon.com/Karlling-Pack-Syringes-Without-Needle/dp/B013WWFJX0


I use a 100ml bottle that I can invert and draw off the coating with the syringe and usually mix up 50ml at a time.
 
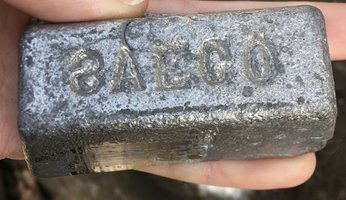
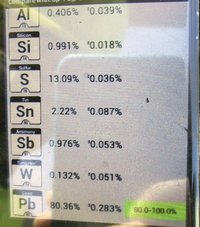
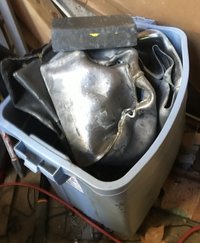
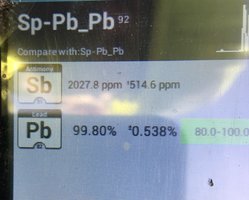
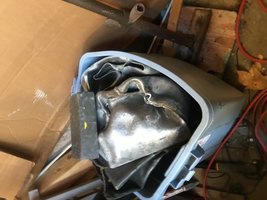
So I went to the scrap yard today. Bought some lead and had the guy gun it for me. It was 99.8% pure. He also took some hits of the samples I brought a and one of them was confusing...
E232F30D-F872-4FE7-BACD-B4A12EEA5D50.jpeg
A34D16A6-25AA-491B-91EA-1F3C7DE1CC1D.jpeg

you can see the corner I cleaned off w a scraper in the lower left and this was a sample taken in between a bunch of good lead readings so I don’t know what to make of this and what to do with it.

they also had brass shells that I brought my sorter to attack and I got 10lbs of mixed 38sp and 357 mag shells.
 
So I went to the scrap yard today. Bought some lead and had the guy gun it for me. It was 99.8% pure. He also took some hits of the samples I brought a and one of them was confusing...
View attachment 413417
View attachment 413418

you can see the corner I cleaned off w a scraper in the lower left and this was a sample taken in between a bunch of good lead readings so I don’t know what to make of this and what to do with it.

they also had brass shells that I brought my sorter to attack and I got 10lbs of mixed 38sp and 357 mag shells.
I’ve seen the same 13% sulfur result there and I’m not sure what the story is.
I plan on looking it up at some point but haven’t had the chance yet.
 
13% seems awfully high though. Maybe I’m wrong but you think it would do some weird things to the alloy.
13% or anything would be some serious influence on how the alloy works.
Agree - 13% does seem very high
I wonder what the reading would be if you sample the center of the ingot.
 
Agree - 13% does seem very high
I wonder what the reading would be if you sample the center of the ingot.
I was wondering if it’s some type of oxide or maybe an issue with how the XRF works. I remember a buddy talking about how they don’t pick up carbon or something so you needed to kind of figure that out as what was left after all the other alloy was added up.
 
I'm going with it's from batteries as well. Could be from some other source but if xrf picked it up it's in there. They do pick up carbon. But they don't all have all the programming in them less expensive model or you choose what you buy do to your needs
 
I was wondering if it’s some type of oxide or maybe an issue with how the XRF works. I remember a buddy talking about how they don’t pick up carbon or something so you needed to kind of figure that out as what was left after all the other alloy was added up.
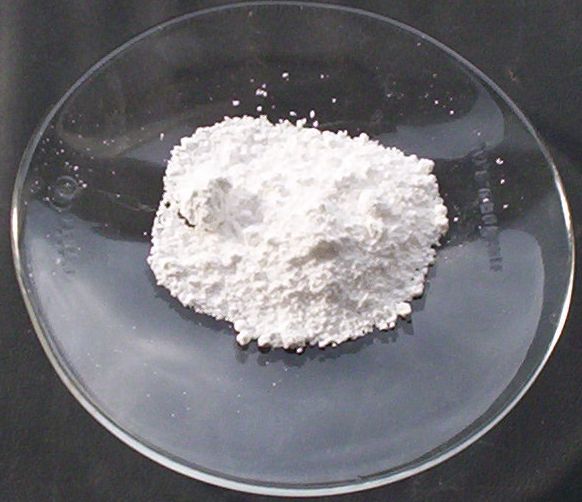
Most likely a lead II sulfate surface contamination being read - handle carefully and flux well.
 
Most likely a lead II sulfate surface contamination being read - handle carefully and flux well.

I’m wish I knew what samples I saw that on because I’m wondering if it was some of the old lead that had been weathered and covered in oxides.
I’m no chemist so I’ll have to find the idiots version but wouldn’t a melted and fluxed product lose those oxides? Or could it be poorly fluxed/heated and now it needs to be re melted and cleaned up?
Looks like it could easily form on the surface if the ingots were stored next to old leaky batteries

Fluxing should break it down pretty readily but heat won't (1200°C decomposition temp)

Another thing I was that it might exchange with iron pretty easily so stirring with a plain iron (steel) rod might reduce it also (also not a chemist so I'm not certain if the reaction would be useful)
 
Great discussion going on here. I put the stuff aside and will melt it down at the end of a smelting day and then take a reformed ingot to see if it XRF's the same.
I would think that it would smell like rotten eggs either when solid or liquid if it was that high in sulfur.

I'm tempted to take it to scrap yard and ask to buy 100lbs of clean lead and ask him to credit me for the questionable lead I trade in 1:1

They sold me a bunch of pure pure stuff today:

51B3DD6D-6450-4B77-BFAB-E50B2E69C8BB.jpeg
43BFEE30-796F-490C-8E5D-05CFE2A5CBAE.jpeg
 

Attachments

  • EE37DE6E-039D-4078-90B8-3931E5C13F5F.jpeg
    EE37DE6E-039D-4078-90B8-3931E5C13F5F.jpeg
    84.8 KB · Views: 0
Last edited:
Back
Top Bottom