beaker
NES Member

I've gotten a couple of requests recently for information on building a curing oven. I built my curing oven to finish my Uzi using Gun Kote, a similar color and finish to the original IMI Uzi Carbines.
So this is what I did, it worked for me. If you make your own oven, you do so at your own risk. I am not responsible for anything you may do with the information provided in this thread. I can answer general questions, but if you don't have a good idea of how this all works, maybe you shouldn't take on a project like this.
My wife wouldn't be too happy if I tried to do this in the kitchen oven, so I needed a way to bake my parts after applying Gun Kote. I looked around, there are some other sources on-line for others who have done this, some use wood planks, some use old metal lockers, I didn't see anything that would work for me. I wanted to do it safely, but also at very low expense. I thought what cheap, safe and available material to use for the carcass; at first I though about drywall, but when I looked into it I realized it would be a terrible choice since it becomes flammable once it dries out, as it might when used in an oven...
![[thinking]](/xen/styles/default/xenforo/smilies.vb/010.gif "Thinking [thinking]") I had just finishing rehabbing a bathroom in my house and I thought, "what about cement backer board?". Its cement, it has pretty good flame retarding properties, and it is really cheap. I actually had a sheet + left over from the bathroom project. In fact many of the materials I used I had lying around from other home improvement and hobby projects.
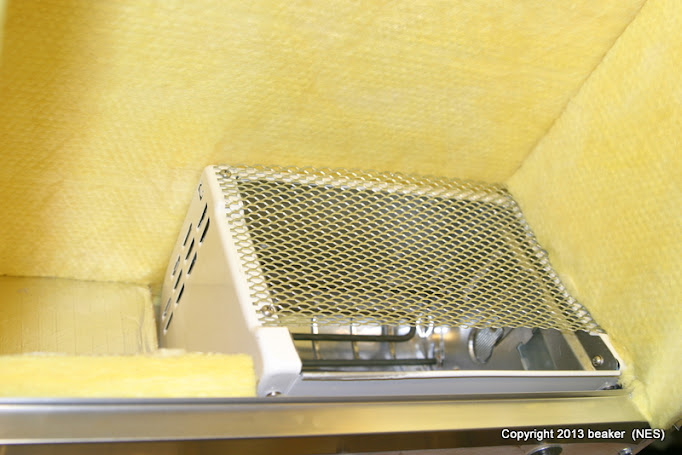
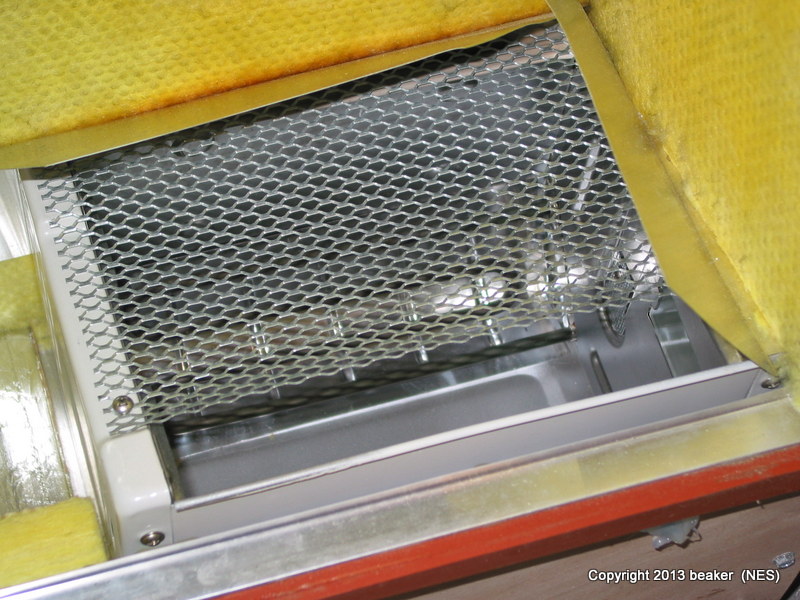
I had just finishing rehabbing a bathroom in my house and I thought, "what about cement backer board?". Its cement, it has pretty good flame retarding properties, and it is really cheap. I actually had a sheet + left over from the bathroom project. In fact many of the materials I used I had lying around from other home improvement and hobby projects. The other home built ovens i'd found used various heat sources. Charcoal starters (electric), heating elements from dryers, toaster ovens etc. The one I chose was a toaster oven. I liked toaster ovens because the heating element is already mounted into a metal container with heat shields, its already wired and I could strip it and mount it into the oven directly without worrying about mounting and protecting the heating elements. I wanted something small, with a good size heating element. I started looking around, and eventually found a perfect unit at Ocean State Job Lot. $12. sweet. Other sources would be thrift stores, or maybe your own junk pile.
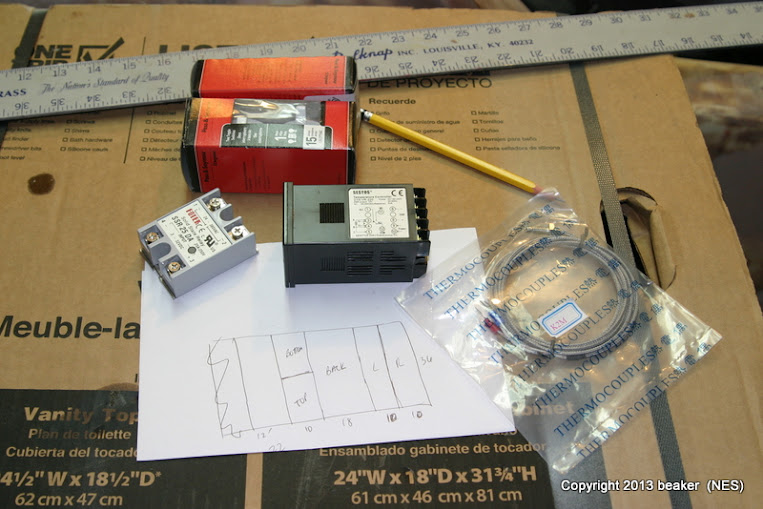
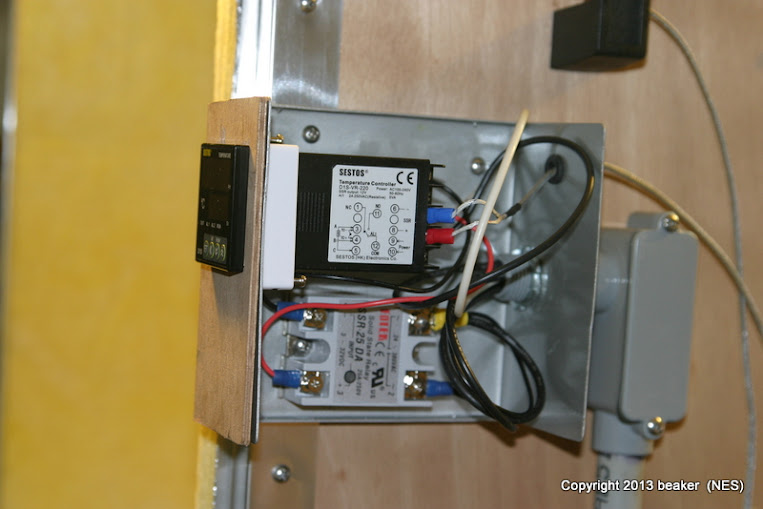
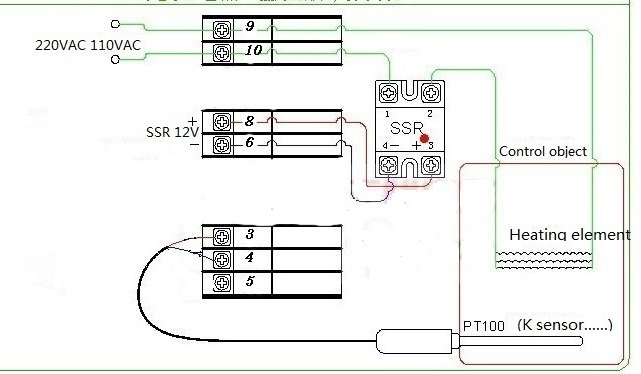
Once I had a heat source, the next step was to find a way to control the temperature. I found a perfect setup on ebay, a sestos temperature controller, a 25amp heater relay, and a K type thermocouple. Here is one that is on ebay now. I think I paid about $37, shipped from china. These are used a lot for beer brewing setups, and it was perfect for what I was doing.
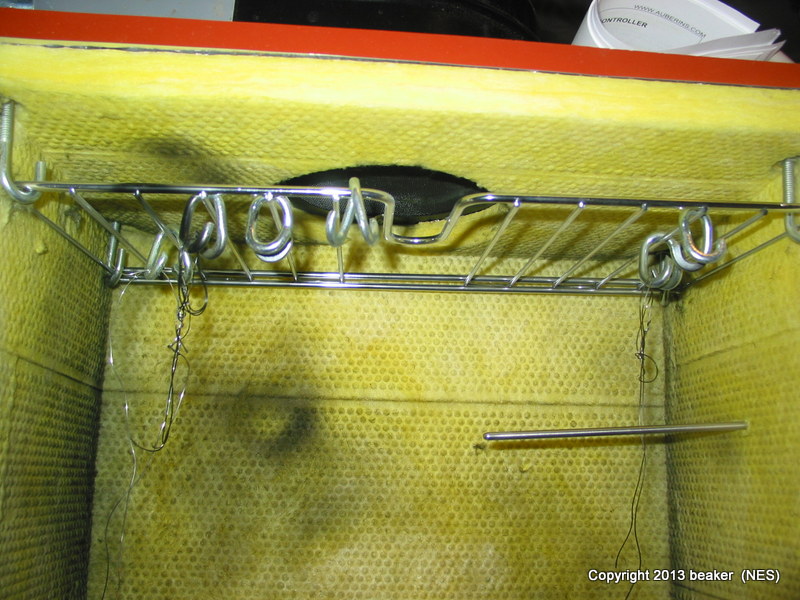
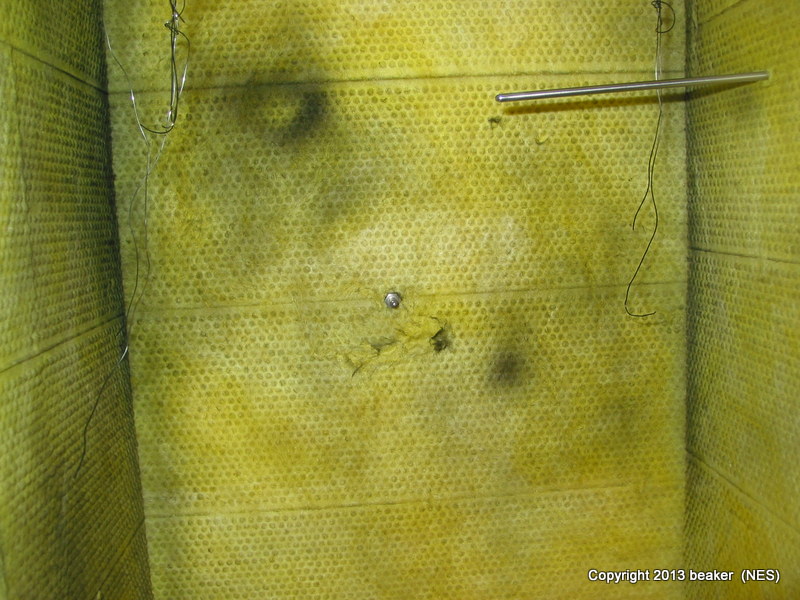
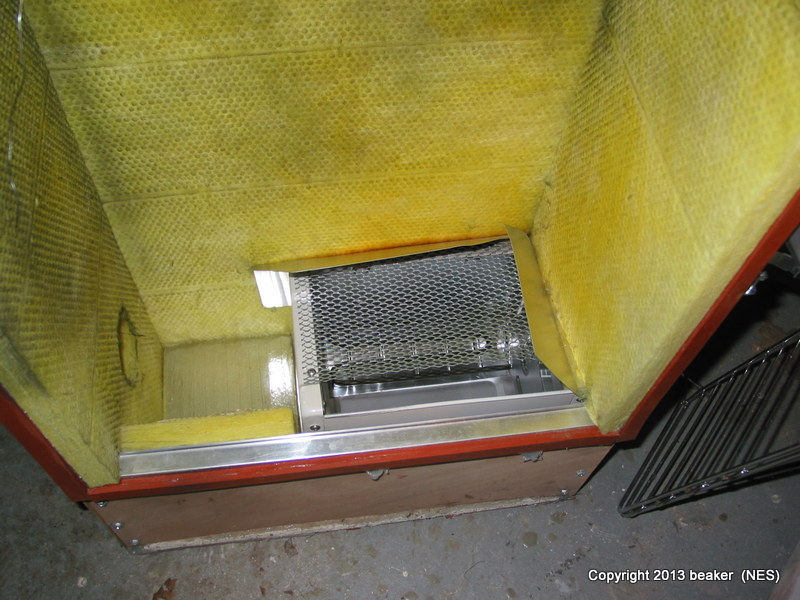
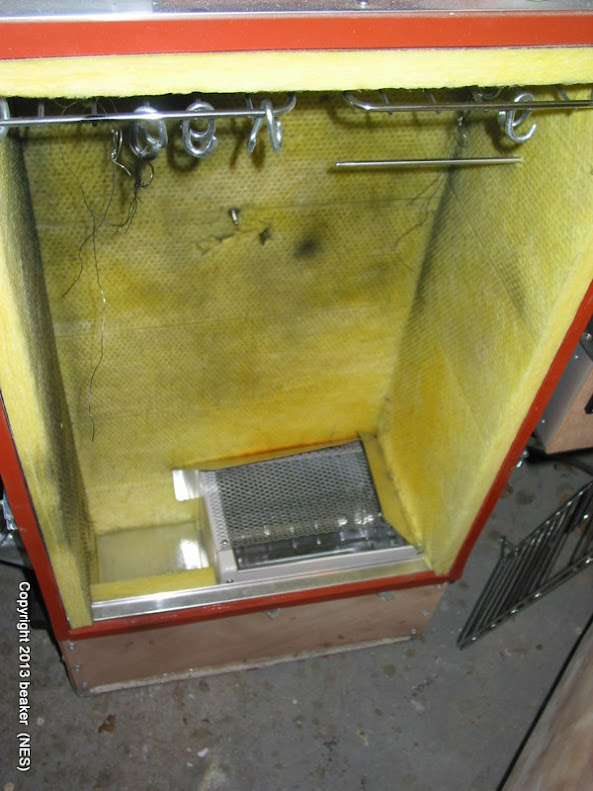
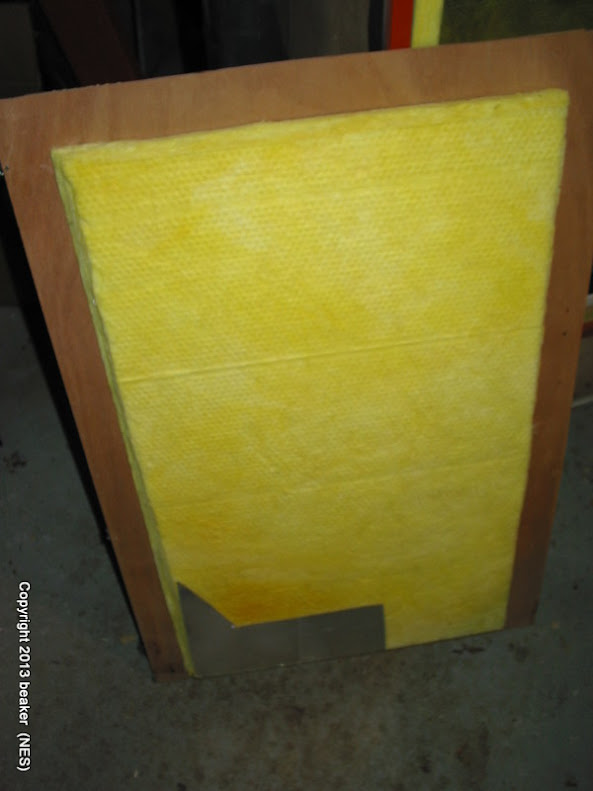
Now I had the carcass material, a heat source, and a temperature controller. The last major component was the insulation for the inside of the carcass. I looked around and found this high temperature fiberglass insulation from McMaster-Carr. This was the most cost effective insulation I could find that could handle the high temperatures I needed to hold.
HI-Temp Rigid Fiberglass Insulation Foil Faced, Medium Density, 1" Thick, 24" X 48" item 9351K1 $18.59 each. With shipping (they are pretty big) this was the most expensive part of the build.
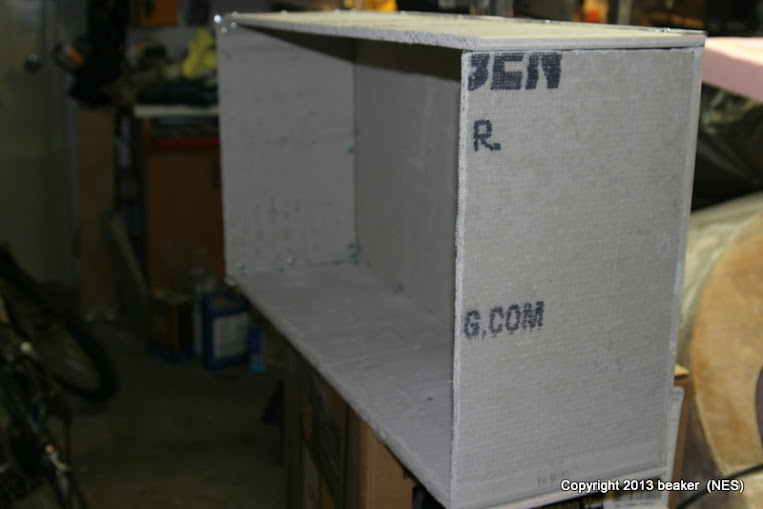
Time to start figuring numbers. I knew wanted a cabinet that would be long enough to hang the uzi parts (receiver, barrel, etc.) and possibly a longer item later so I started doing a sheet layout. The final outside carcass dimensions are 36" high x 18" wide x 10" deep. This can be done mostly from a full sheet of cement board IIRC. You lose 1" on all internal surfaces when you put the insulation in.
LAYOUT and Controller:
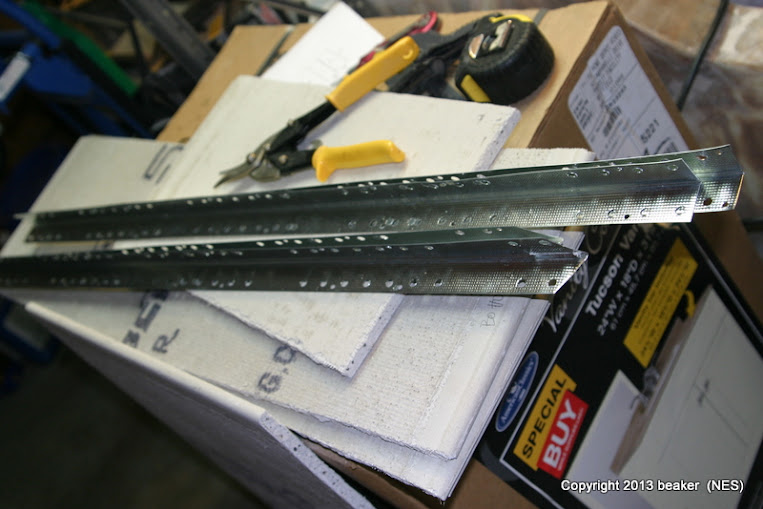
Cut up Cement Board:

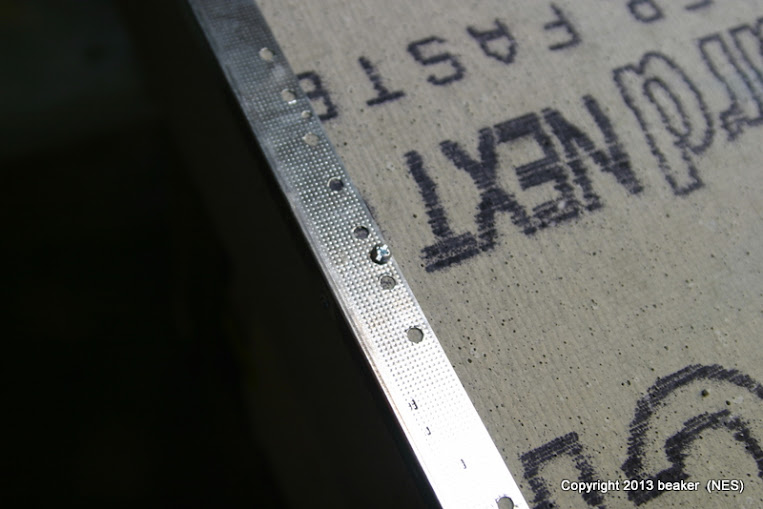
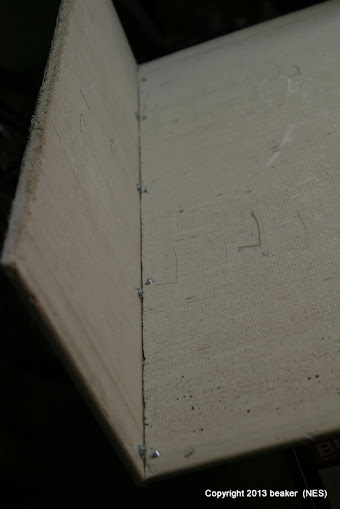
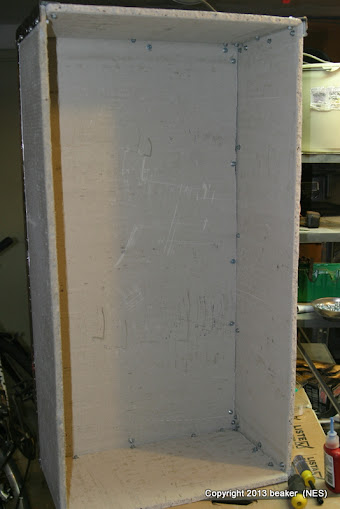
I used drywall corner beads from Home Depot (steel and cheap) to hold the cement board together. I used some small machine screws as fasteners.
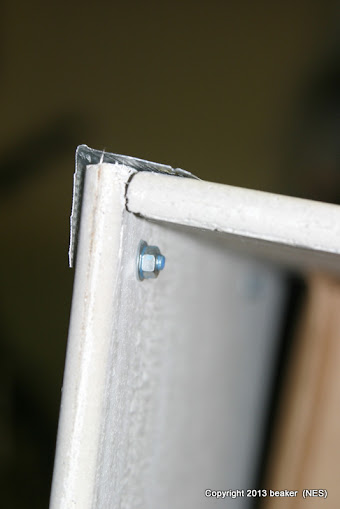
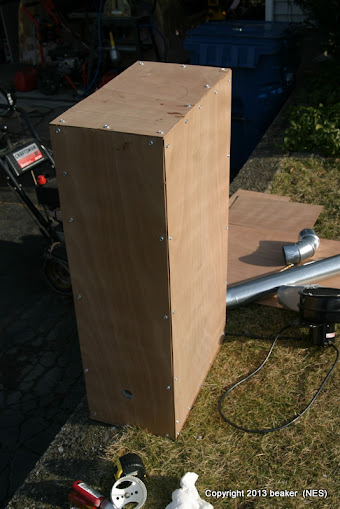
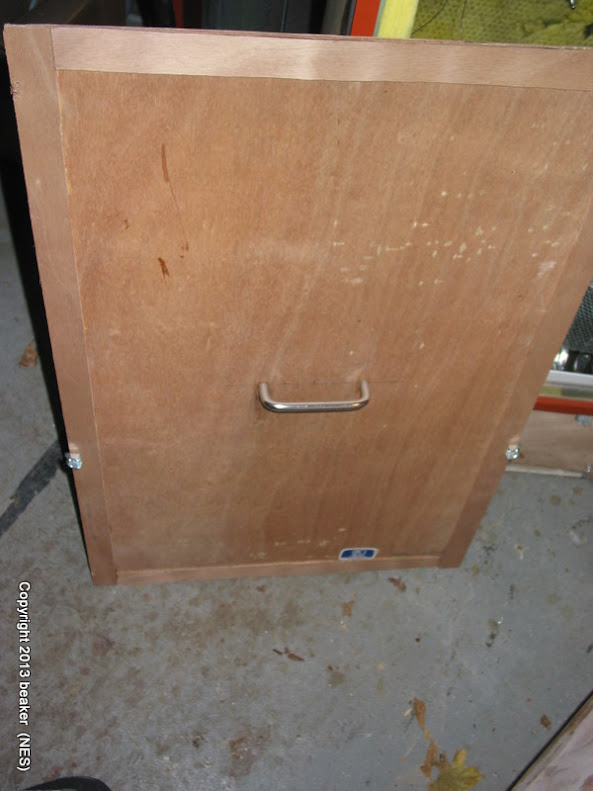
Once I got the carcass bolted together, I used a bunch of 1/8" marine plywood I had in the shop to cover the outside. Mostly to reinforce the cement board, and prevent it from being cracked or damaged. I just used some self tapping screws into the metal corner beads underneath to hold it on.

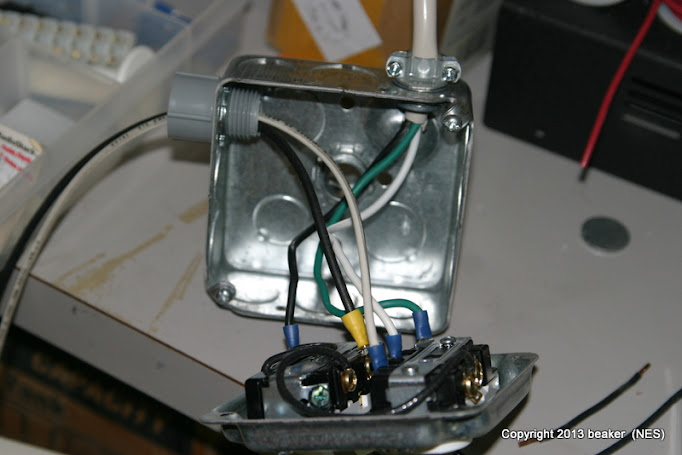
I stripped everything off of the small toaster oven, and terminated the wires for inside the junction box.
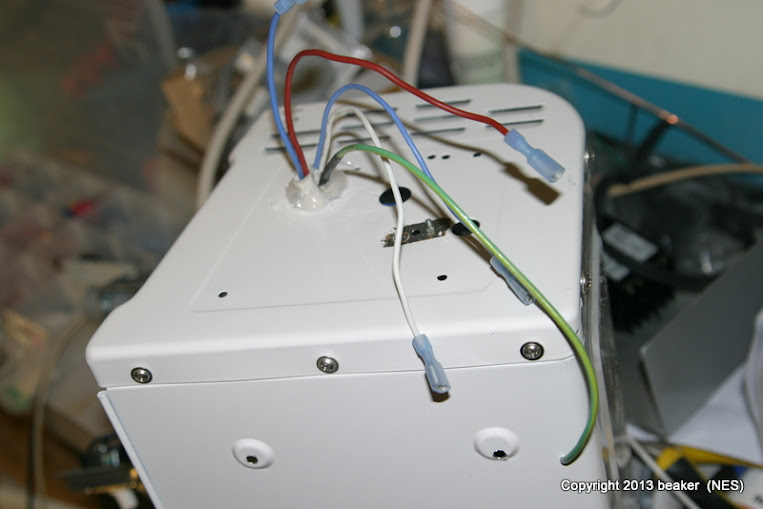
I drilled a hole in the side of the carcass to put the wires out, this is under the junction box on the side of the oven where the power cord and switches are located.
Part II coming next...
- - - Updated - - -
1


![[thumbsup]](/xen/styles/default/xenforo/smilies.vb/044.gif "Thumbs Up [thumbsup]")
![[wink]](/xen/styles/default/xenforo/smilies.vb/002.gif "Wink [wink]")
![[shocked]](/xen/styles/default/xenforo/smilies.vb/007.gif "Shocked [shocked]")
")