After seeing a Mosin Nagant crate in the Karma section and seeing this:
Mosin Nagant Rifle Crate Coffee Table « AIM
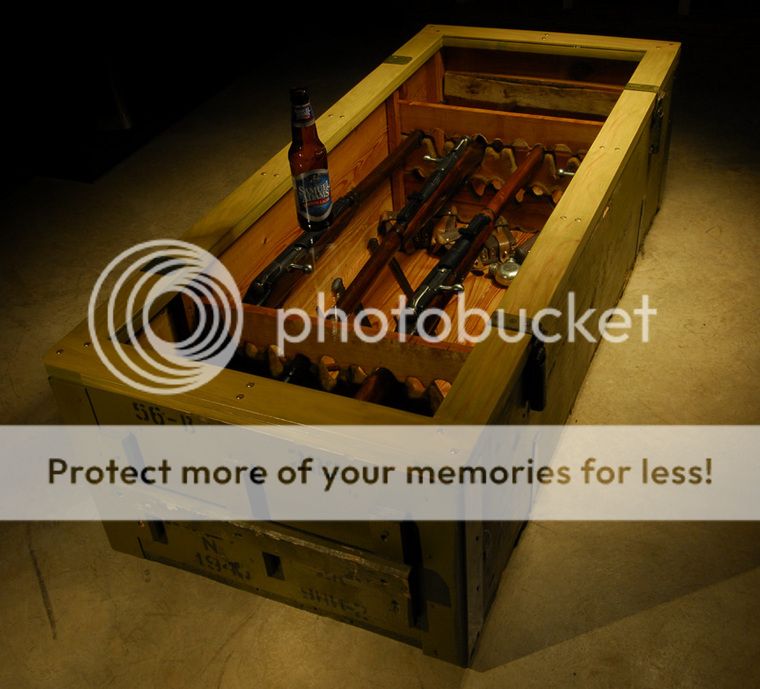
I knew I had to make one. Long story short, the original winner backed out and I ended up meeting a great member who gave the crate to me. I have done rough and some finish carpentry before and have most of the tools needed for the job (I think) and I figure its an old crate, it isnt going to look worse when I am done with it. The current plan is to copy the basics of the reference link. That is, clean up the outside with a matching paint, seal the inside with polyurethane, add feet, fabricate a glass top and then light the whole thing up. My goal was to spend as little as possible while still producing a good table. IE: I am cheap. Apologies for the crappy cell phone pics, they always look better on a two inch screen than they do on a real monitor.
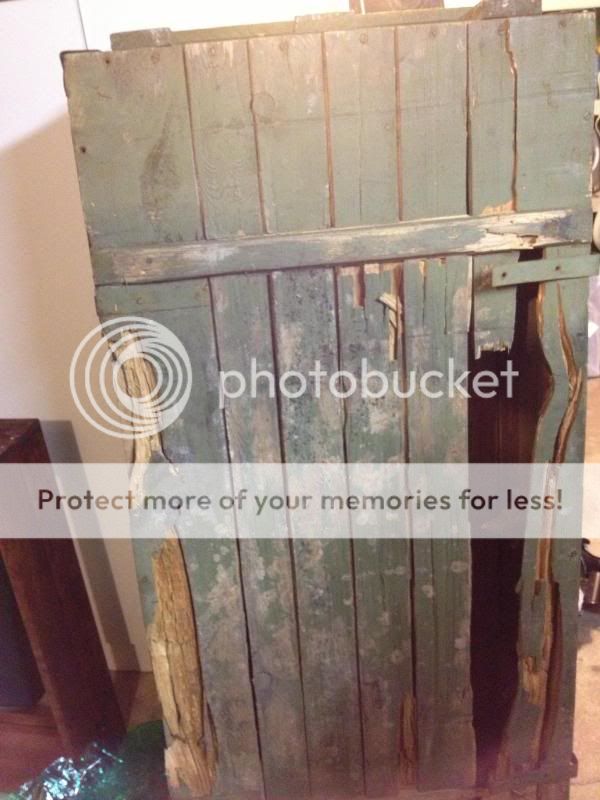
After getting it home, the dry rot on the bottom was really apparent and more prevalent than I had thought:
However, the rest of the crate was in good shape and the markings, although only on each end were intact.
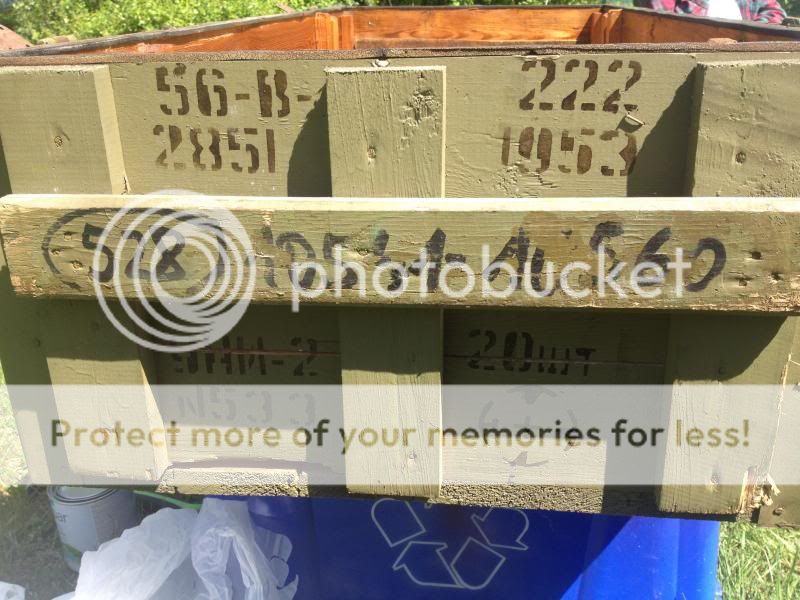
Anyone have any idea what the markings mean, other than the "20 wt" meaning 20 units I suppose?
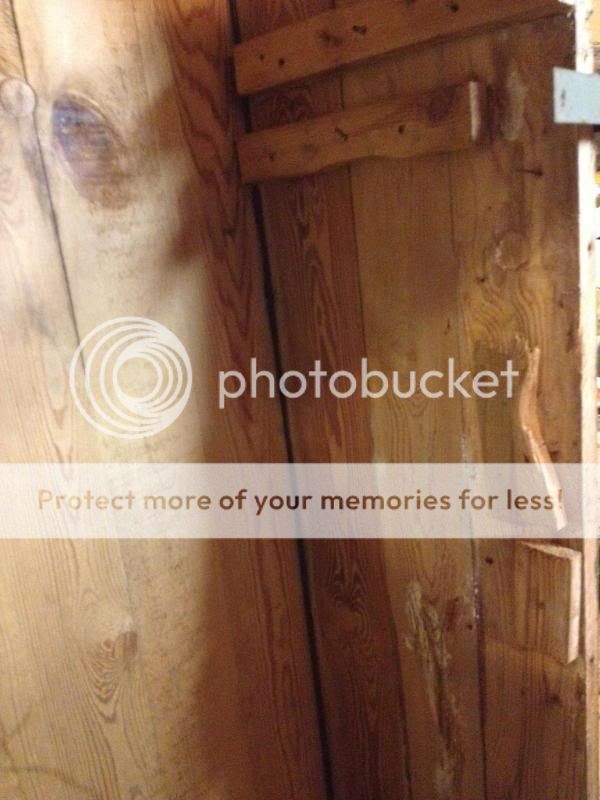
The inner braces appeared to be all there with only the smallest one having damage.
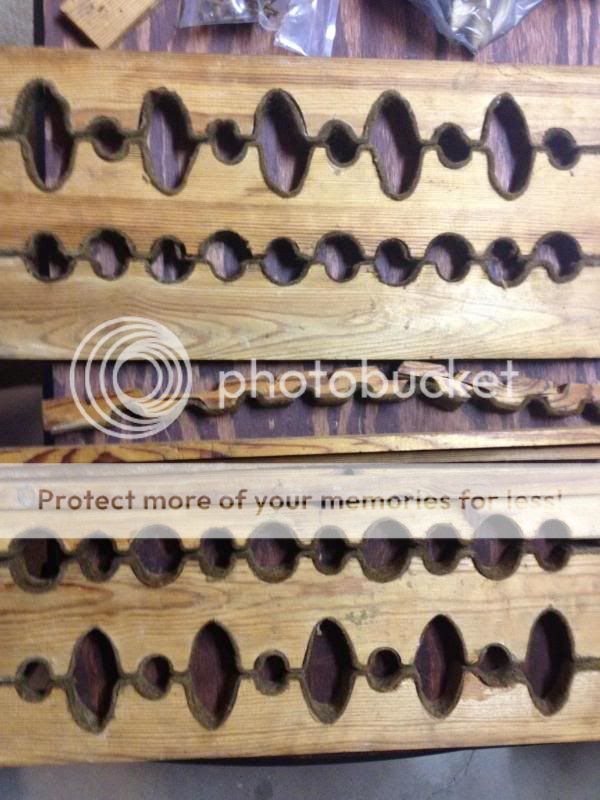
There were some other thinner pieces of wood and a few small "filler" pieces still intact but I have no clue where they belong. I figure a little more research on the web and it will all make sense.
First course of order was to remove the back completely as there was not enough salvagable wood, in my opinion, to make a repair. Out comes about 30 rusty screws that use a flat screwdriver tip only slightly wider than a piece of paper..... Seriously, these things had amazingly small slots even after cleaning the junk out of them. After looking at the crate further I am amazed at the way this thing is constructed, it has toungue and groove boards, metal corners that are nailed in, screws everywhere and the cross bars are even dovetailed into the front and backs, making a really stable and tough box.
After realizing how tough this thing really is I have decided to swap out the lid and use it for the back, keeping as much of the original crate as possible. Originally I wanted to cut out the glass area in the original top but I realized that the small ends would not be very stable and I would still need to source out a bottom and I did NOT want to use plywood or some other crap as the edges would be visible from the sides if I copied the original construction. Using the lid for the back would leave it about an eighth of an inch short on both long sides but I judged that acceptable.
Bottom removed, looking in with the crate standing on end gives you an idea of the condition of the rest of the untreated wood, it looks pretty good:
I then removed the lid, flipped the box onto its face and screwed the lid onto the back. I reused most of the old fasteners but had to add a few 3/4 inch long phillips head wood screws to the metal straps as some of the original screws were either junk or missing. I also went to Lowes with a board piece and bought a quart of matching paint in flat and started touching up some of the bare wood areas. The paint matched well enough that the slight difference in shade can be accounted for. I also went through the inside and removed as much of the preservative paper as possible. The pieces of wood on the inside are atttached after the paper is put in, anchoring multiple layers of paper behind every board. Most of it came out completely, with some stuck behind certain boards. I judged it good enough as I wanted the crate to still have some reminder of its former use.
That ended my day yesterday working on the crate. Today my son and I lugged the crate into the sun outside and I dug out an old gallon can of satin polyurethane. Two chip brushes later the inside has a good looking golden color and the entire inside has been given two coats of poly, with another coat added to the inner braces.
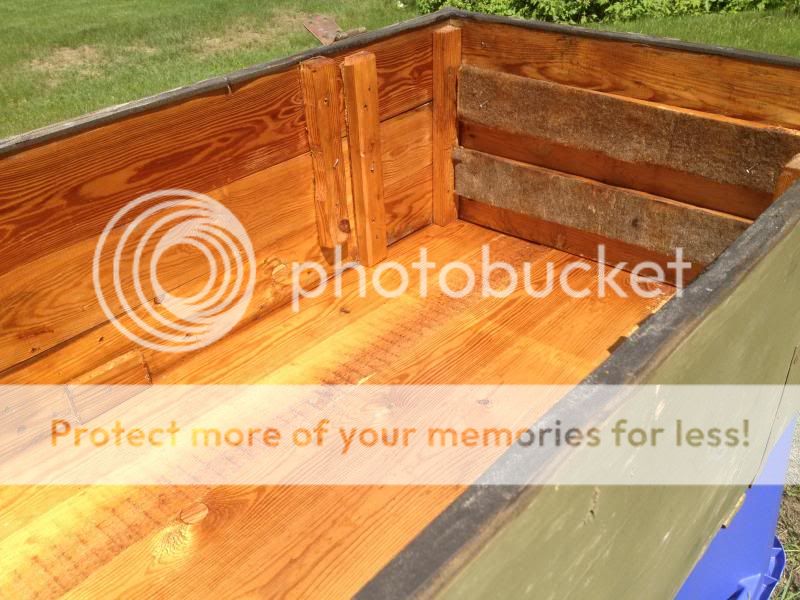
The picture is from about halfway through the job and is in direct sunlight. The existing felt looks darker than in the picture and what looks like a crack in one board is not apparent. One thing that is apparrent now that I have had time to look is that the fit between the bottom and sides willneed some light -proofing so that the interior lights will not show from the outside except through the top. I am thinking a strip of felt that looks like the existing felt at the seam, any suggestions?
Thats it for now: Next post will be after sourcing a piece of safety glass for the top as well as deciding what material to use (oak, pine or who knows) plus finish (poly or paint) for the top. Wooden legs are an option but I may try and figure out something more in keeping with the theme.
Thanks for looking.
Mosin Nagant Rifle Crate Coffee Table « AIM

I knew I had to make one. Long story short, the original winner backed out and I ended up meeting a great member who gave the crate to me. I have done rough and some finish carpentry before and have most of the tools needed for the job (I think) and I figure its an old crate, it isnt going to look worse when I am done with it. The current plan is to copy the basics of the reference link. That is, clean up the outside with a matching paint, seal the inside with polyurethane, add feet, fabricate a glass top and then light the whole thing up. My goal was to spend as little as possible while still producing a good table. IE: I am cheap. Apologies for the crappy cell phone pics, they always look better on a two inch screen than they do on a real monitor.
After getting it home, the dry rot on the bottom was really apparent and more prevalent than I had thought:

However, the rest of the crate was in good shape and the markings, although only on each end were intact.

Anyone have any idea what the markings mean, other than the "20 wt" meaning 20 units I suppose?
The inner braces appeared to be all there with only the smallest one having damage.

There were some other thinner pieces of wood and a few small "filler" pieces still intact but I have no clue where they belong. I figure a little more research on the web and it will all make sense.
First course of order was to remove the back completely as there was not enough salvagable wood, in my opinion, to make a repair. Out comes about 30 rusty screws that use a flat screwdriver tip only slightly wider than a piece of paper..... Seriously, these things had amazingly small slots even after cleaning the junk out of them. After looking at the crate further I am amazed at the way this thing is constructed, it has toungue and groove boards, metal corners that are nailed in, screws everywhere and the cross bars are even dovetailed into the front and backs, making a really stable and tough box.
After realizing how tough this thing really is I have decided to swap out the lid and use it for the back, keeping as much of the original crate as possible. Originally I wanted to cut out the glass area in the original top but I realized that the small ends would not be very stable and I would still need to source out a bottom and I did NOT want to use plywood or some other crap as the edges would be visible from the sides if I copied the original construction. Using the lid for the back would leave it about an eighth of an inch short on both long sides but I judged that acceptable.
Bottom removed, looking in with the crate standing on end gives you an idea of the condition of the rest of the untreated wood, it looks pretty good:

I then removed the lid, flipped the box onto its face and screwed the lid onto the back. I reused most of the old fasteners but had to add a few 3/4 inch long phillips head wood screws to the metal straps as some of the original screws were either junk or missing. I also went to Lowes with a board piece and bought a quart of matching paint in flat and started touching up some of the bare wood areas. The paint matched well enough that the slight difference in shade can be accounted for. I also went through the inside and removed as much of the preservative paper as possible. The pieces of wood on the inside are atttached after the paper is put in, anchoring multiple layers of paper behind every board. Most of it came out completely, with some stuck behind certain boards. I judged it good enough as I wanted the crate to still have some reminder of its former use.
That ended my day yesterday working on the crate. Today my son and I lugged the crate into the sun outside and I dug out an old gallon can of satin polyurethane. Two chip brushes later the inside has a good looking golden color and the entire inside has been given two coats of poly, with another coat added to the inner braces.

The picture is from about halfway through the job and is in direct sunlight. The existing felt looks darker than in the picture and what looks like a crack in one board is not apparent. One thing that is apparrent now that I have had time to look is that the fit between the bottom and sides willneed some light -proofing so that the interior lights will not show from the outside except through the top. I am thinking a strip of felt that looks like the existing felt at the seam, any suggestions?
Thats it for now: Next post will be after sourcing a piece of safety glass for the top as well as deciding what material to use (oak, pine or who knows) plus finish (poly or paint) for the top. Wooden legs are an option but I may try and figure out something more in keeping with the theme.
Thanks for looking.
Last edited:
![[thumbsup]](/xen/styles/default/xenforo/smilies.vb/044.gif "Thumbs Up [thumbsup]")