kevin9
NES Member
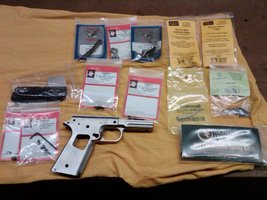
I finally got around to ordering some of the parts to begin building my NE 1911 Commander.
I'm starting with the fire control parts of the frame. Here's the initial set of parts:

I started with fitting the trigger. It took a while to get it in smoothly then I had to polish it to remove the tooling marks. Not sure whether I'll keep it bright or finish it dark somehow.
Next step was cleaning up the sear, disconnector and hammer. I used this write-up for guidance on cutting the secondary angle on the sear and setting the height of the hammer sear hook.
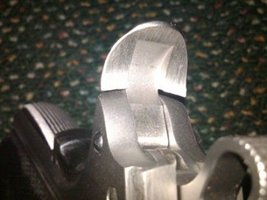
Finally I fit the thumb safety in with the sear and hammer. Like the trigger that took a while to get the right surfaces cut properly then cleaned up.
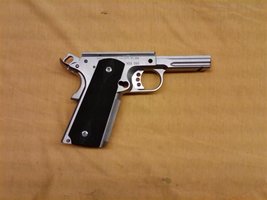
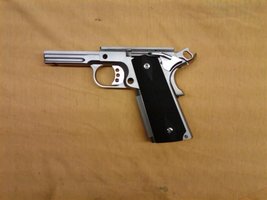
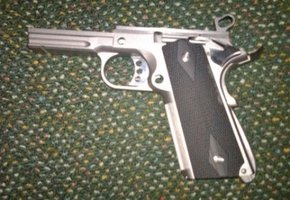
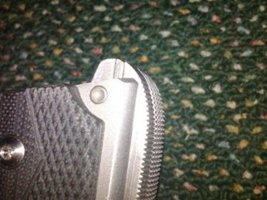
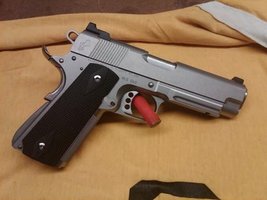
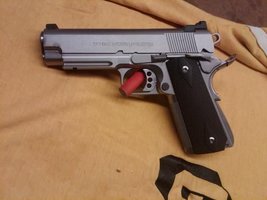
I test fit the grips and grip safety. Here's the results so far:


The grips fit nicely I think and I like the black on stainless look.
The grip safety goes in but needs to be fitted for function and blended in with the frame. I'm holding off doing that until I order and receive my next batch of parts as that will include the mainspring housing need to retain the bottom of the grip safety.
One thing I did notice is that the trigger is a bit loose front to back. It appears that the bottom of the disconnector does not go quite far enough forward to contact the back of the trigger bow. I don't think I want to bend the back of the trigger bow out as that could cause the sides of the bow to move in and bind on the magazine. I'm thinking I'll either bend the bottom of the disconnector forward slightly or enlarge the pin hole in it. Once I get the grip safety fitted I'll figure out how to address this.
More to come as the parts arrive.
I'm starting with the fire control parts of the frame. Here's the initial set of parts:
I started with fitting the trigger. It took a while to get it in smoothly then I had to polish it to remove the tooling marks. Not sure whether I'll keep it bright or finish it dark somehow.
Next step was cleaning up the sear, disconnector and hammer. I used this write-up for guidance on cutting the secondary angle on the sear and setting the height of the hammer sear hook.
Finally I fit the thumb safety in with the sear and hammer. Like the trigger that took a while to get the right surfaces cut properly then cleaned up.
I test fit the grips and grip safety. Here's the results so far:
The grips fit nicely I think and I like the black on stainless look.
The grip safety goes in but needs to be fitted for function and blended in with the frame. I'm holding off doing that until I order and receive my next batch of parts as that will include the mainspring housing need to retain the bottom of the grip safety.
One thing I did notice is that the trigger is a bit loose front to back. It appears that the bottom of the disconnector does not go quite far enough forward to contact the back of the trigger bow. I don't think I want to bend the back of the trigger bow out as that could cause the sides of the bow to move in and bind on the magazine. I'm thinking I'll either bend the bottom of the disconnector forward slightly or enlarge the pin hole in it. Once I get the grip safety fitted I'll figure out how to address this.
More to come as the parts arrive.
Attachments
Last edited:
![[wink]](/xen/styles/default/xenforo/smilies.vb/002.gif "Wink [wink]")
![[smile]](/xen/styles/default/xenforo/smilies.vb/001.gif "Smile [smile]")