-
If you enjoy the forum please consider supporting it by signing up for a NES Membership The benefits pay for the membership many times over.
-
Be sure to enter the NES/MFS May Giveaway ***Canik METE SFX***
You are using an out of date browser. It may not display this or other websites correctly.
You should upgrade or use an alternative browser.
You should upgrade or use an alternative browser.
Backyard Aquaponics in the Northeastern U.S.-- Update on plants 08/10/2014
- Thread starter C-4
- Start date
I have no intentions of ever doing this, but this thread is awesome; thanks for taking the time to do document the process.
You're welcome. This is my 3rd year doing this so I felt like I could go over the process step-by-step in a way others would understand it. Like the other poster above suggested, I'll check the nitrites every other day and I'll post when it starts to come down. Hopefully not much longer for the nitrites to come down to zero. My experience has been that once it starts coming down, it comes down fast.
Update: 06/01/2014 Nitrite Zero
Day 18
Please read this carefully since it does get a little complicated.
I measured the nitrite levels yesterday. We have had some rain over the last 3 days and my system is completely open to the air so one of my concerns is that it would cause some overflow and dilute the nitrite. The results were a nitrite level of zero:
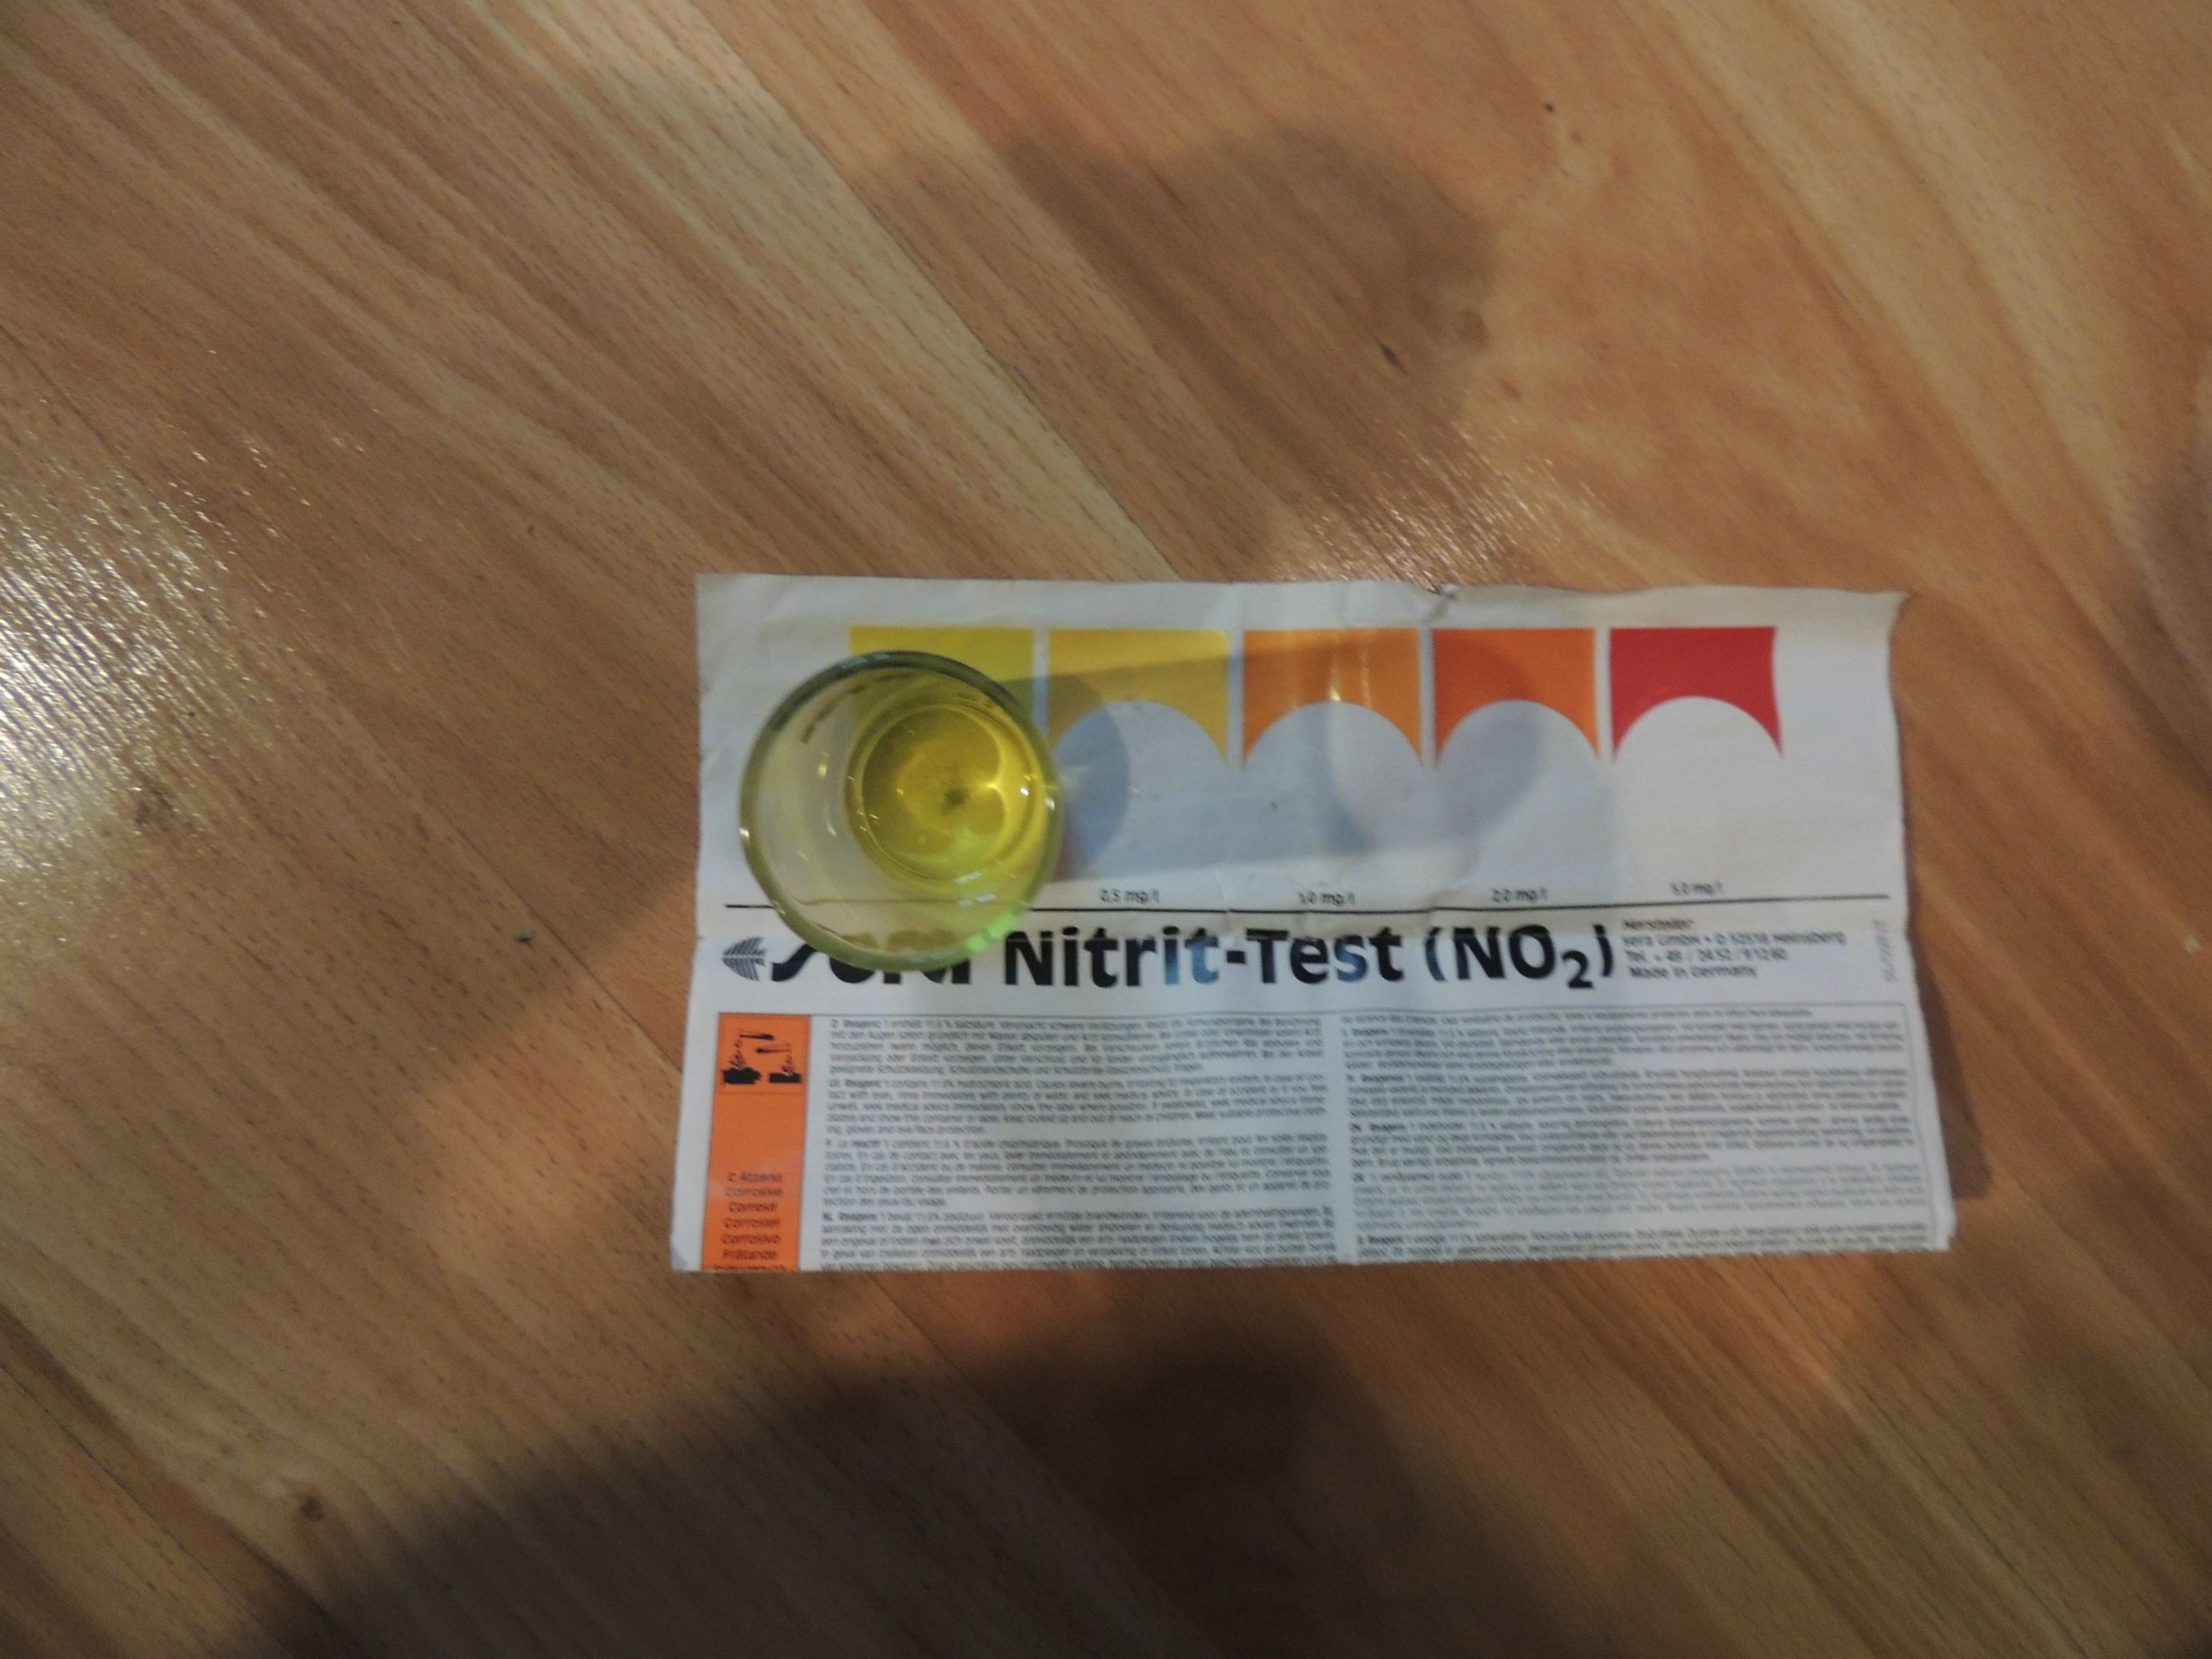

This is great news, sort of. I know it didn't rain enough to do a complete change of the water, but my concern is that the nitrites were artificially lowered because of the rain. So I did the next logical test which was to check out the nitrates. These were and should still be off the charts since there is no way for the nitrates to get out of the system unless they too were diluted by rain and some overflow out of the sump tank. The water can overflow from the sump tank where the 2" PVC tubing comes into the sump tank from the grow bed. There is a 3" diameter hole but the PVC tubing is 2" and there is no seal around the PVC pipe so water can flow out at that level where it comes into the sump tank. None of the fish, however, are small enough to go through the opening.
So I measured the nitrate and while still present, it was not > 100mg/L.

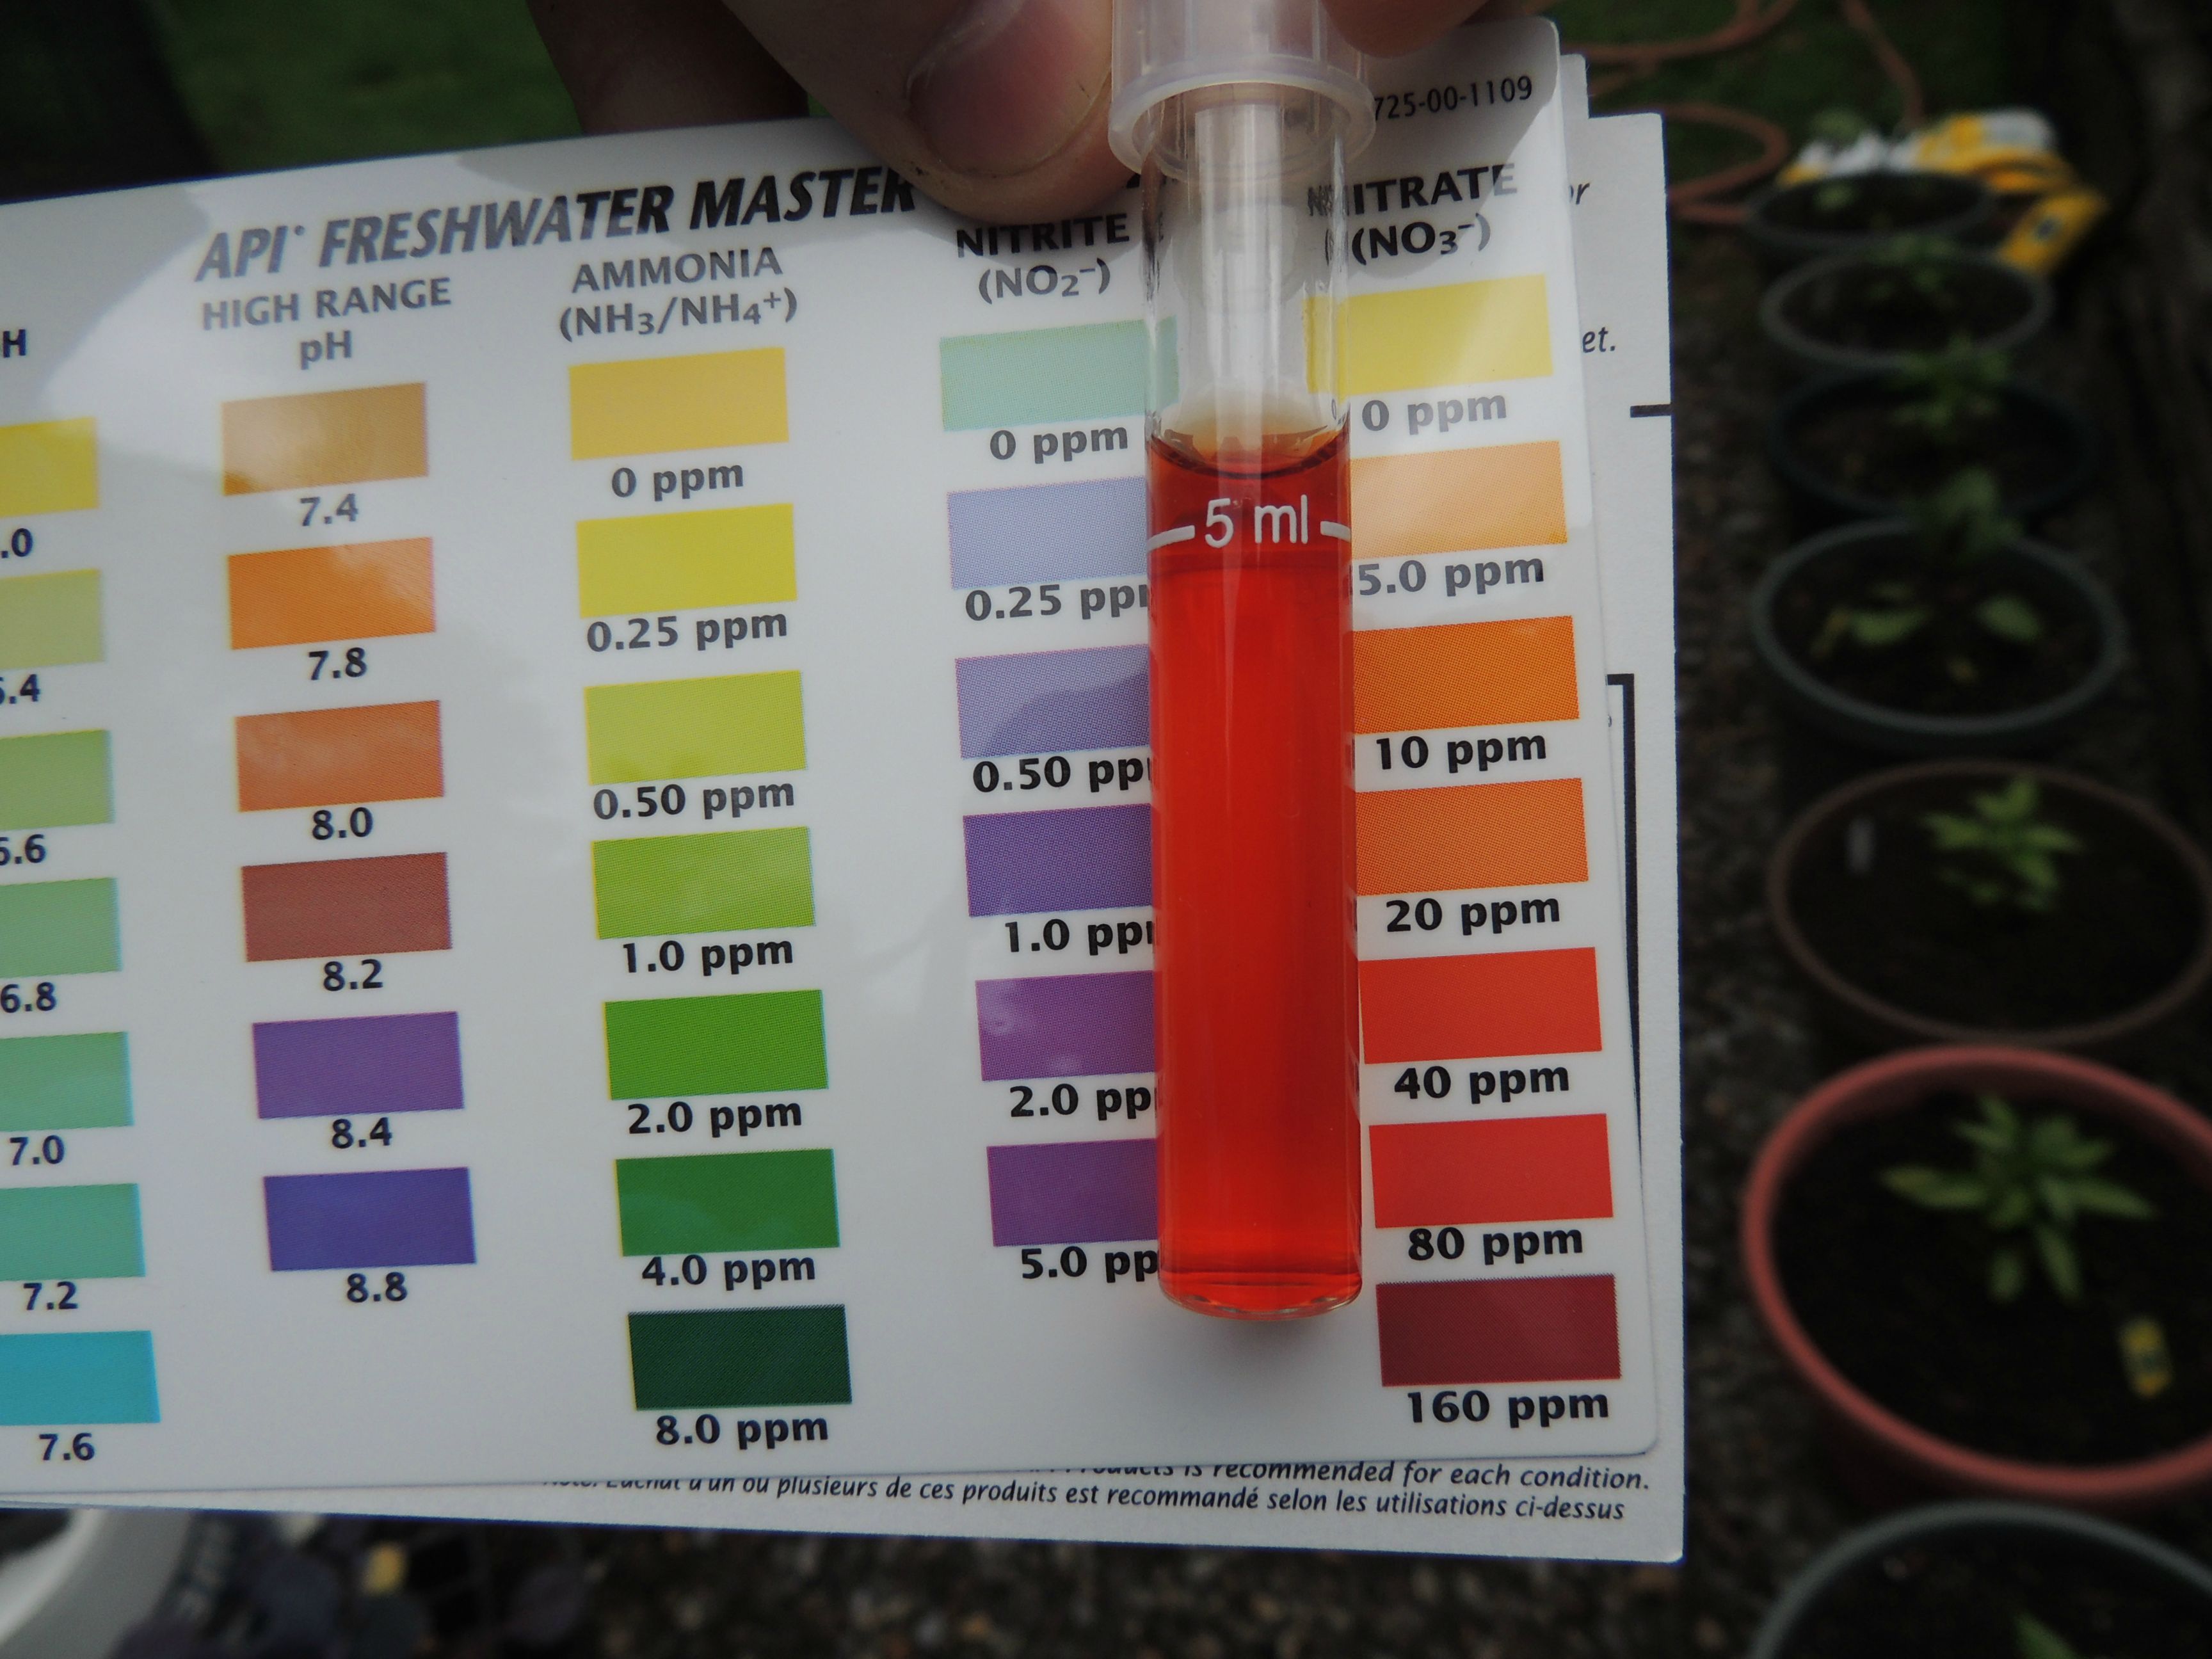
The Sera test (first picture) shows around 37.5mg/L and the API test (it's hard to read in the picture) shows around 40mg/L. So both tests show approximately 40mg/L. This is good because it shows that the tests complement each other and this is very pleasing. 40mg/L is about 50% or less of what it should be since it was > 100mg/L.
Conclusion: If the nitrite was 5+mg/L on 05/28/14, then it should still be measurable on 05/31/2014. The fact that it is zero means that the bacteria did break at least half of it down to nitrate. We knew even on 05/28/2014 that we have Nitrobacter because we'd had positive nitrates.
Here is my dilemma: I see two main ways to proceed:
1) Drain the grow bed and sump tank and refill with water, and add ammonia (urea). Wait until this again goes through the cycle until all of it is transformed into nitrate. This ensures that I have a very healthy population of both Nitrosomonas and Nitrobacter. This would be the most prudent way of proceeding. However, I would have to cover both the grow bed and sump tank to make sure none of the water is diluted by more rain which is forecast in the next 5 days. If one of you were to ask me what to do next, this is what I would recommend. Our biggest concern is to provide the best environment for the fish so we should do everything we can to ensure their safety.
2) Drain the grow bed and sump tank, refill with fresh water, and connect it to the fish tank so the system starts running today. This has the advantage that I finally start running my system 06/01/14. I only have a limited number of months to run the system so I would like to get things started. I know I have a population of Nitrobacter because they did get rid of about half of the nitrites that were left. The fish burden is relatively modest. I can control ammonia by how much I feed the fish since they produce ammonia as waste. I can salt the system with NaCl which would protect the fish if there was a nitrite spike, of which I think there is a low risk.
While I would recommend #1 to any of you, especially if you live in the southern half of the U.S. and have year-round aquaponics available, I've decided to go with #2. I think that I have a deep and broad enough understanding of the principles of aquaponics that I can follow the levels of ammonia/nitrite/nitrate as I deem necessary to prevent a toxic environment from being established. Don't try this at home! But seriously, if I didn't think that I could personally do this safely enough for the fish, then I wouldn't do it.
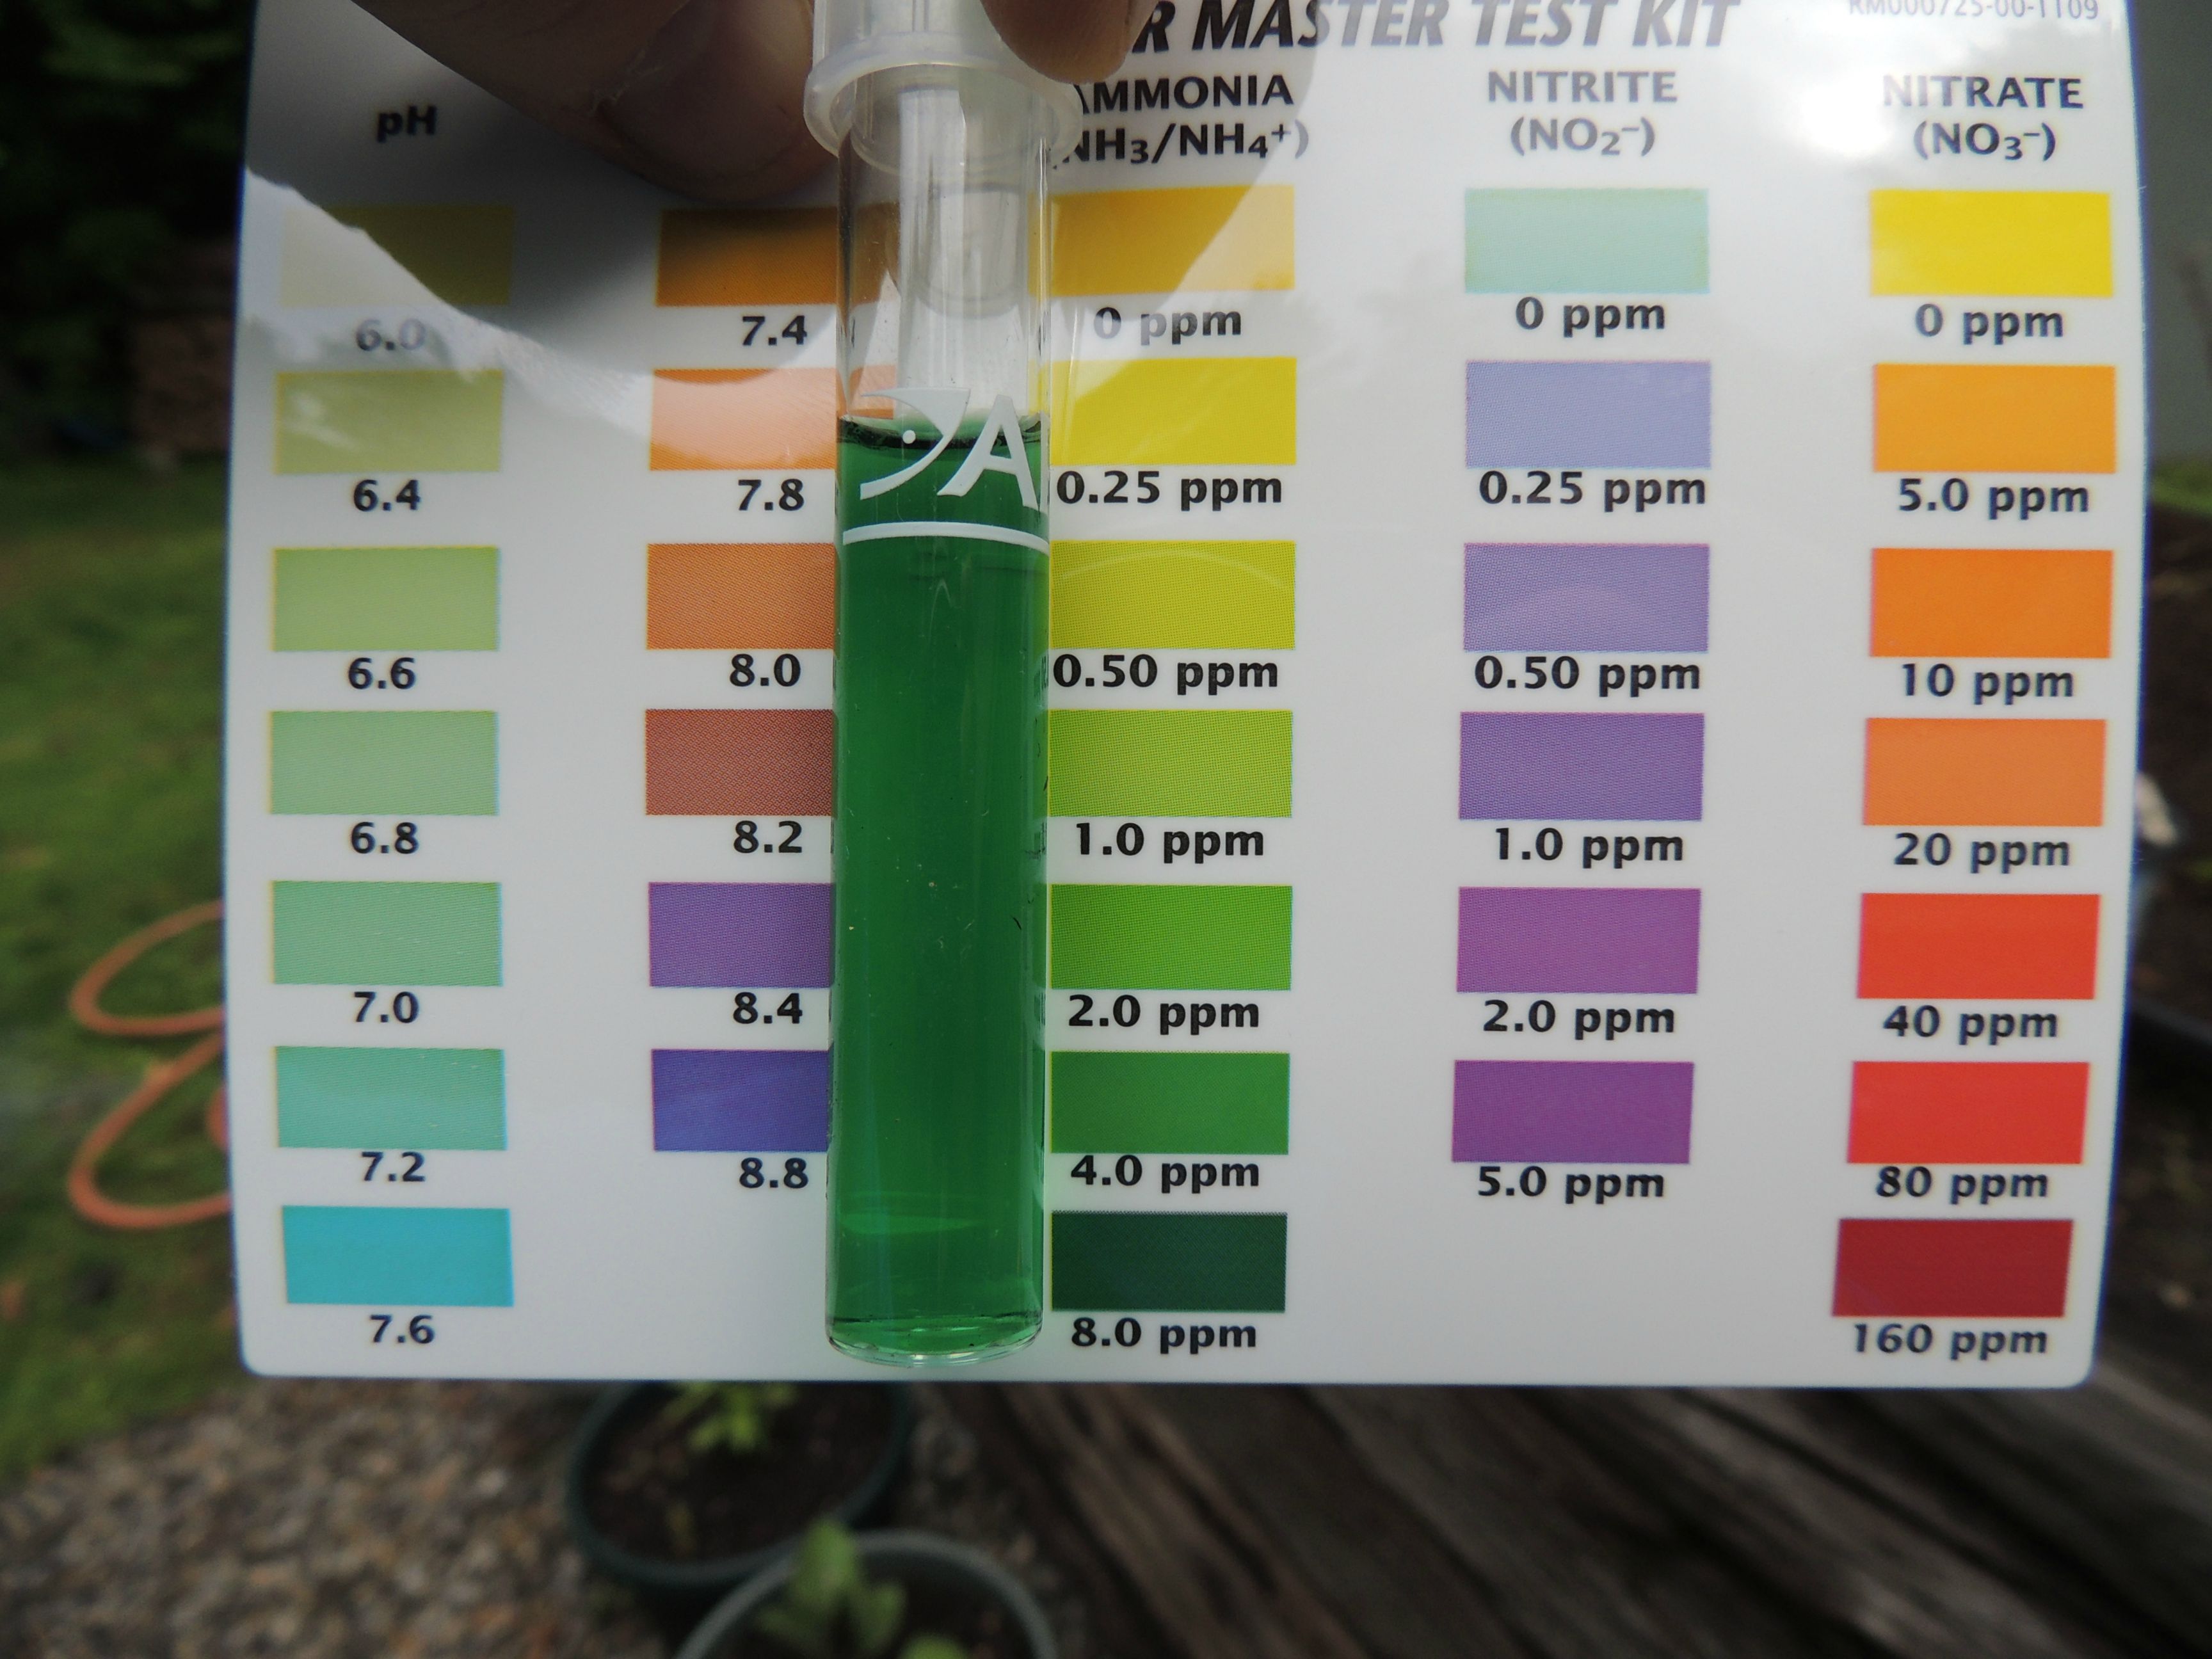
I will get some pictures up of the connected system which I plan on doing today. I did measure ammonia in the fish tank and it was a little higher than I'd like, around 4mg/L, but I am going to do a complete water change. Temperature shock should not be an issue since the well water is now at 52F and the fish tank has been in the 50's F. So I will be starting with fresh water throughout the system plus adding 1 ppt (part per thousand) of salt today and again tomorrow to get 2 ppt in the system as a prophylaxis against nitrite poisoning.
More to come.![[grin]](/xen/styles/default/xenforo/smilies.vb/041.gif "Grin [grin]")
Day 18
Please read this carefully since it does get a little complicated.
I measured the nitrite levels yesterday. We have had some rain over the last 3 days and my system is completely open to the air so one of my concerns is that it would cause some overflow and dilute the nitrite. The results were a nitrite level of zero:
This is great news, sort of. I know it didn't rain enough to do a complete change of the water, but my concern is that the nitrites were artificially lowered because of the rain. So I did the next logical test which was to check out the nitrates. These were and should still be off the charts since there is no way for the nitrates to get out of the system unless they too were diluted by rain and some overflow out of the sump tank. The water can overflow from the sump tank where the 2" PVC tubing comes into the sump tank from the grow bed. There is a 3" diameter hole but the PVC tubing is 2" and there is no seal around the PVC pipe so water can flow out at that level where it comes into the sump tank. None of the fish, however, are small enough to go through the opening.
So I measured the nitrate and while still present, it was not > 100mg/L.
The Sera test (first picture) shows around 37.5mg/L and the API test (it's hard to read in the picture) shows around 40mg/L. So both tests show approximately 40mg/L. This is good because it shows that the tests complement each other and this is very pleasing. 40mg/L is about 50% or less of what it should be since it was > 100mg/L.
Conclusion: If the nitrite was 5+mg/L on 05/28/14, then it should still be measurable on 05/31/2014. The fact that it is zero means that the bacteria did break at least half of it down to nitrate. We knew even on 05/28/2014 that we have Nitrobacter because we'd had positive nitrates.
Here is my dilemma: I see two main ways to proceed:
1) Drain the grow bed and sump tank and refill with water, and add ammonia (urea). Wait until this again goes through the cycle until all of it is transformed into nitrate. This ensures that I have a very healthy population of both Nitrosomonas and Nitrobacter. This would be the most prudent way of proceeding. However, I would have to cover both the grow bed and sump tank to make sure none of the water is diluted by more rain which is forecast in the next 5 days. If one of you were to ask me what to do next, this is what I would recommend. Our biggest concern is to provide the best environment for the fish so we should do everything we can to ensure their safety.
2) Drain the grow bed and sump tank, refill with fresh water, and connect it to the fish tank so the system starts running today. This has the advantage that I finally start running my system 06/01/14. I only have a limited number of months to run the system so I would like to get things started. I know I have a population of Nitrobacter because they did get rid of about half of the nitrites that were left. The fish burden is relatively modest. I can control ammonia by how much I feed the fish since they produce ammonia as waste. I can salt the system with NaCl which would protect the fish if there was a nitrite spike, of which I think there is a low risk.
While I would recommend #1 to any of you, especially if you live in the southern half of the U.S. and have year-round aquaponics available, I've decided to go with #2. I think that I have a deep and broad enough understanding of the principles of aquaponics that I can follow the levels of ammonia/nitrite/nitrate as I deem necessary to prevent a toxic environment from being established. Don't try this at home! But seriously, if I didn't think that I could personally do this safely enough for the fish, then I wouldn't do it.
I will get some pictures up of the connected system which I plan on doing today. I did measure ammonia in the fish tank and it was a little higher than I'd like, around 4mg/L, but I am going to do a complete water change. Temperature shock should not be an issue since the well water is now at 52F and the fish tank has been in the 50's F. So I will be starting with fresh water throughout the system plus adding 1 ppt (part per thousand) of salt today and again tomorrow to get 2 ppt in the system as a prophylaxis against nitrite poisoning.
More to come.
Last edited:
This is great! I would like to try to do this when I have a little more free time. Can all fish species be used?
This is great! I would like to try to do this when I have a little more free time. Can all fish species be used?
I will go into detail about that later. Since this thread was started with the northeast in mind, the fish species used are usually those available locally in lakes, ponds, rivers and streams. New Hampshire, and I presume all states, does not allow the live transport of fish except those on a bait list unless you possess an aquaculture permit specifically for those fish caught in the wild. In NH, it is $20 a year for a non-commercial license. I currently have channel catfish, brown bullhead catfish (hornpout), yellow perch, white perch, bluegill and sunfish that I can catch, possess and transport. You also, of course, need a fishing license to catch the fish in the first place.
In addition to the above fish, you could also try trout, but it is a difficult fish to raise due to the temperature requirements. Rainbow trout grow best at a water temperature of 64 F. They can survive at higher temperatures but they become sluggish due to the lower oxygen content of the water. The peak temperature in my system last year was 80 F!
Tilapia have the opposite problem. They grow best between 75 and 85 F, stop growing at 70, and die at 55 F. They're awesome if you're in Texas or Arizona, but not in the northeast unless you do it indoors or in a greenhouse.
The fish I would recommend the most are catfish species and yellow perch. I have found yellow perch to be extremely hardy fish. You wouldn't think so, but trust me that they are very tough. And believe me when I say I know how to kill fish!
This is some great stuff, C-4! You are very correct about yellow perch being a hardy breed. 8 years in the Upper Peninsula of MI taught me just how hardy they are.
This is some great stuff, C-4! You are very correct about yellow perch being a hardy breed. 8 years in the Upper Peninsula of MI taught me just how hardy they are.
I will hopefully post an update tomorrow. I'll cover the plants I've put in and go into the fish some more.
Day 51
We left off on 06/01/2014, a little more than 4 weeks ago, with the grow bed having gone through 18 days of cycling. This brought us to a point where I felt there was enough bacteria in the grow bed that the fish could now be added to the system. To summarize:
1) Fish produce ammonia as waste. They are also able to chemically combine ammonia with carbon dioxide in the liver to produce urea. However, many bacteria have the enzyme urease that will break down urea back into ammonia and carbon dioxide.
2) Ammonia is very toxic to fish and is disposed of by the fish in the surrounding water, either directly diffusing from the blood through the gills and into the water, or through urine (yes, fish do pee and have kidneys and a bladder!).
3) If the ammonia is not removed from the water, the fish will eventually die due to toxic levels of ammonia.
4) Ammonia can leave the water in two ways:
a) It can be absorbed directly by a living organism. For instance, in the natural environment, plants and photosynthetic bacteria can absorb ammonia directly through their roots or cell membranes respectively.
b) It can be transformed by bacteria into other, much less toxic compounds. Specifically, ammonia oxidized by certain bacterial species into the nitrite ion, and then other bacterial species convert the nitrite ion
into the nitrate ion.
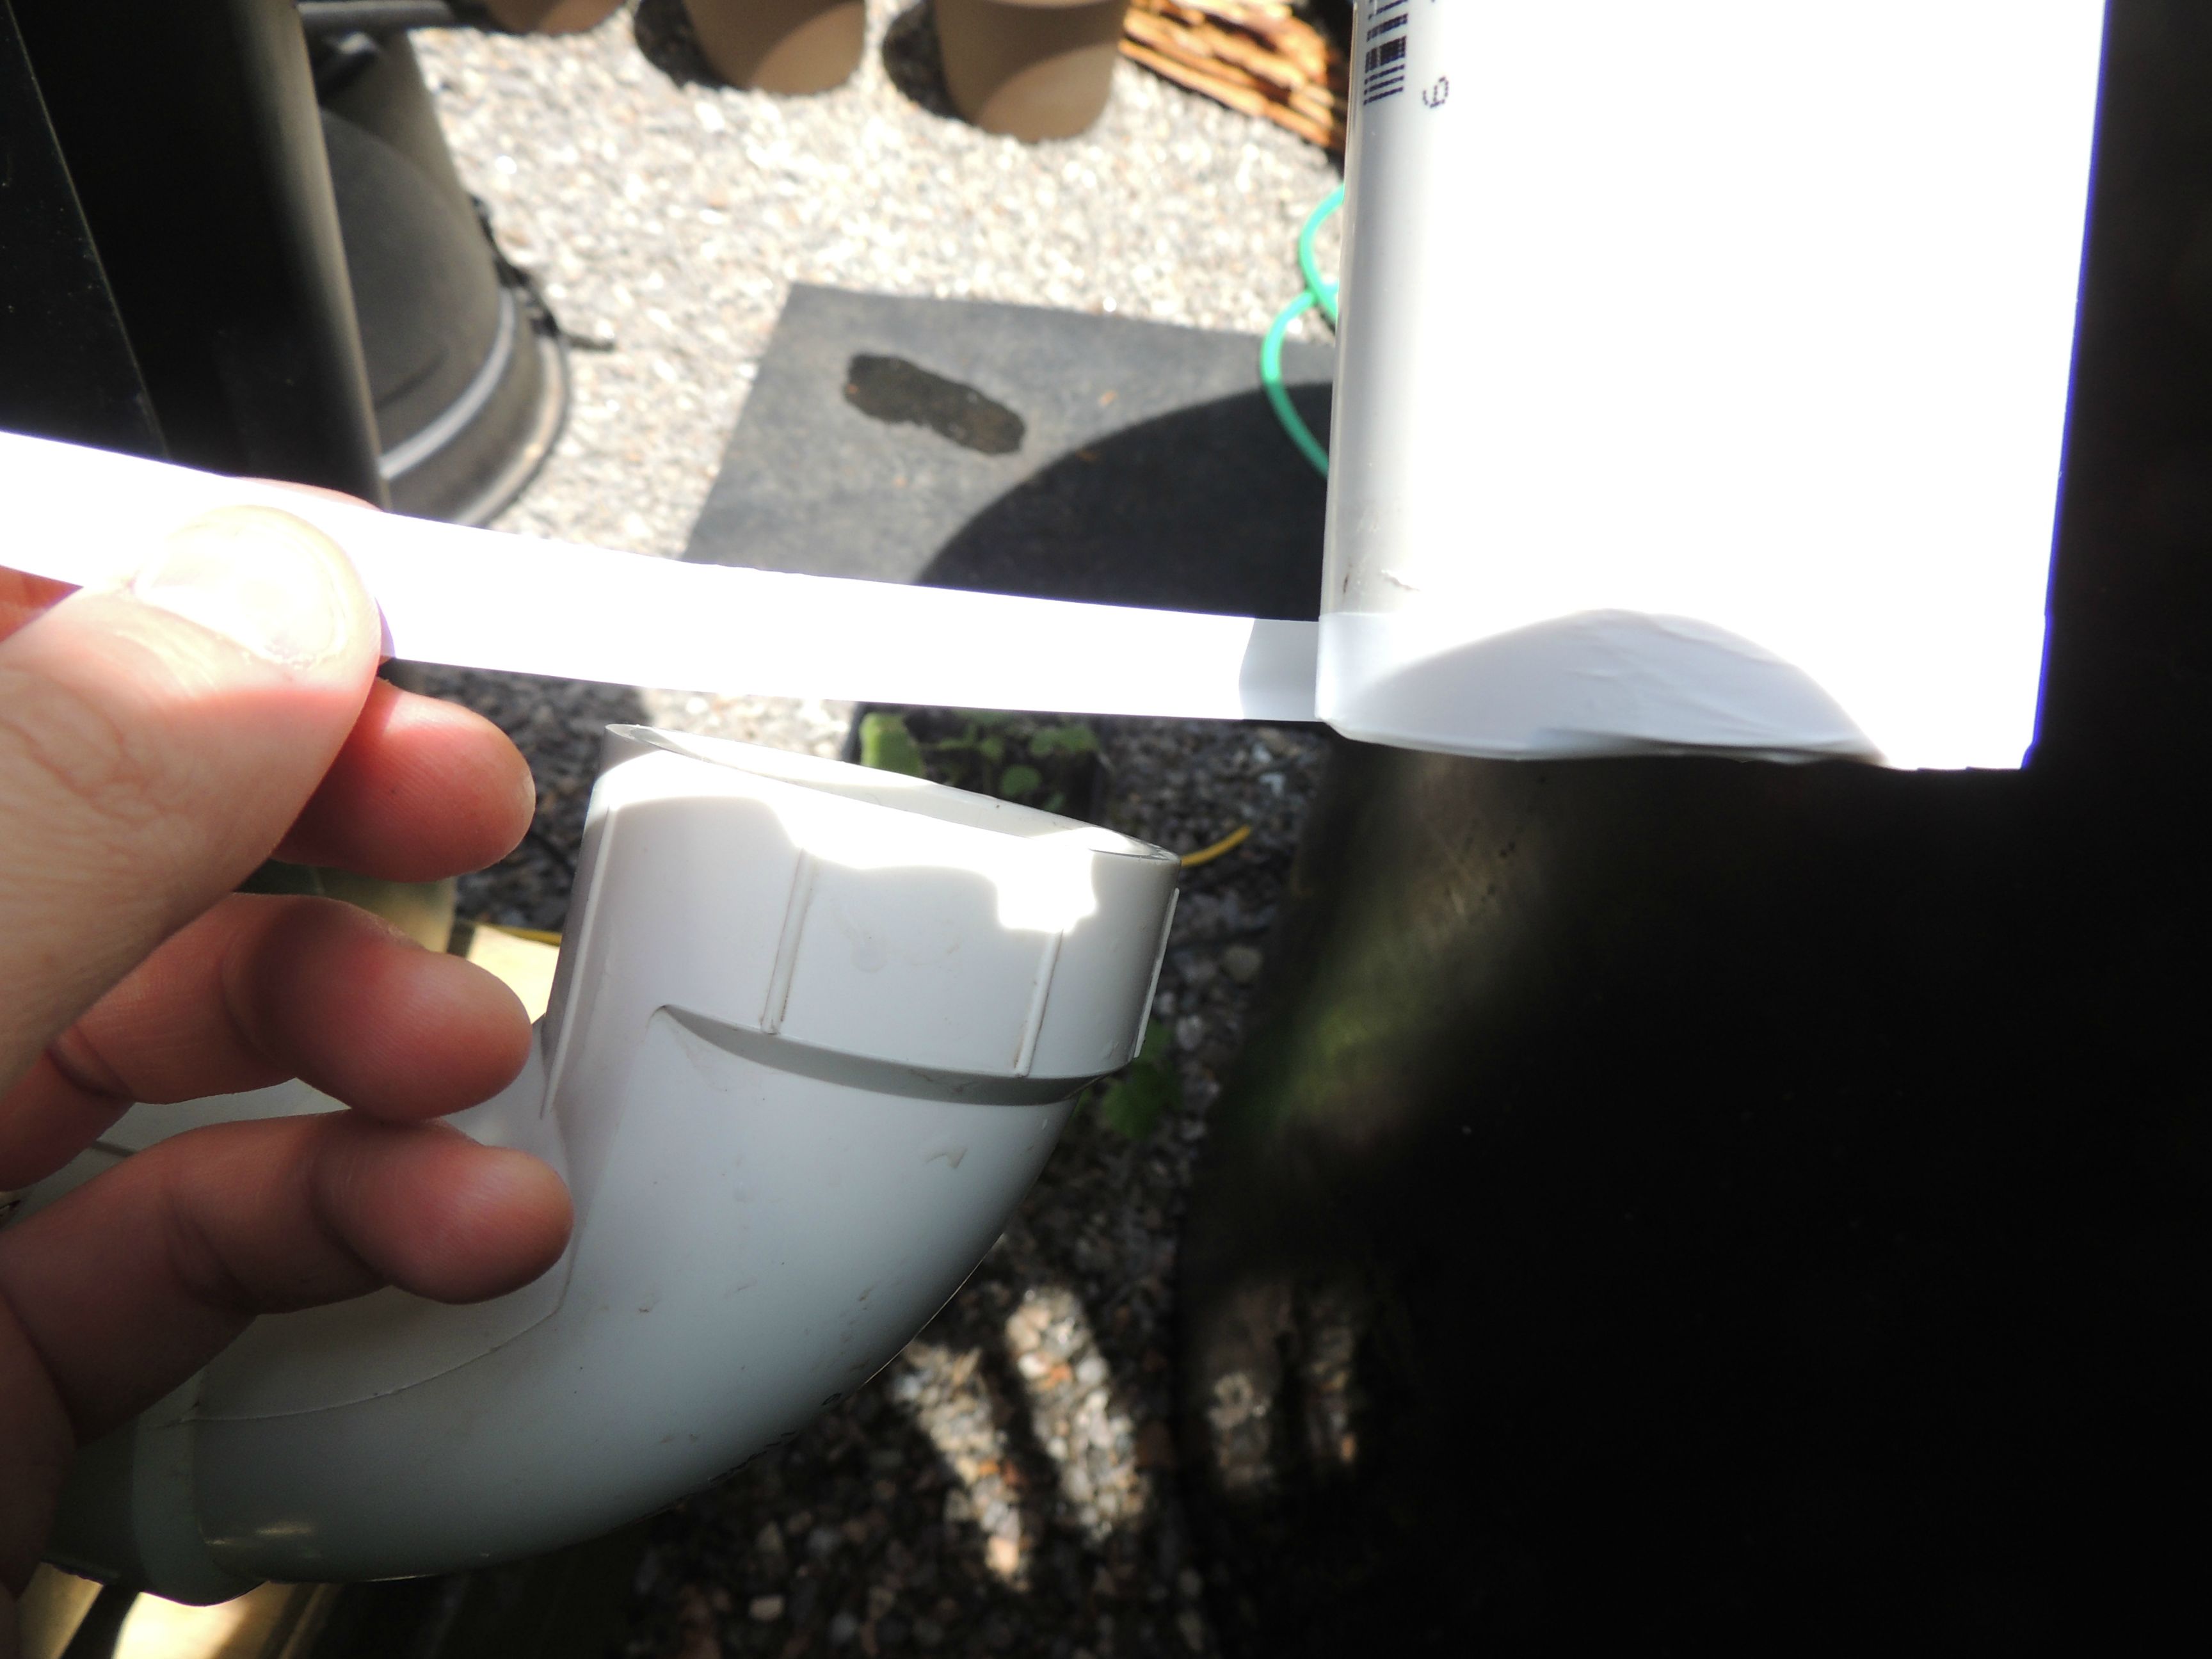
With enough bacteria on Day 18, I connected the fish tank to the grow bed and sump tank. Due to trying to save space, I did have to use 2 sweep 90 degree PVC joints..
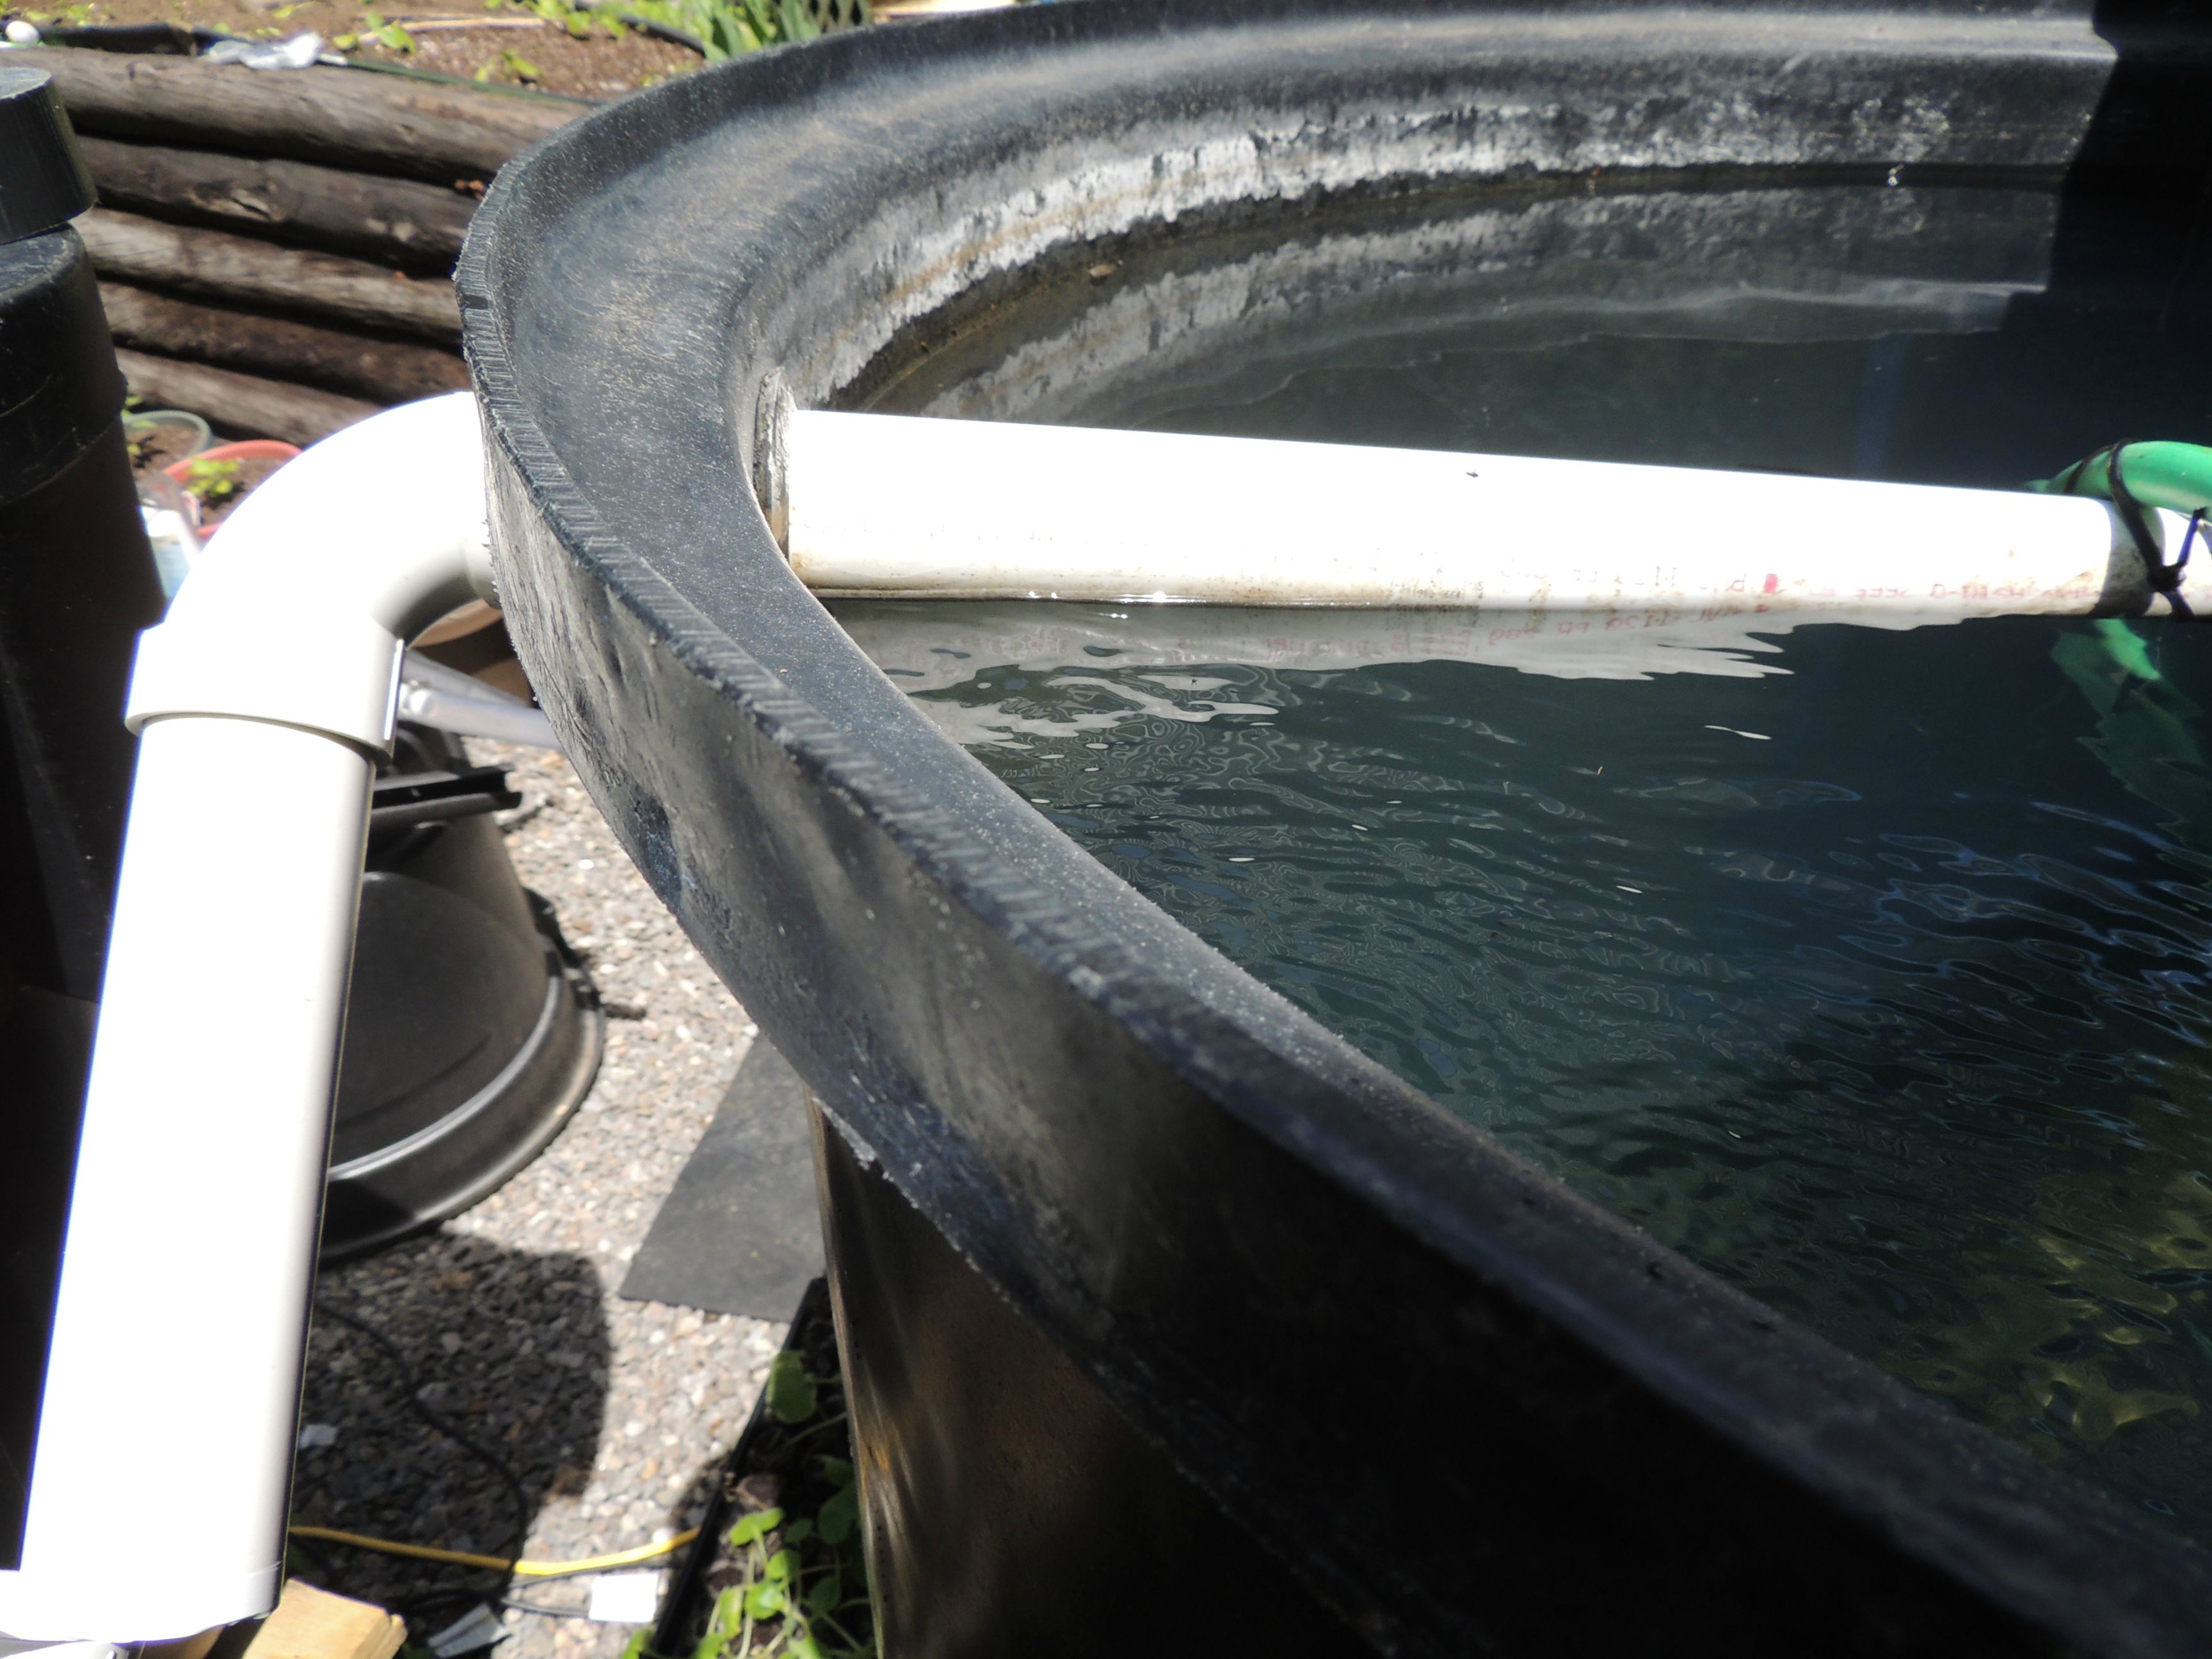
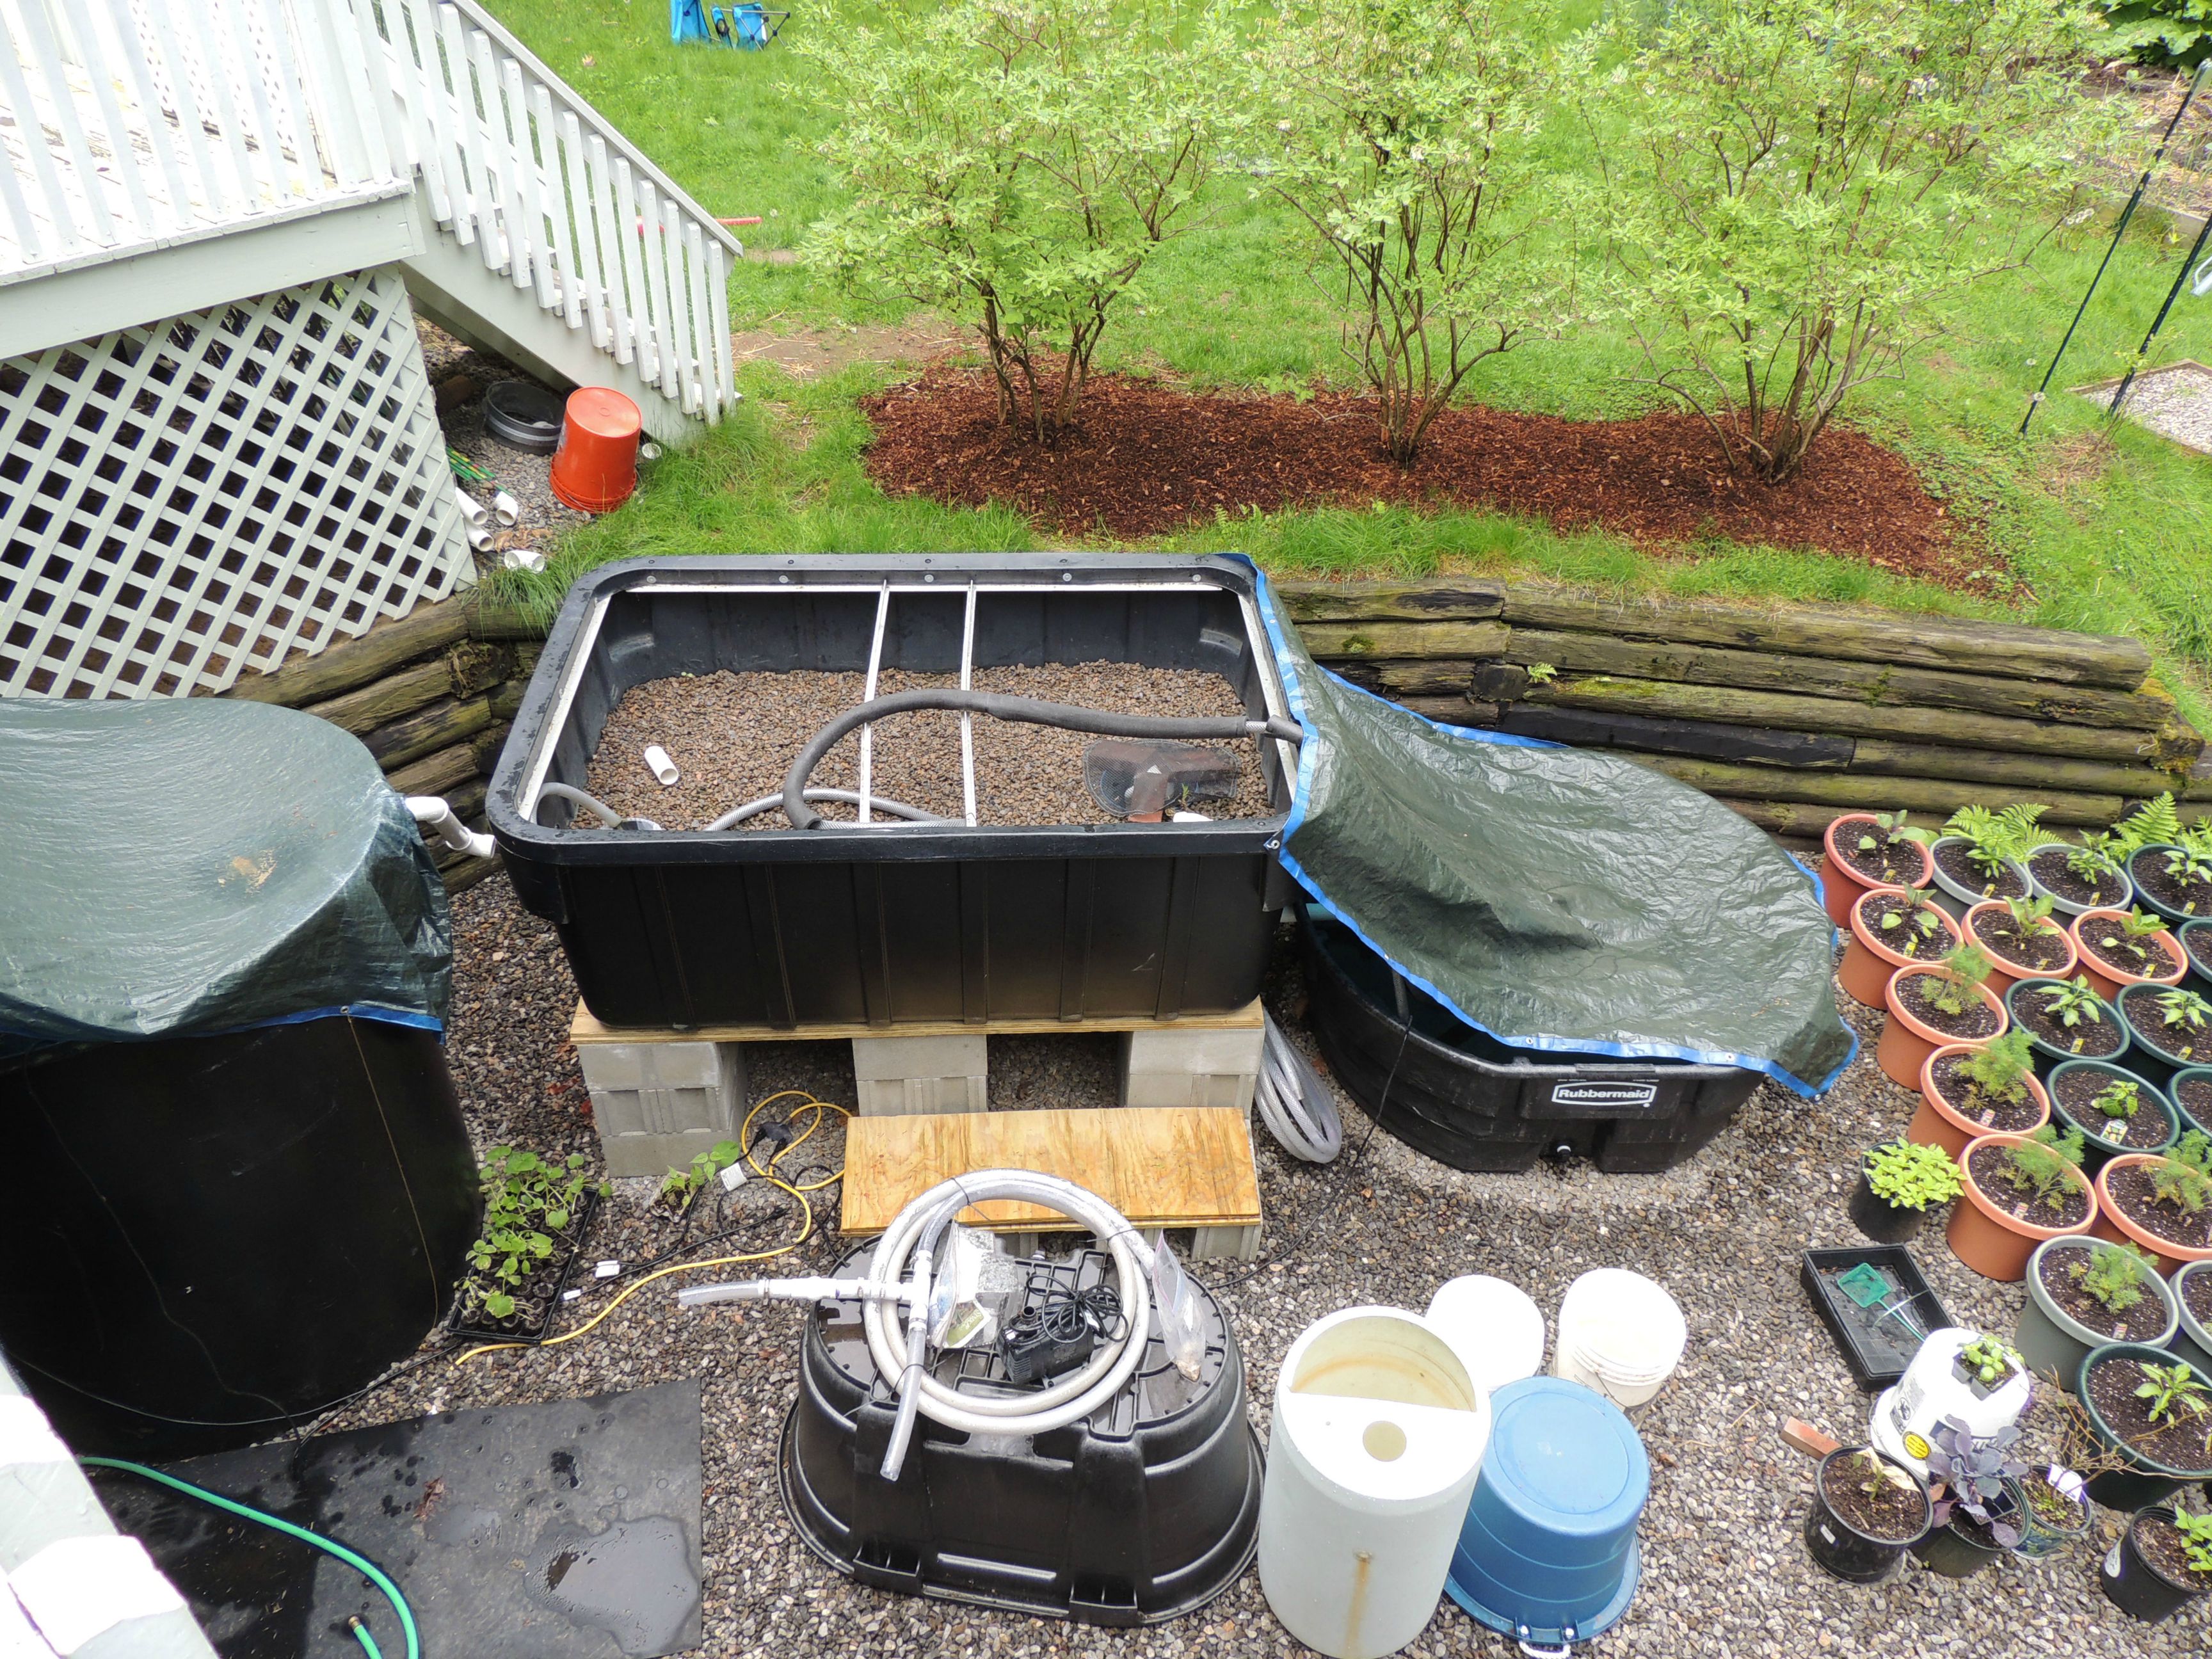
To recap, here is the set-up. On the left is the 550 gallon fish tank. In the middle is the grow bed filled with the expanded shale that is the matrix onto which the bacteria grow. On the right is the sump tank. Water will flow from the fish tank to the grow bed/expanded shale, and then to the sump tank. The only pump in the system is in the sump tank since water will flow by gravity from the fish tank to the grow bed, and from the grow bed to the sump tank. There is the additional Automatic Bell Siphon portion, but that is still emptying the grow bed into the sump tank by gravity.

The fish tank is on the right (photo is from other side of tank than above photo). The 2" PVC pipe goes through the side wall of the fish tank through a rubber bulkhead fitting so it is sealed and no water gets around the pipe.
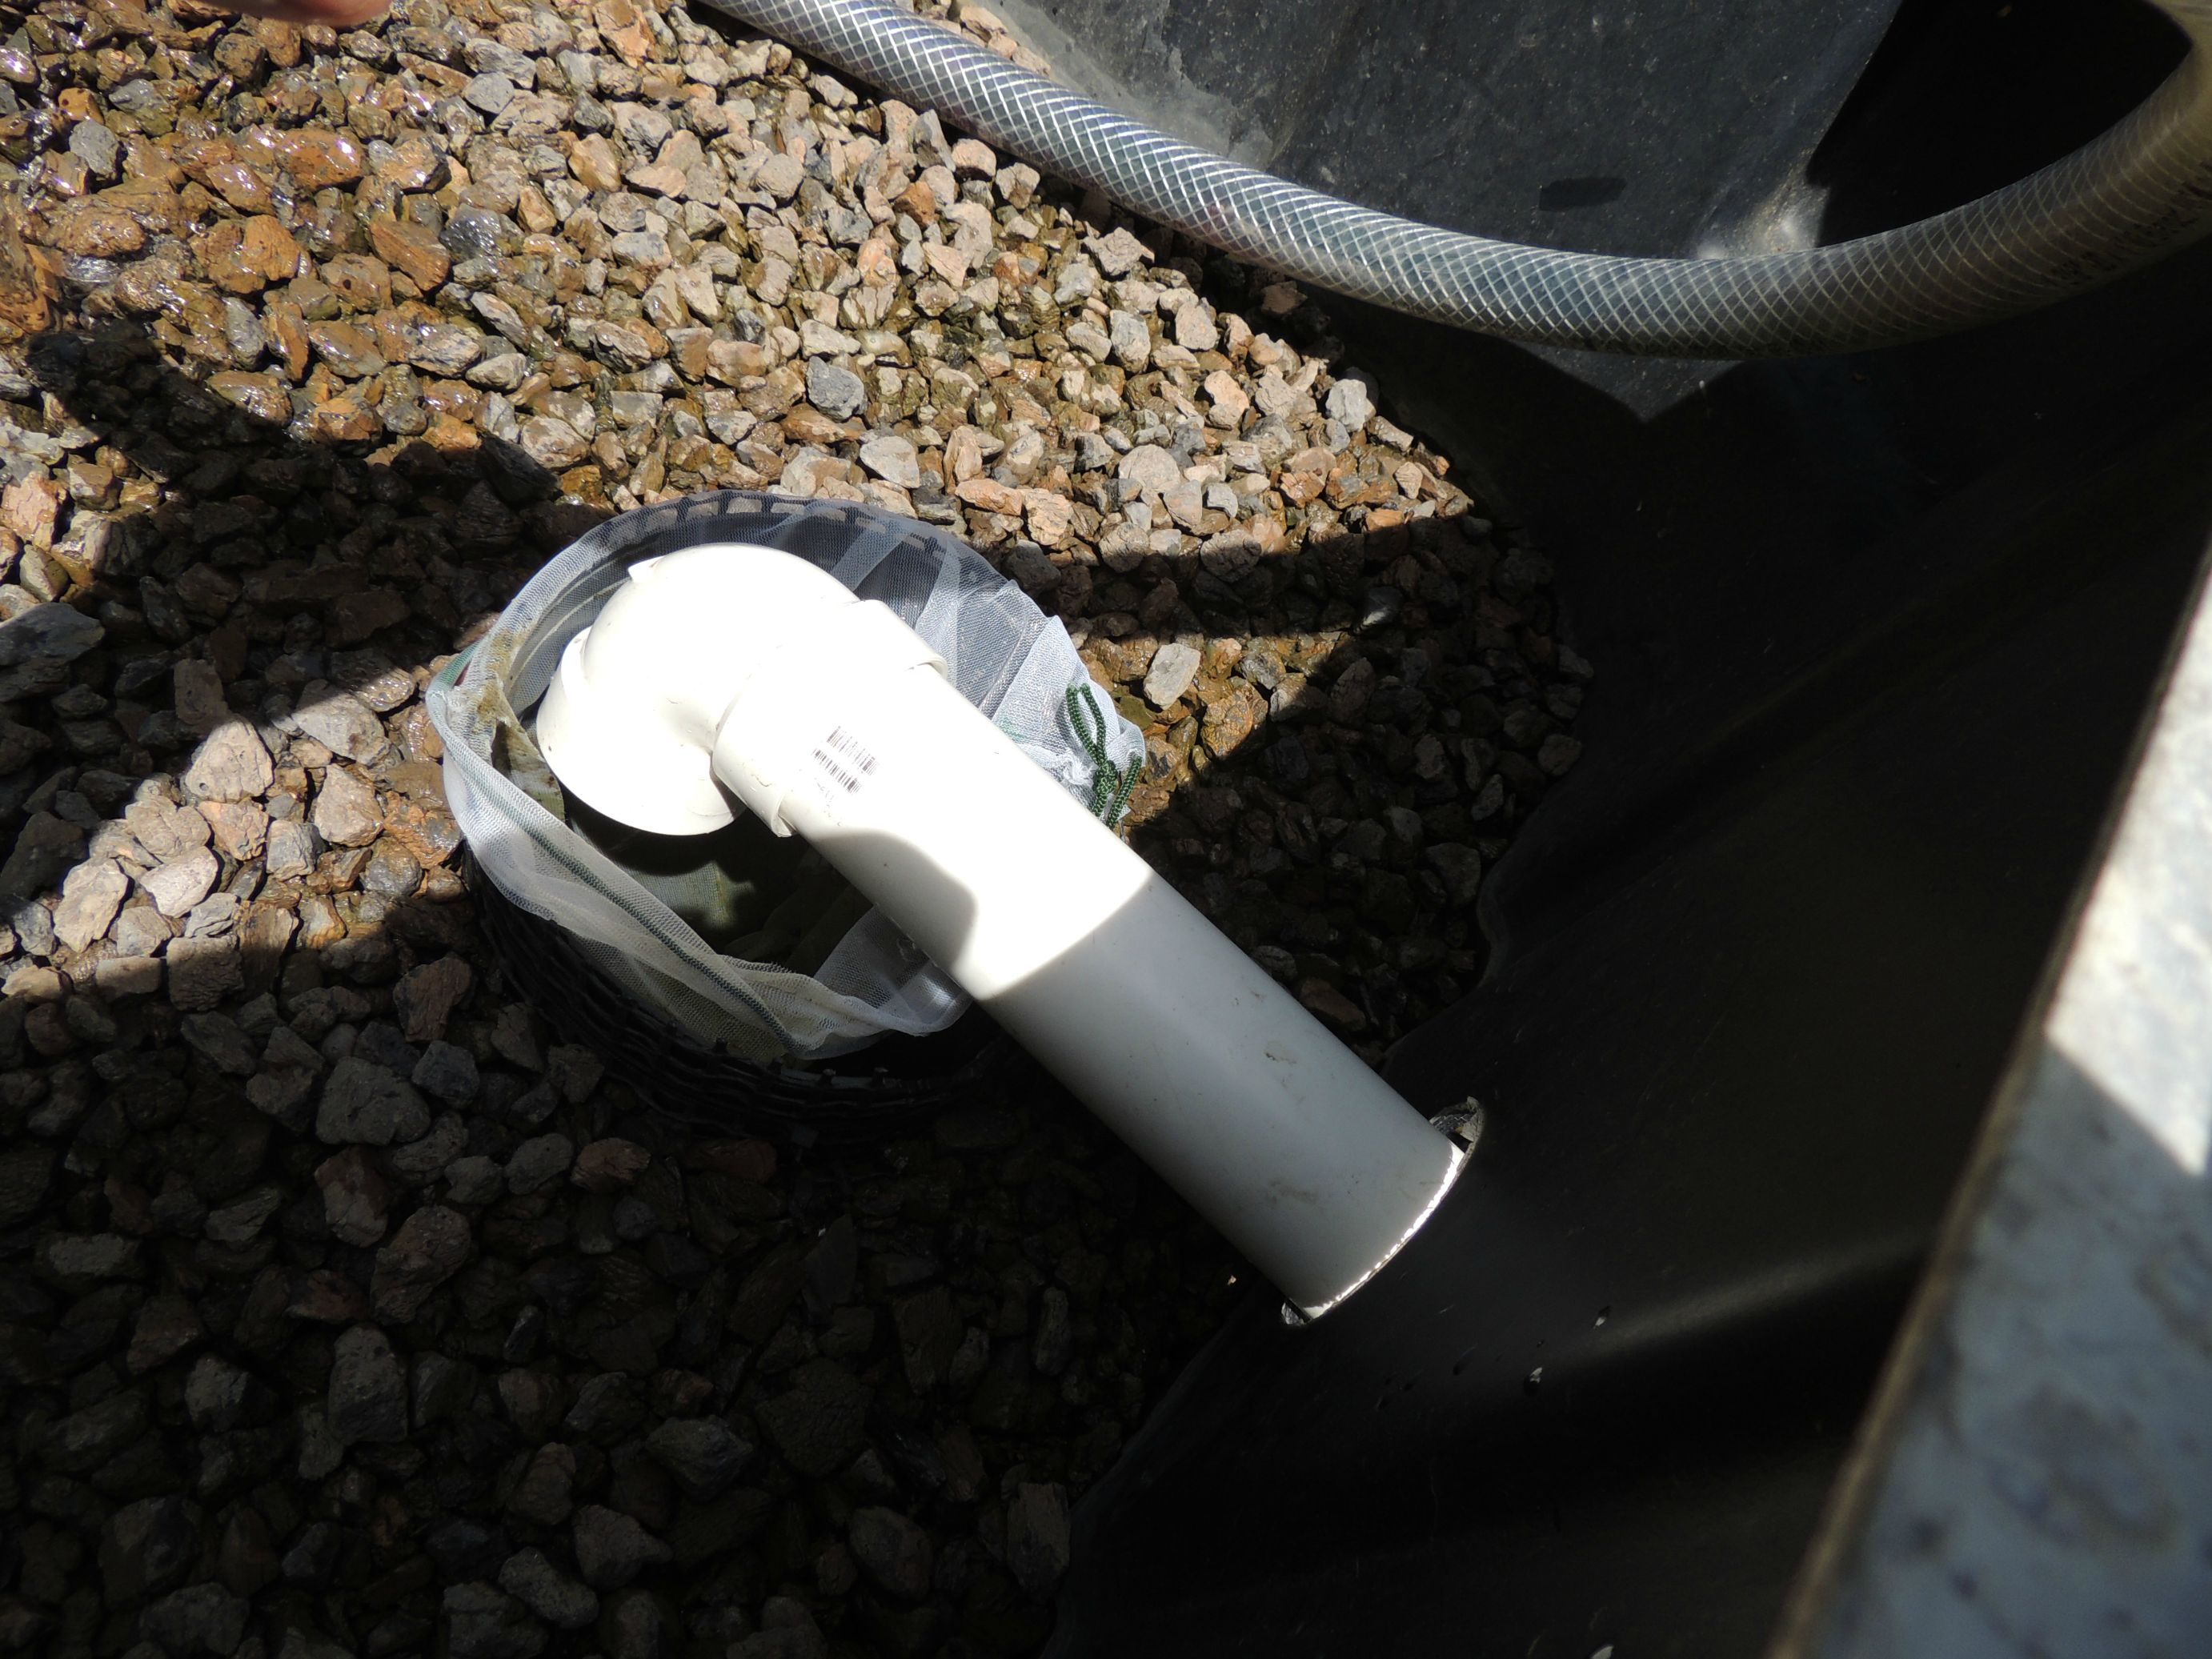
This is where the PVC pipe goes through the side wall of the grow bed. Here, no rubber bulkhead fitting is required since the water level never rises above the PVC pipe.
On the right is the 550 gallon fish tank. On the left is the grow bed. This is what the joints looked connected:
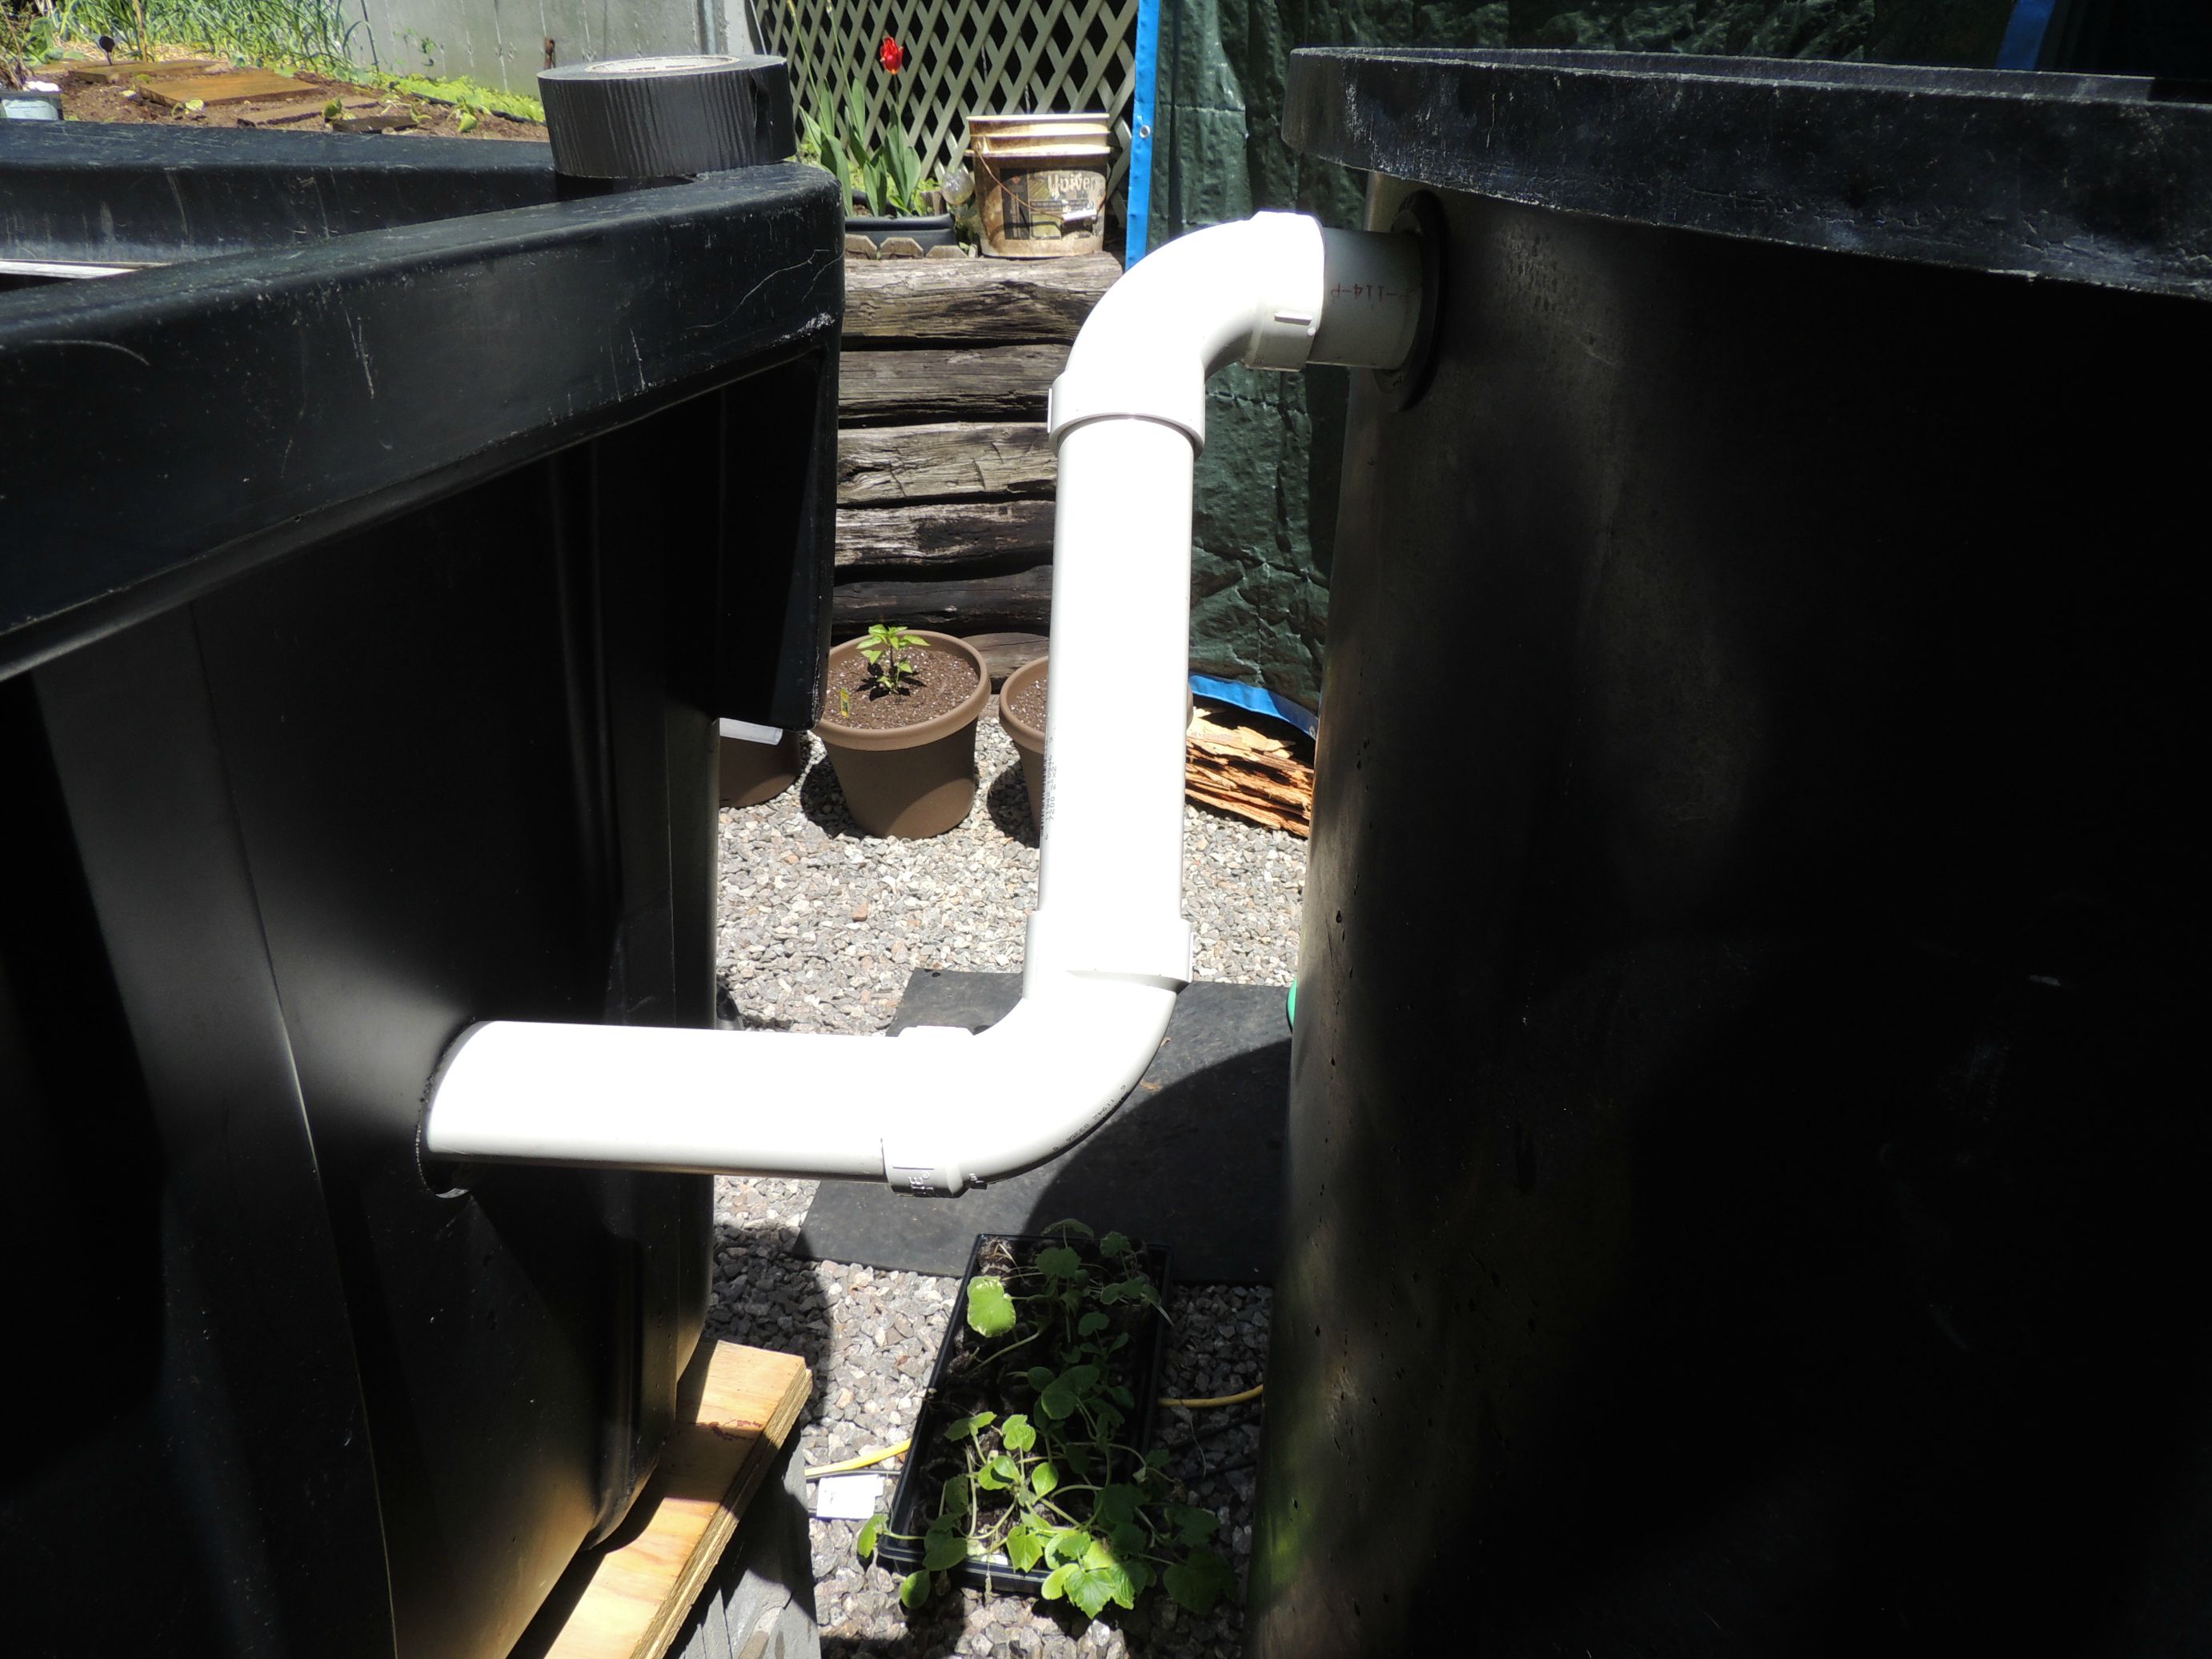
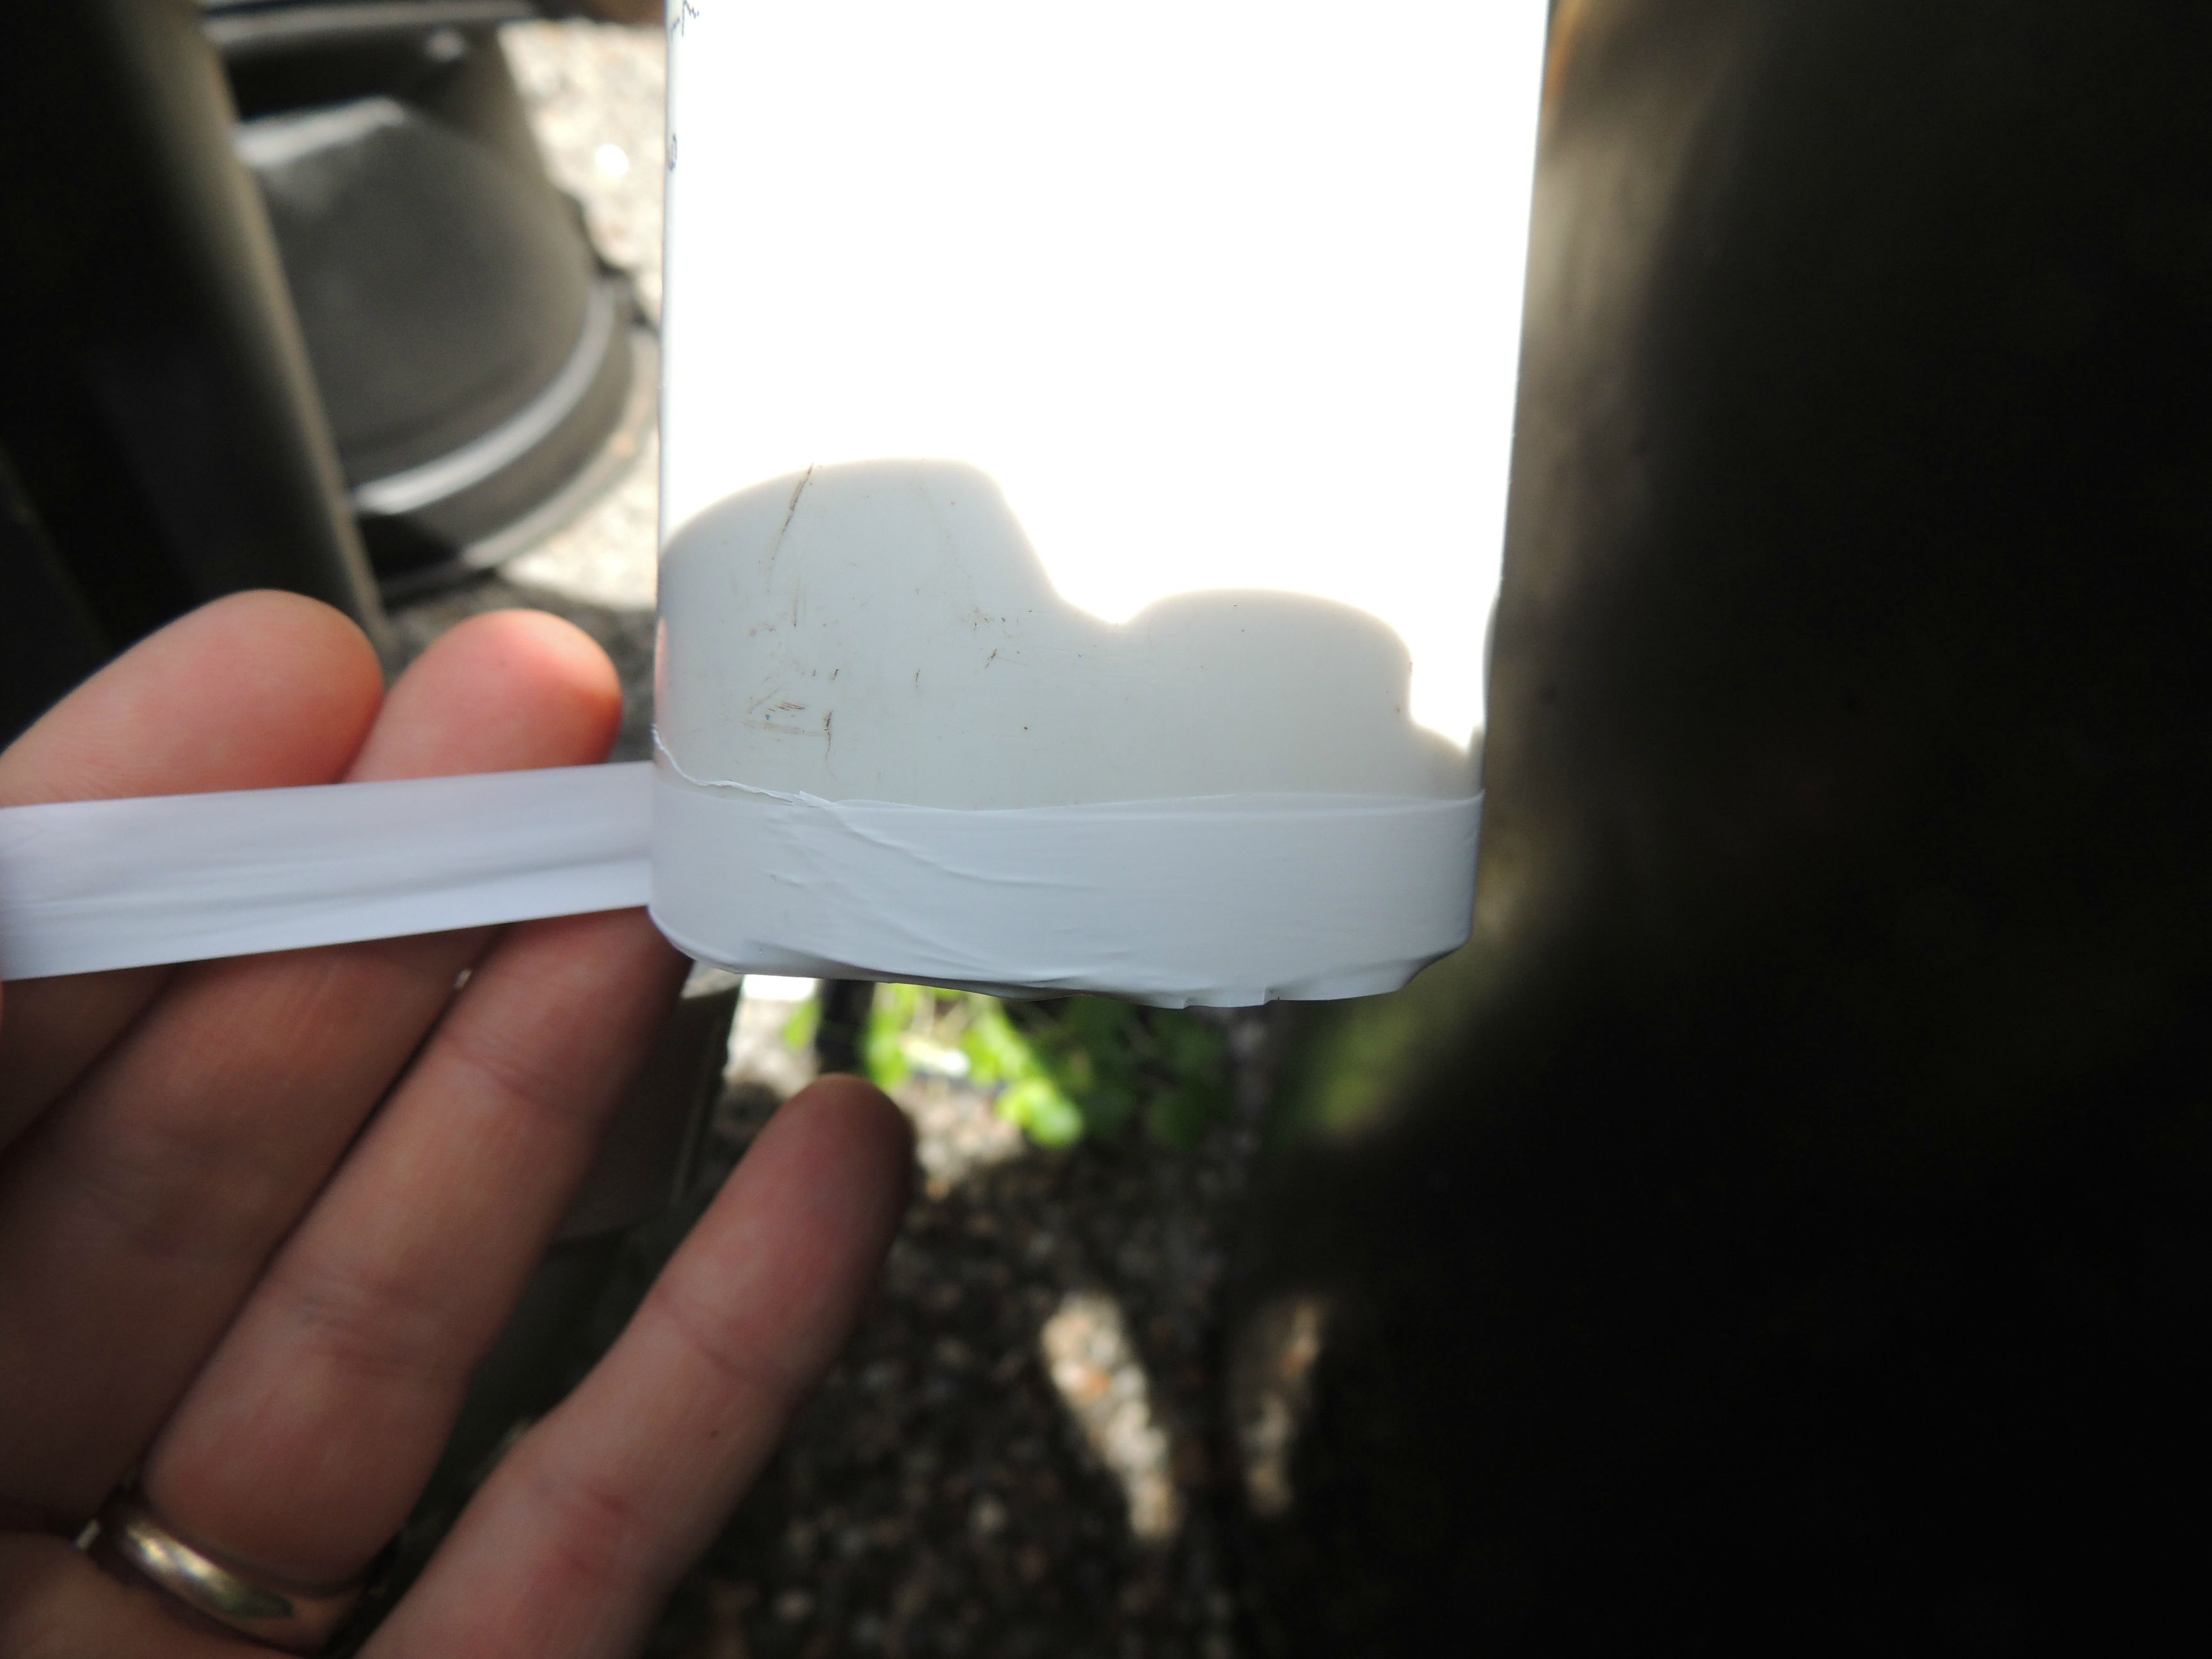
I'm not a plumber, so please don't judge this too harshly. The water is circulating from the sump tank into the fish tank. From the fish tank, it flows under no pressure through the two 90 degree joints above into the grow bed. Since it's not under pressure, I wrapped the 2" PVC tubing with Teflon tape and then press-fit the pieces together. I also did wrap some duct tape around each joint to further secure it.
So we now have the fish tank connected as pictured below. The 1 1/4" internal diameter tubing from the sump tank is still pictured in the grow bed, but I then ran it all the way to the fish tank. You can see some black foam pipe insulation. This is to prevent algae from growing on the inside of the tubing. Algae needs light. I will touch on this a little later as it's important to keep as much light from hitting the water as possible or you can get an algae bloom. However, colonies of bacteria will still cover the inside of the tubing since they don't need sunlight.
This isn't a great photo, but you can see the submersible pond pump on the left side of this photo. Flow rate is dependent on how much higher you place the outflow tubing. In this case, the flow out of the tubing is about 10 gallons a minute or about 600 gallons an hour. I'll touch on this flow rate later as it is a very important value when it comes to adequately biologically filtering the water.
I want to briefly go over the design of the outflow from the fish tank. This photo is from 2 years ago showing the top of the fish tank. It doesn't look exactly like this today but I had this photo already. the water from the sump tank enters the fish tank from the sump tank. The outflow is slightly more complicated by design. There is a 2" PVC pipe that extends from about 3" from the bottom of the tank all the way up to a T-junction at the surface. This is also referred to as a "stand pipe". The outflow at the bottom of the pipe is covered with a 1/2" plastic mesh to prevent fish from entering the 2" PVC pipe, but to allow fish waste up the pipe. Once at the top, the pipe turns 90 degrees and exits out the fish tank into the grow bed. The purpose of the T-junction which is open at the top is to act as an alternate path for the water to exit should the 1/2" mesh at the bottom of the stand pipe become clogged. What happens is the water level rises about 3/4" and then overflows into the top of the T-junction. In the 3 years I've done this, I've never had the outflow become clogged at the bottom of the tank, but it's good insurance just to be safe.
To summarize what we've gone over so far today:
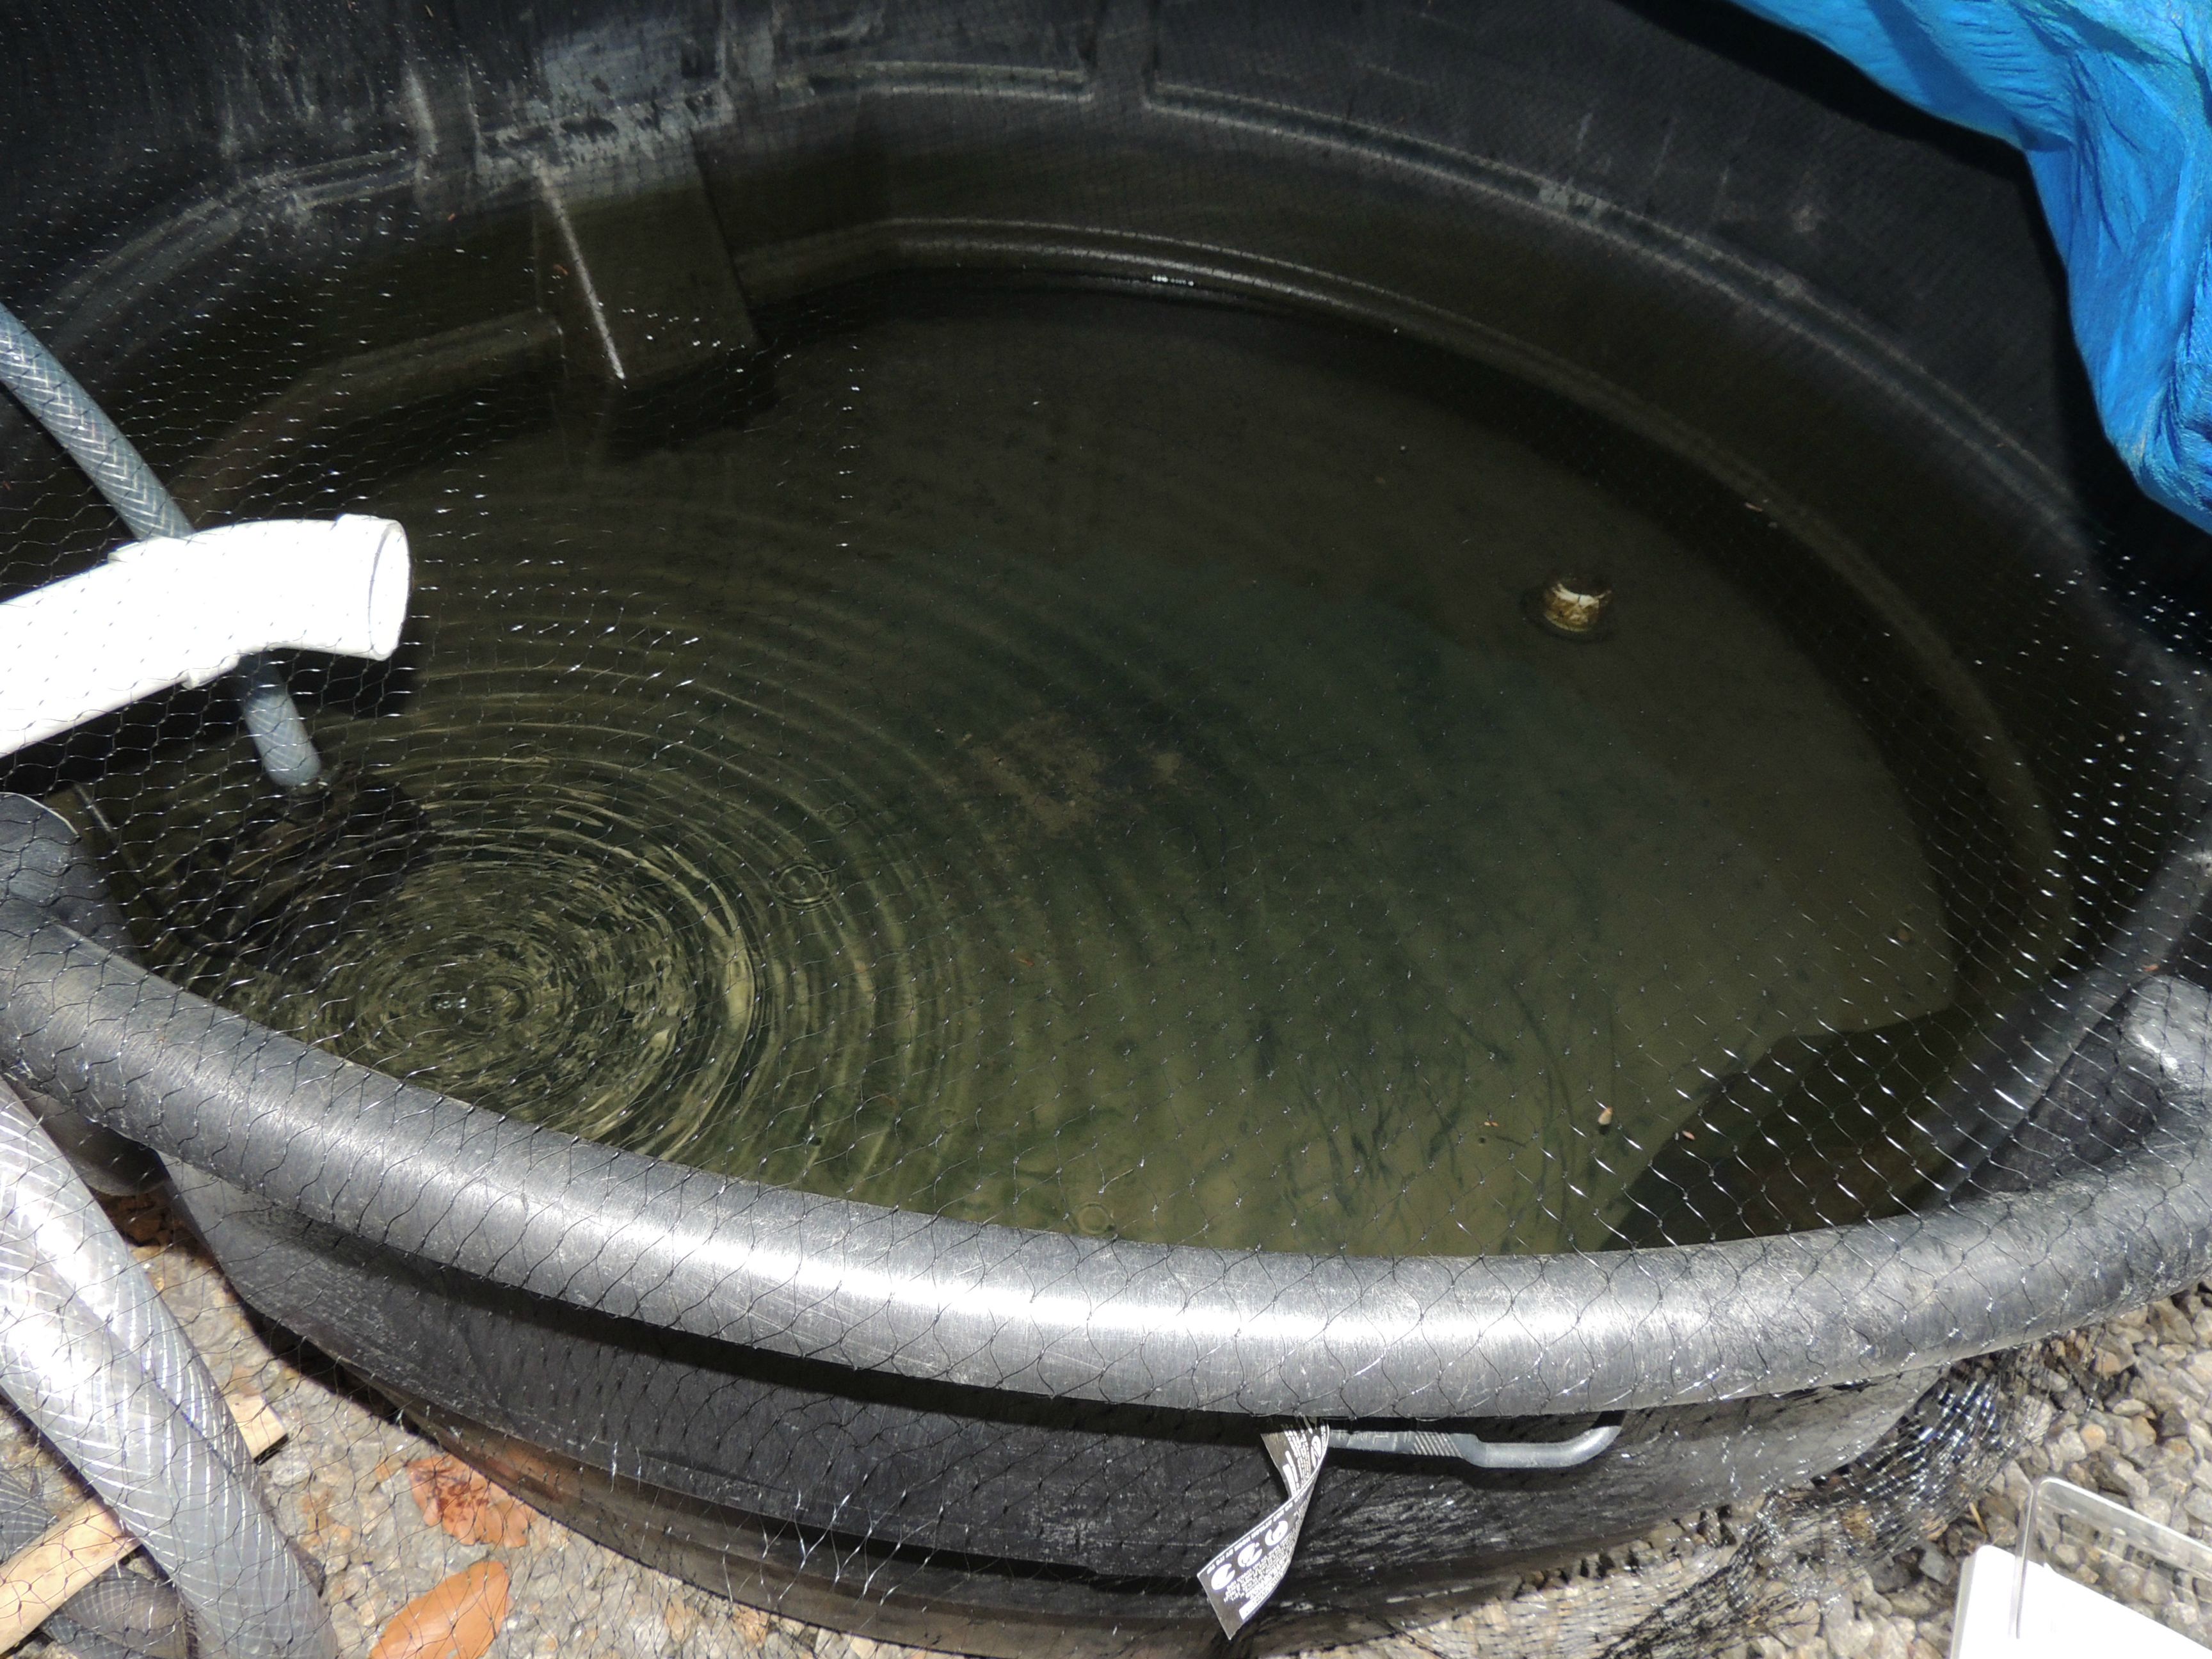
1) The sump tank is at the lowest point in our system. It is a 300 gallon tank but fills to about 225+ gallons of water given that the inflow pipe is about 6" or so down from the top of the container. This contains a submersible pond pump that sends water out through a 1 1/4" tubing all the way to the fish tank.
2) The water enters the fish tank at the top. This forces water at the bottom of the tank up the stand pipe and out the side of the tank into the grow bed.
3) From the grow bed, the water level rises until it triggers the Automatic Bell Siphon which then proceeds to empty the water from the grow bed into the sump tank.
4) The set-up now allows for the water to be treated by the bacteria in the grow bed so that all the ammonia is converted to nitrite and then nitrate.
My next post will discuss the role of plants in removing nitrate from the water ie. the 'second half' of an aquaponics system. Here is a teaser:

Stay tuned.
We left off on 06/01/2014, a little more than 4 weeks ago, with the grow bed having gone through 18 days of cycling. This brought us to a point where I felt there was enough bacteria in the grow bed that the fish could now be added to the system. To summarize:
1) Fish produce ammonia as waste. They are also able to chemically combine ammonia with carbon dioxide in the liver to produce urea. However, many bacteria have the enzyme urease that will break down urea back into ammonia and carbon dioxide.
2) Ammonia is very toxic to fish and is disposed of by the fish in the surrounding water, either directly diffusing from the blood through the gills and into the water, or through urine (yes, fish do pee and have kidneys and a bladder!).
3) If the ammonia is not removed from the water, the fish will eventually die due to toxic levels of ammonia.
4) Ammonia can leave the water in two ways:
a) It can be absorbed directly by a living organism. For instance, in the natural environment, plants and photosynthetic bacteria can absorb ammonia directly through their roots or cell membranes respectively.
b) It can be transformed by bacteria into other, much less toxic compounds. Specifically, ammonia oxidized by certain bacterial species into the nitrite ion, and then other bacterial species convert the nitrite ion
into the nitrate ion.
With enough bacteria on Day 18, I connected the fish tank to the grow bed and sump tank. Due to trying to save space, I did have to use 2 sweep 90 degree PVC joints..
To recap, here is the set-up. On the left is the 550 gallon fish tank. In the middle is the grow bed filled with the expanded shale that is the matrix onto which the bacteria grow. On the right is the sump tank. Water will flow from the fish tank to the grow bed/expanded shale, and then to the sump tank. The only pump in the system is in the sump tank since water will flow by gravity from the fish tank to the grow bed, and from the grow bed to the sump tank. There is the additional Automatic Bell Siphon portion, but that is still emptying the grow bed into the sump tank by gravity.
The fish tank is on the right (photo is from other side of tank than above photo). The 2" PVC pipe goes through the side wall of the fish tank through a rubber bulkhead fitting so it is sealed and no water gets around the pipe.
This is where the PVC pipe goes through the side wall of the grow bed. Here, no rubber bulkhead fitting is required since the water level never rises above the PVC pipe.
On the right is the 550 gallon fish tank. On the left is the grow bed. This is what the joints looked connected:
I'm not a plumber, so please don't judge this too harshly. The water is circulating from the sump tank into the fish tank. From the fish tank, it flows under no pressure through the two 90 degree joints above into the grow bed. Since it's not under pressure, I wrapped the 2" PVC tubing with Teflon tape and then press-fit the pieces together. I also did wrap some duct tape around each joint to further secure it.
So we now have the fish tank connected as pictured below. The 1 1/4" internal diameter tubing from the sump tank is still pictured in the grow bed, but I then ran it all the way to the fish tank. You can see some black foam pipe insulation. This is to prevent algae from growing on the inside of the tubing. Algae needs light. I will touch on this a little later as it's important to keep as much light from hitting the water as possible or you can get an algae bloom. However, colonies of bacteria will still cover the inside of the tubing since they don't need sunlight.
This isn't a great photo, but you can see the submersible pond pump on the left side of this photo. Flow rate is dependent on how much higher you place the outflow tubing. In this case, the flow out of the tubing is about 10 gallons a minute or about 600 gallons an hour. I'll touch on this flow rate later as it is a very important value when it comes to adequately biologically filtering the water.
I want to briefly go over the design of the outflow from the fish tank. This photo is from 2 years ago showing the top of the fish tank. It doesn't look exactly like this today but I had this photo already. the water from the sump tank enters the fish tank from the sump tank. The outflow is slightly more complicated by design. There is a 2" PVC pipe that extends from about 3" from the bottom of the tank all the way up to a T-junction at the surface. This is also referred to as a "stand pipe". The outflow at the bottom of the pipe is covered with a 1/2" plastic mesh to prevent fish from entering the 2" PVC pipe, but to allow fish waste up the pipe. Once at the top, the pipe turns 90 degrees and exits out the fish tank into the grow bed. The purpose of the T-junction which is open at the top is to act as an alternate path for the water to exit should the 1/2" mesh at the bottom of the stand pipe become clogged. What happens is the water level rises about 3/4" and then overflows into the top of the T-junction. In the 3 years I've done this, I've never had the outflow become clogged at the bottom of the tank, but it's good insurance just to be safe.
To summarize what we've gone over so far today:
1) The sump tank is at the lowest point in our system. It is a 300 gallon tank but fills to about 225+ gallons of water given that the inflow pipe is about 6" or so down from the top of the container. This contains a submersible pond pump that sends water out through a 1 1/4" tubing all the way to the fish tank.
2) The water enters the fish tank at the top. This forces water at the bottom of the tank up the stand pipe and out the side of the tank into the grow bed.
3) From the grow bed, the water level rises until it triggers the Automatic Bell Siphon which then proceeds to empty the water from the grow bed into the sump tank.
4) The set-up now allows for the water to be treated by the bacteria in the grow bed so that all the ammonia is converted to nitrite and then nitrate.
My next post will discuss the role of plants in removing nitrate from the water ie. the 'second half' of an aquaponics system. Here is a teaser:
Stay tuned.
Last edited:
- Joined
- May 13, 2014
- Messages
- 4
- Likes
- 0
Nice job, C-4!
And don't worry about the plumbing, it looks good. I will say that teflon tape is both a sealant and a dry lubricant, so your pipes and fittings will be easier to remove later on.
This all looks very good, maybe one of these days I can get by to have a look at it, once your schedule calms down a bit.
Wow, that's pretty freakin awesome!
Good Job!
Good Job!
Let me summarize where we left off:
1) The expanded shale in the grow bed had enough of a bacterial population that we could add fish to the system and be assured that any ammonia produced by the fish would be converted to nitrate.
2) The bacterial species that perform this conversion include the Nitrosomonas that converts ammonia into nitrite, and then Nitrobacter that converts nitrite to nitrate. The bacteria does this as a source of energy, using oxygen from the atmosphere to oxidize ammonia to nitrite and nitrate. Since these bacteria use inorganic substances as a source of energy, they are called autotrophes. This is referred to as chemosynthesis as opposed to autotrophic plants and algae which perform photosyntesis.
However, we are now posed with a dilemma: How do we remove nitrate from the water? Do we even need to remove nitrate from the water? The answer lies in trying to recreate as natural an environment as we can for the fish. In nature, nitrate levels are typically very low, usually less than 20mg/Liter, and more often less than 10mg/L. My well water which is the source of the water for the aquaponics system doesn't contain enough nitrate to register on my testing kit.
While nitrate is far less toxic than ammonia or nitrite, it can reach toxic levels if there is nothing removing it from your aquaponics system. The two methods that are used to remove it are:
1) Water changes. This is why aquarium hobbyists do partial water changes in their aquariums, maybe 20% of the water per week. Obviously, the amount of water change can vary depending on how heavily the fish are fed, and how many fish/weight of fish there is. The more feeding, the more ammonia is produced from the metabolism of protein in the feed, the more ammonia is released by the fish into the water, and the more nitrate is produced from the bacteria converting the ammonia to nitrate. While many aquarium hobbyists keep a certain amount of plants in their aquarium, it usually grossly insufficient to keep the ammonia levels down unless you were to keep few small fish and a large amount of plants. It would also be critical to have enough light for the plants to grow and stay healthy. While there is a role for water changes in an aquaponics system, it is much more ideal to keep enough plants in your system to absorb enough nitrate from the water to keep the level low. Ideally, this is below 40mg/L but this can be difficult to maintain.
2) The second method to remove nitrate from the water is using plants growing in the grow bed. Plants need nitrogen to manufacture proteins and other substances. Plants cannot capture nitrogen from the atmosphere and must rely on naturally occurring nitrogen such as from lightening (nitrogen oxides formed when oxygen and nitrogen in the atmosphere react at high heat), bacteria that can capture or "fix" atmospheric nitrogen gas to ammonia, etc. The process of turning atmospheric nitrogen into ammonia is called "fixing nitrogen" because you are taking the relatively inert nitrogen gas and converting it into ammonia or the ammonium ion that can then be used by the plant. Most plants actually prefer to absorb their nitrogen in the form of nitrate, but they also have ammonia transporters that can absorb ammonia also directly from the water.
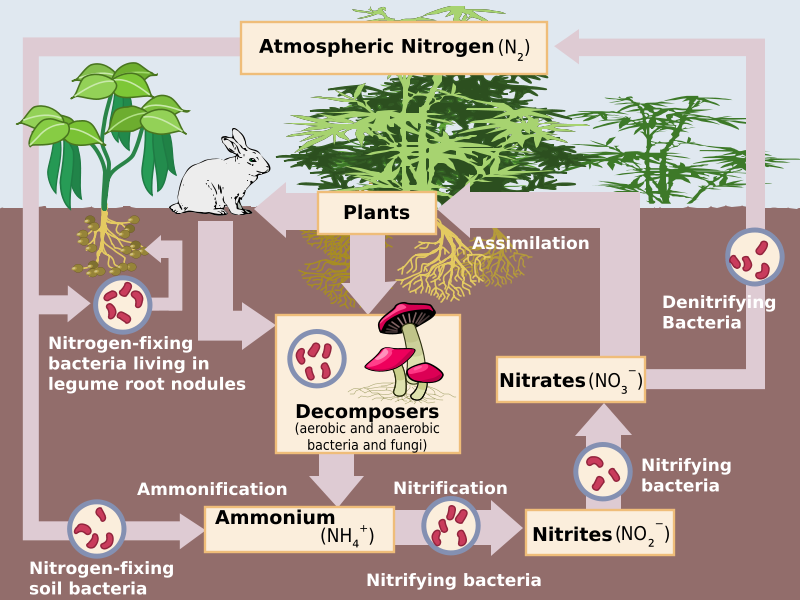
The following picture illustrates the nitrogen cycle whereby nitrogen gas is fixed by bacteria, then incorporated by plants, which are in turn eaten by animals, which then excrete ammonia in the form of actual ammonia as fish do, or as ammonia combined with carbon dioxide as mammals and many animals do, or as uric acid which is the preferred method of birds and reptiles. There are bacteria that can actually break down nitrate back into it's nitrogen and oxygen gas components and I will discuss this again at a later date.
The point here is that nitrate must be removed from the water in the aquaponics system. The basis of aquaponics is to use plants to remove nitrate, thereby creating a closed-loop system. Theoretically, the only thing that is added to the system is food for the fish and enough water to replace that lost by evaporation. The end product is fish meat and either a fruit or vegetable, or the plant leaves themselves are consumed. Since some fish like tilapia will eat plants, you can even take the system one step further and feed, say, spinach grown in the system back to the fish.
Now for the plants!
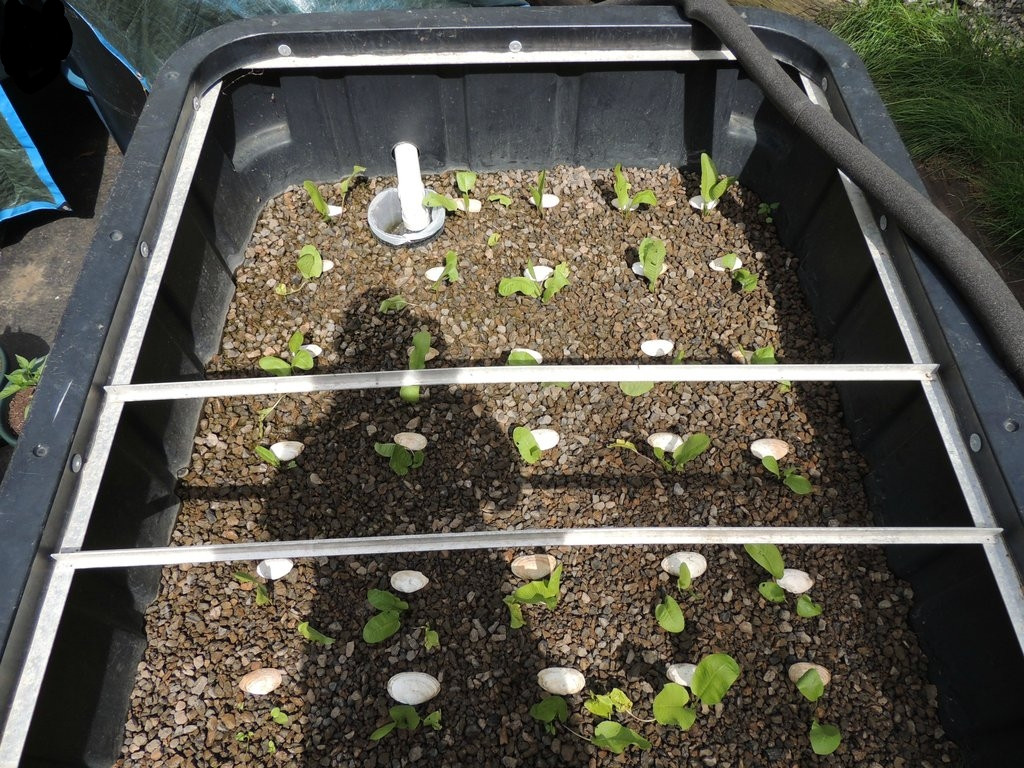
This is the grow bed after cycling with bacteria. You can add plants before the cycling is finished as they can absorb ammonia, nitrite and nitrate, but I didn't do so. I did run into some problems with the horseradish as I grew them indoors and then didn't acclimatize the plants slowly enough. This led to burned leaves and the plants had to regrow outside again. Not a big deal but I probably would have planted them earlier. I chose horseradish mainly because they have done well in my system in the past two years. They have several attractive features: they grow upright and therefore save space. They produce both an edible root and also edible leaves (yes, they're edible!). They grow at a wide range of temperatures, tolerating both extremes of cold and heat, although they are known for doing well in cooler weather. They also like a lot of water. The one thing I've found with the roots is that they may develop in two ways: Sometimes they will form a nice, thick root, and other times they form a very fine, large 'hair ball'. I'm not sure what the factors are that lead to one or the other. The hair ball definitely has a much larger surface area for collecting nitrate, but the root is edible. So either way I'm happy.
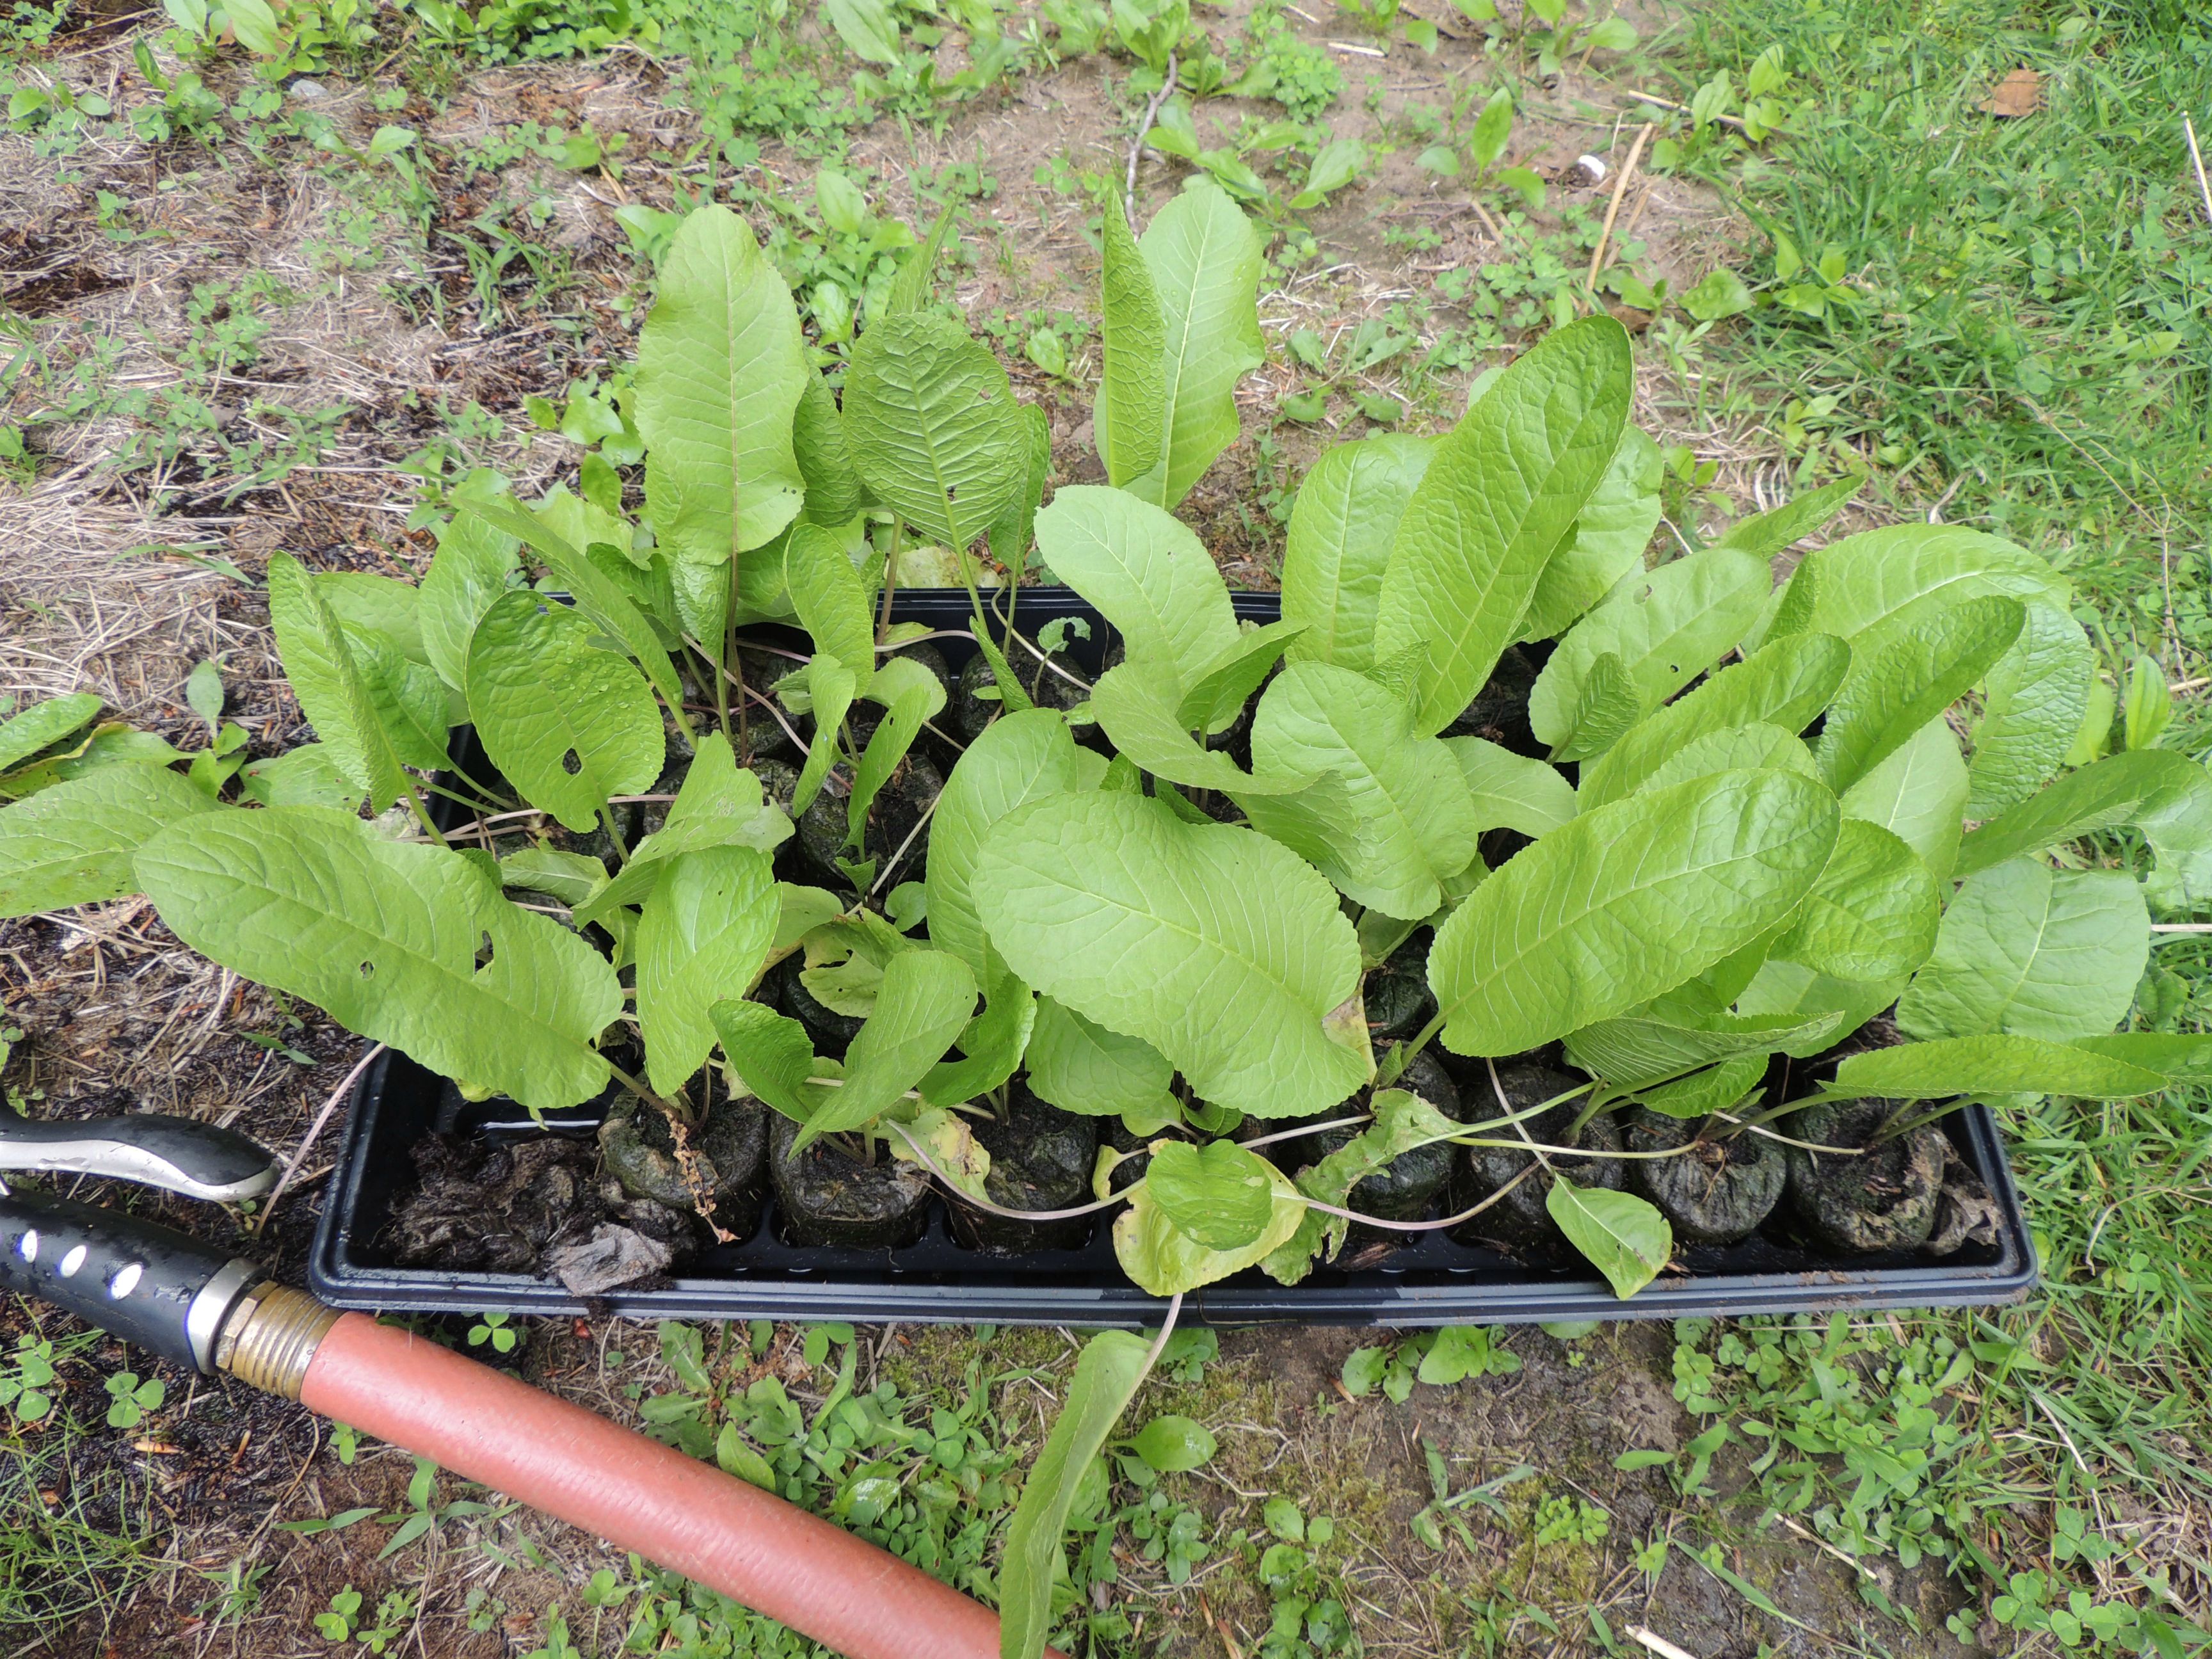
This is the horseradish growing in peat after they regrew their leaves (I left them outdoors). Horseradish is extremely easy to grow from even a tiny piece of root planted in the ground.
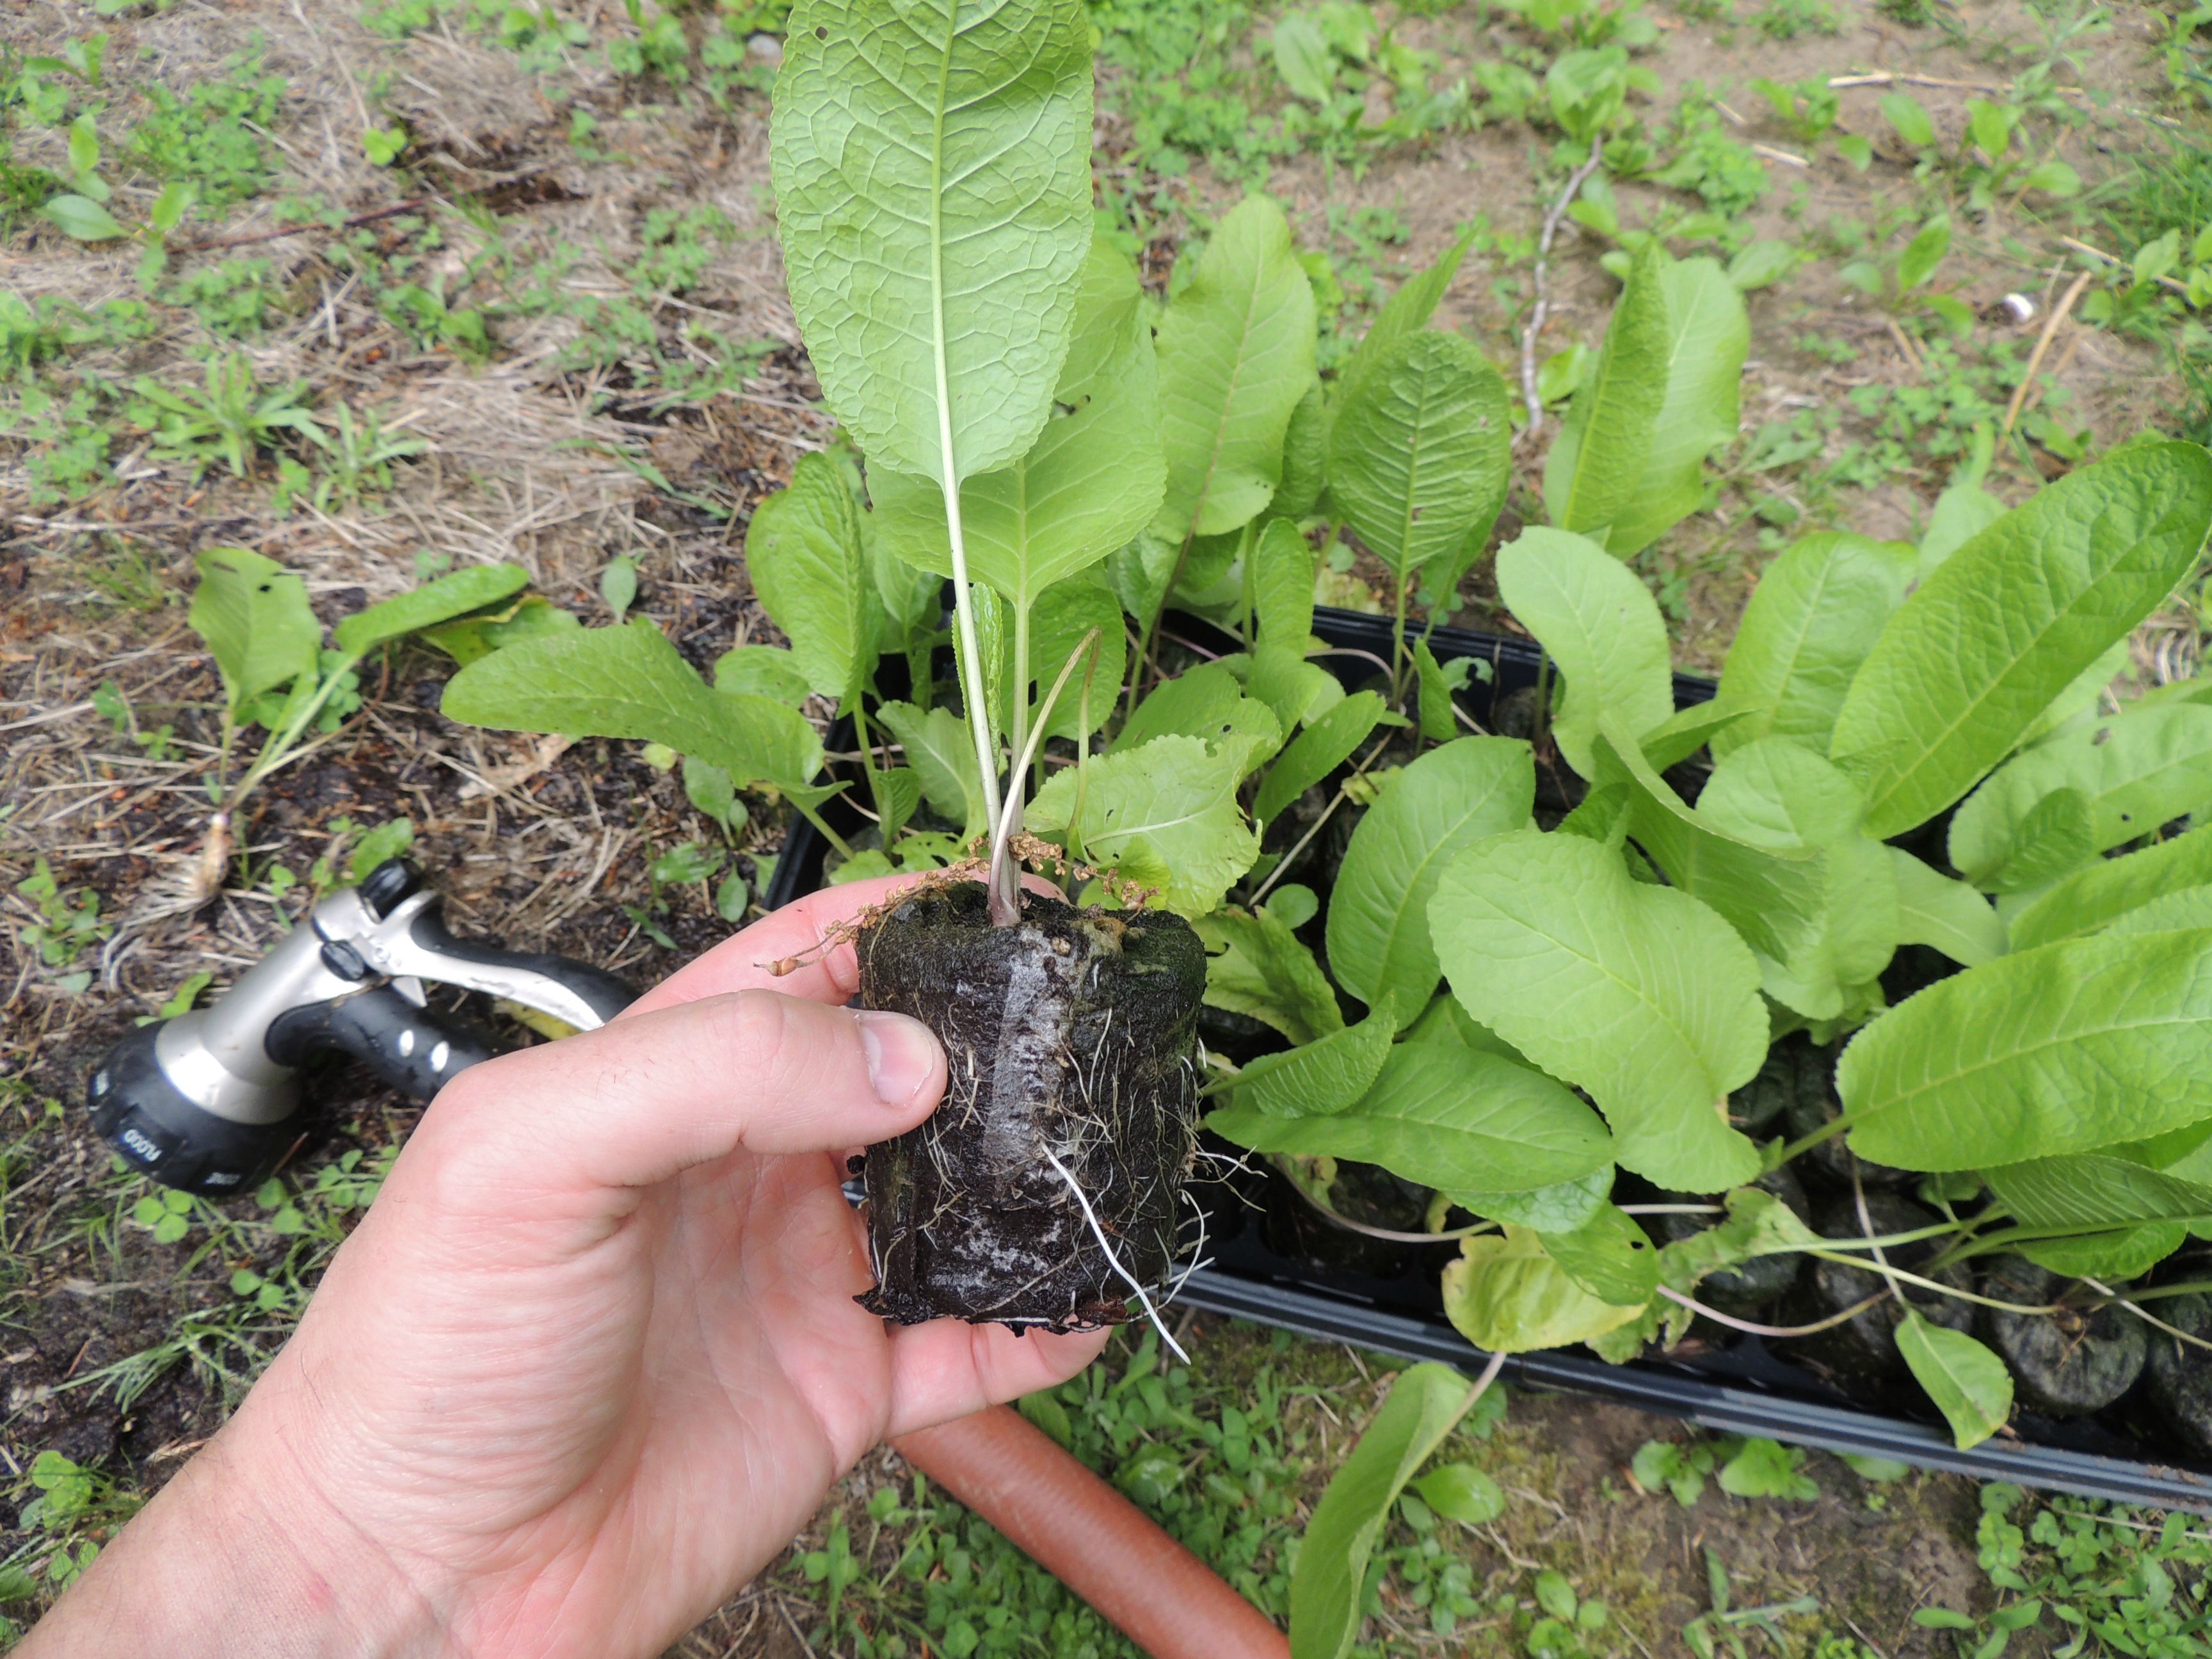
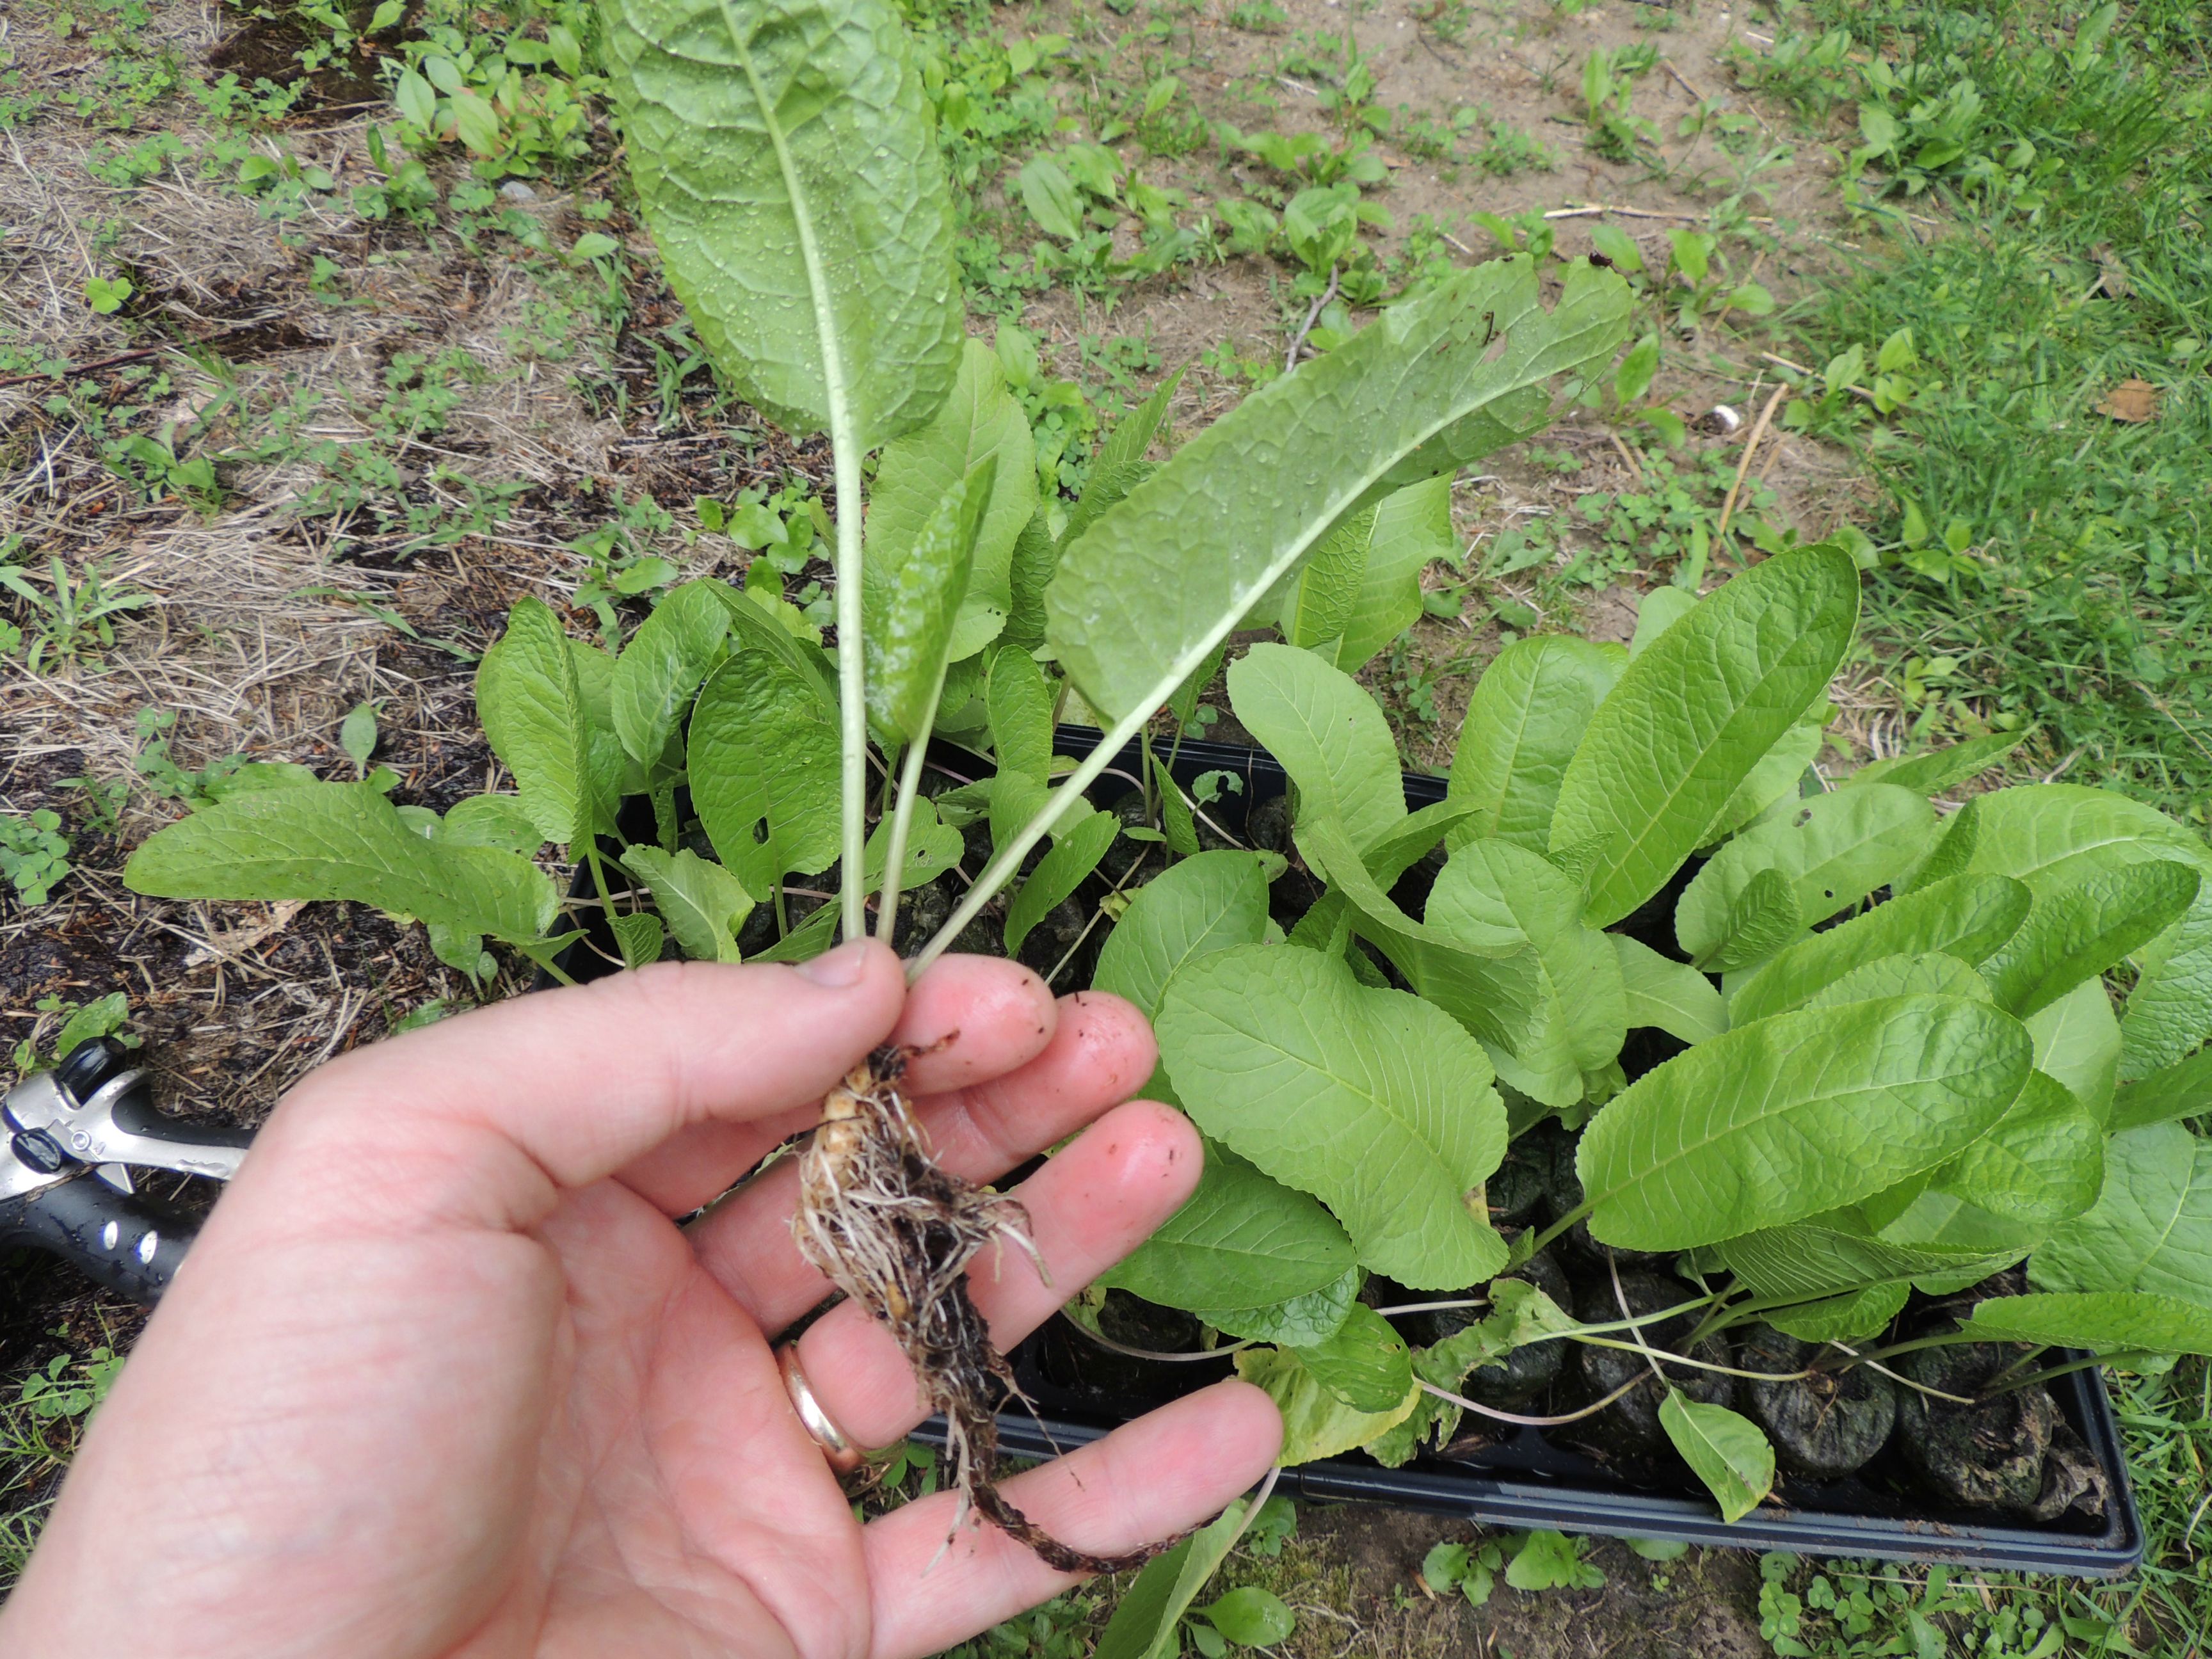
I washed all the peat off the roots. You could certainly take the mesh off the peat and plant it directly like that in the expanded shale grow bed, but I'd rather not have any soil/peat in the grow bed.
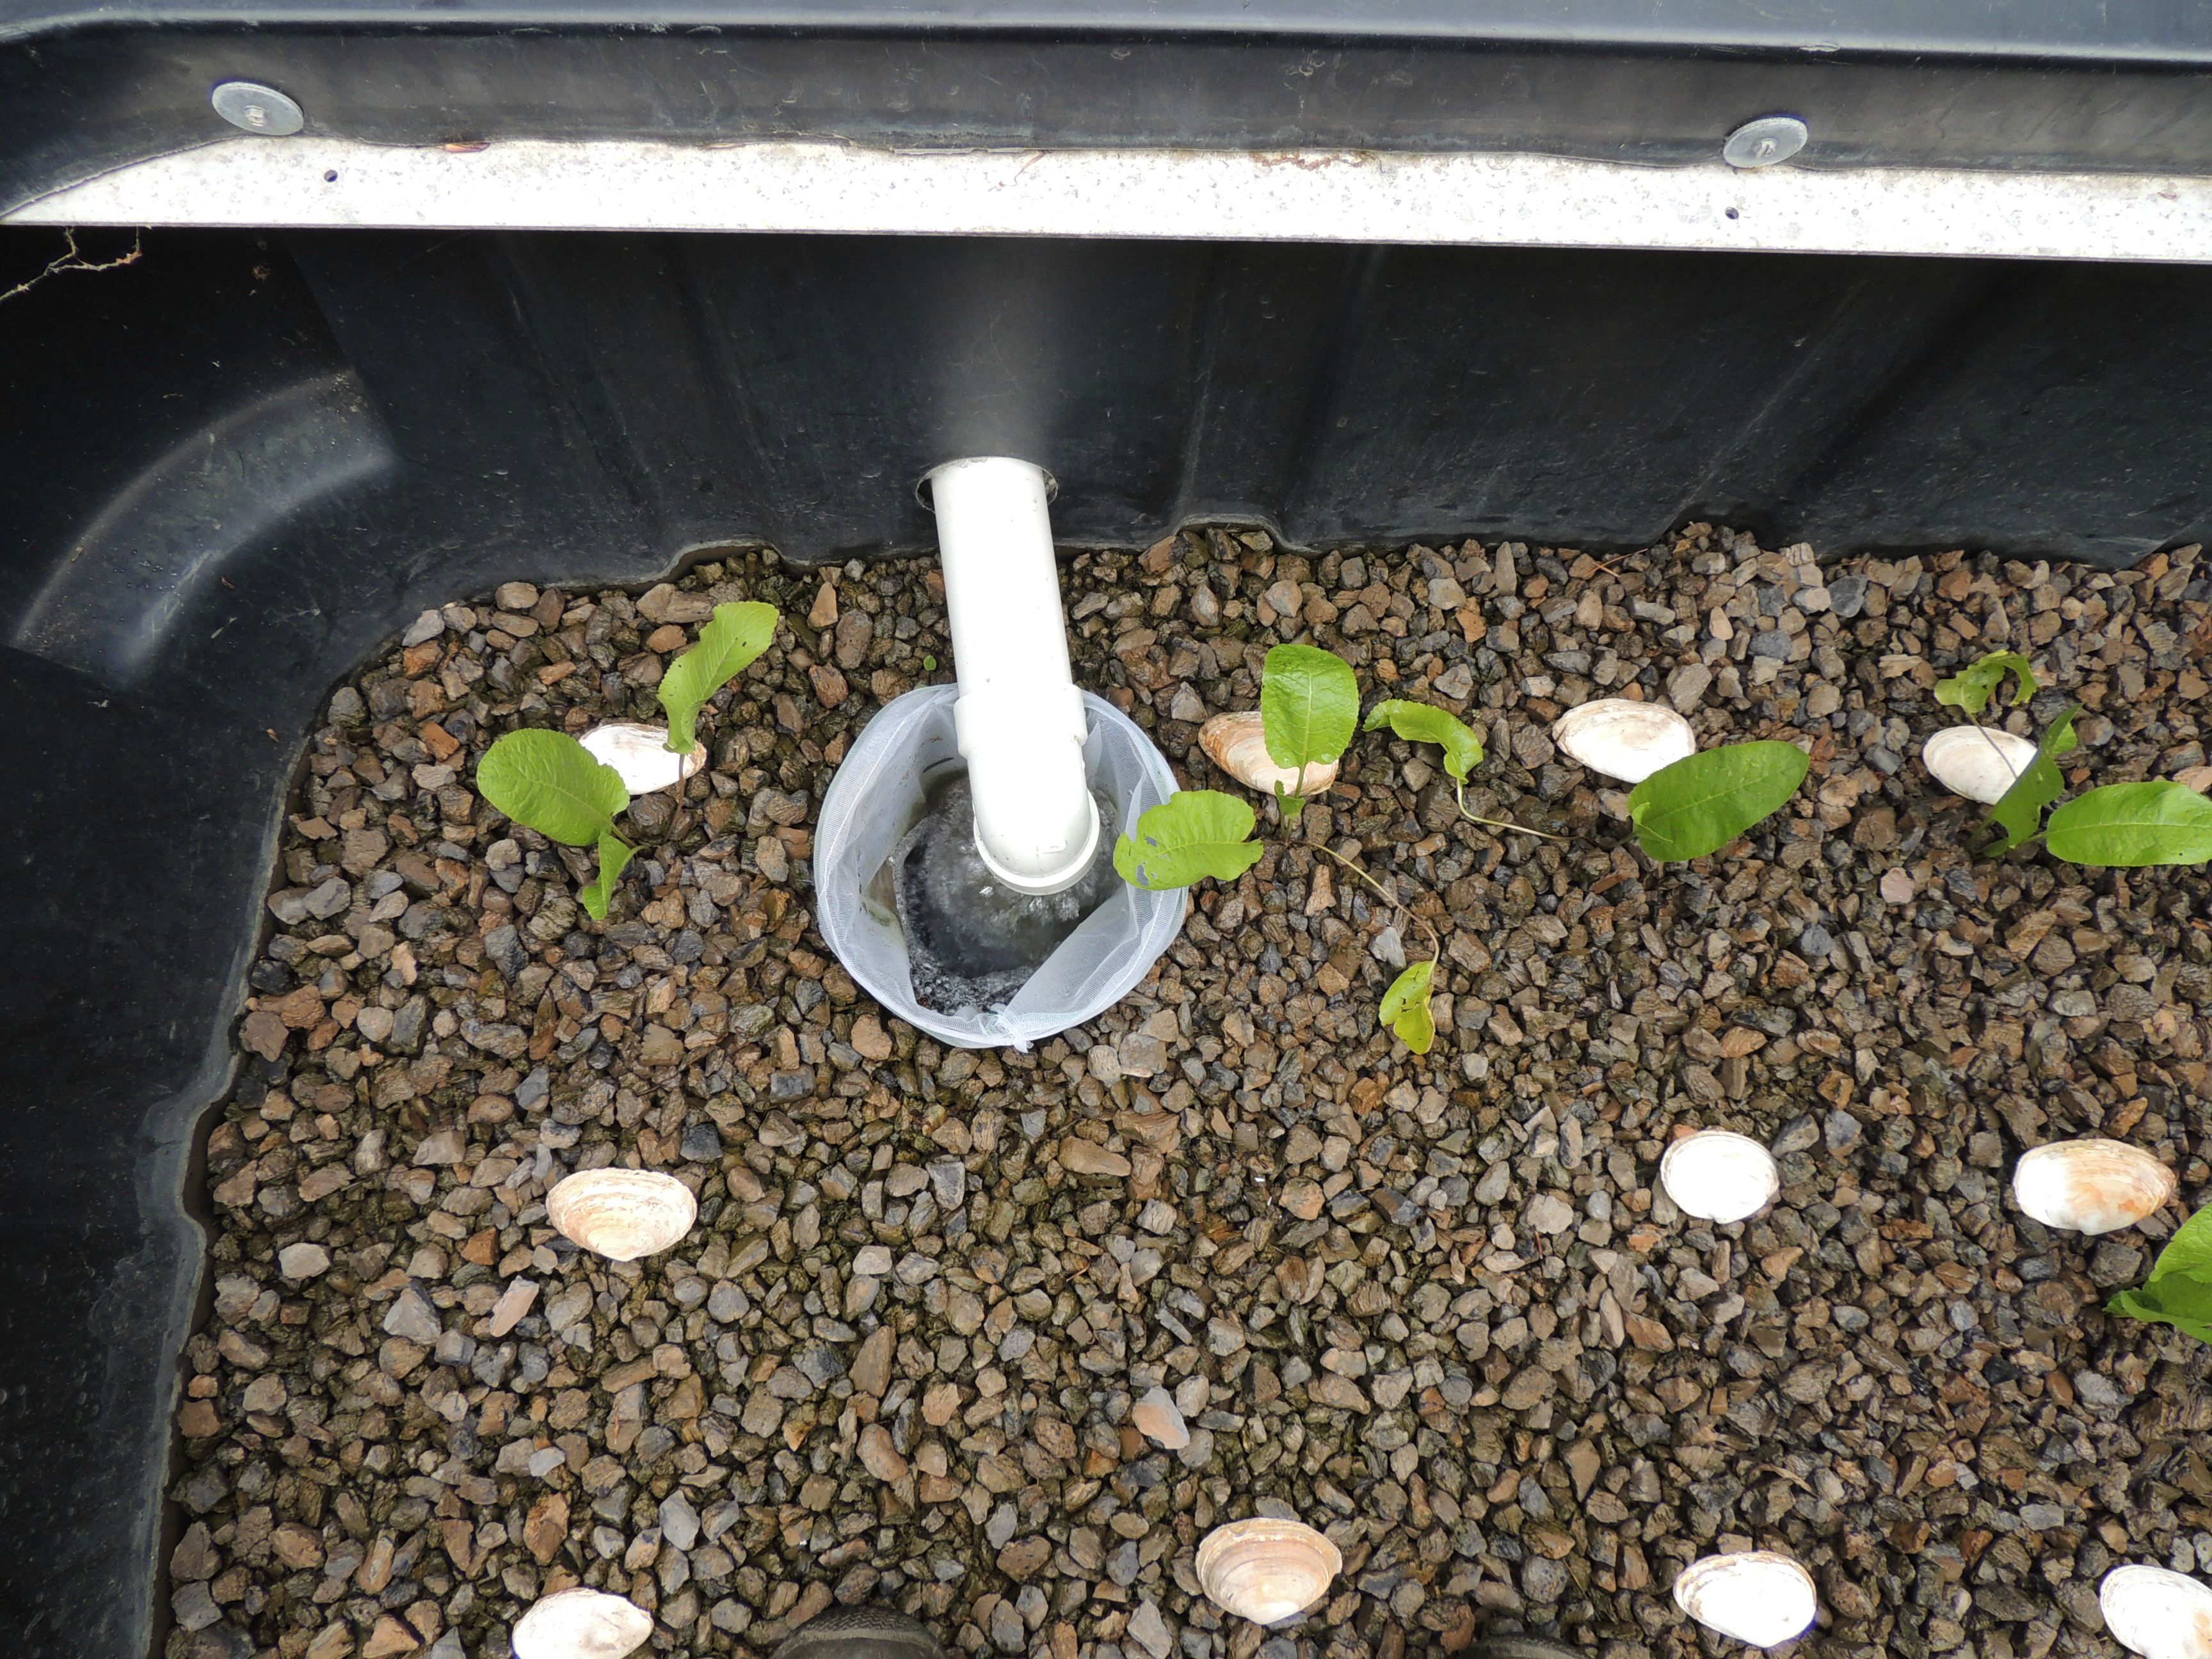
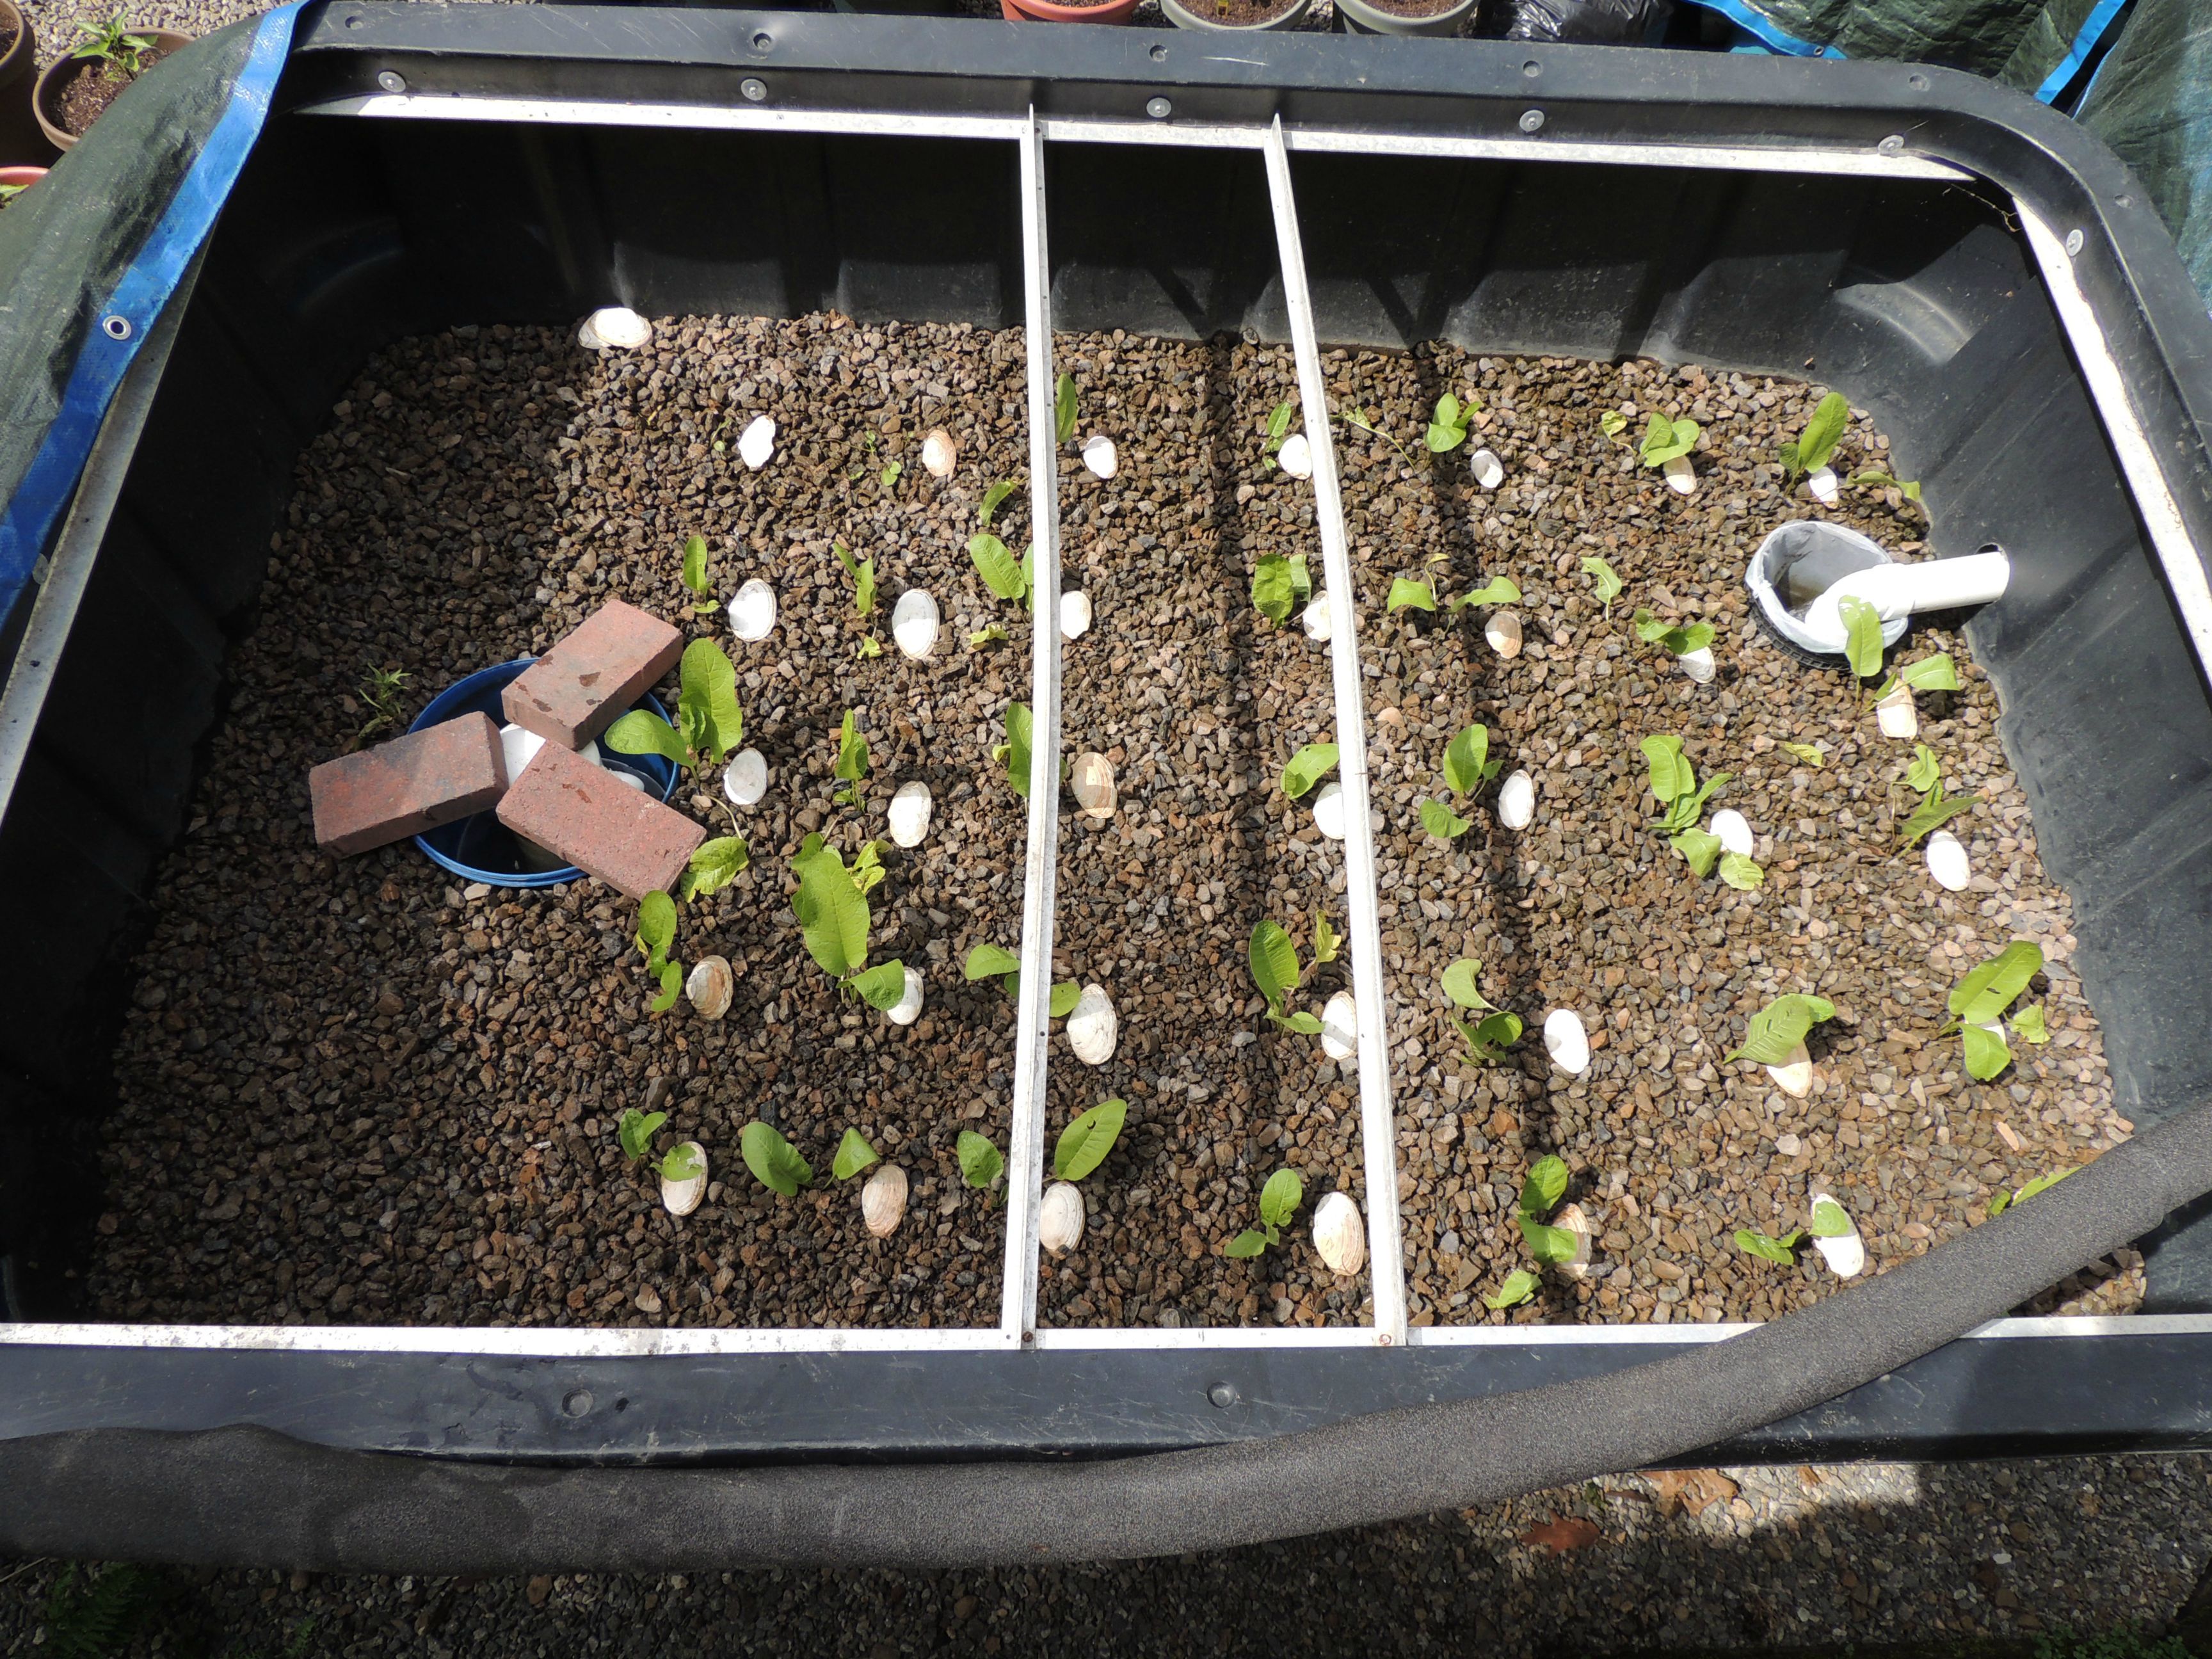
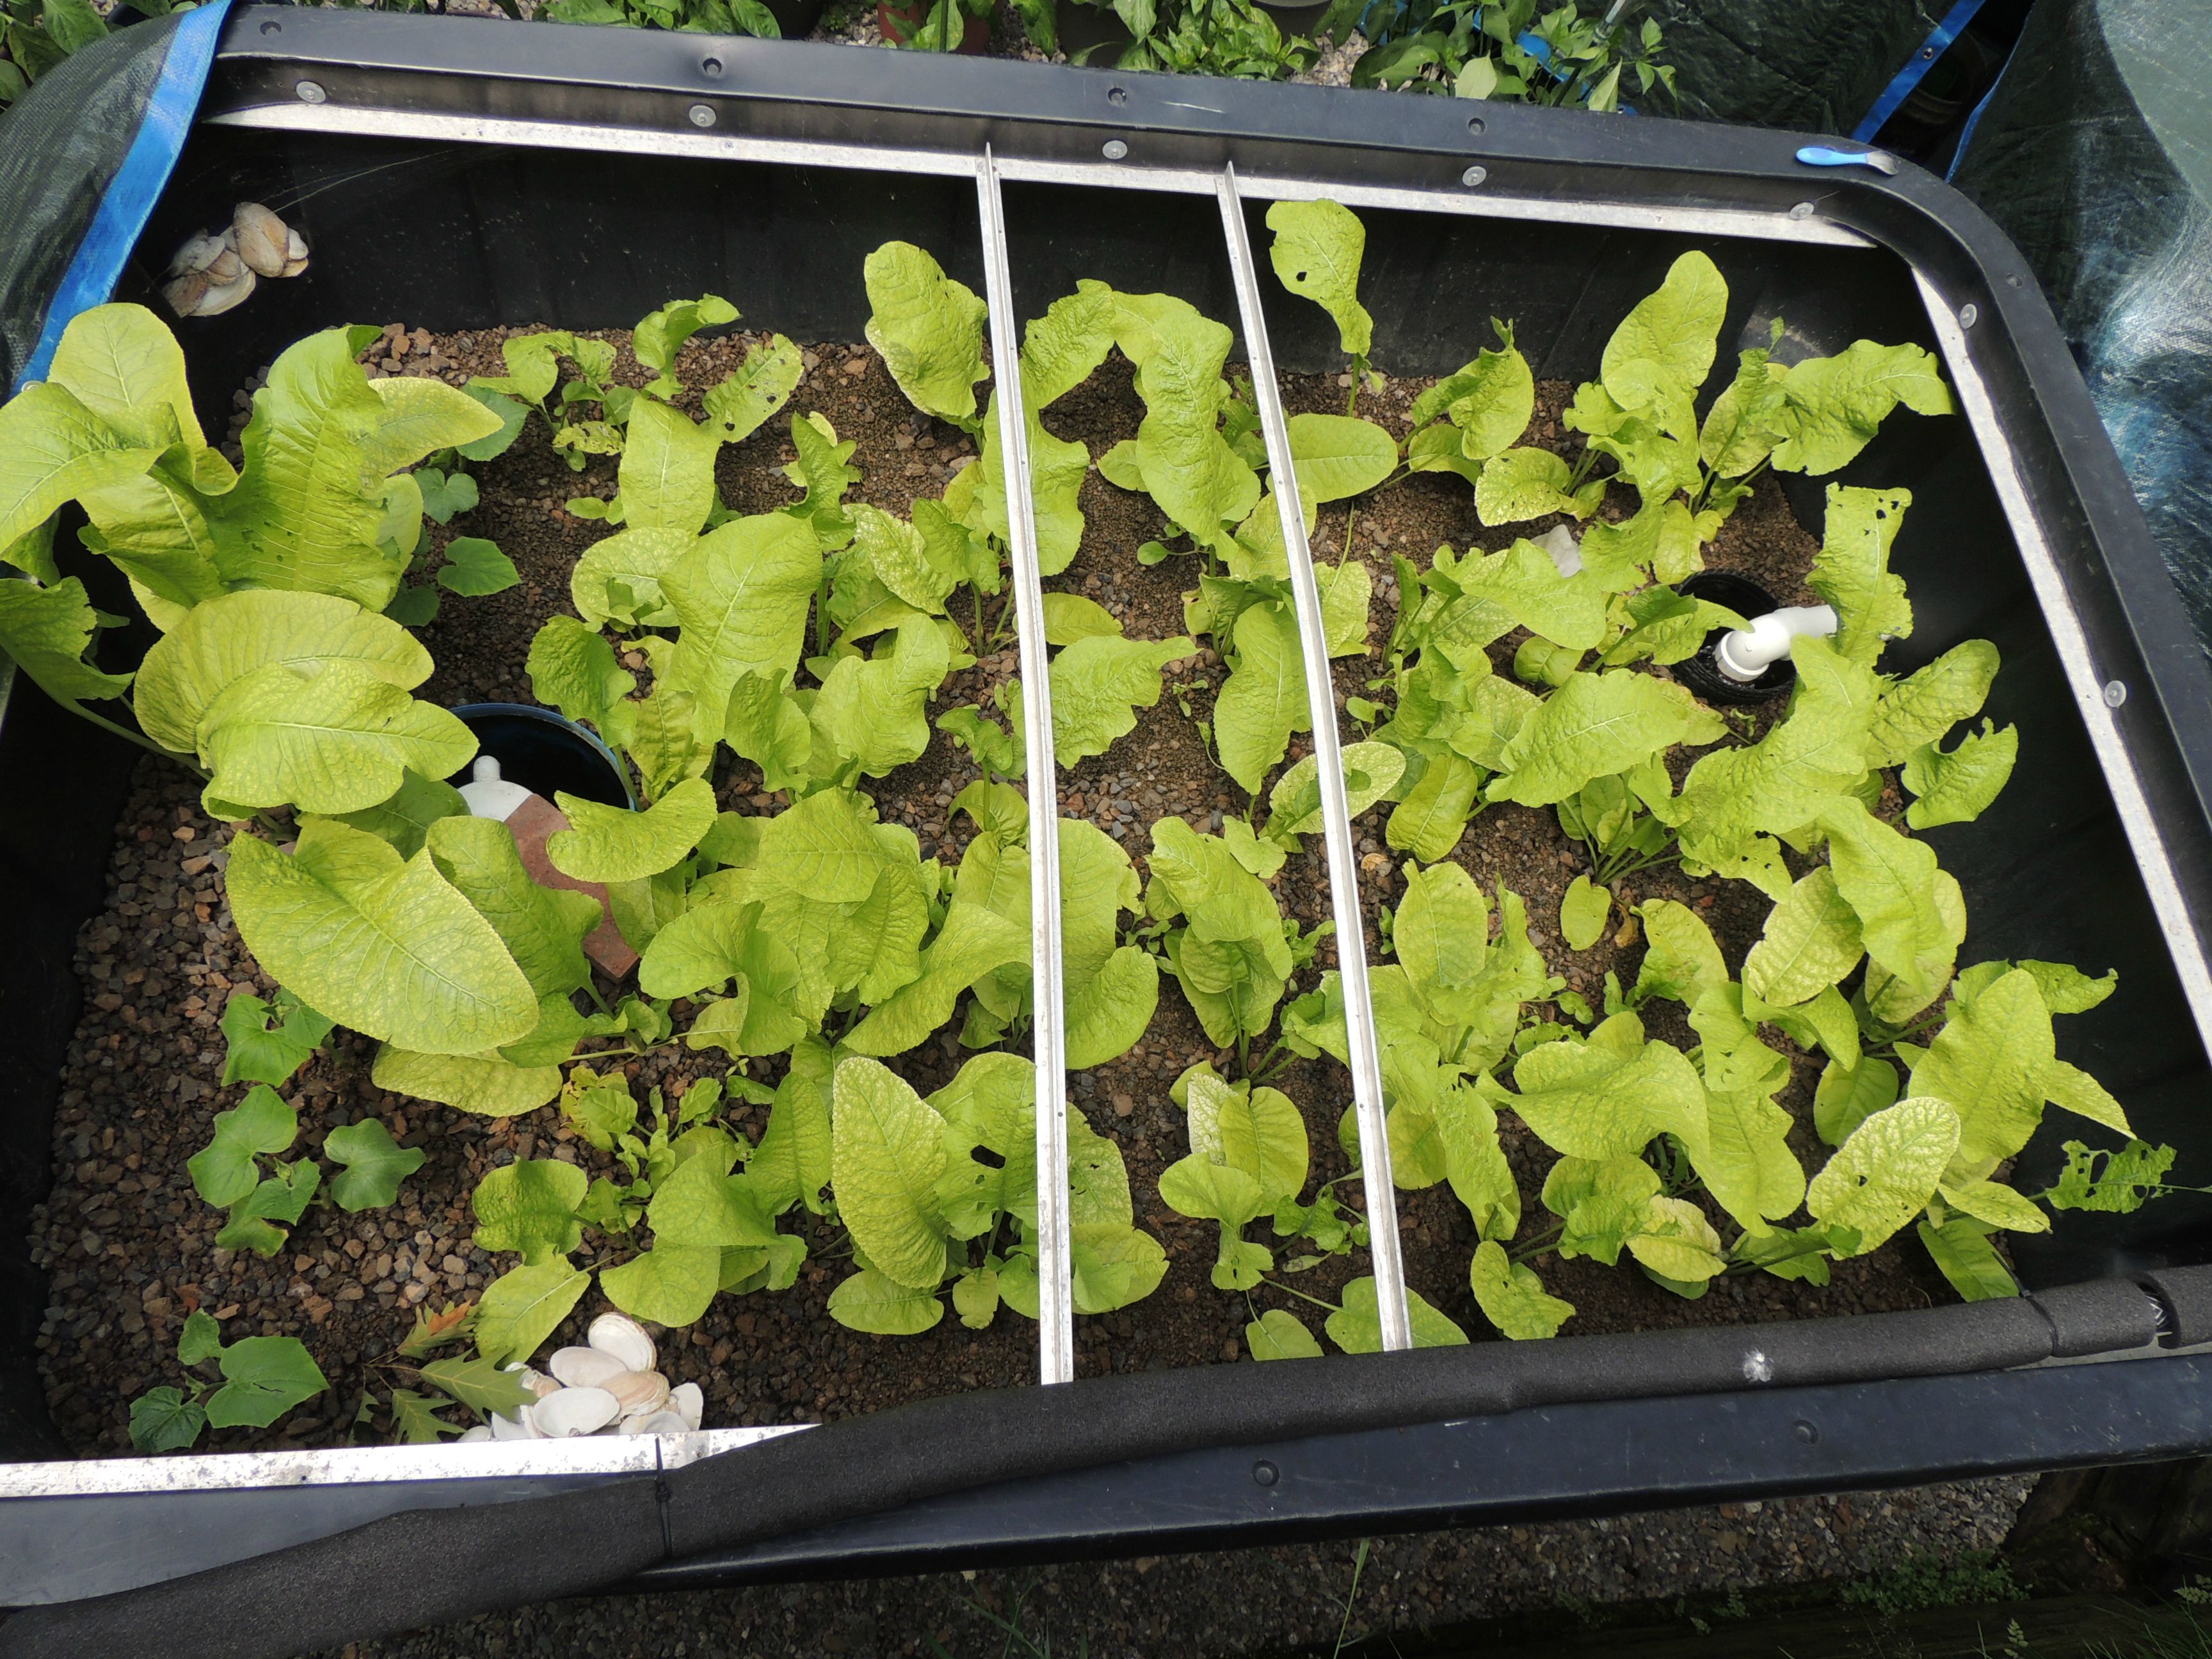
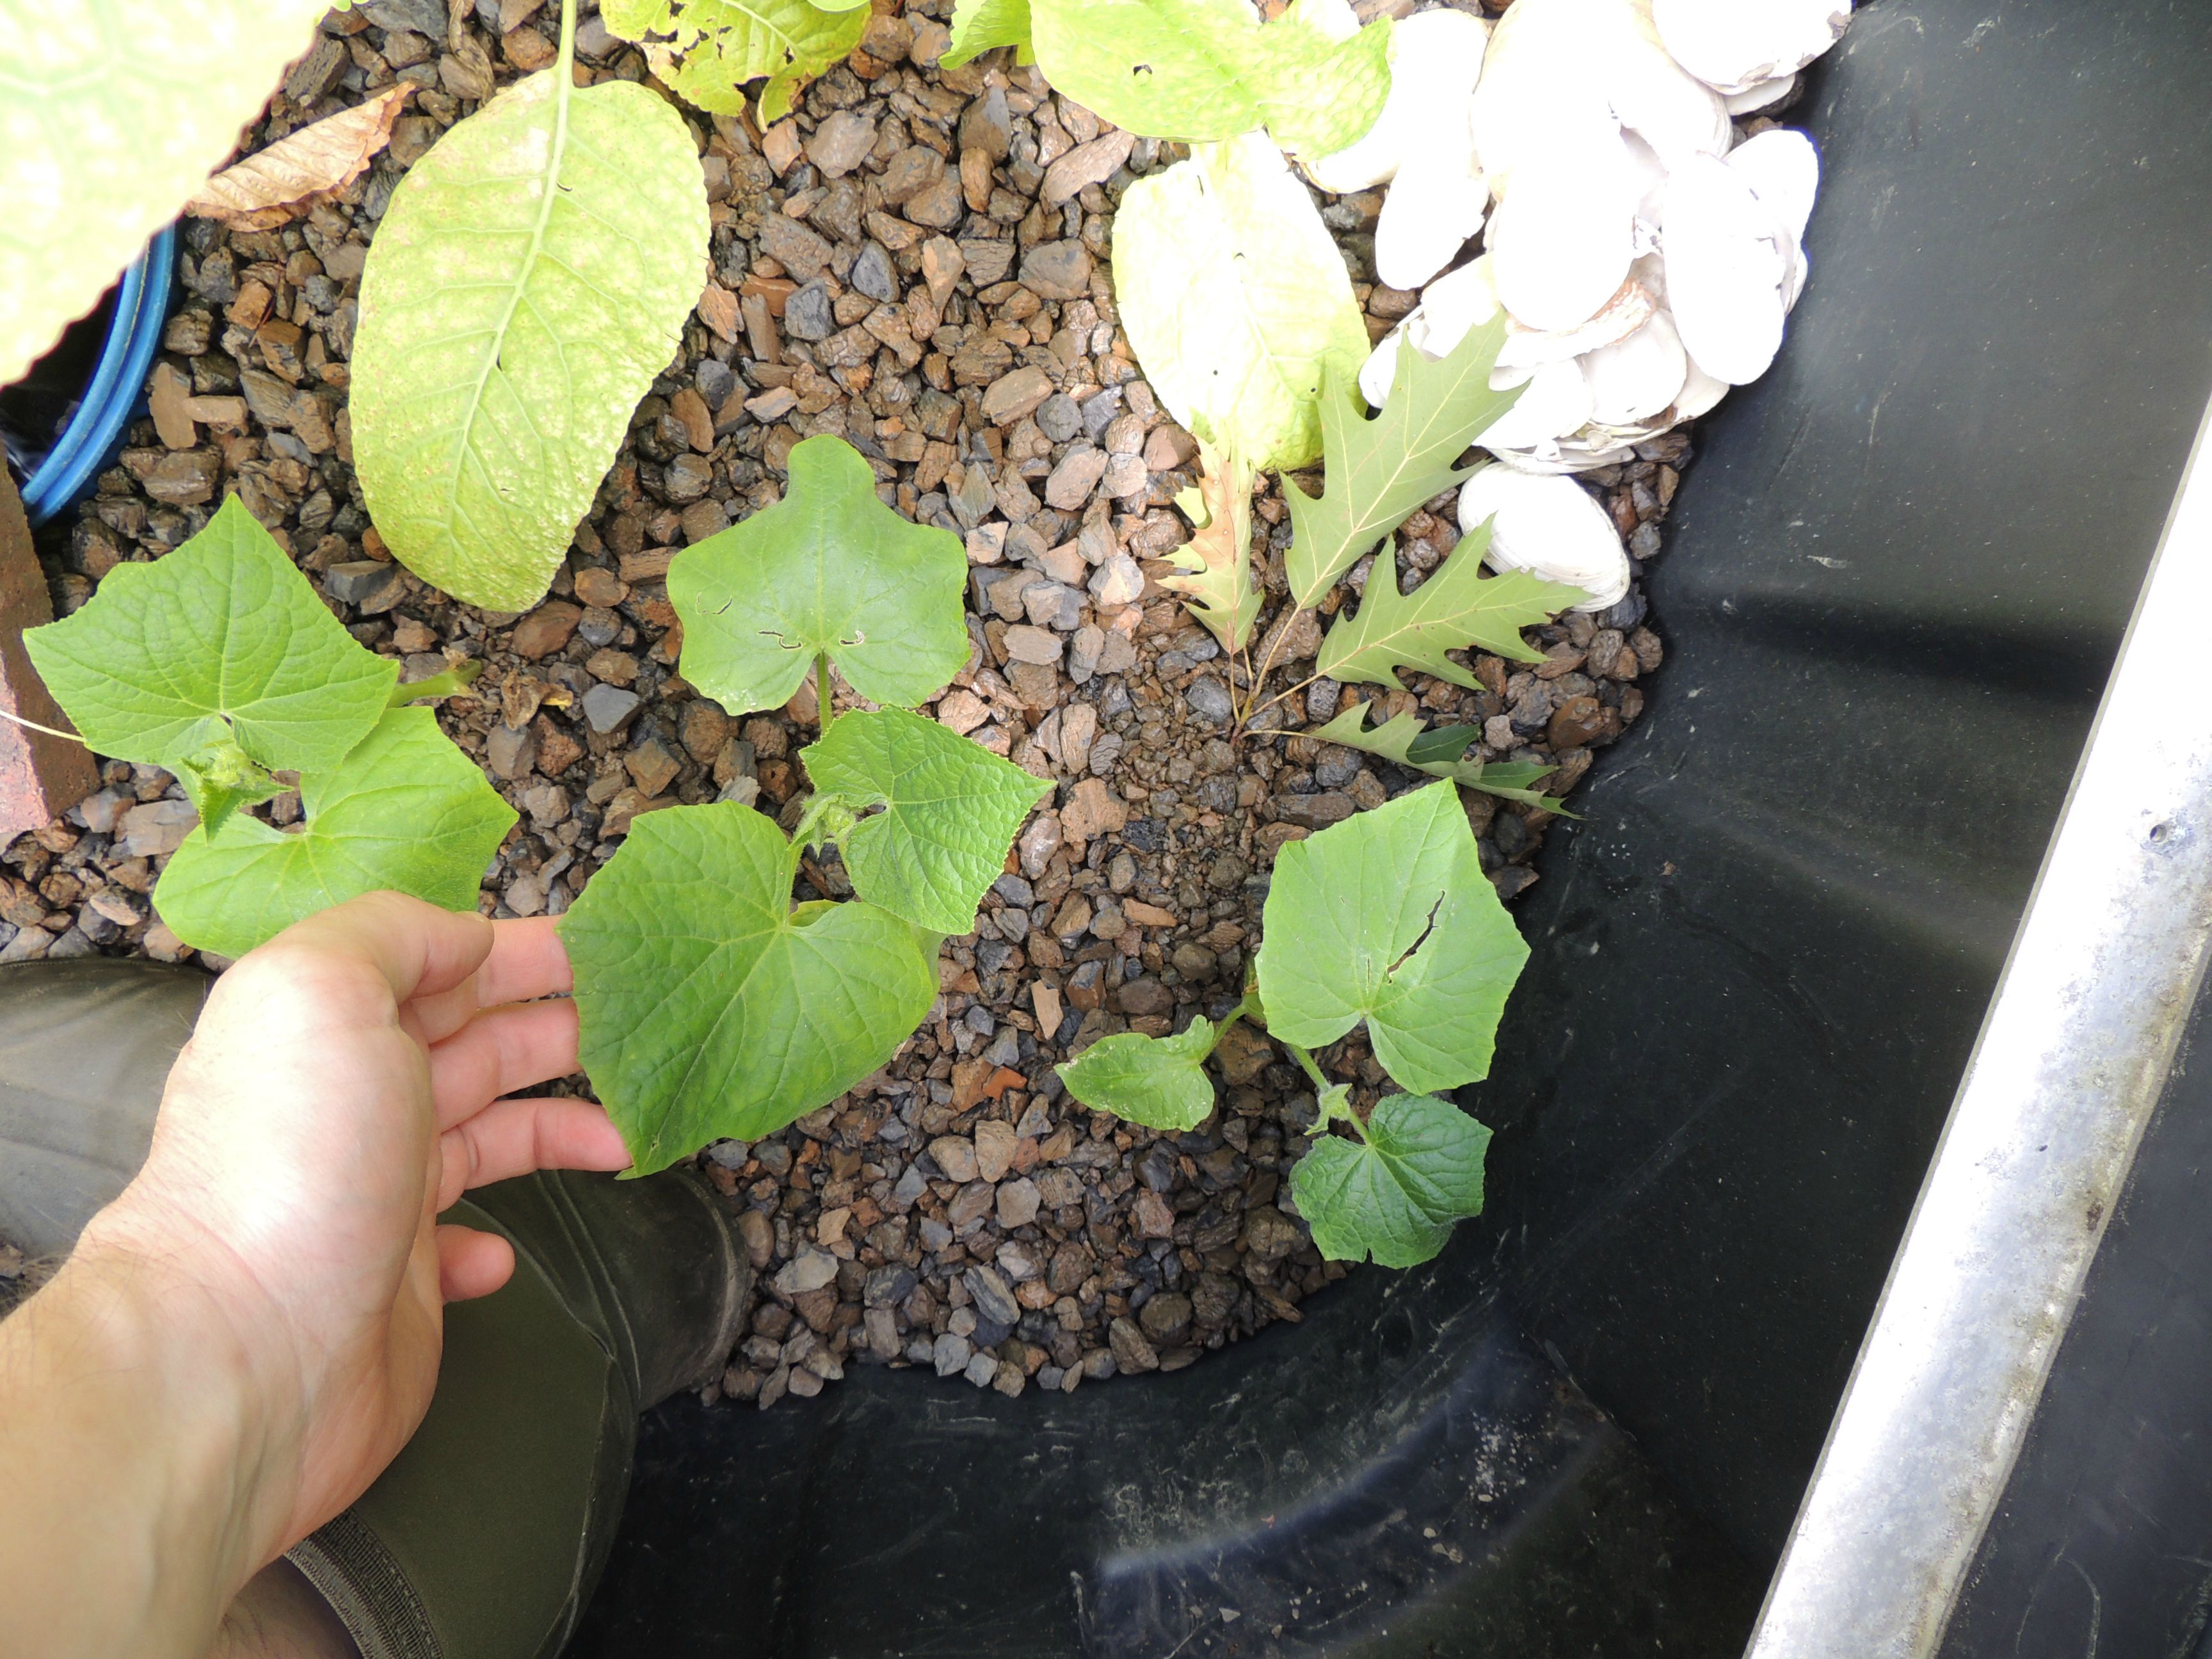
I used steamer clam shells to mark the areas in the grow bed where I would plant the horseradish. The total number of plants was 36 if I recall correctly. I did also plant some cucumber at one end of the grow bed.
Planting completed
 I didn't want the water splashing up onto the plants and the inlet for the water into the grow bed from the fish tank worked out very nicely.
I didn't want the water splashing up onto the plants and the inlet for the water into the grow bed from the fish tank worked out very nicely.
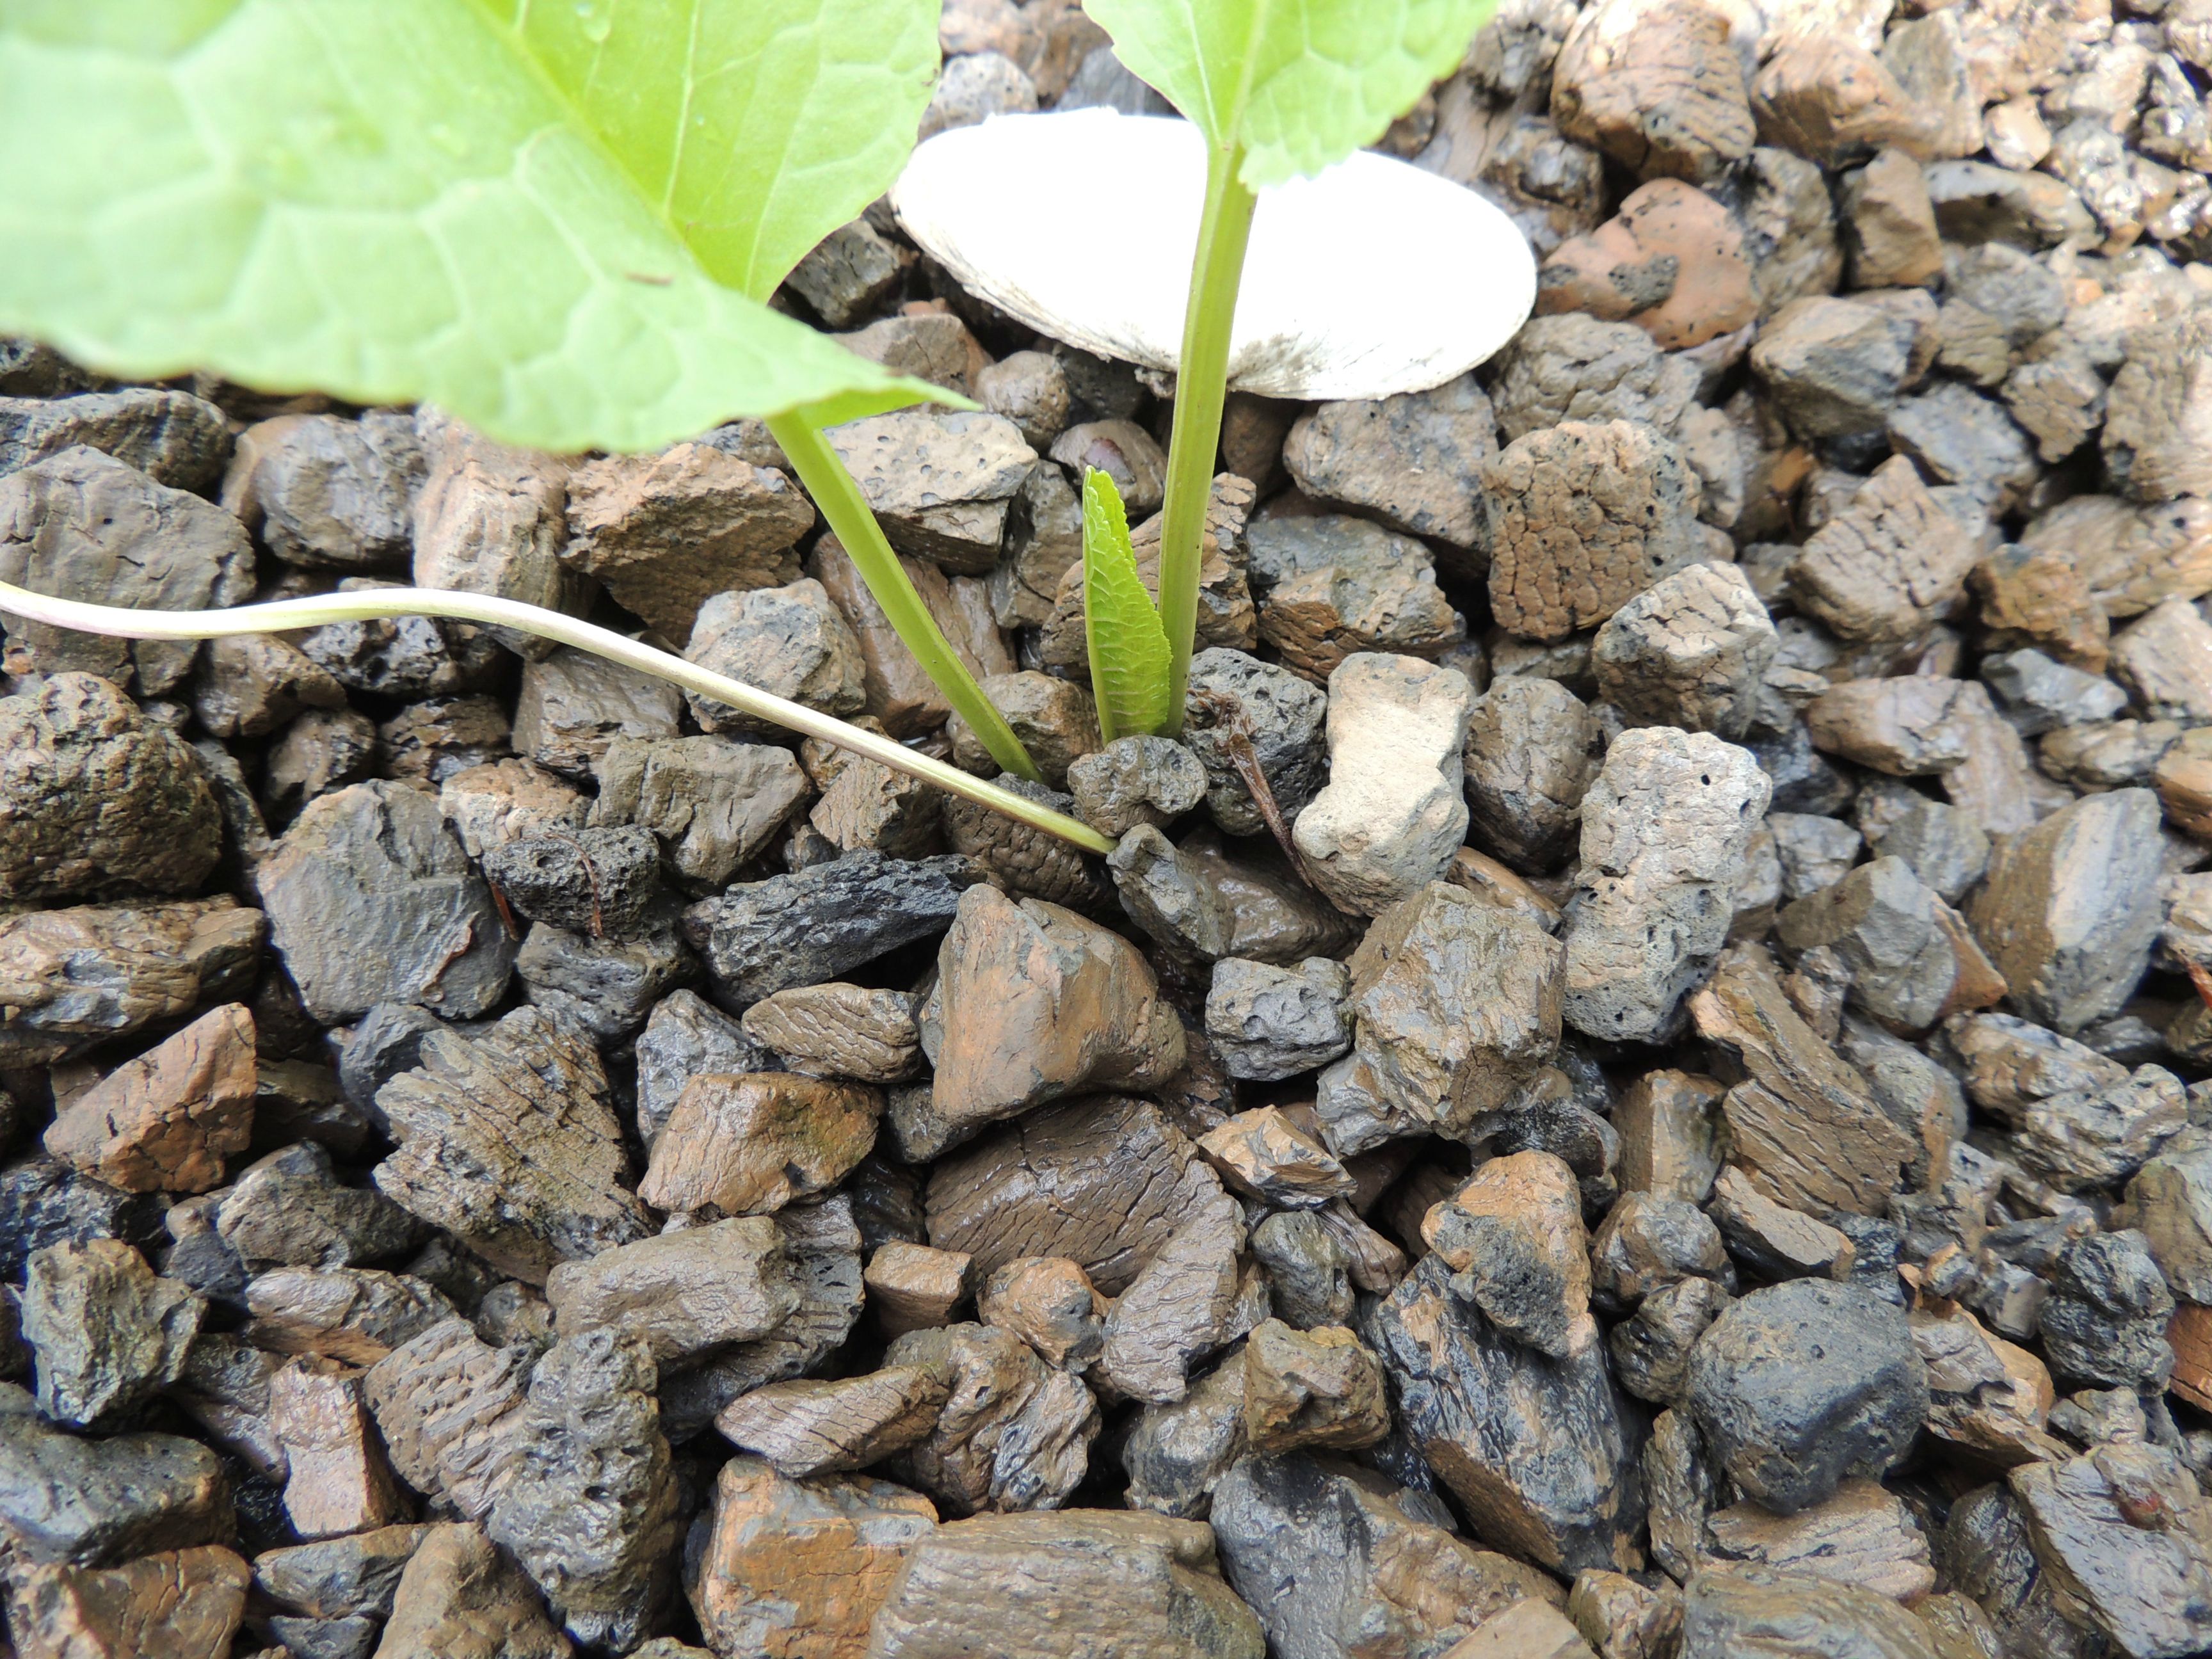
The plants are in expanded shale only with no soil.
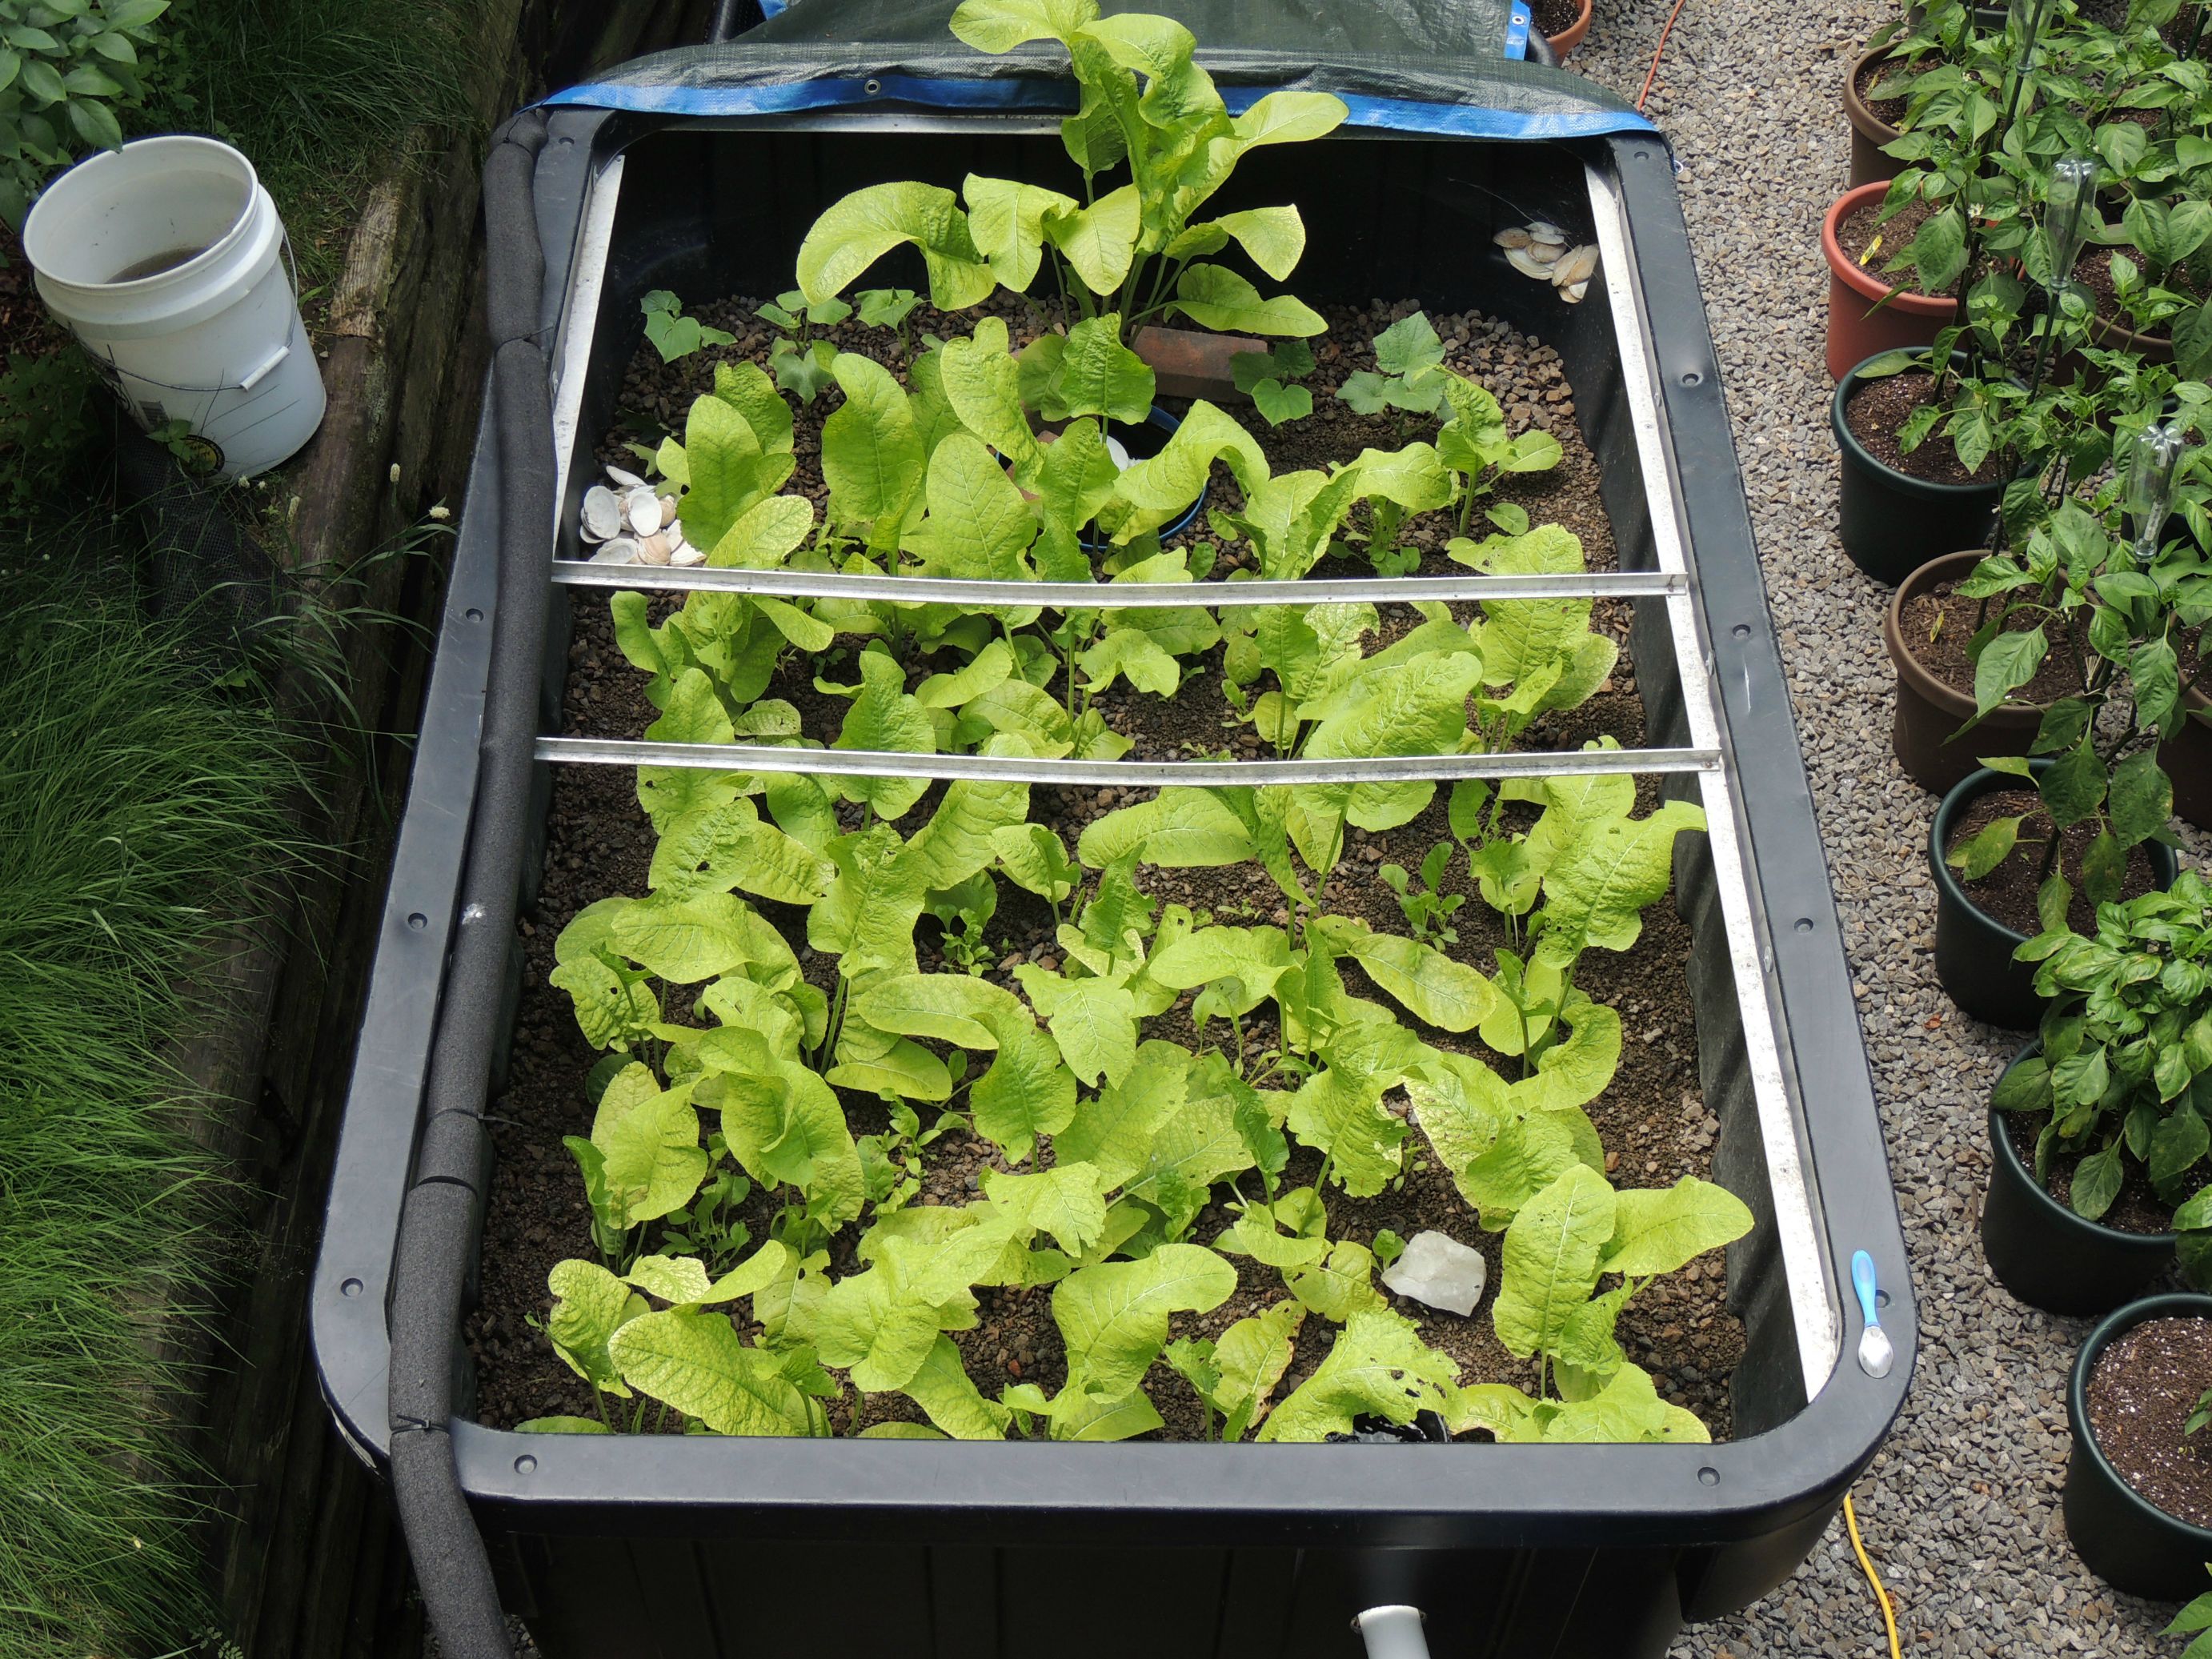
After a few weeks of growth:
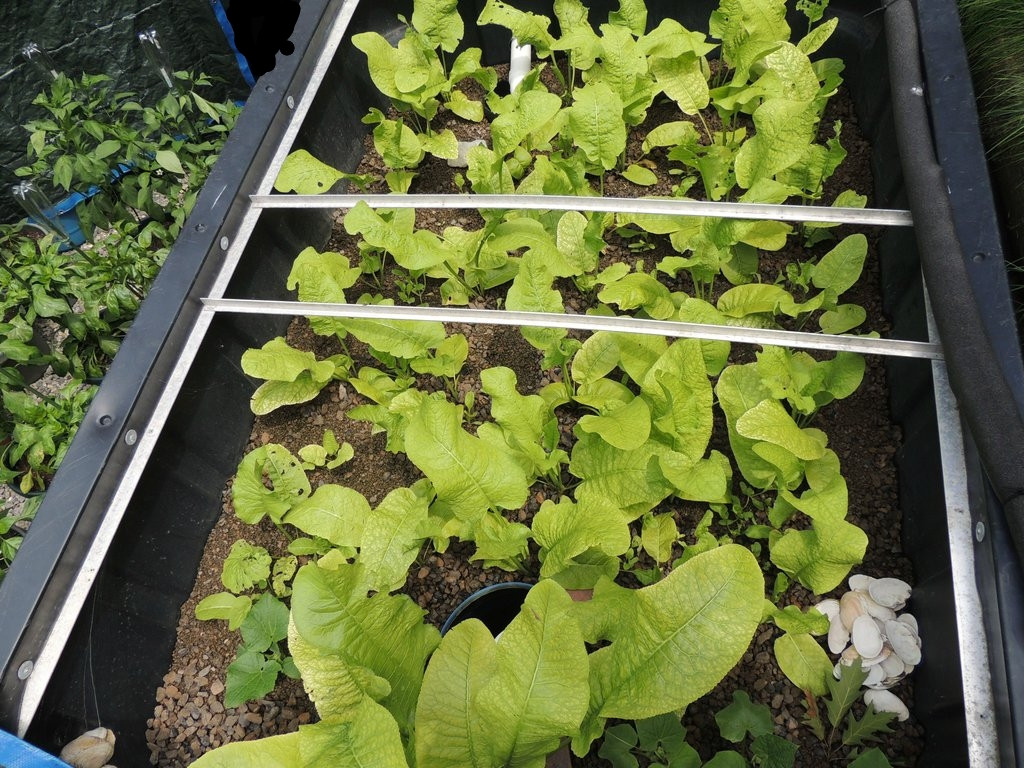
View from the fish tank end:
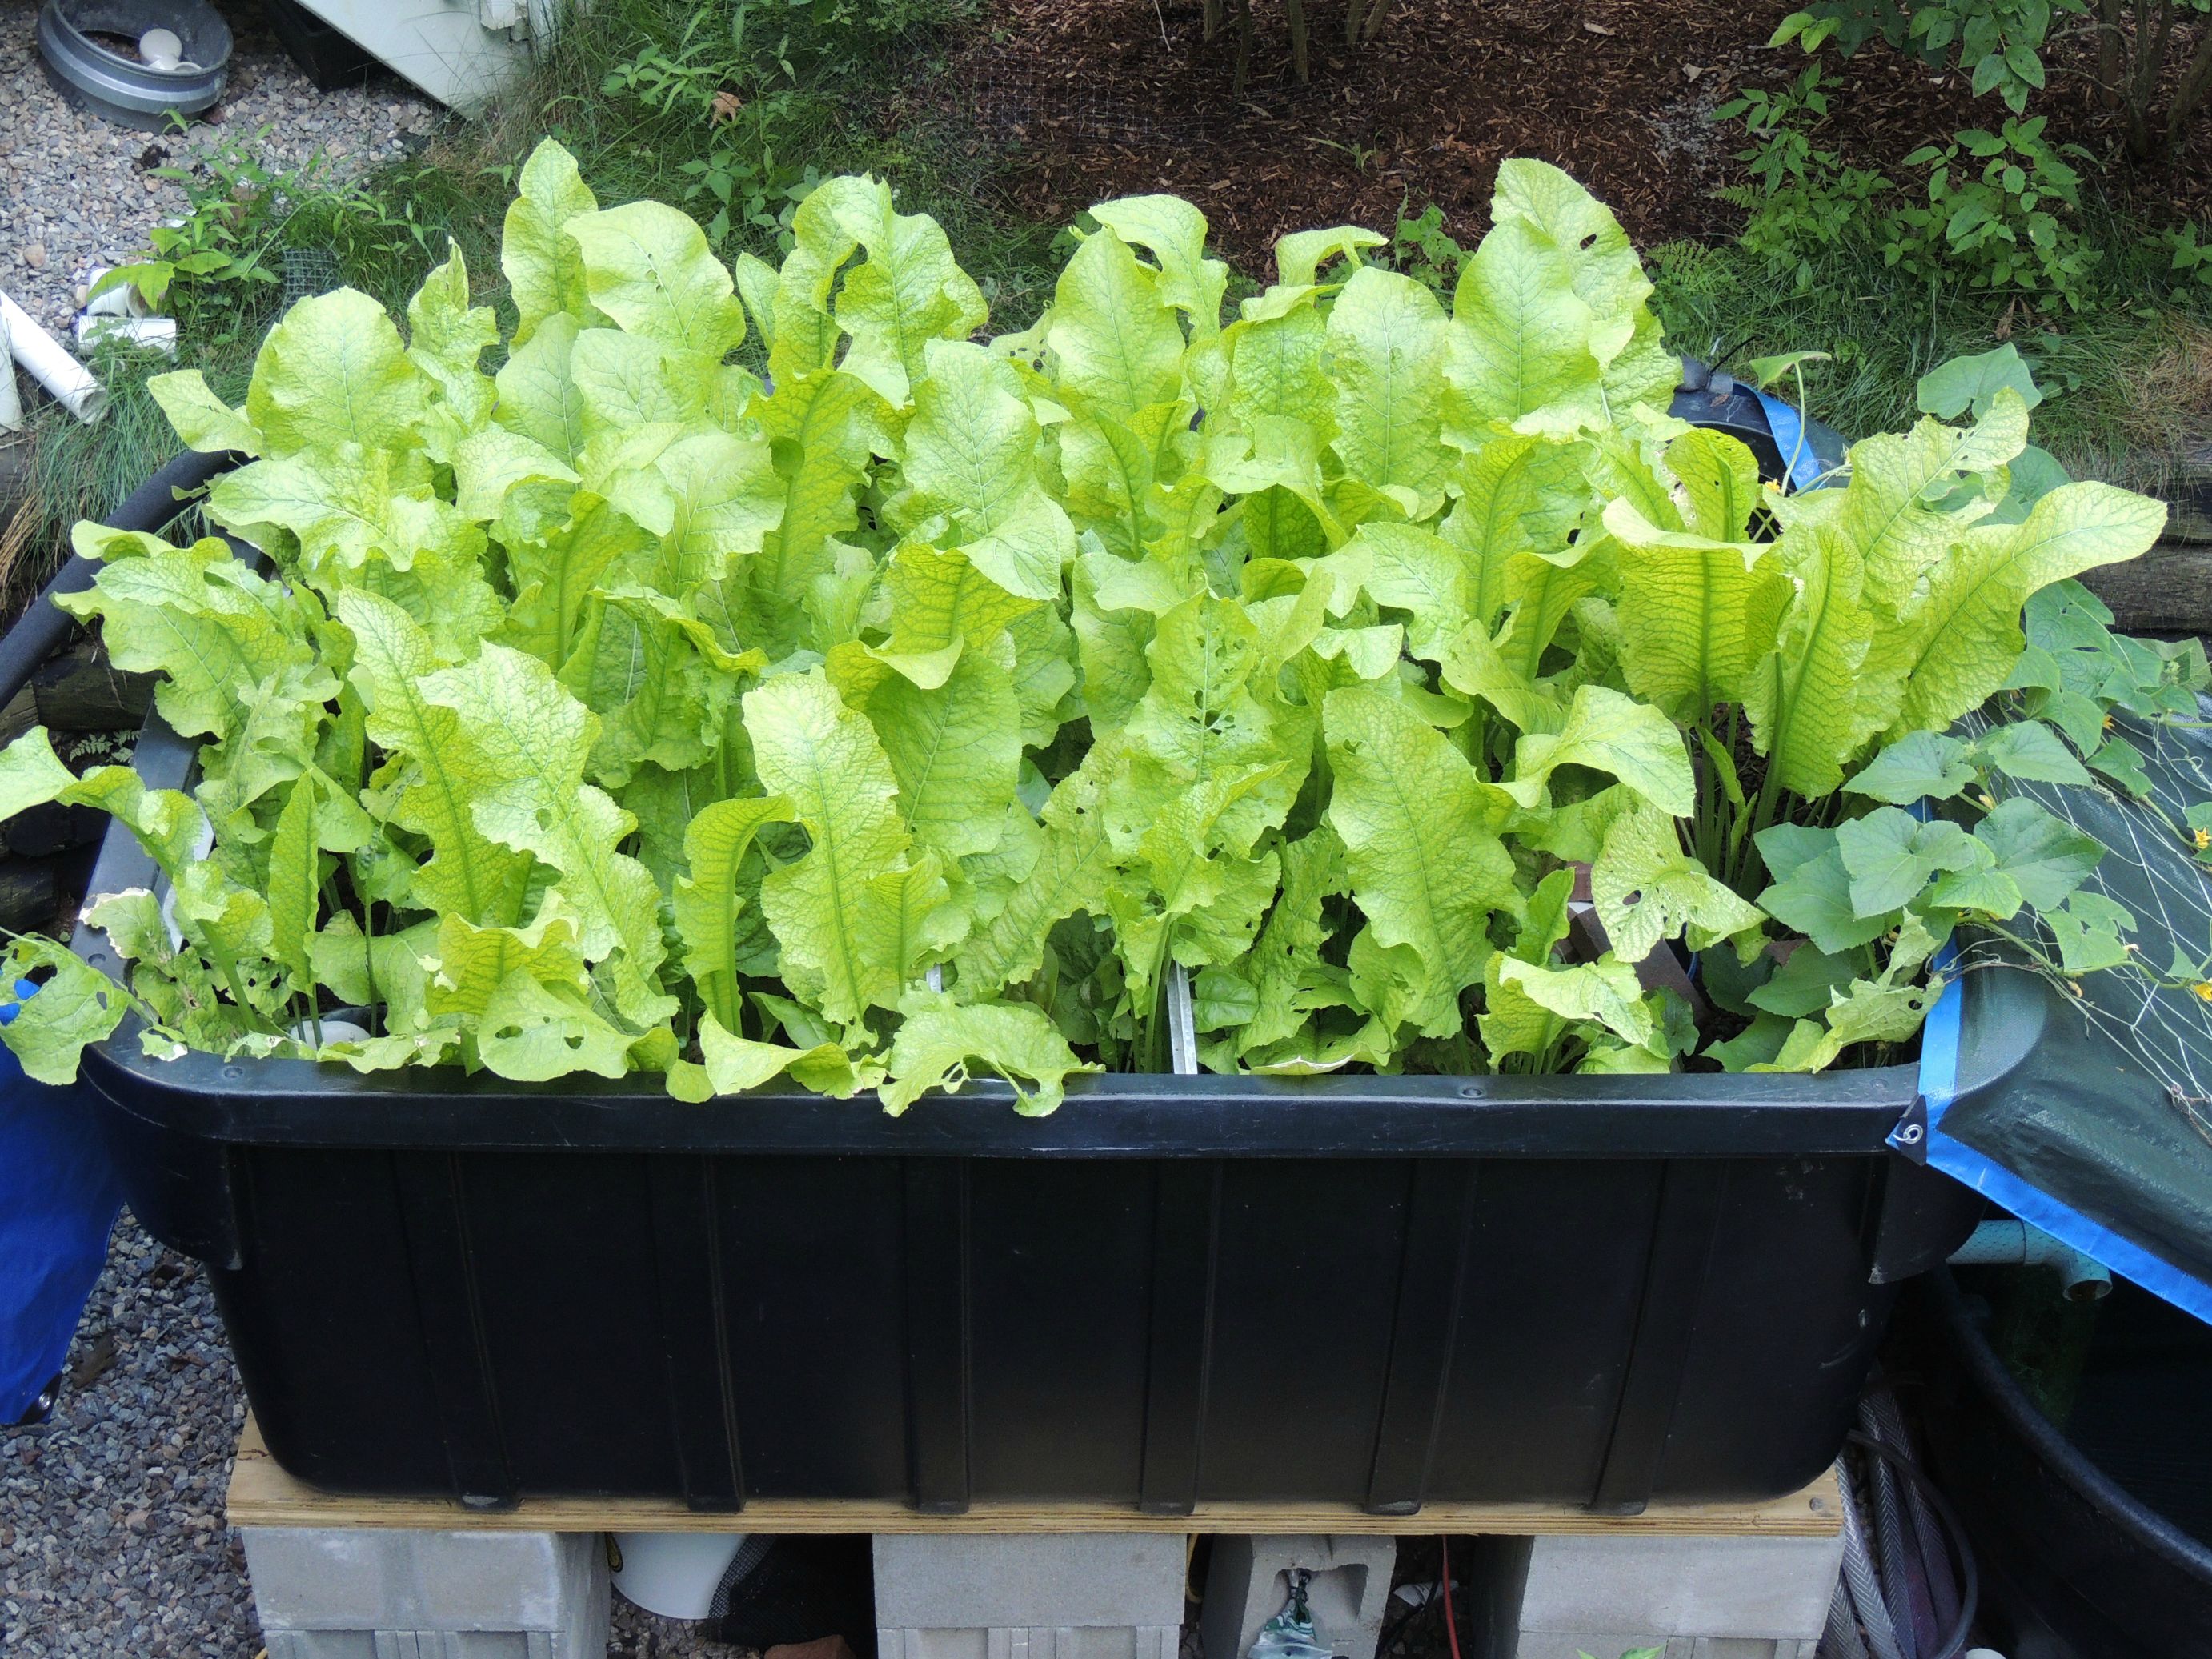
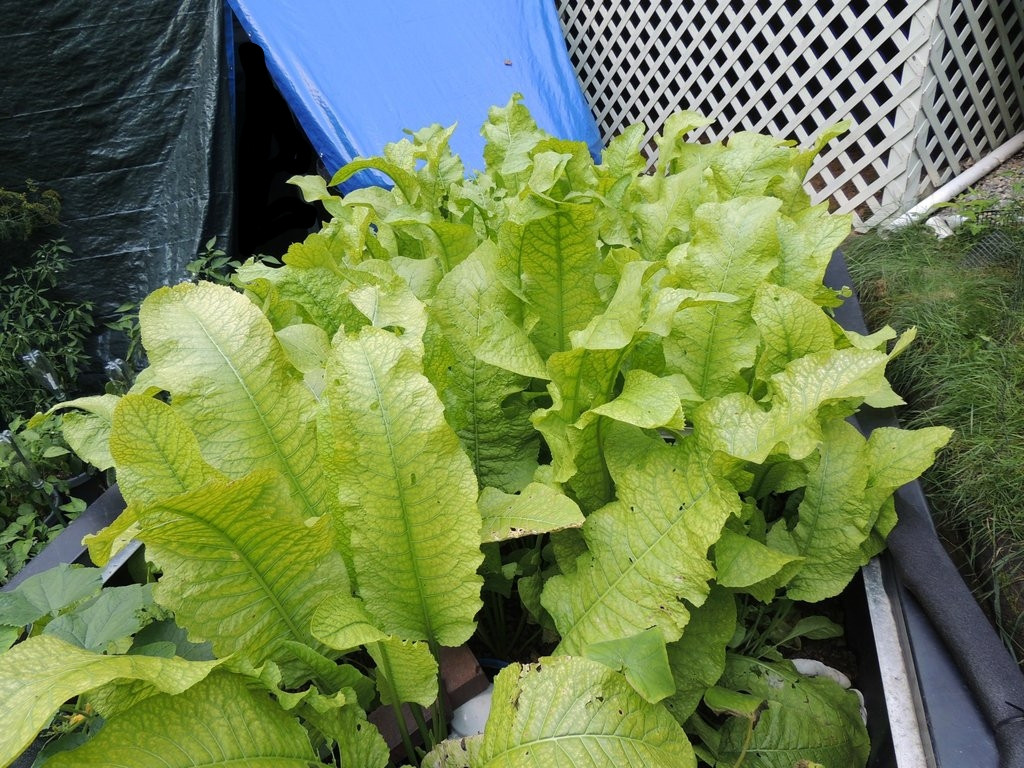
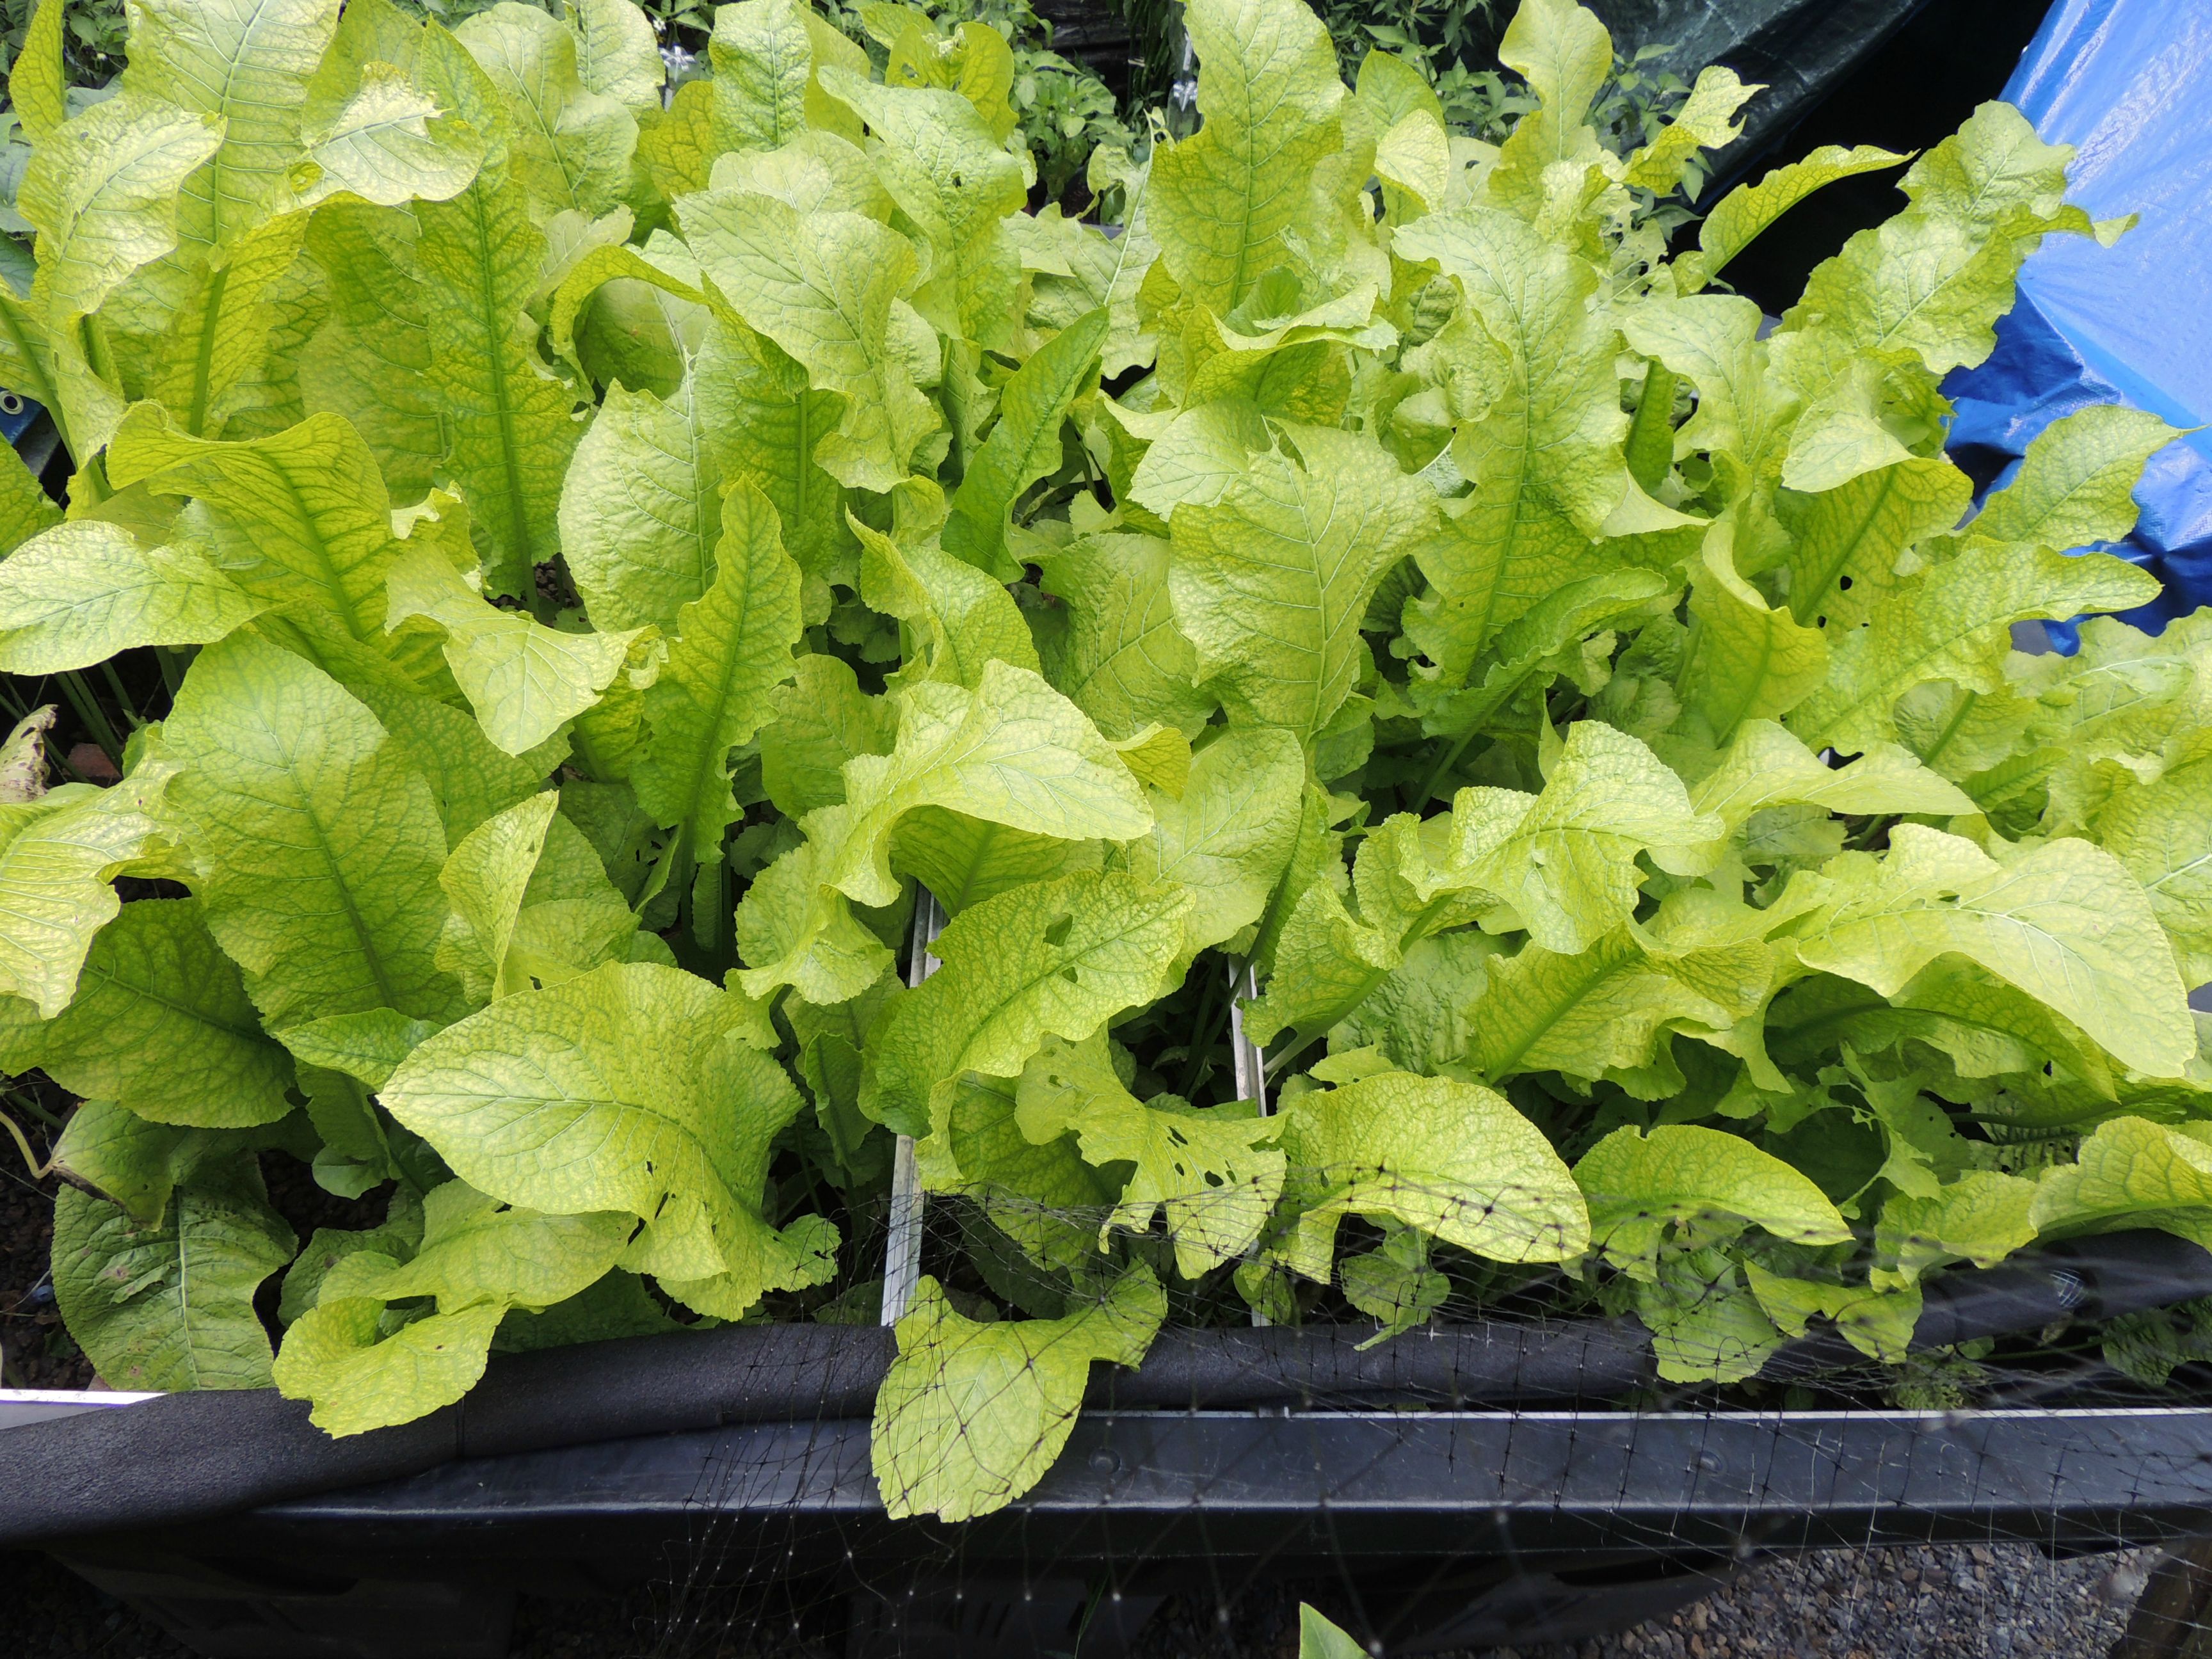
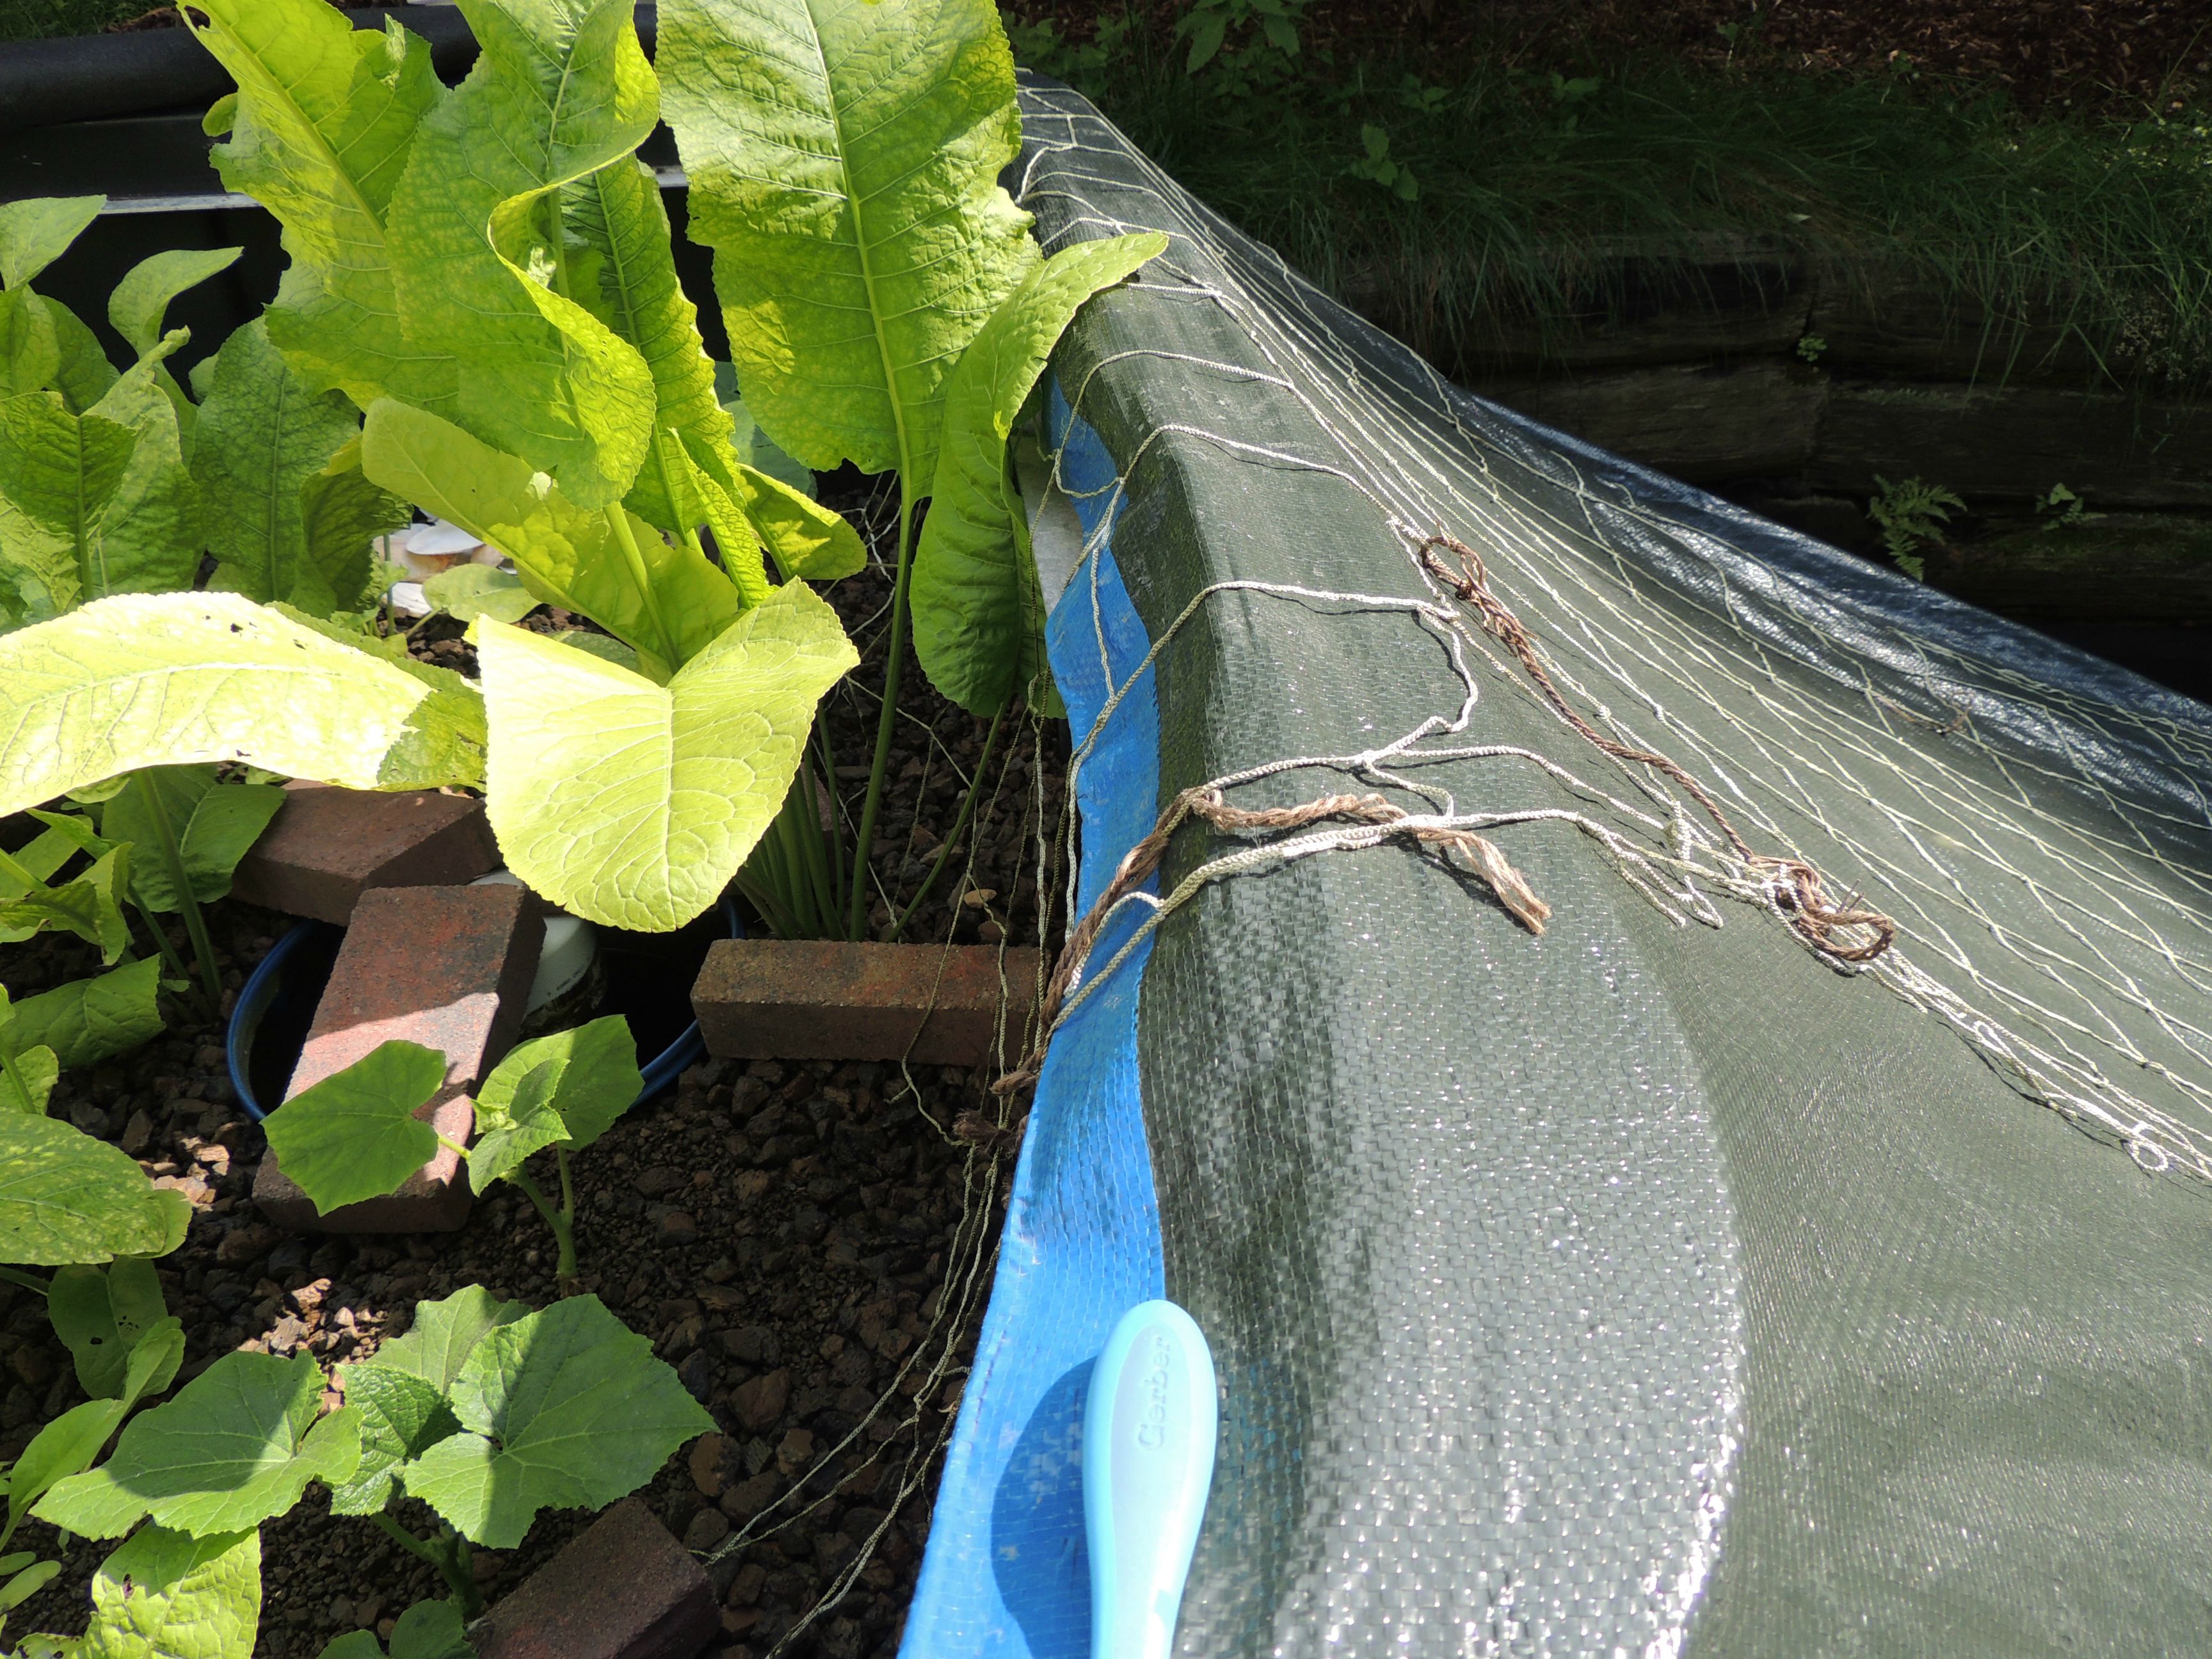
This is a picture of the horseradish plants yesterday, 08/09/2014:
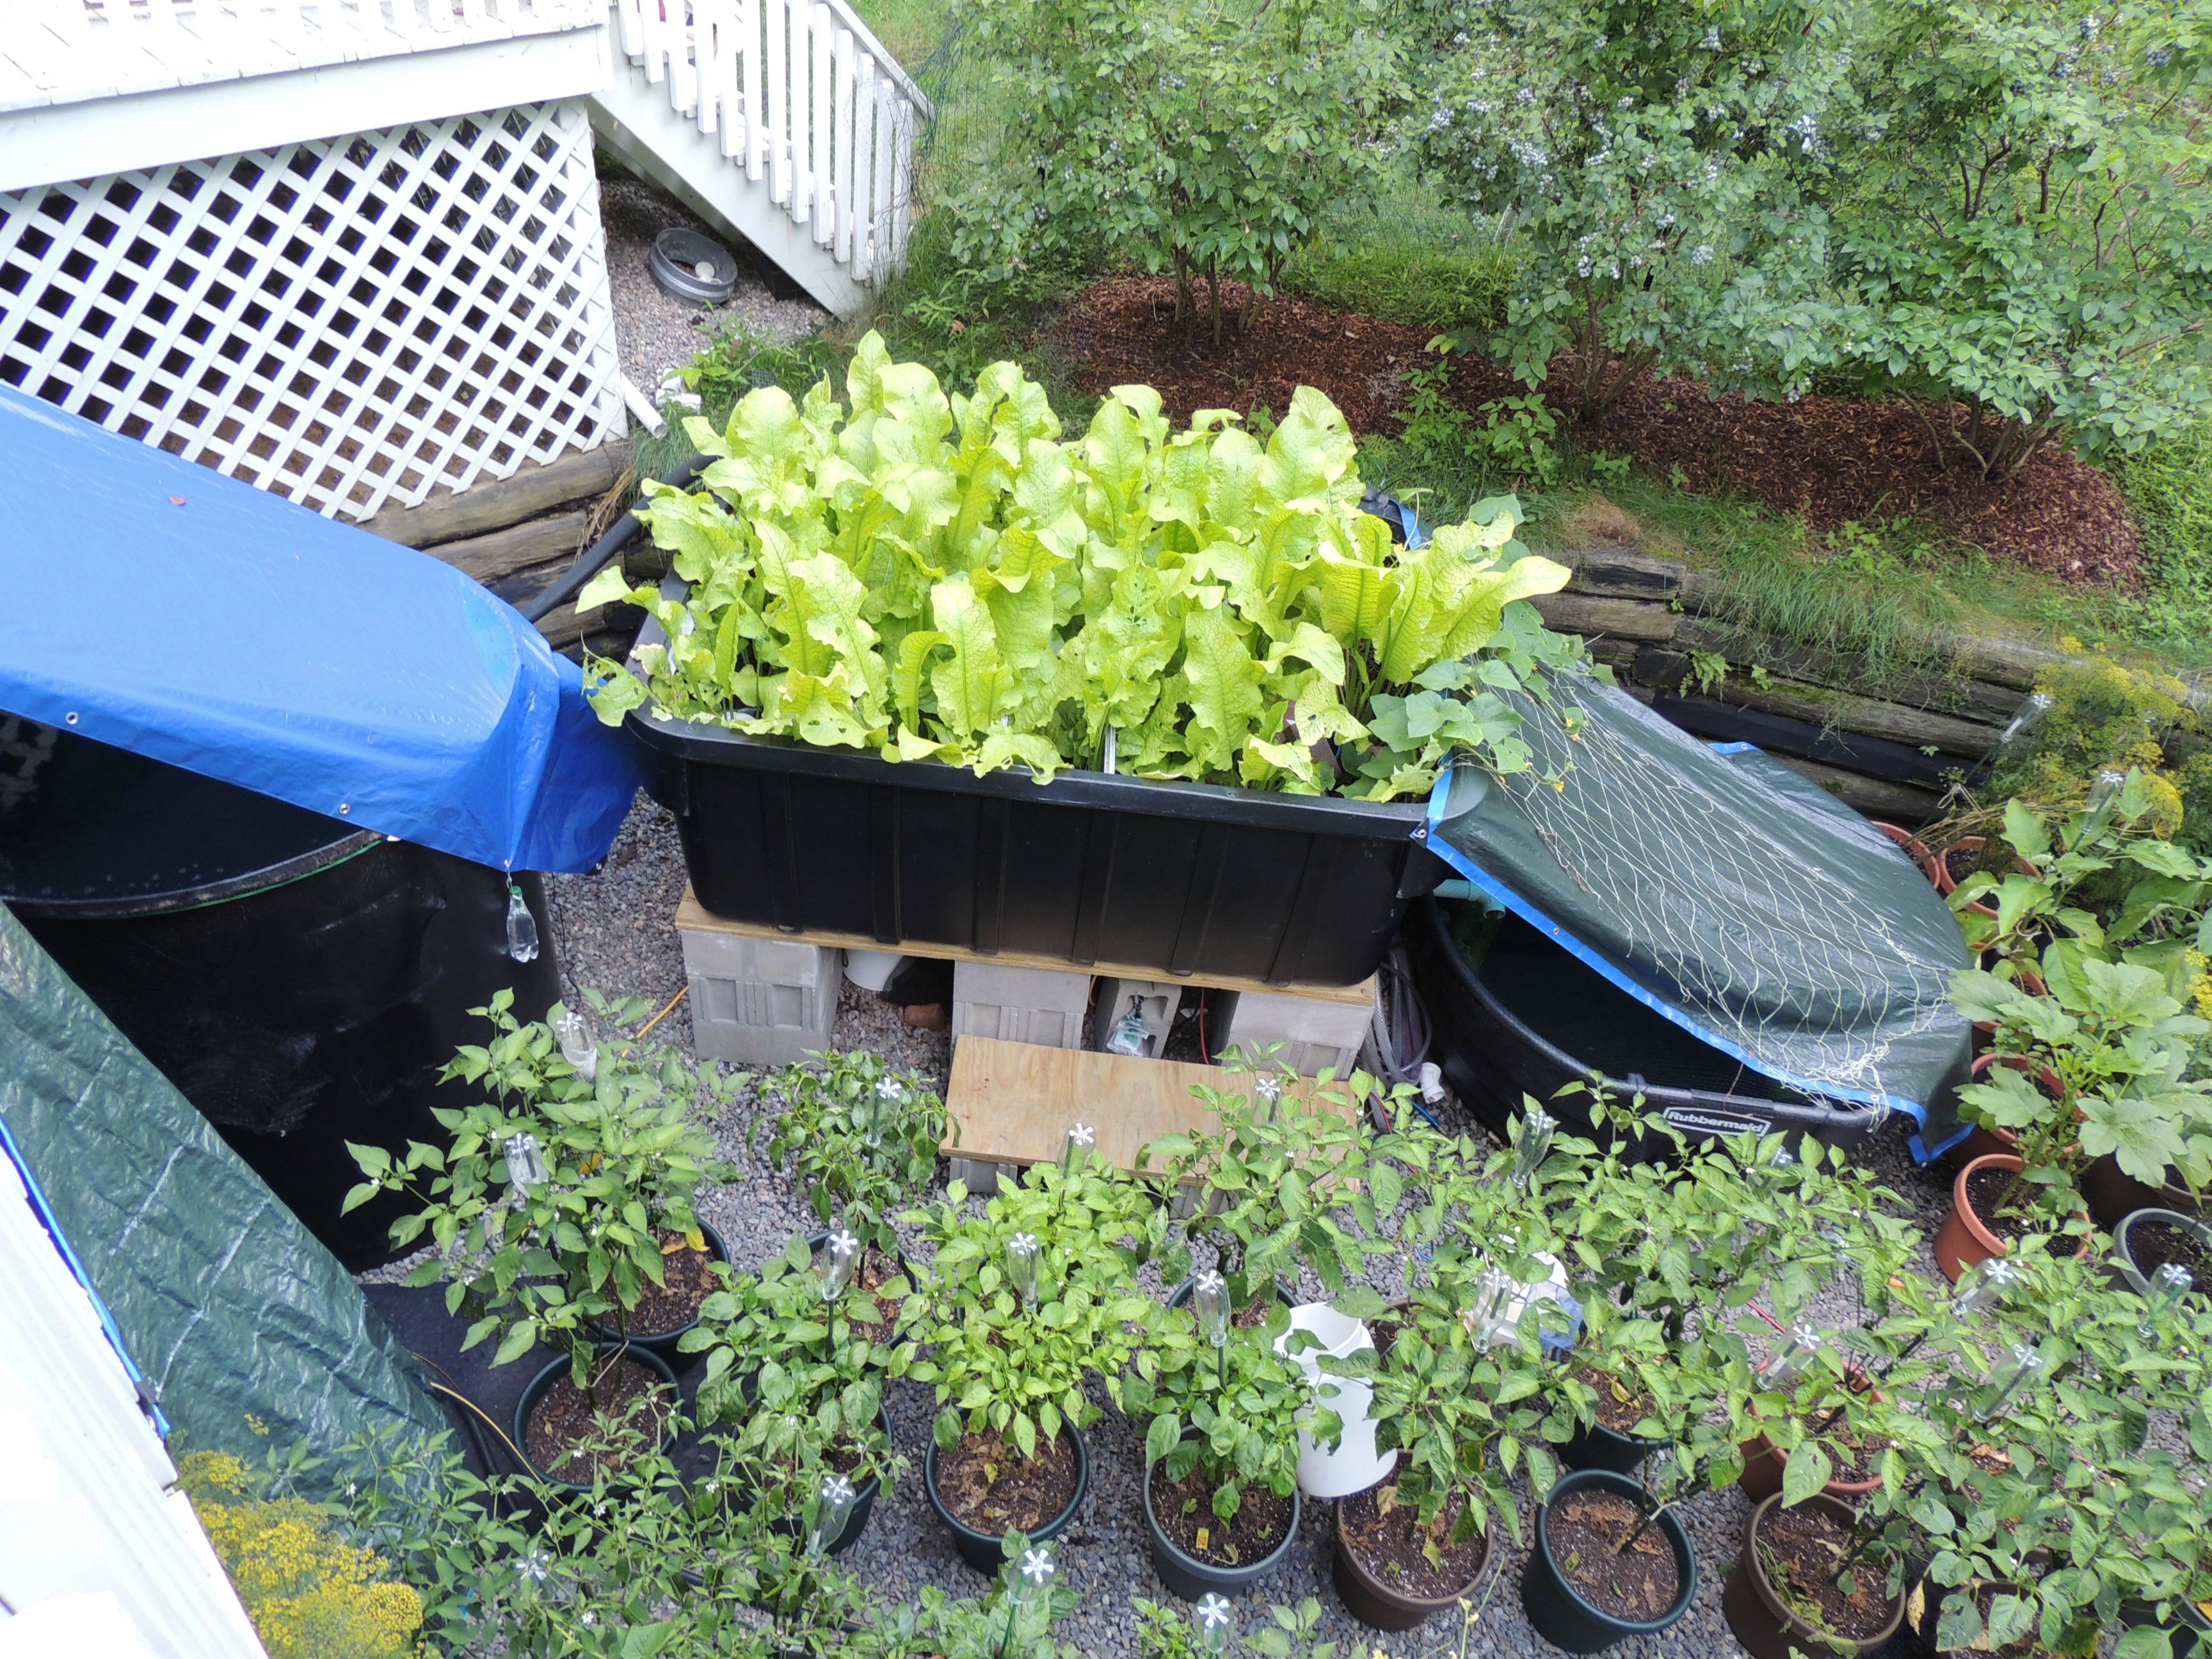
Long view:
Side view:
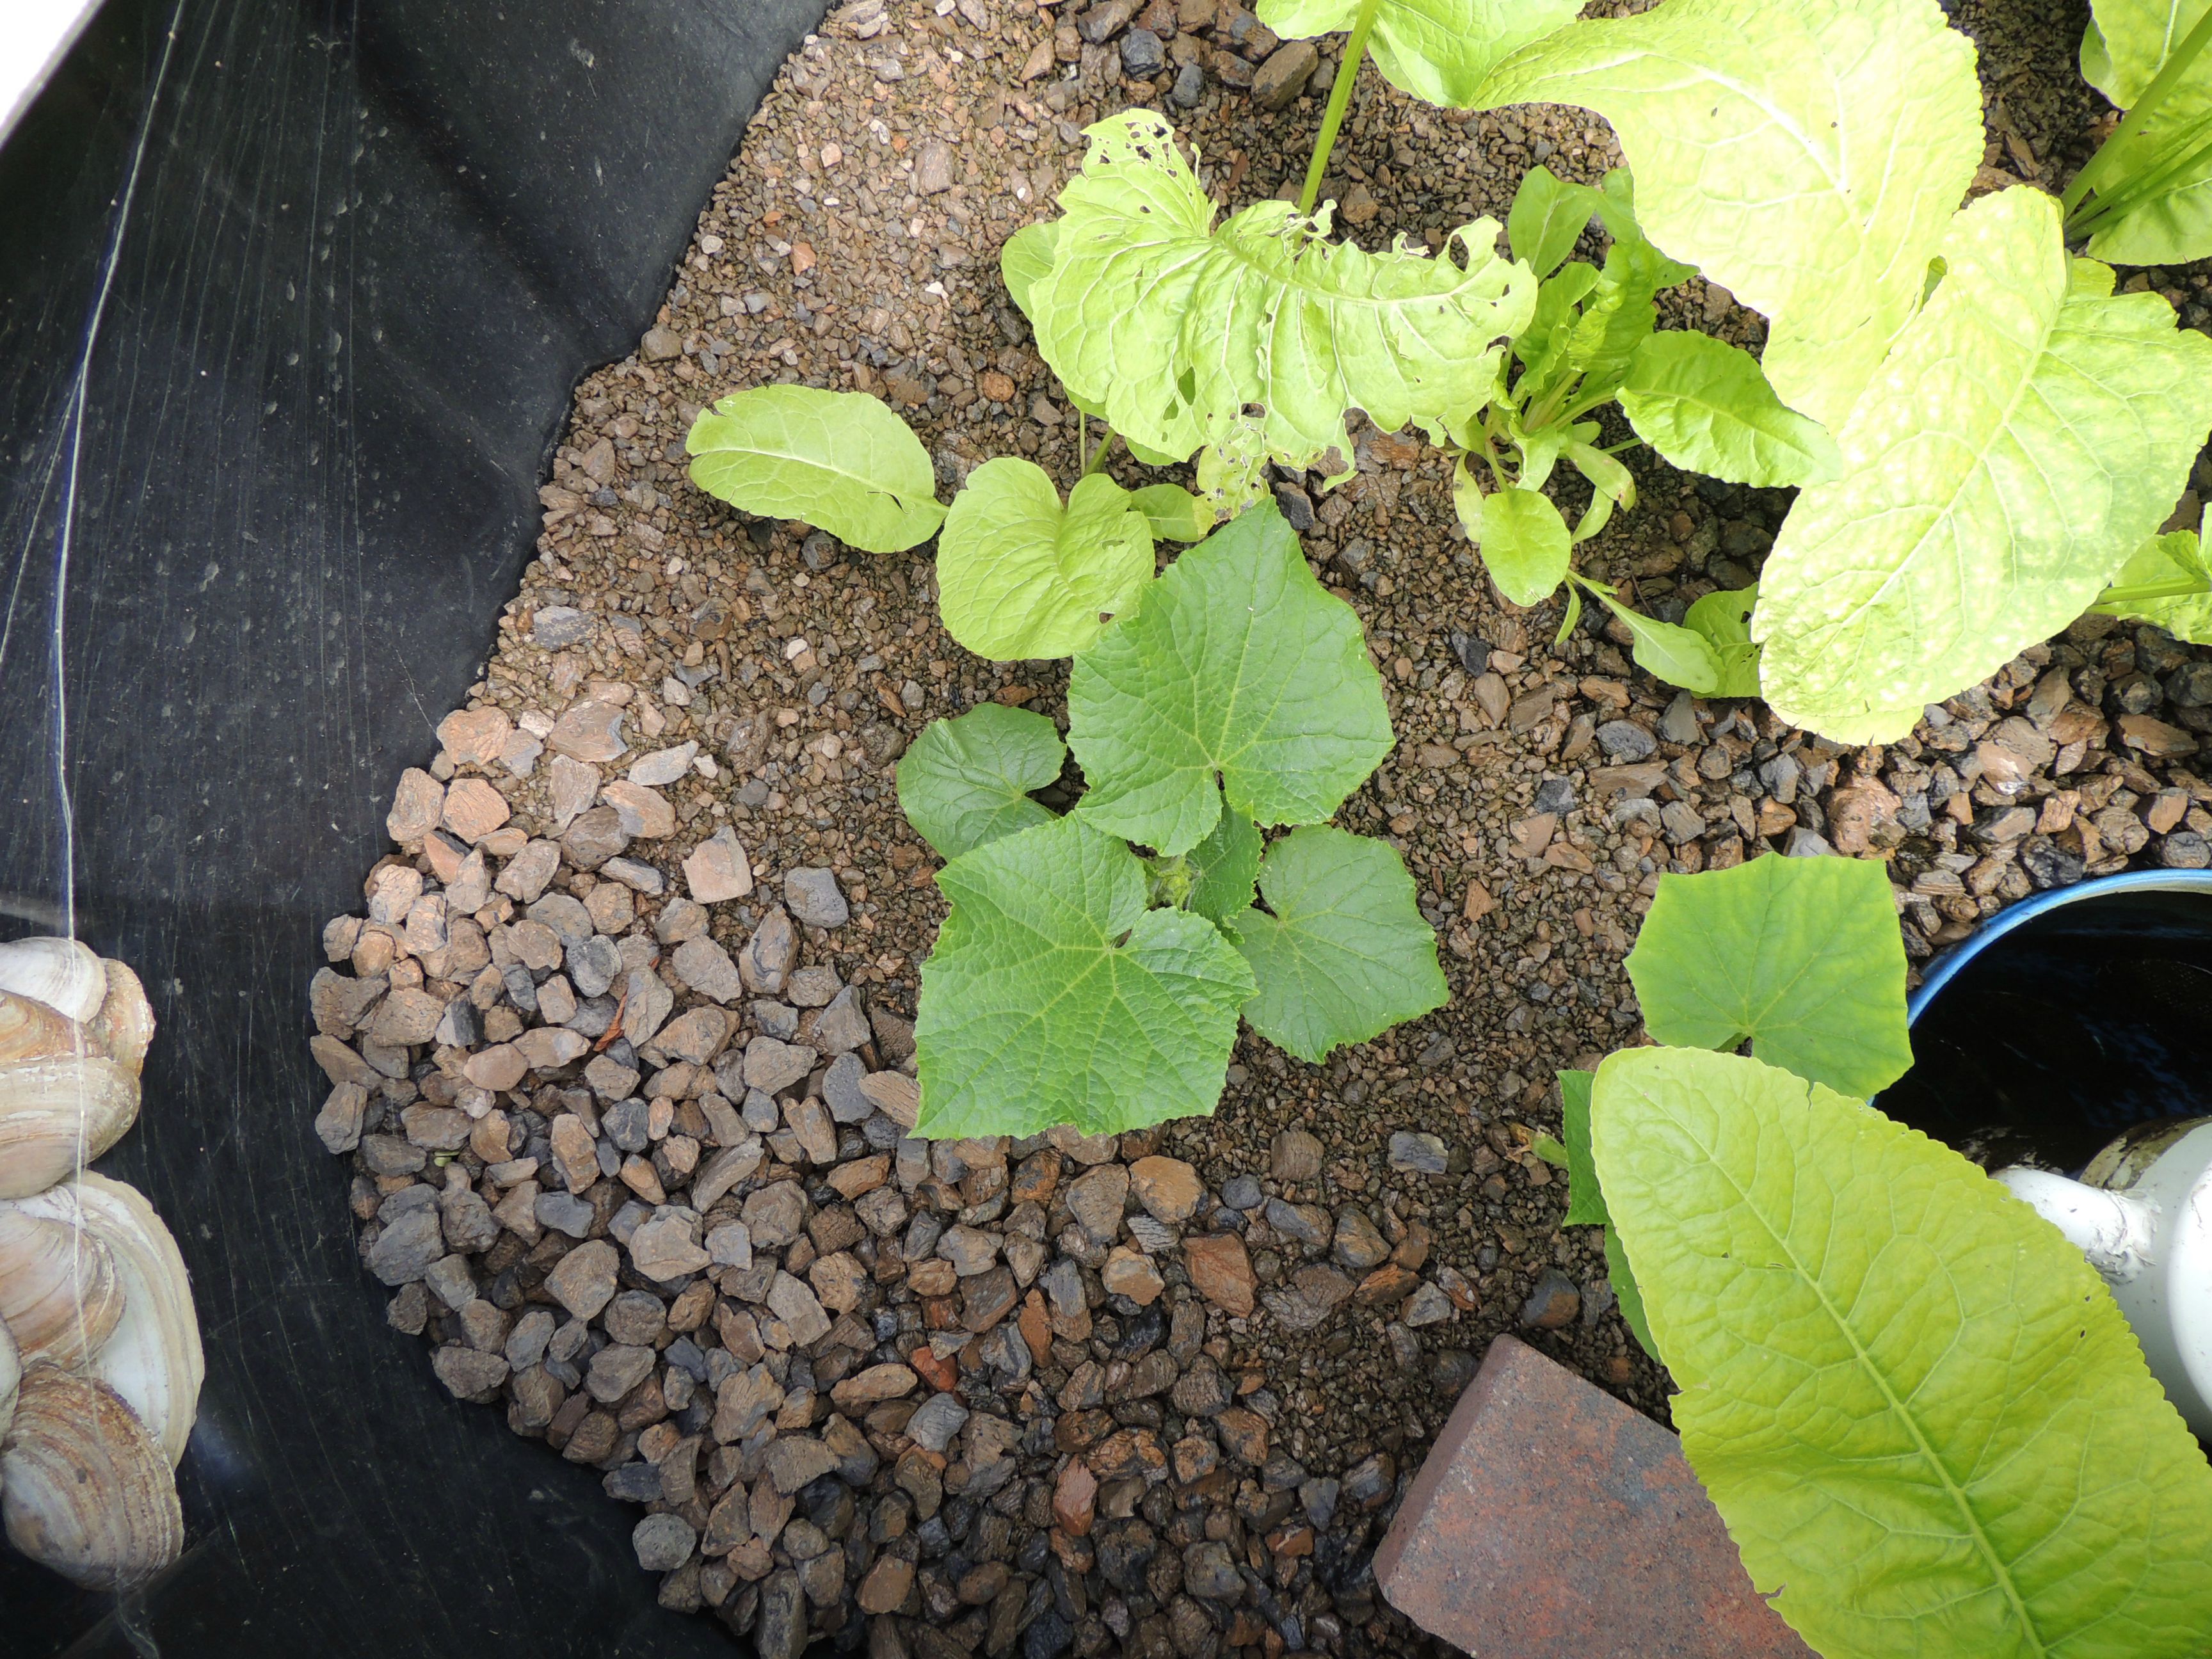
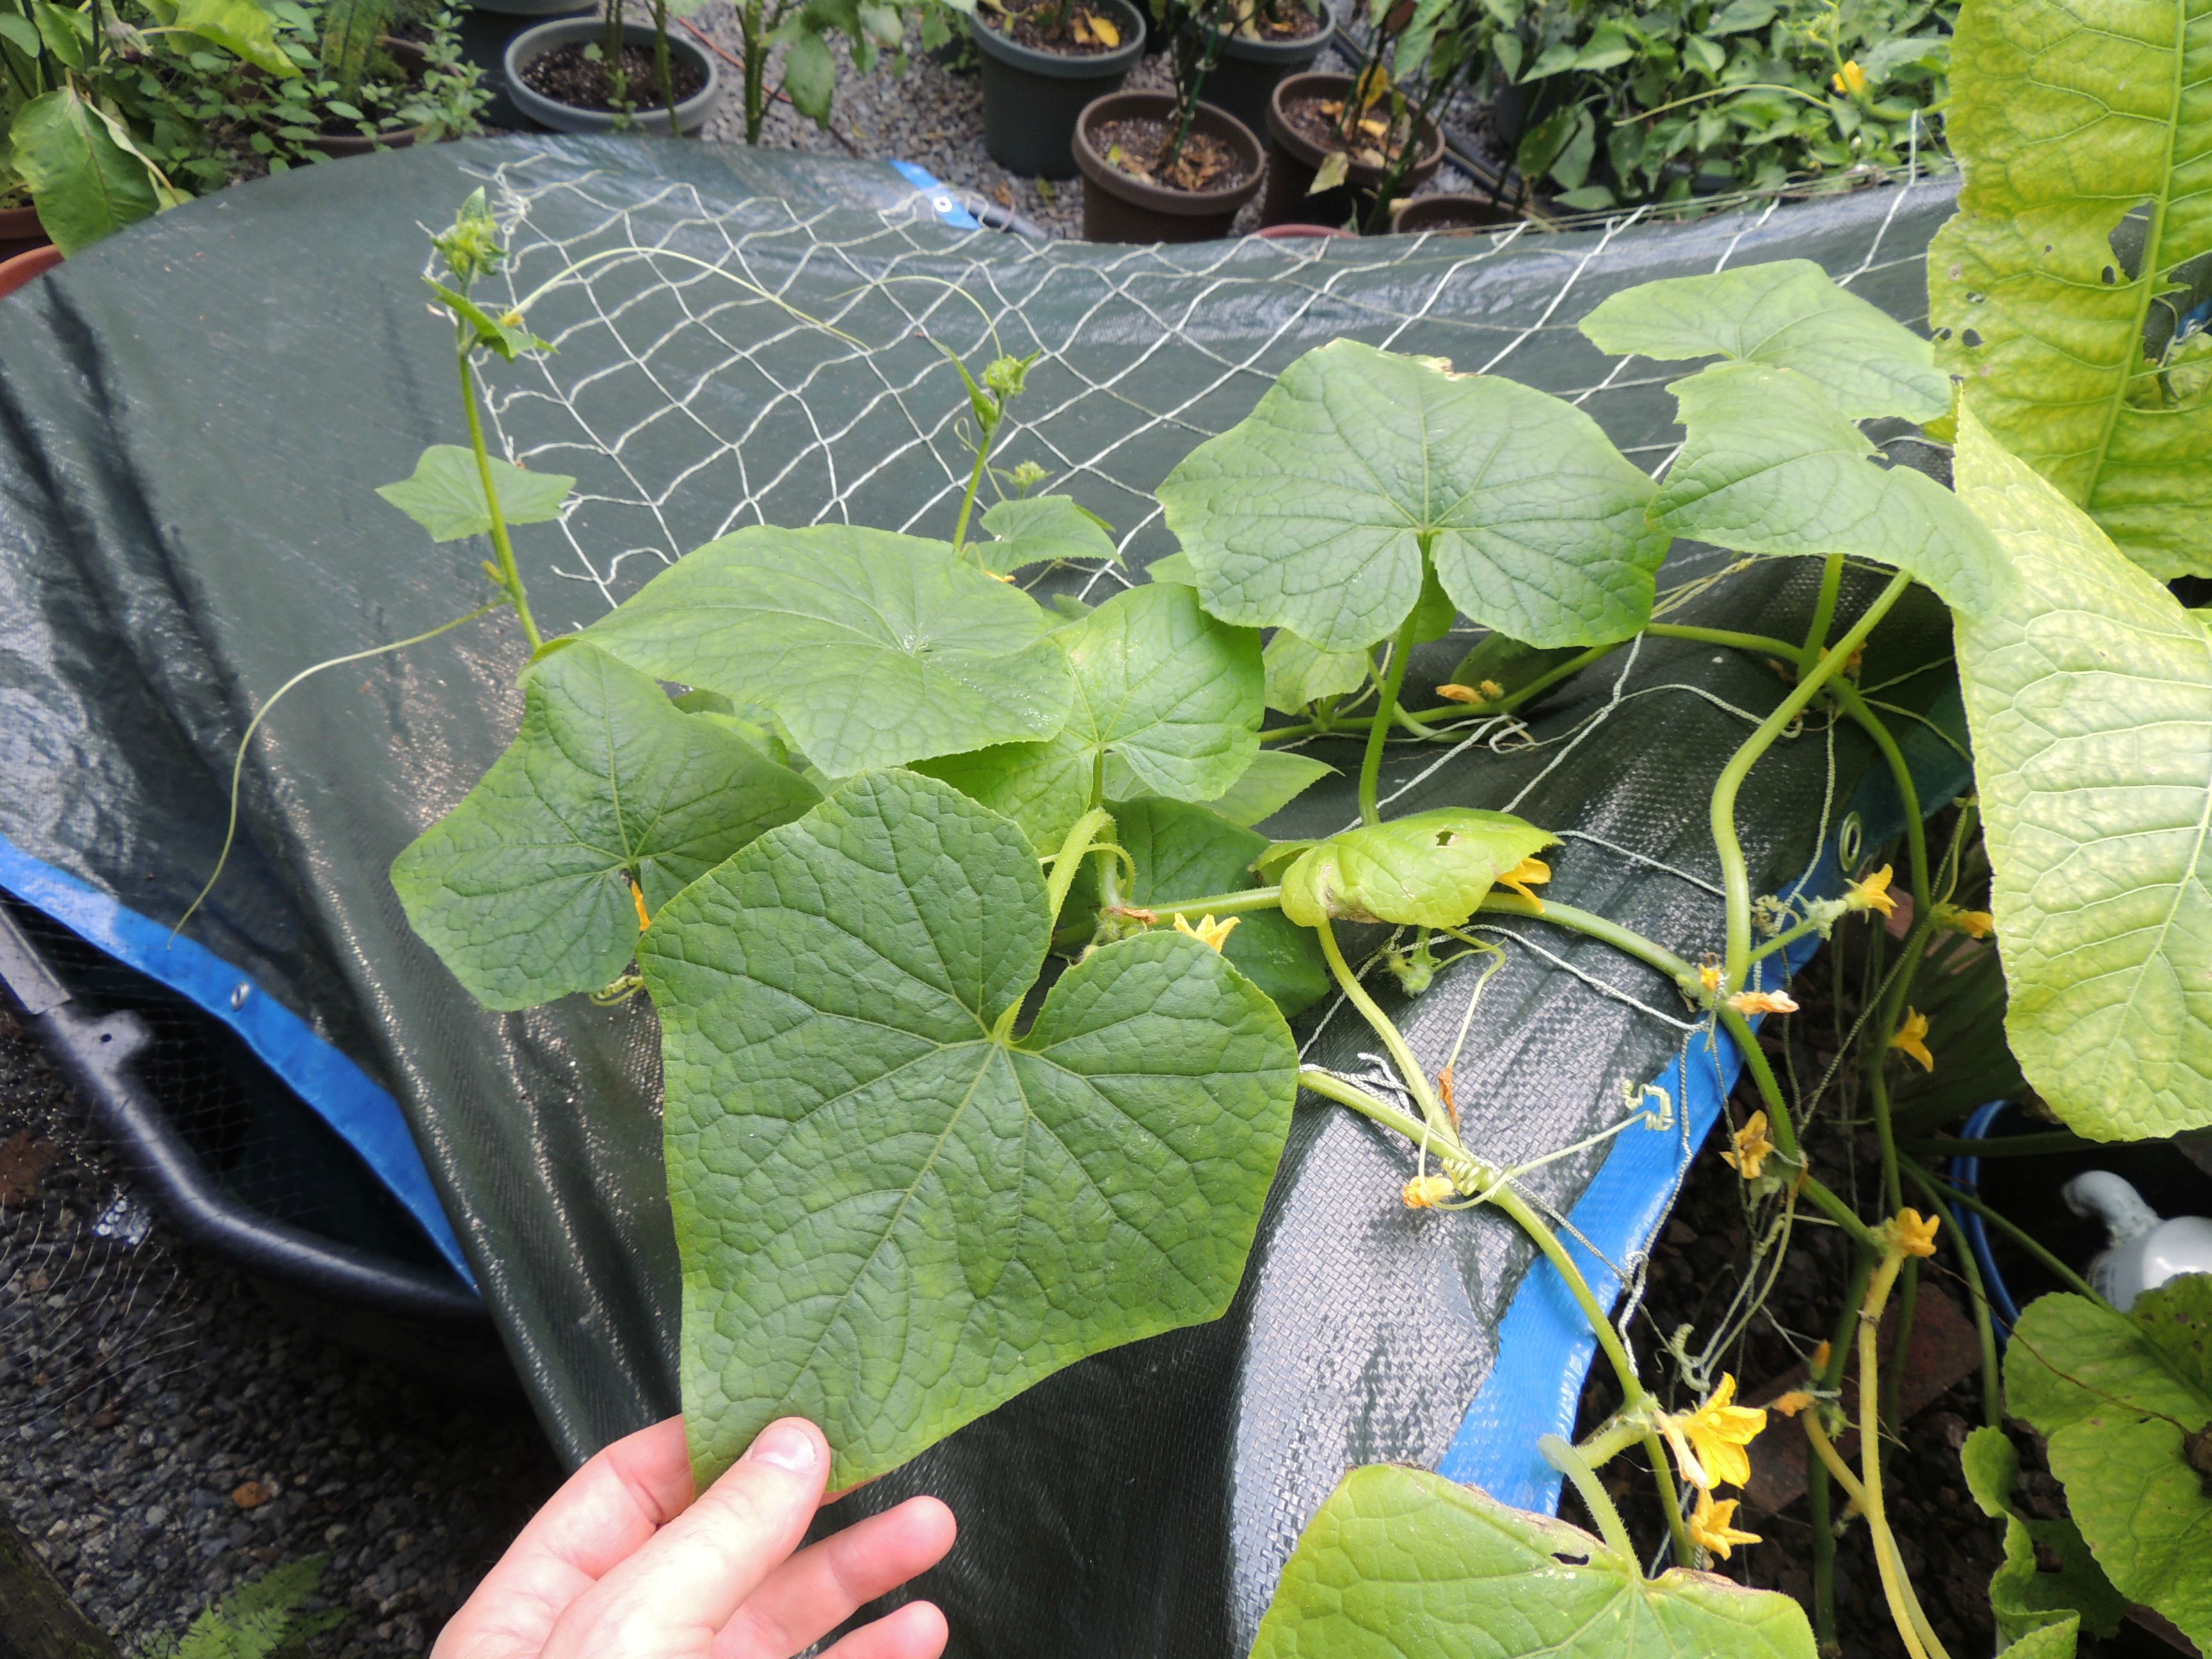
Close-up. Here you can see the cucumber plants:
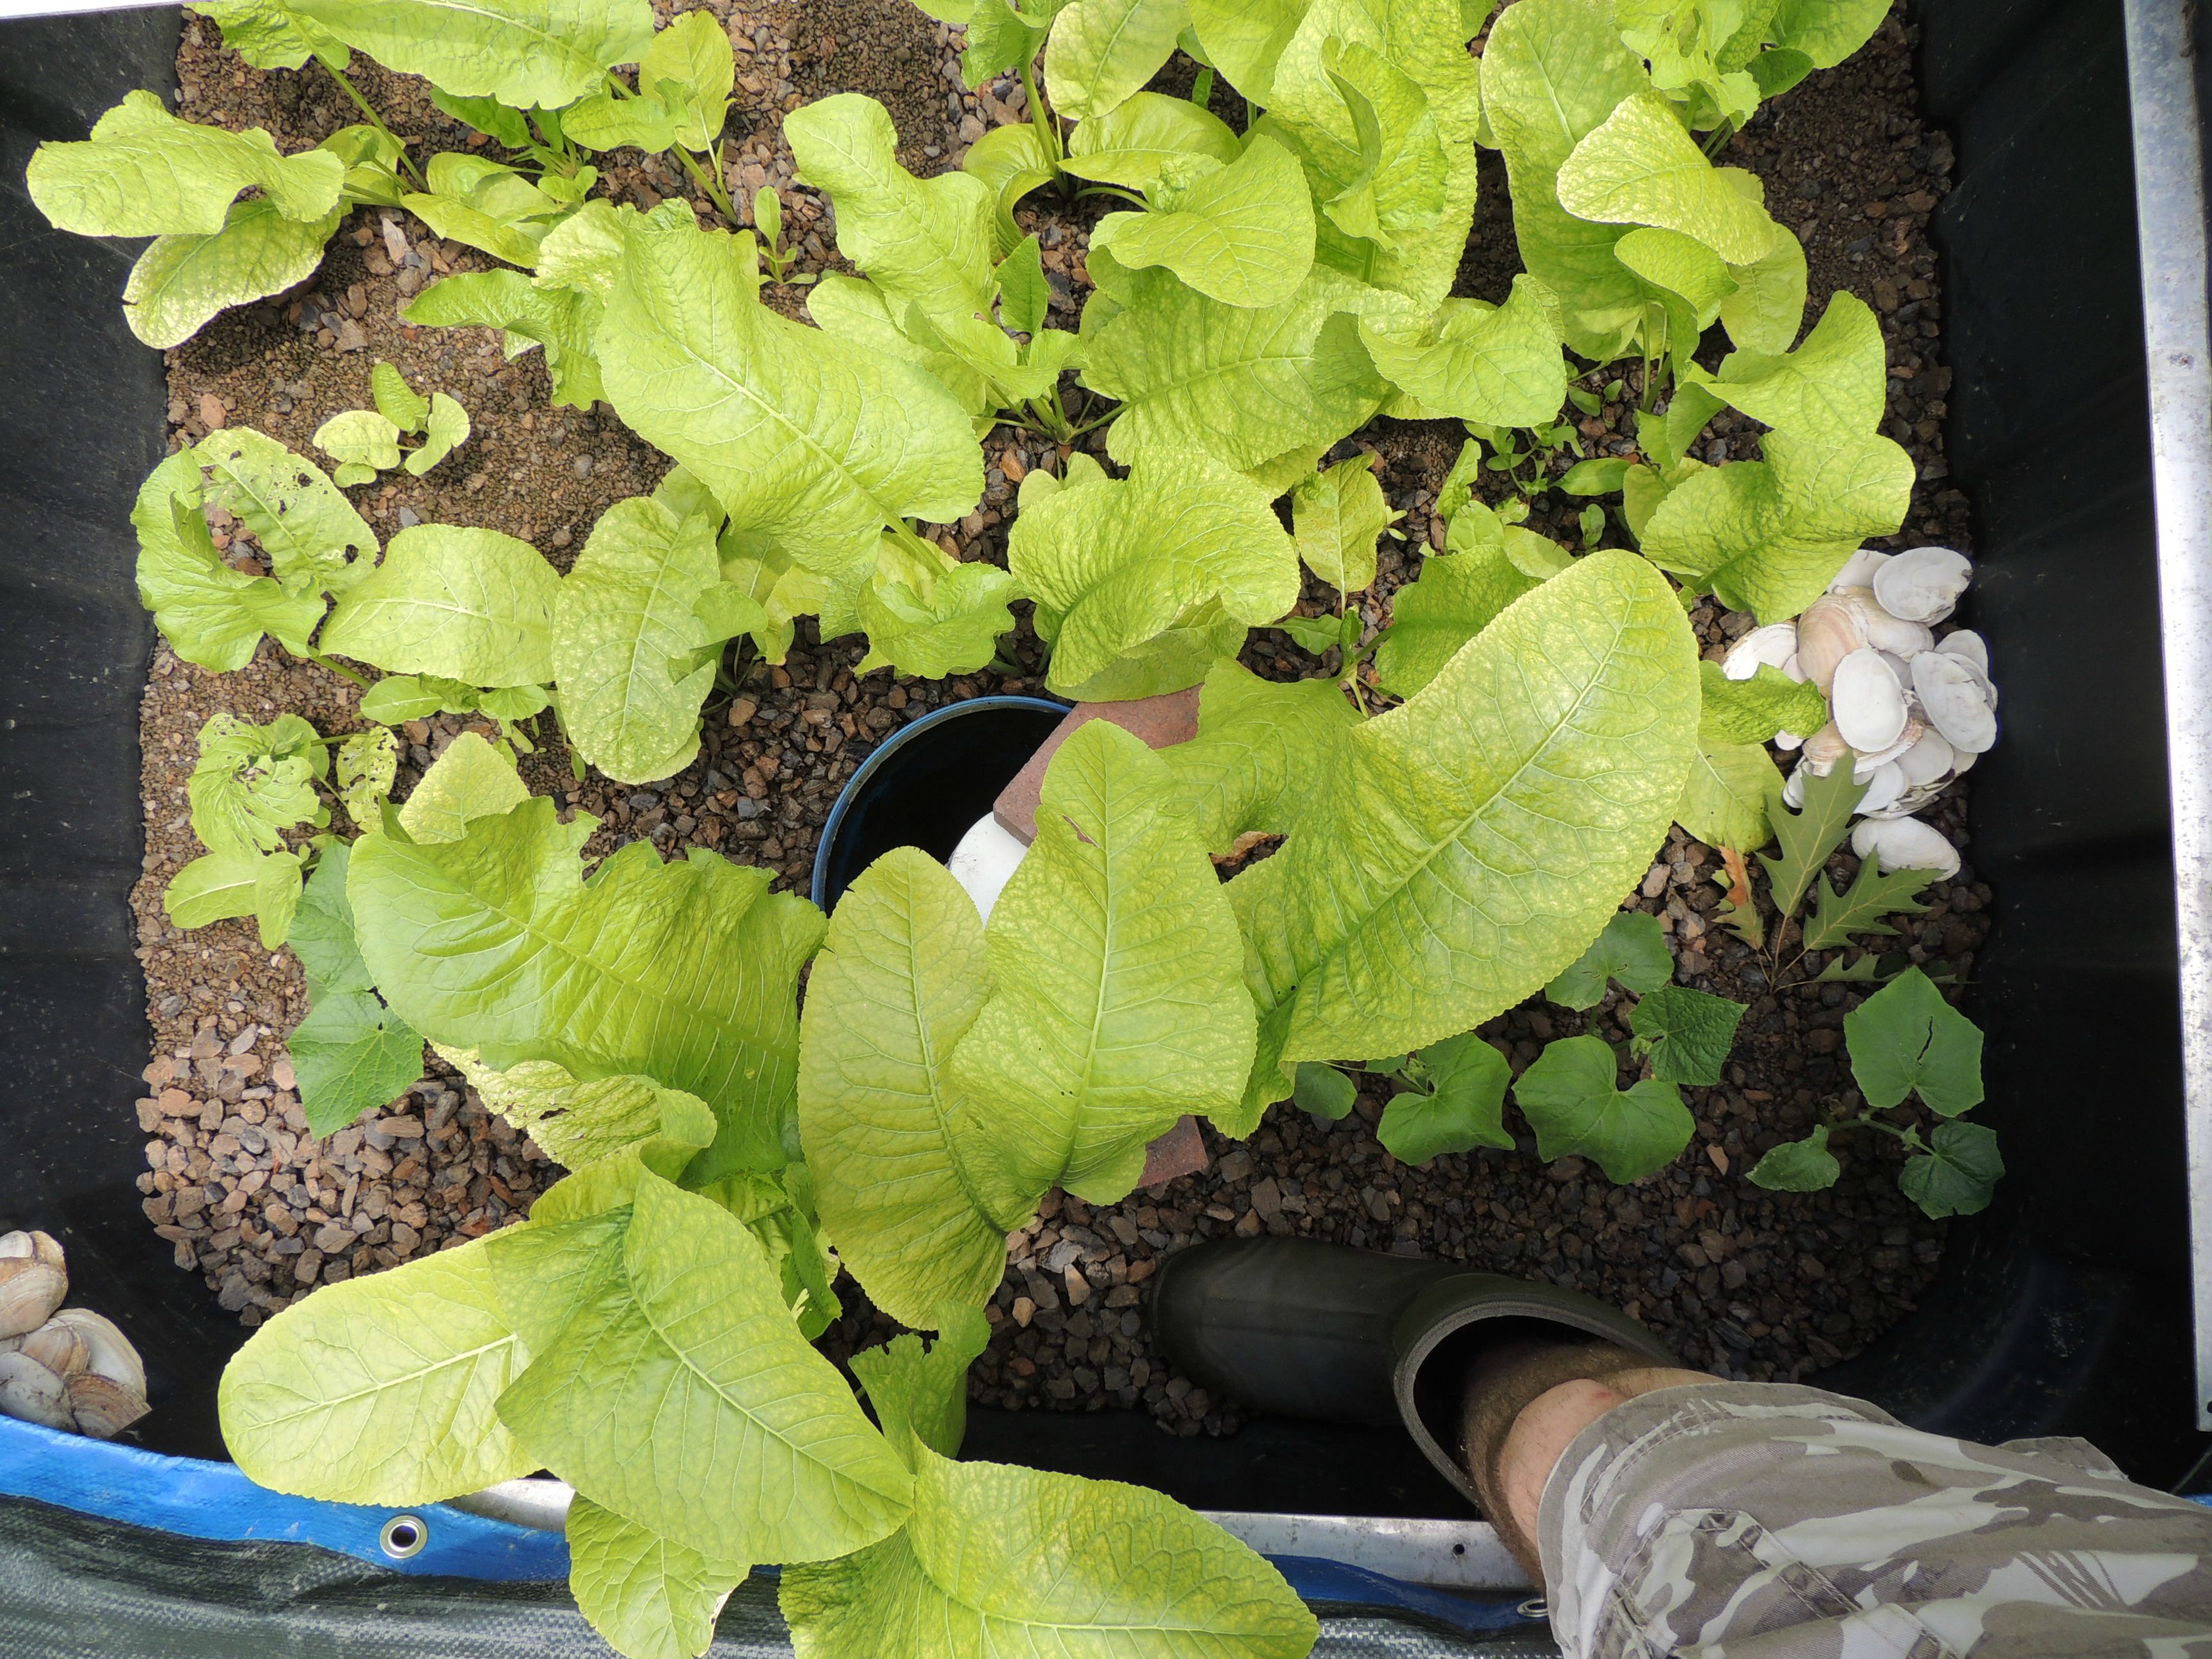
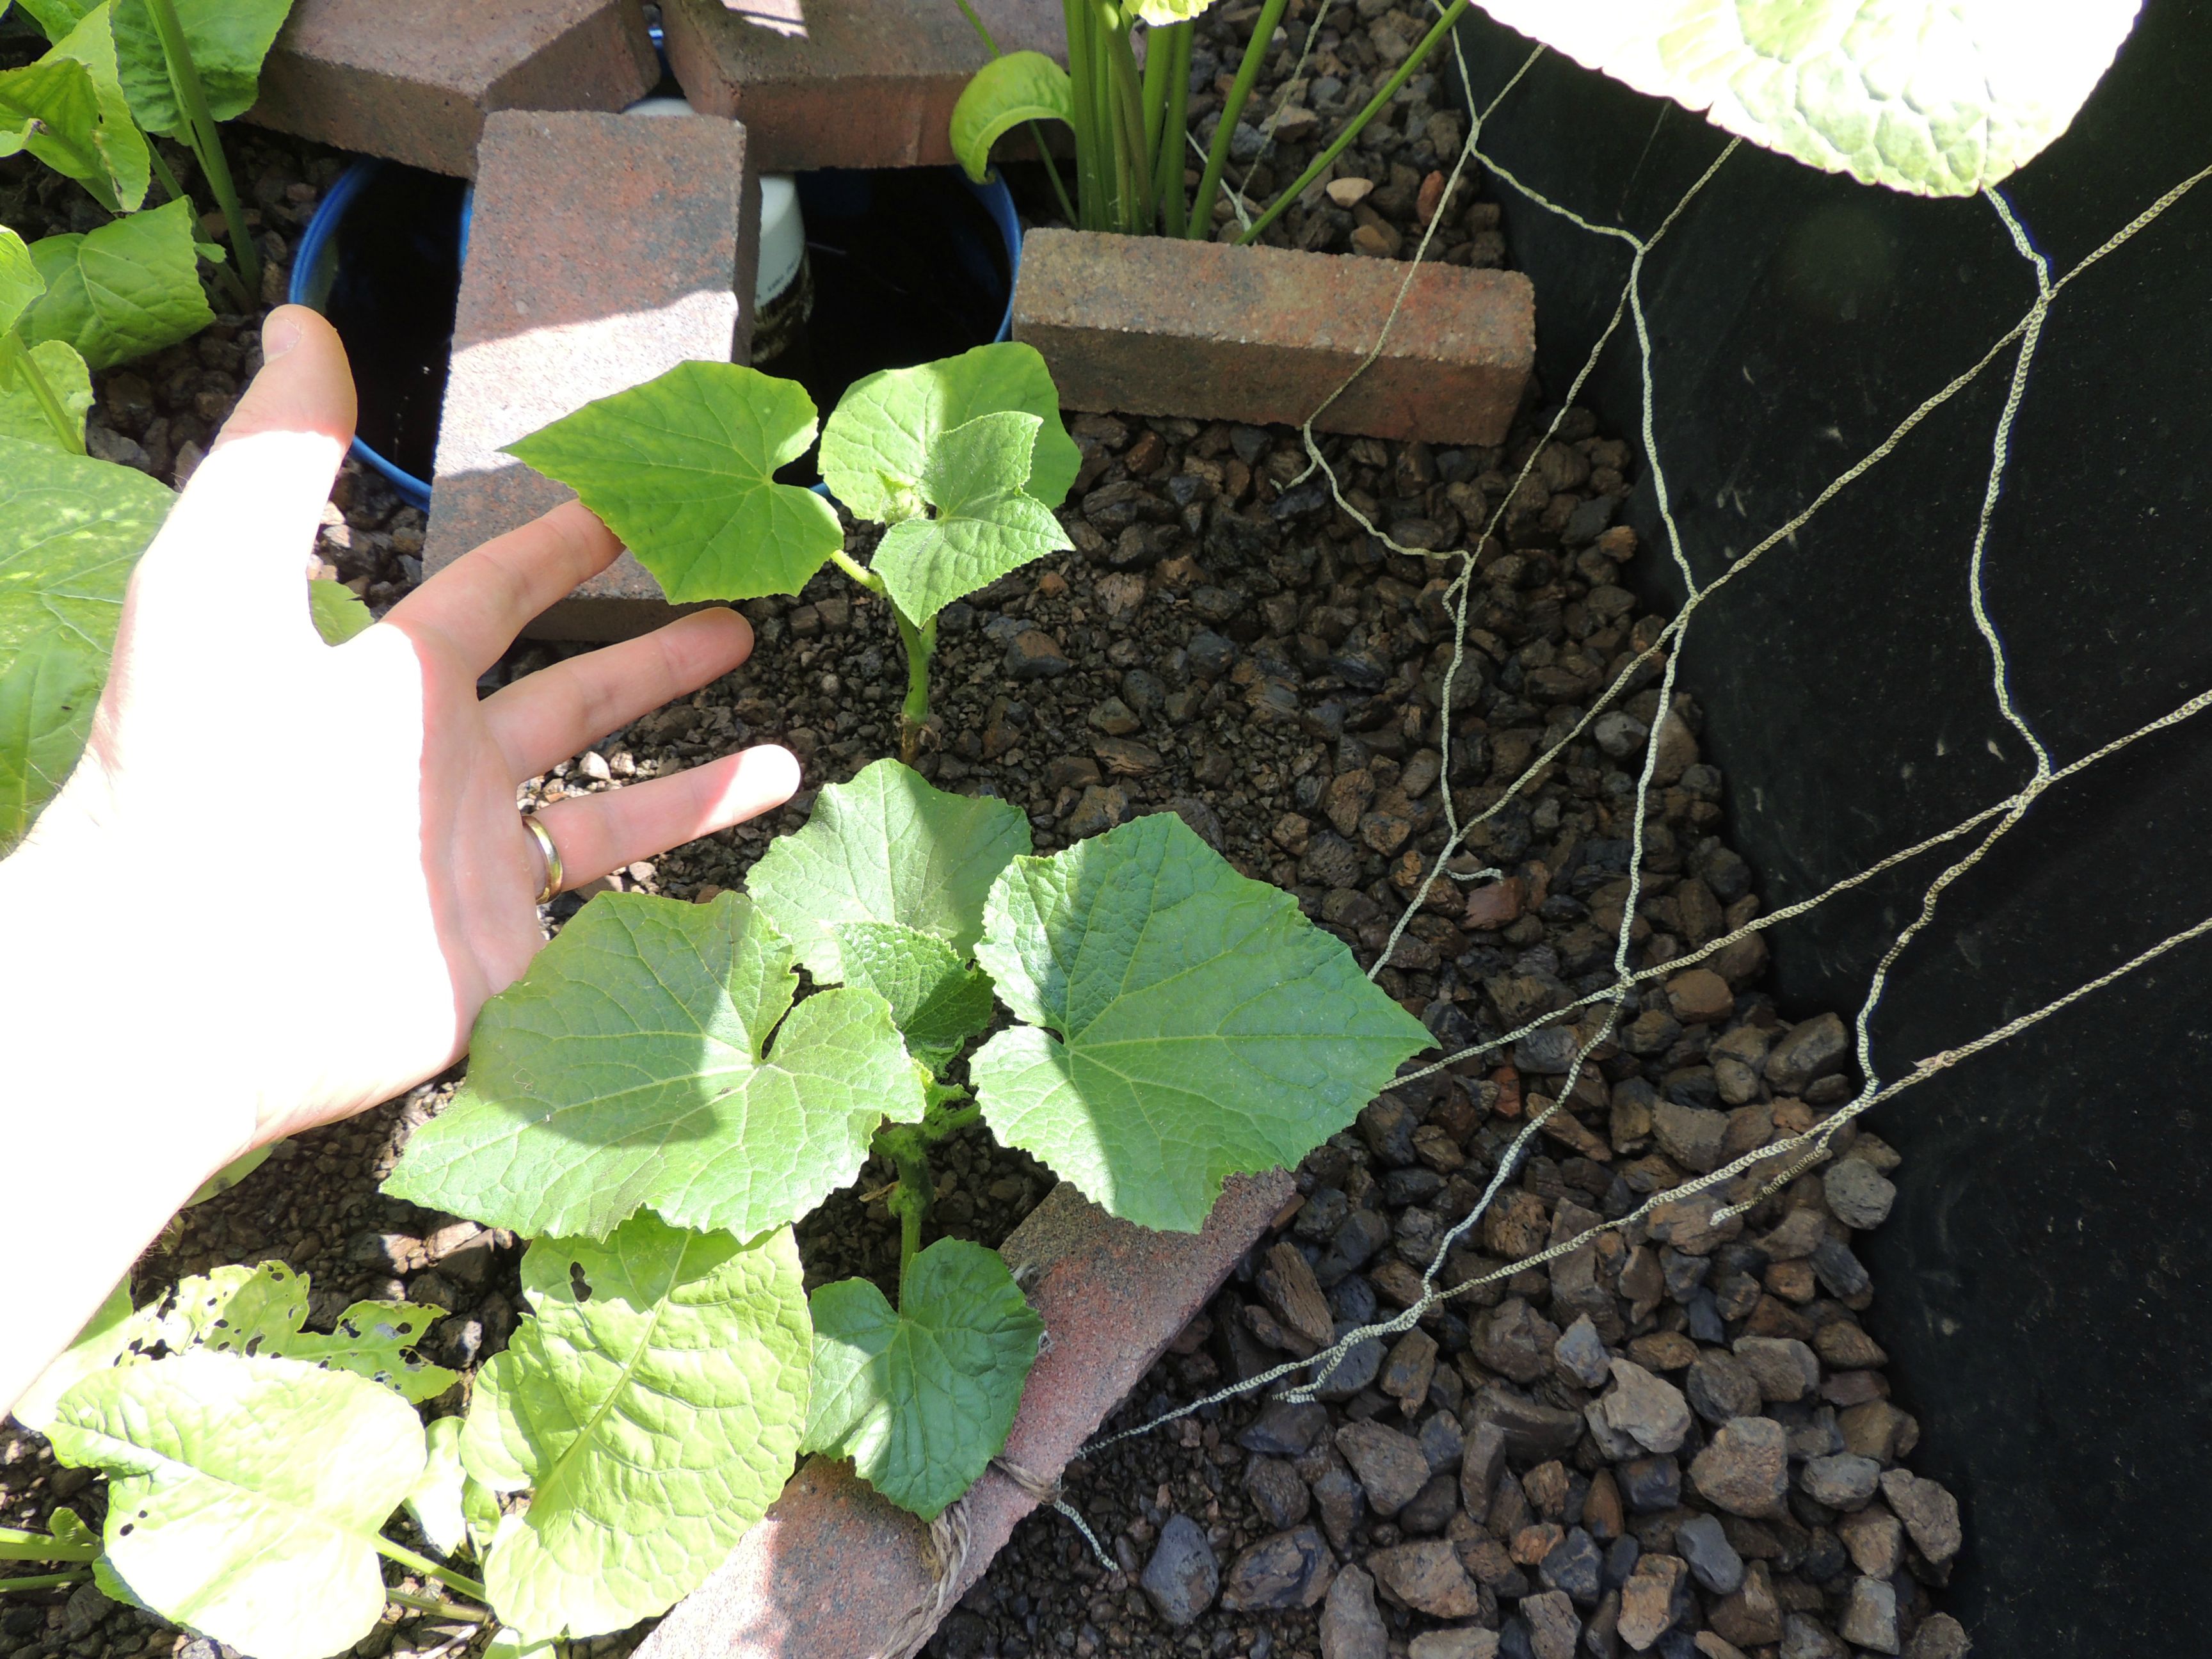
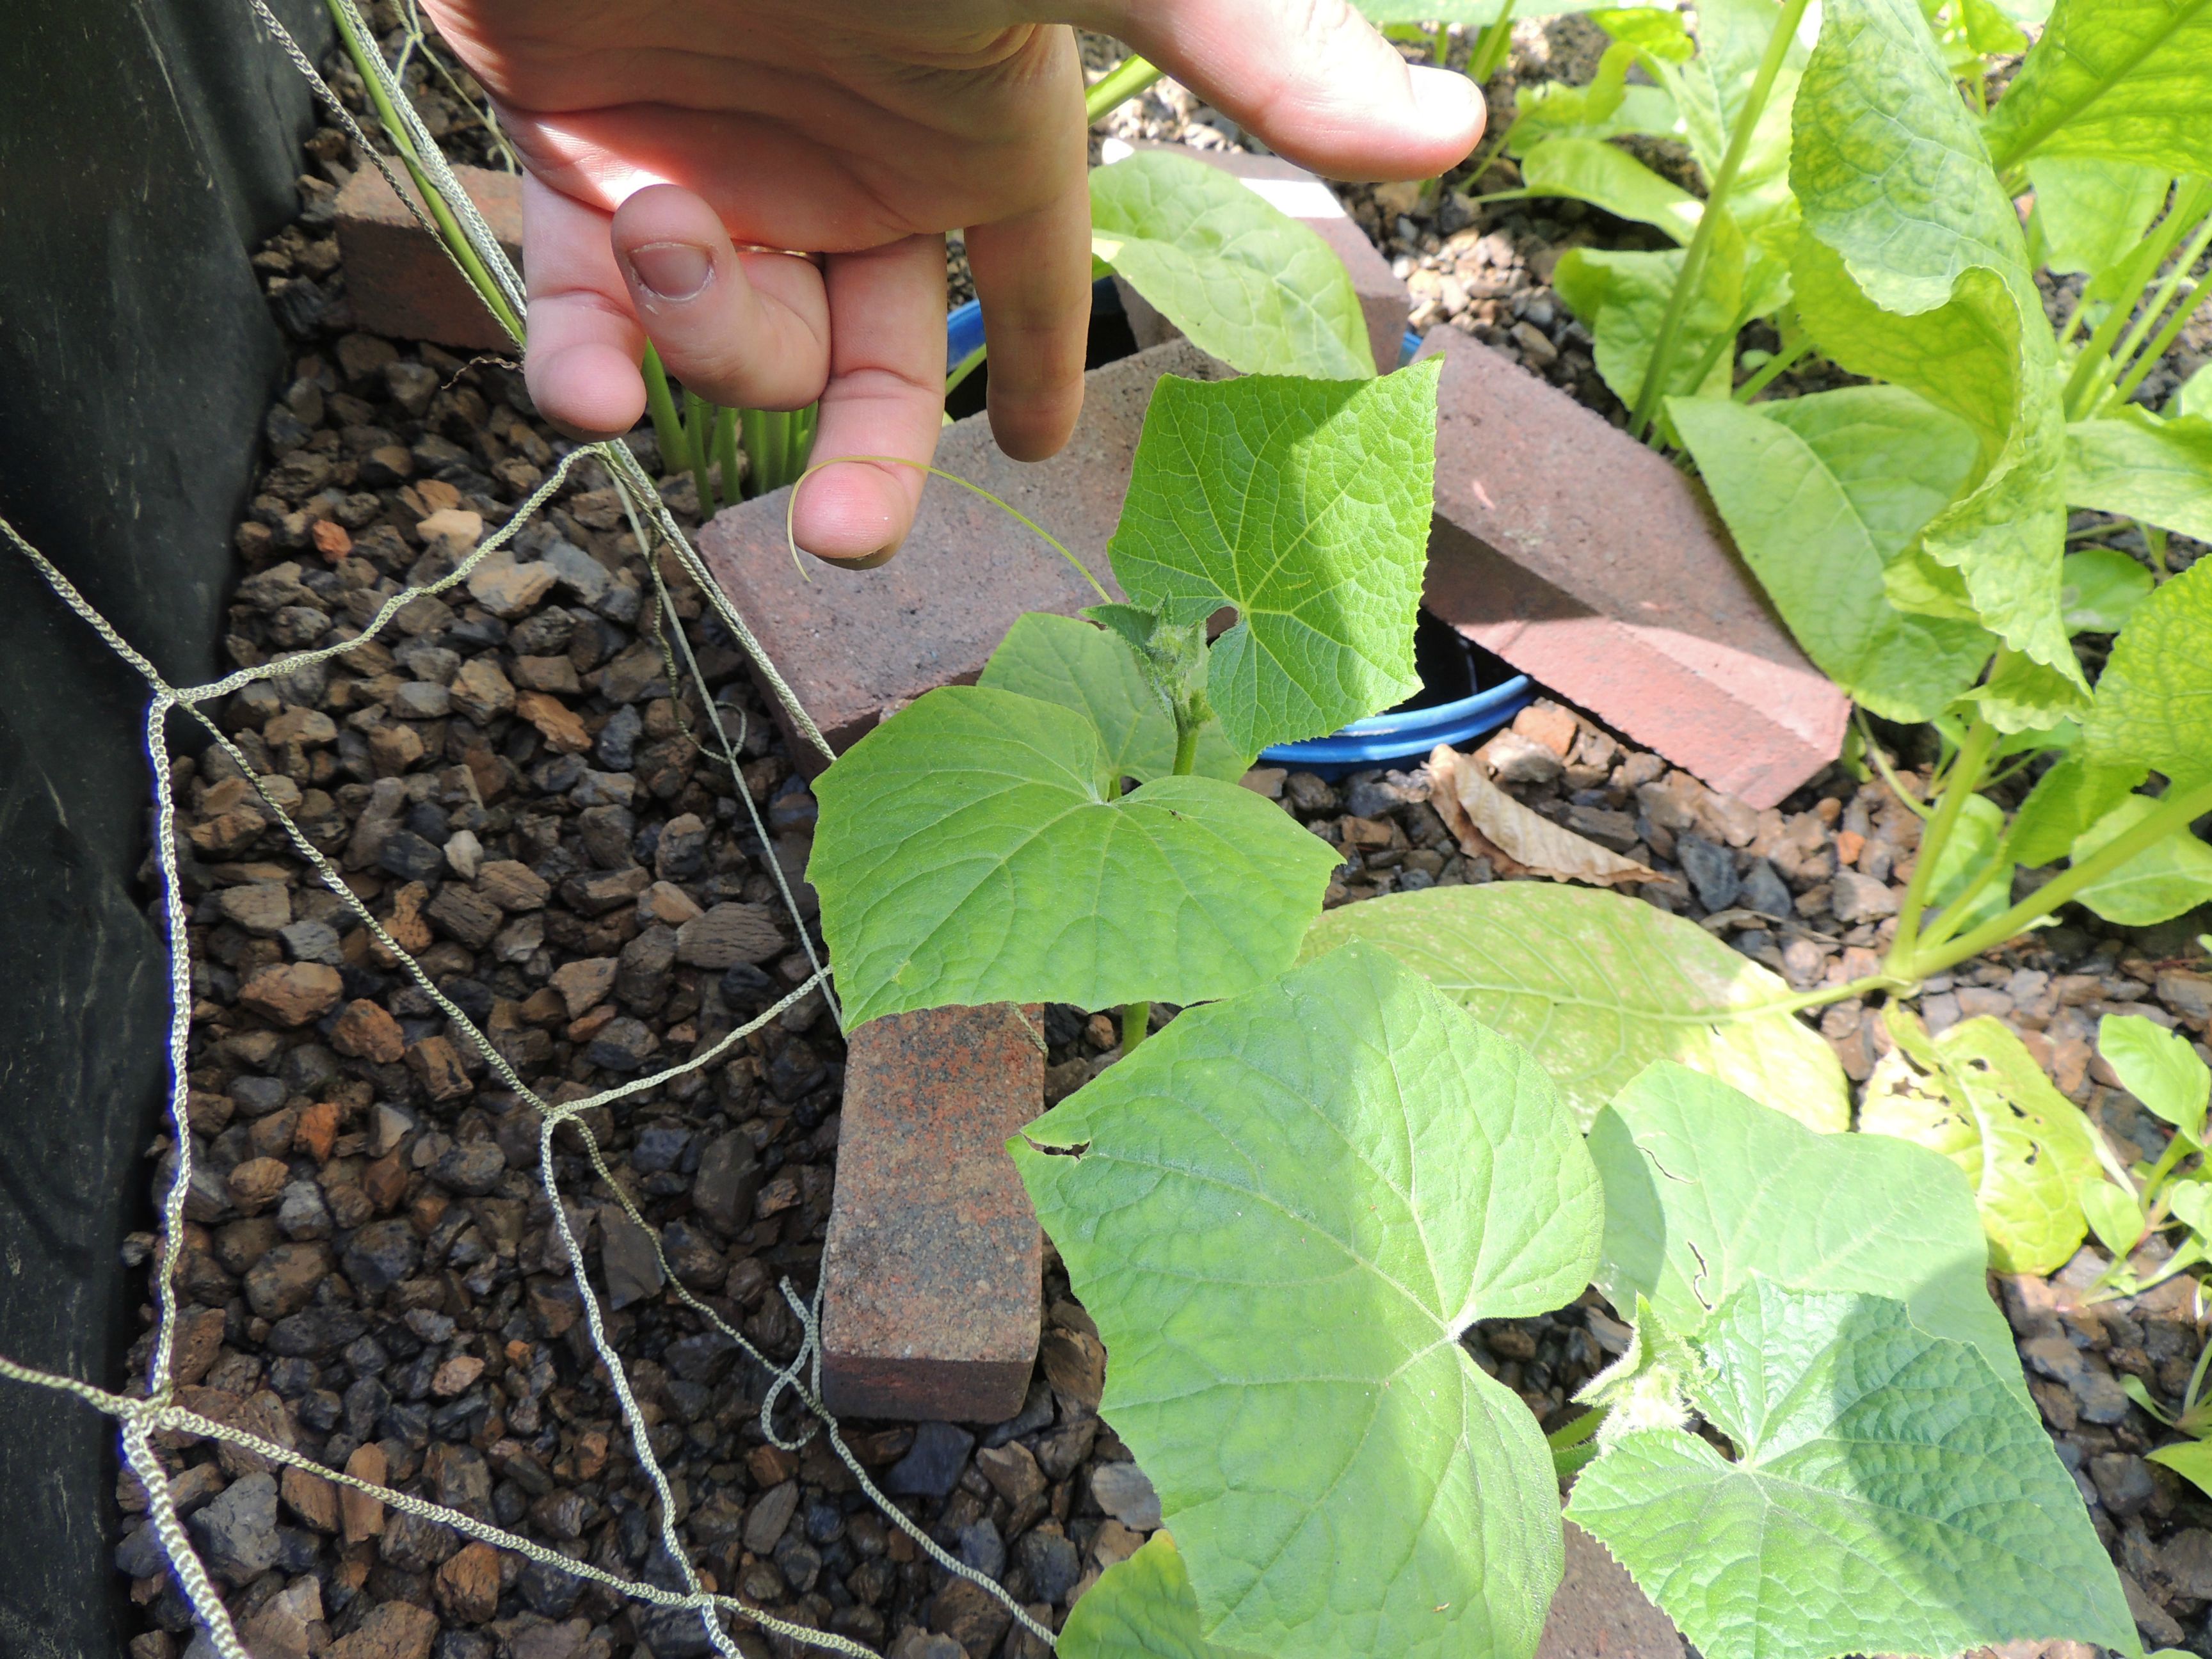
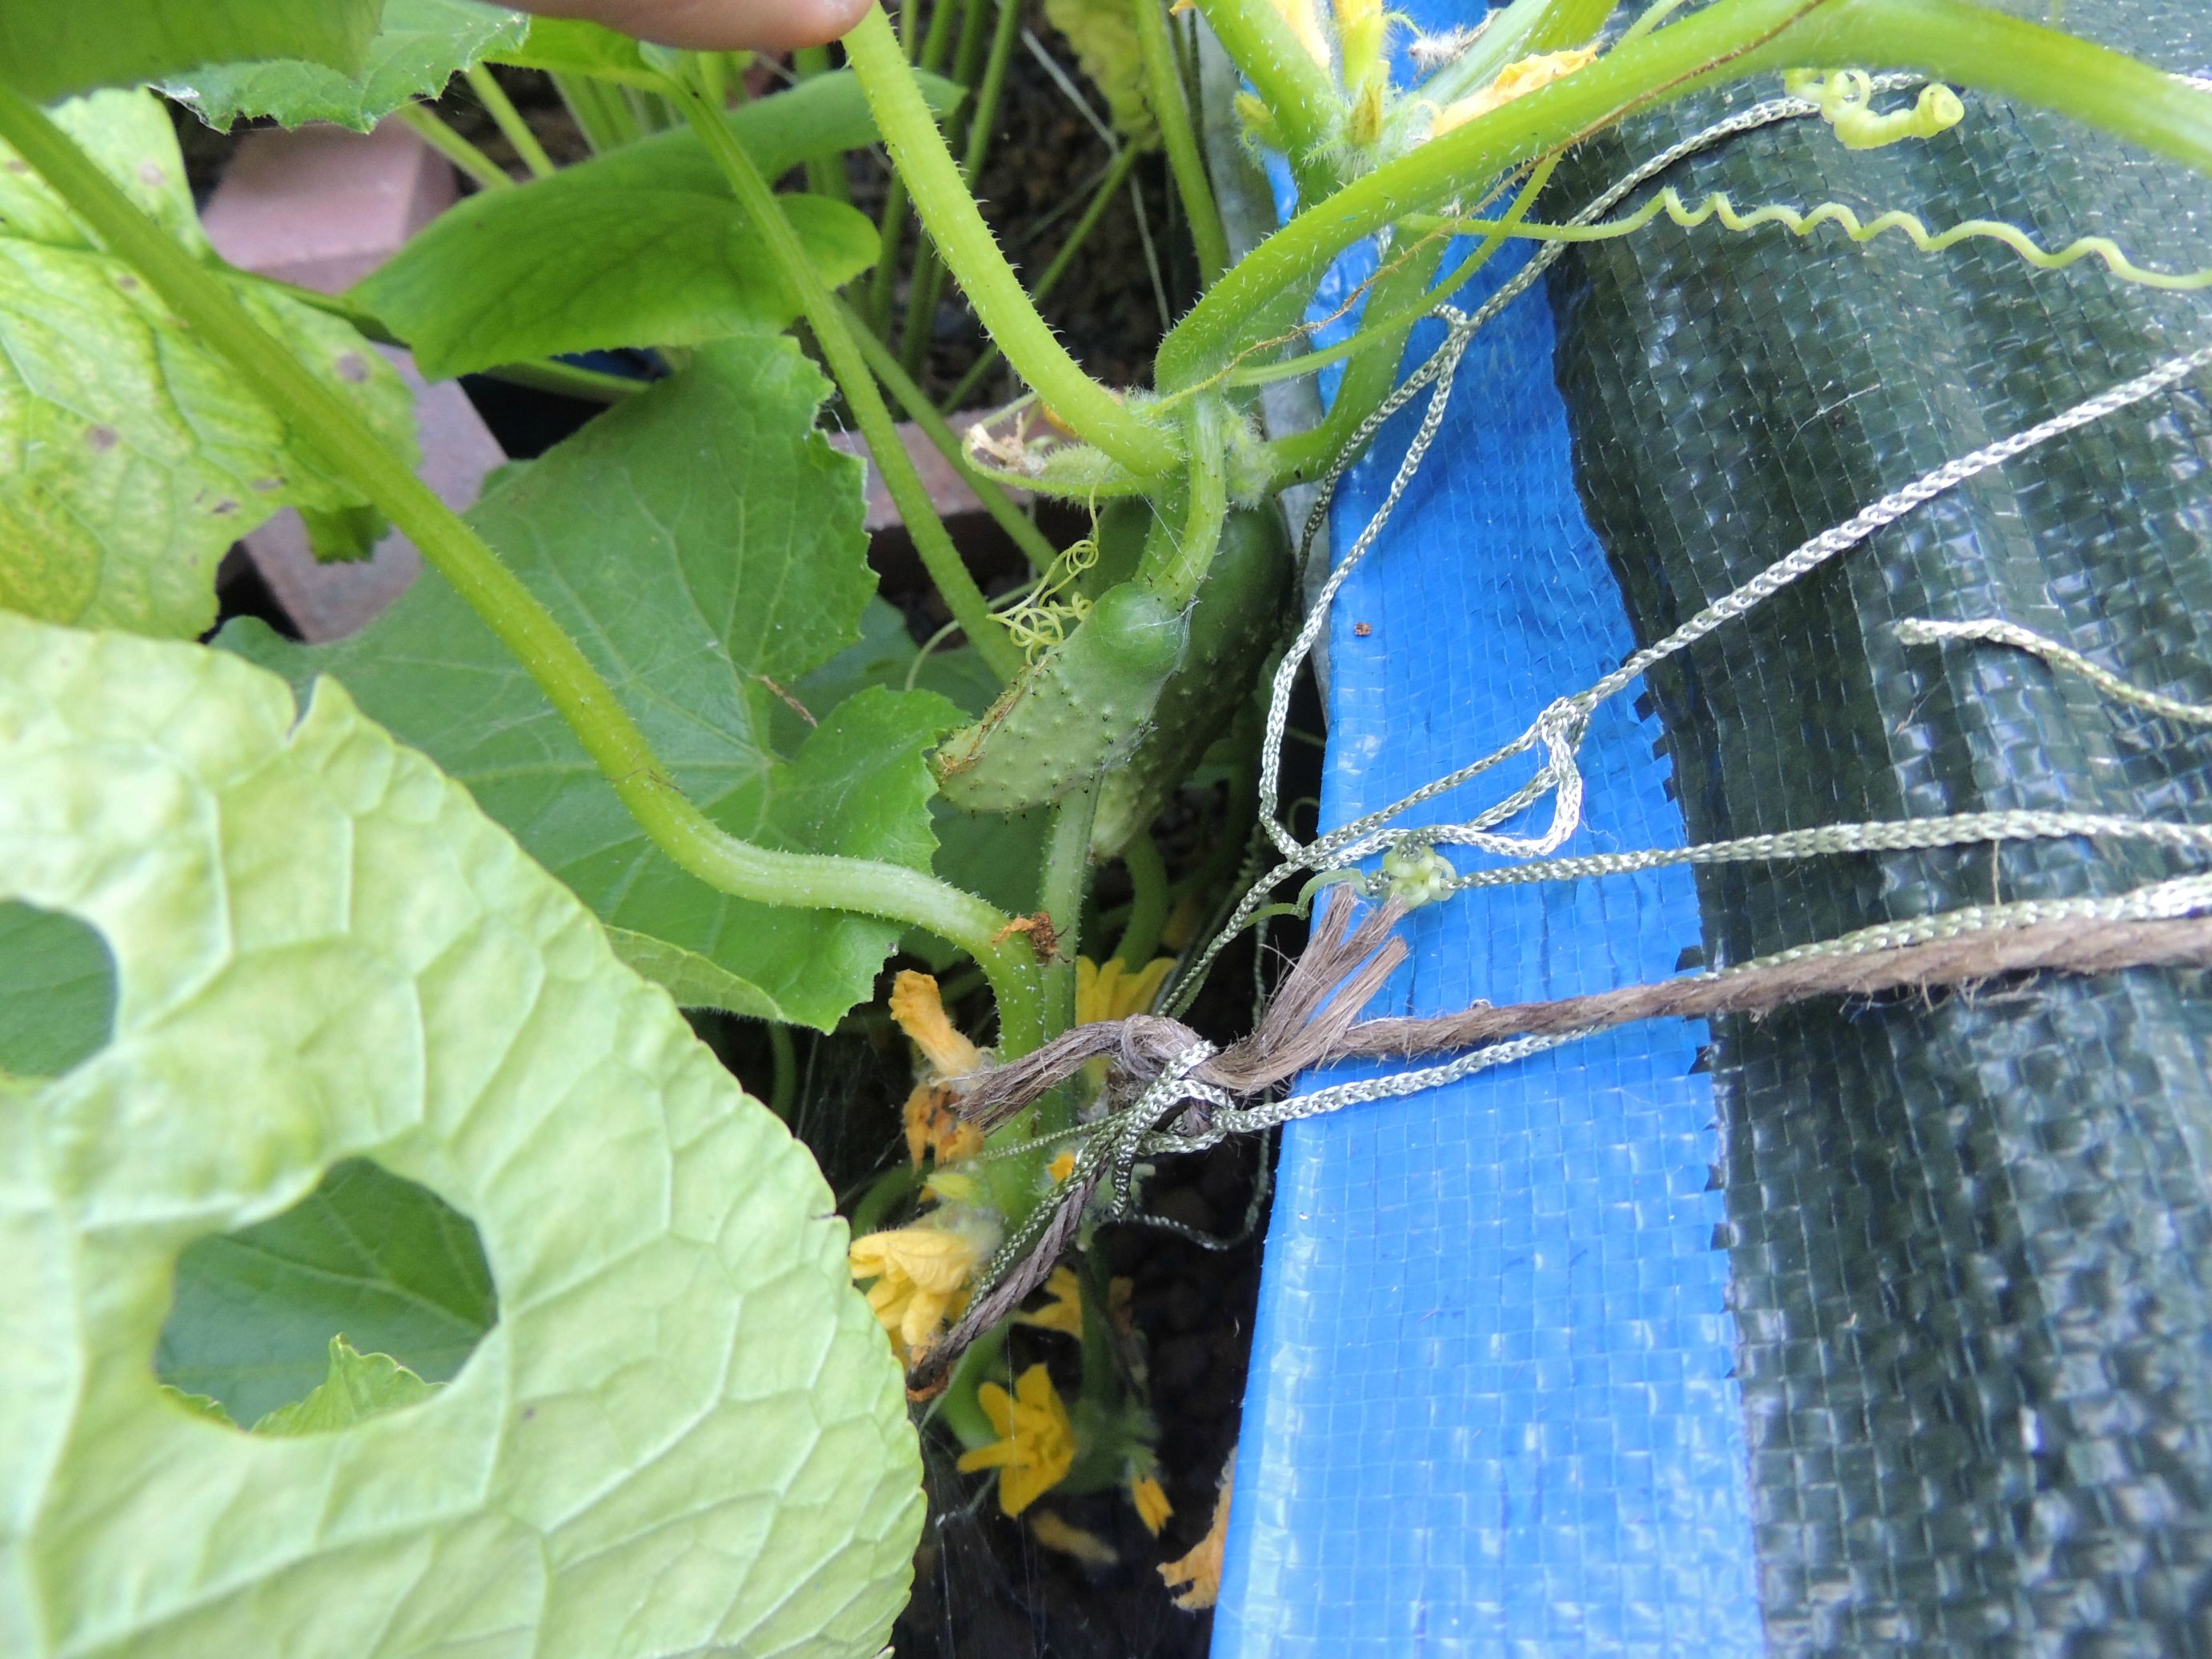
These are close-ups of the cucumber plants from a while ago. I planted them in the grow bed after the first two leaves emerged, so all the growth you are seeing was mostly in the grow bed:
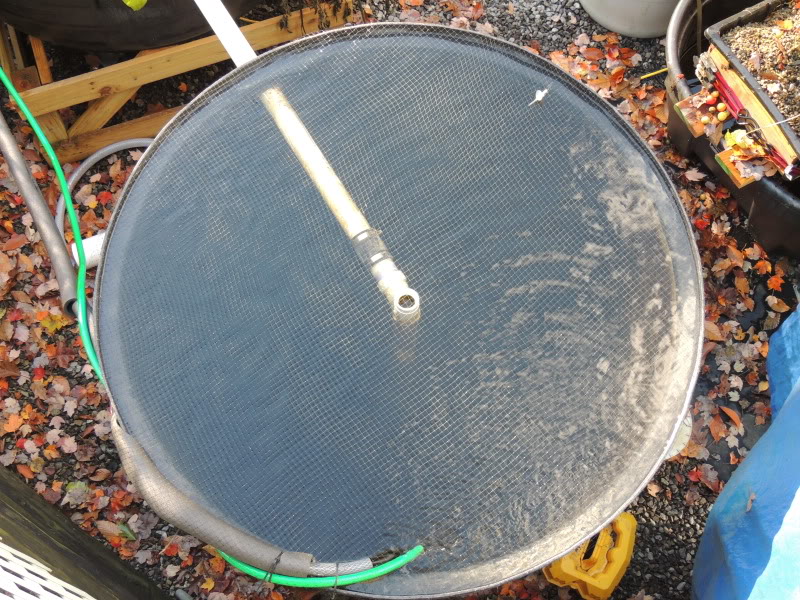
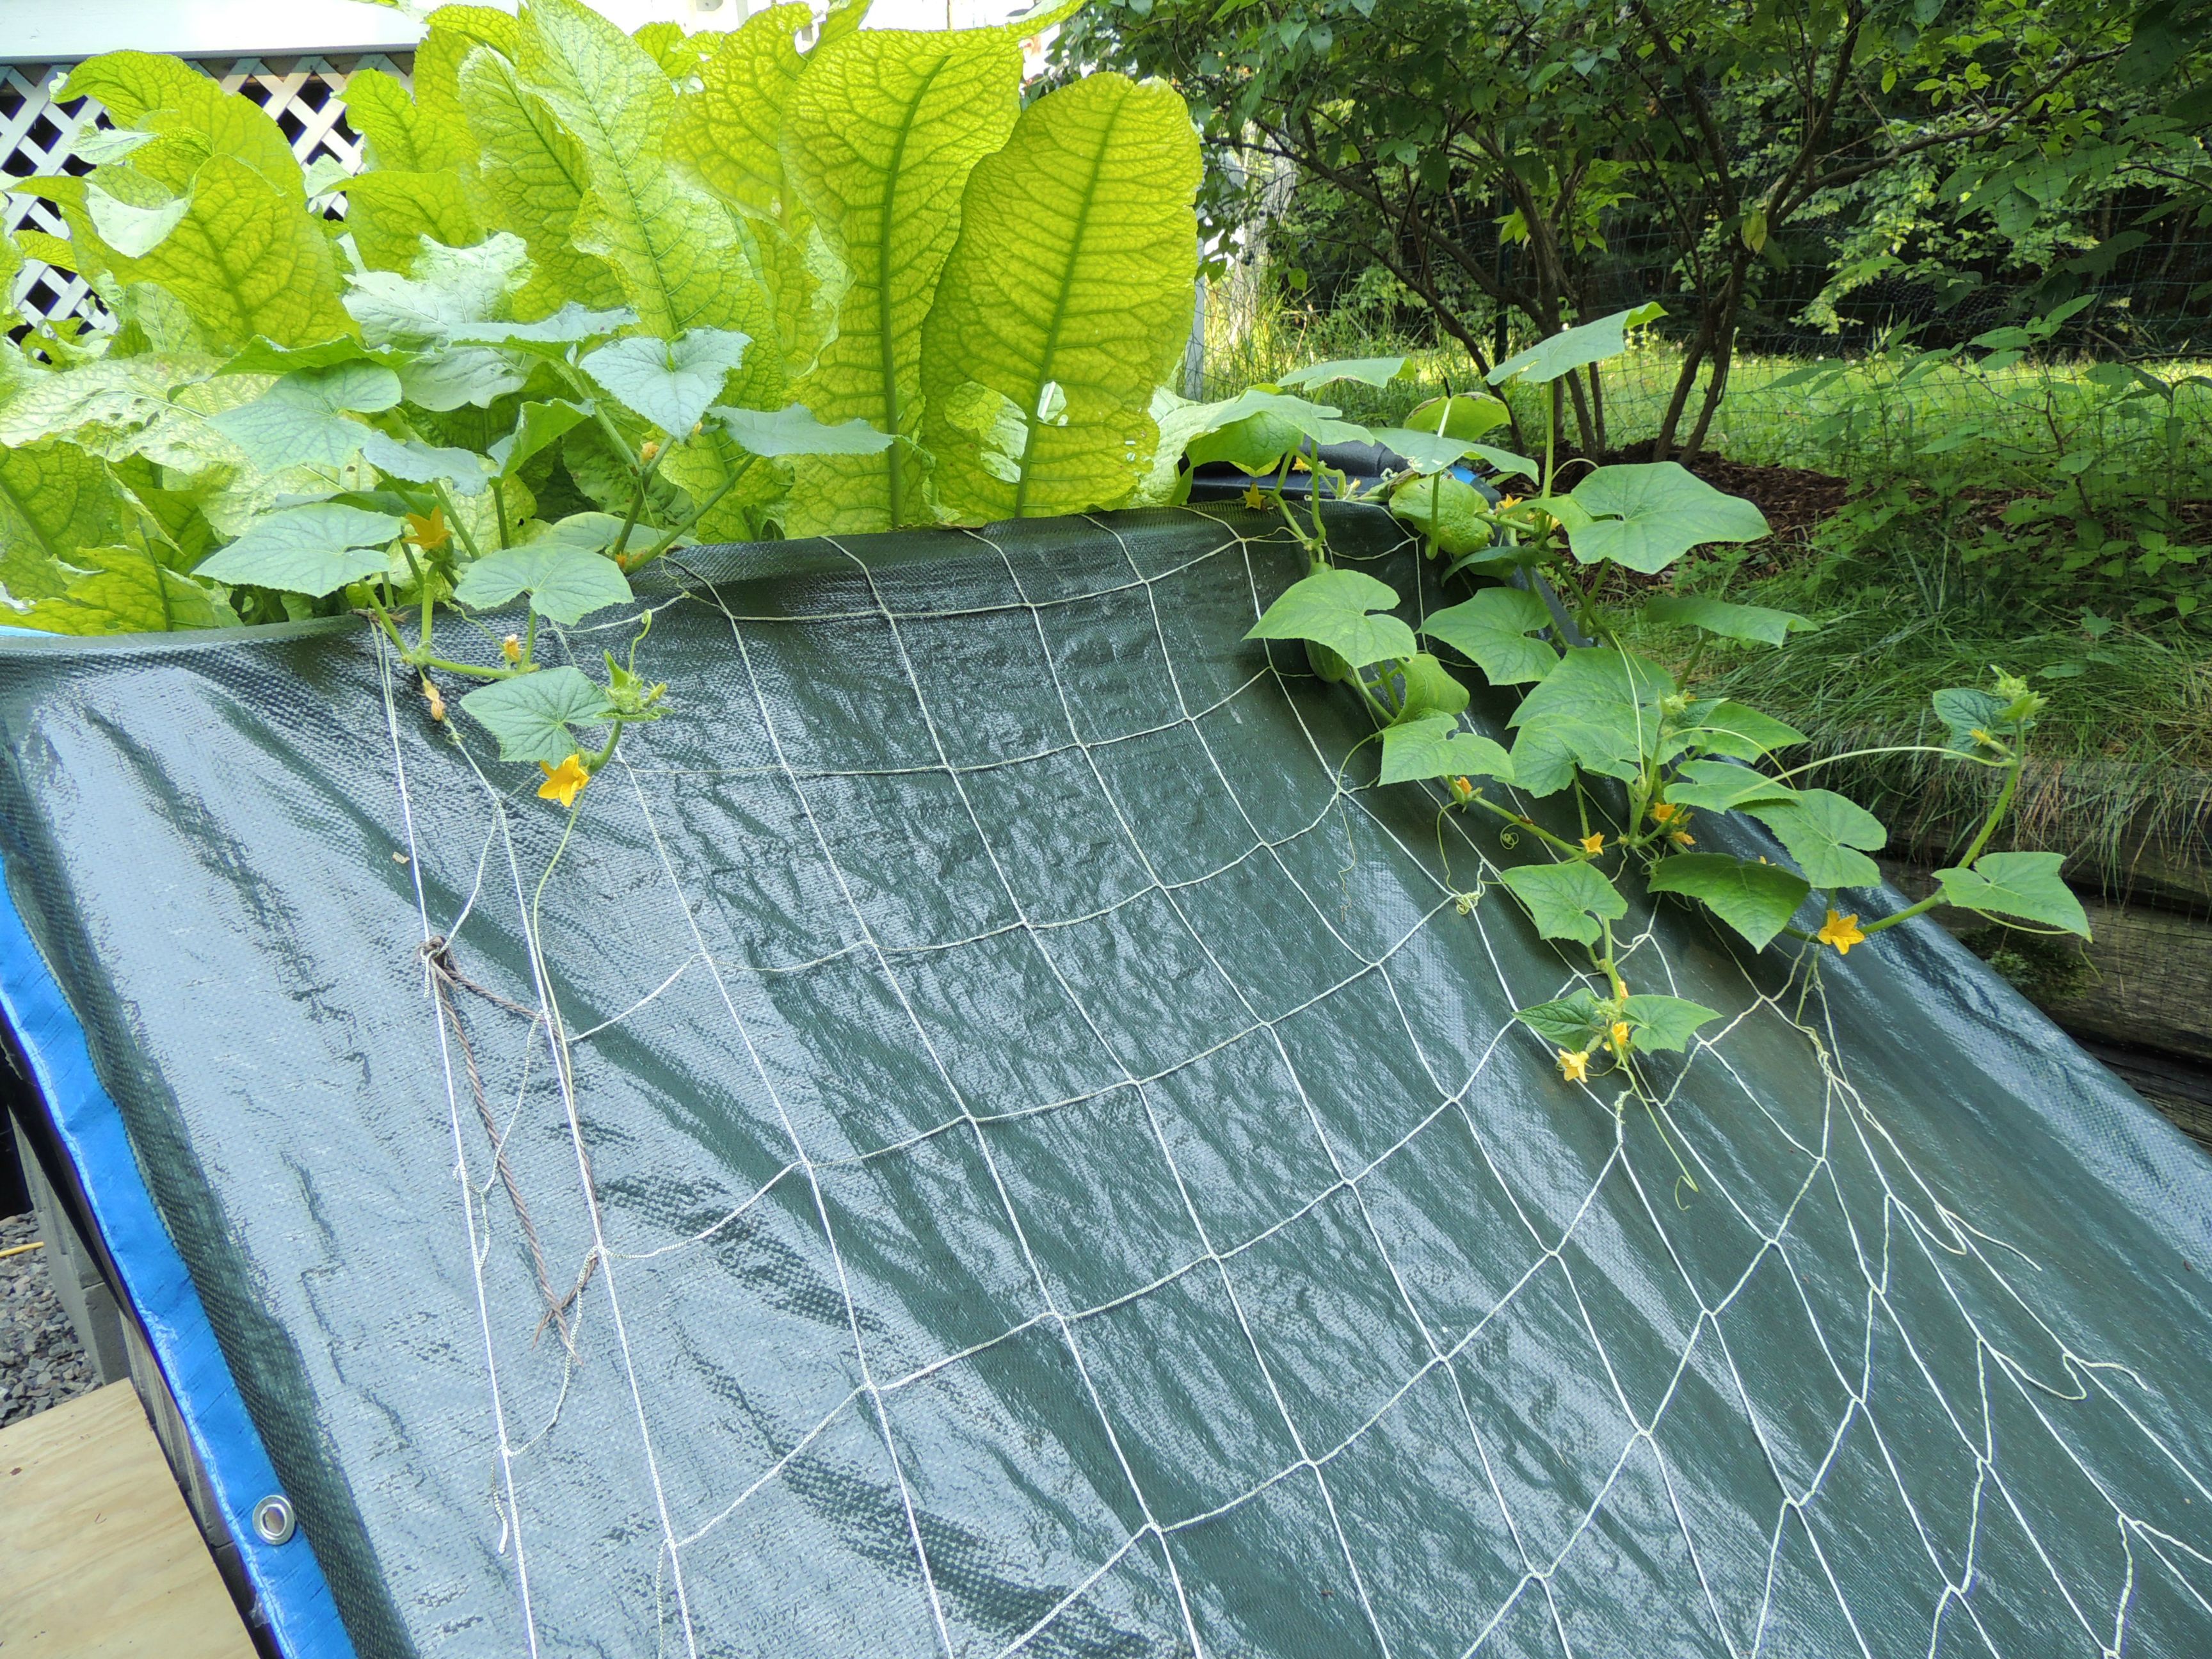
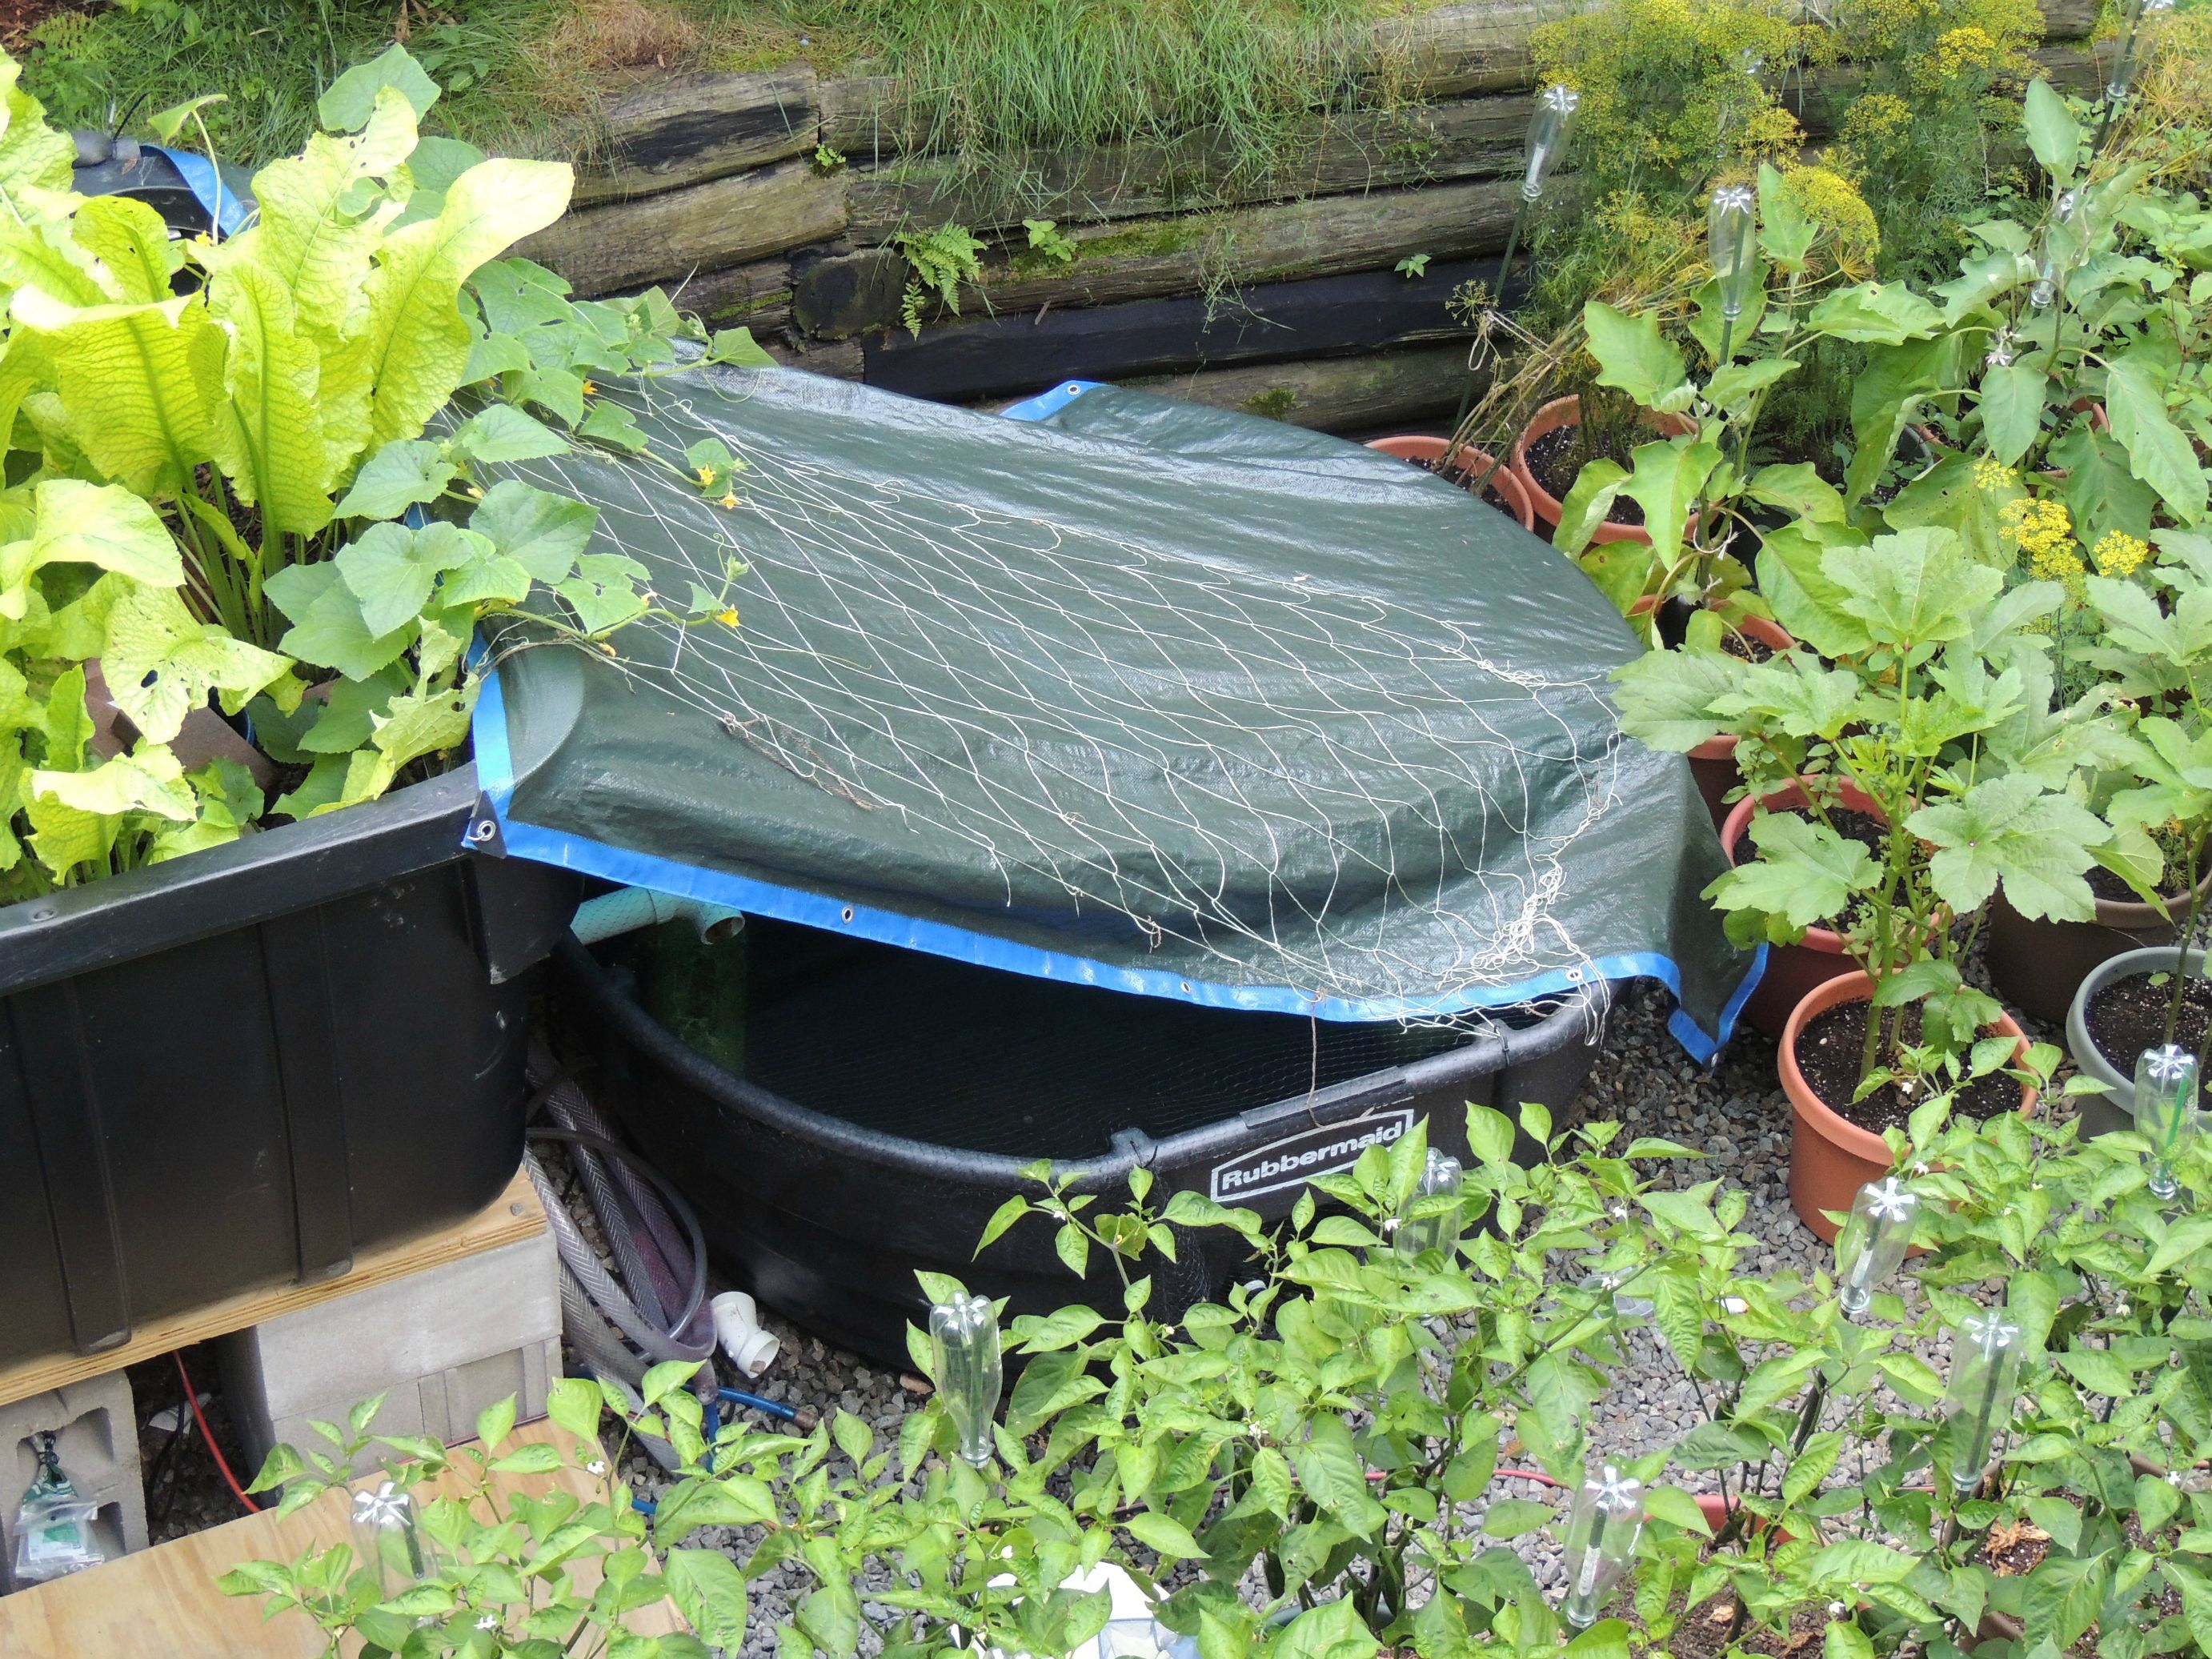
I put netting over the sump tank so the cucumber plants could climb along it:
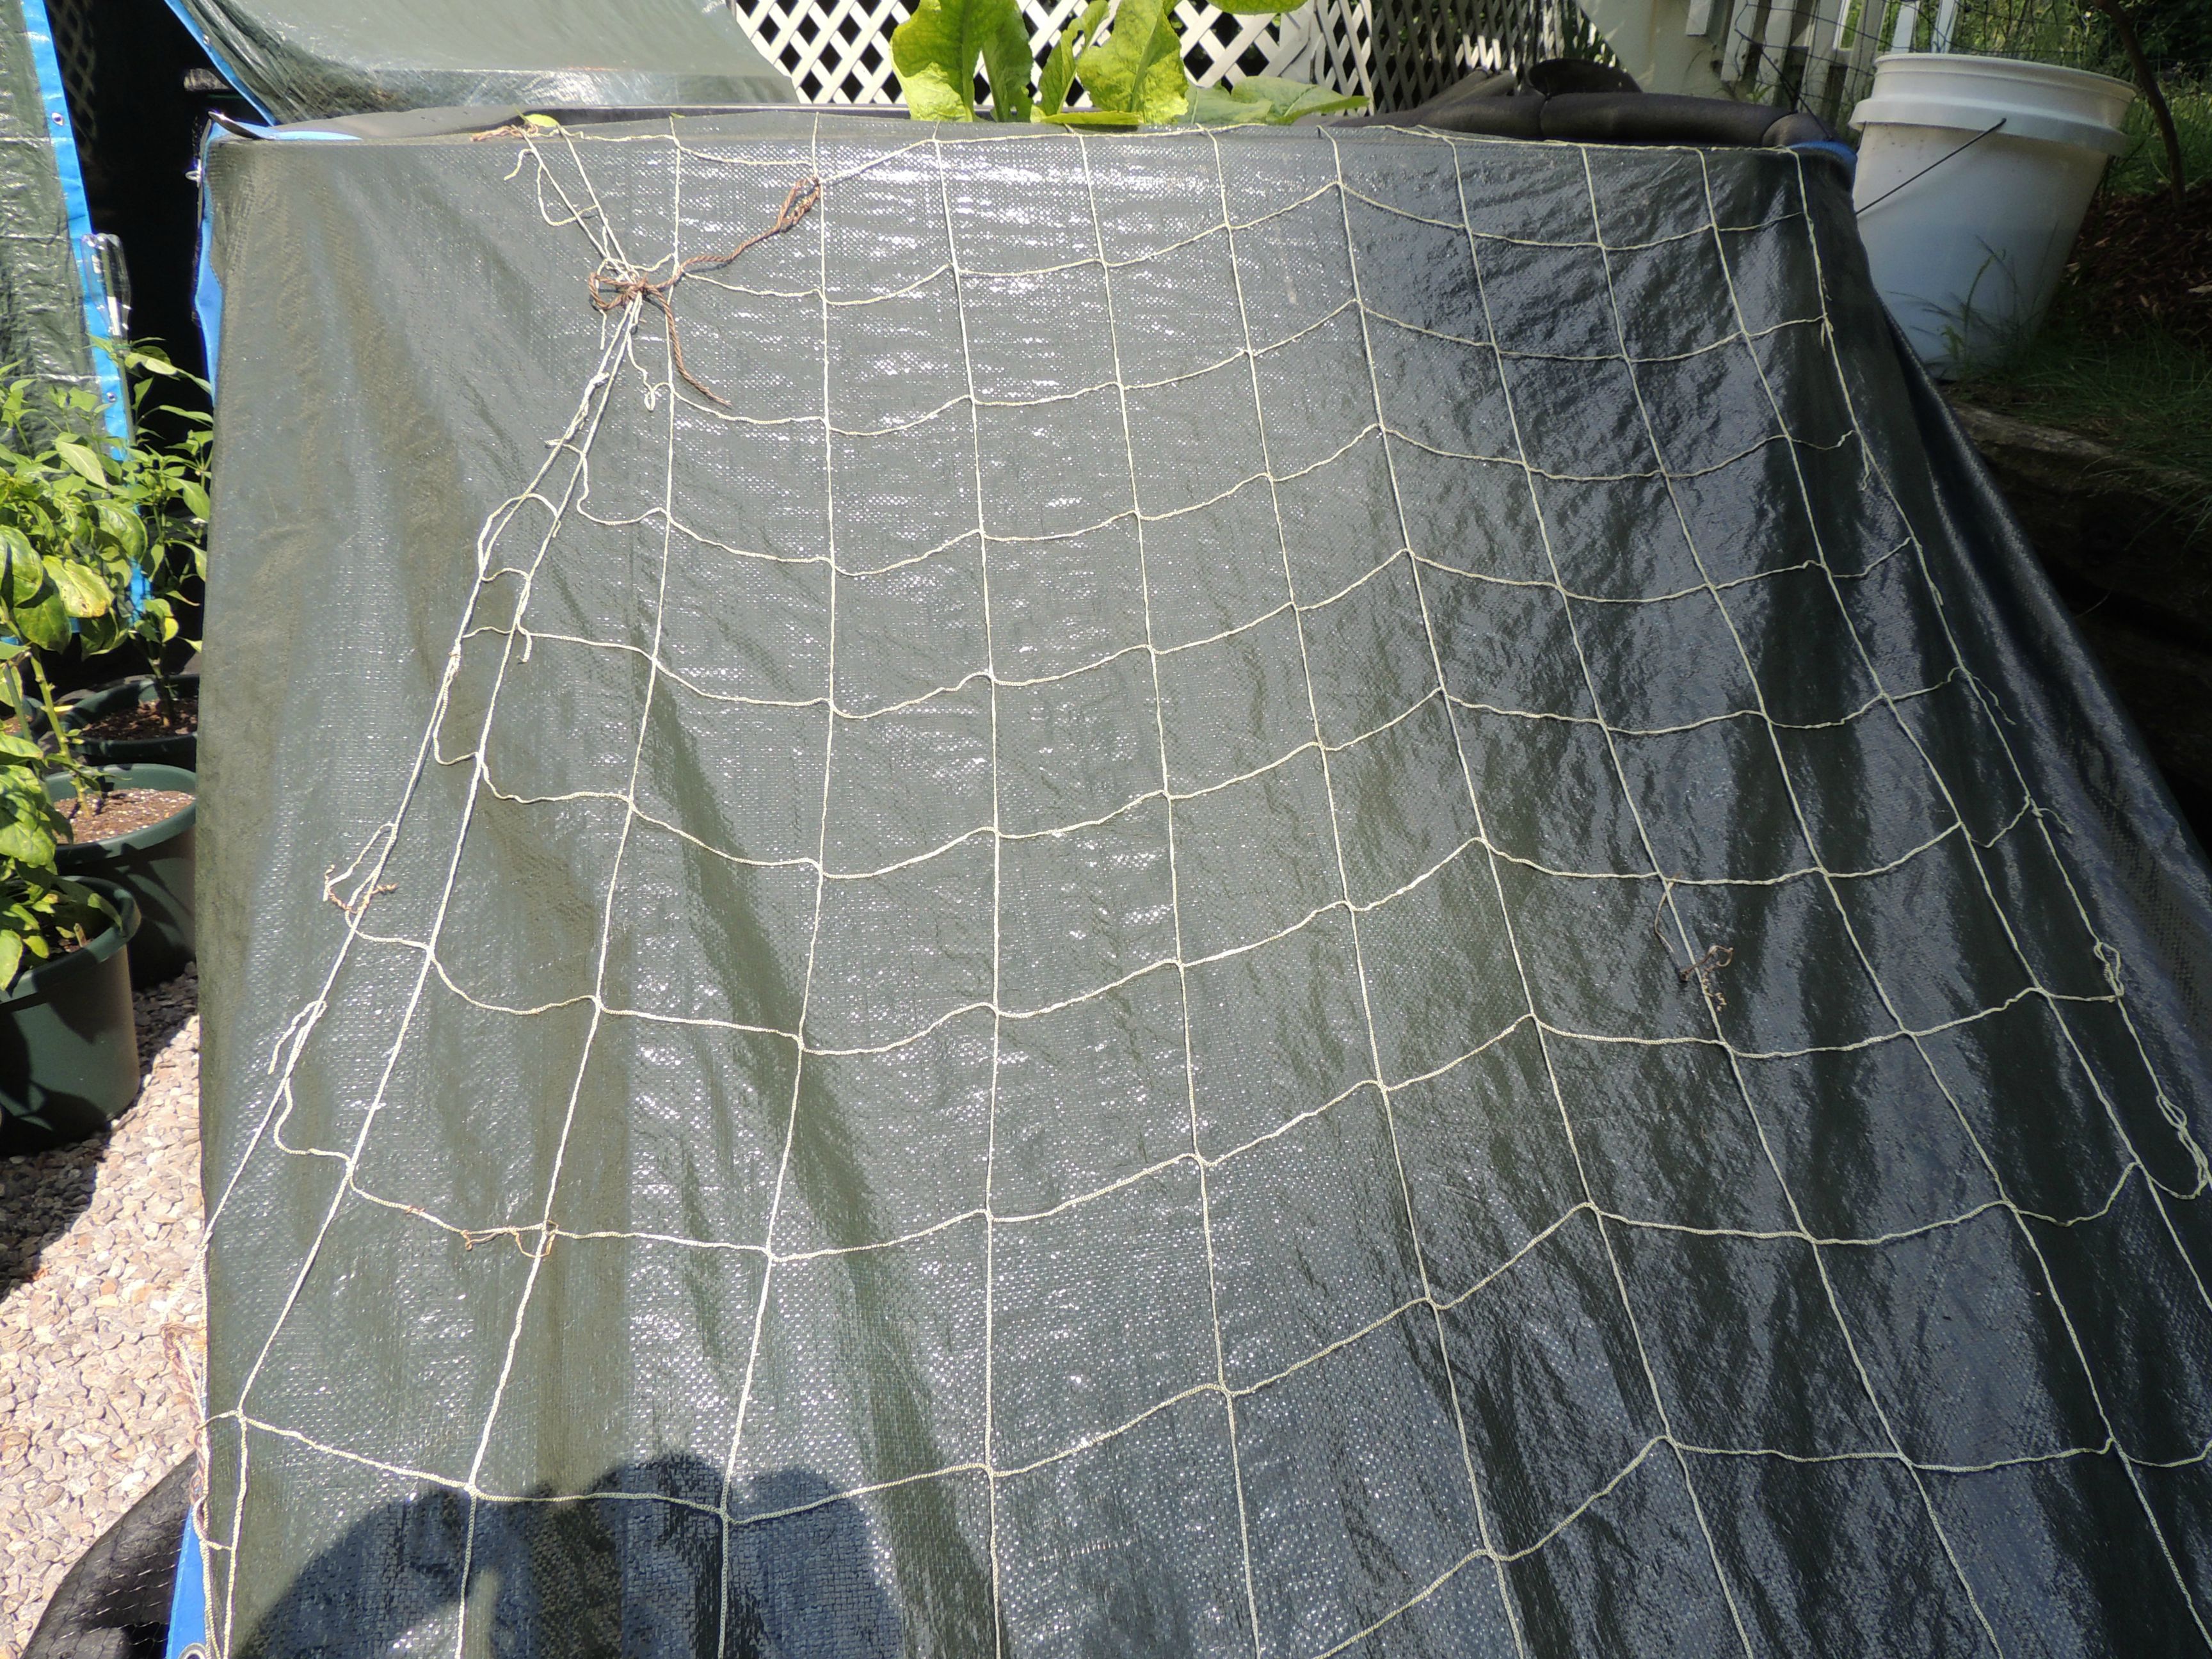
Other side:
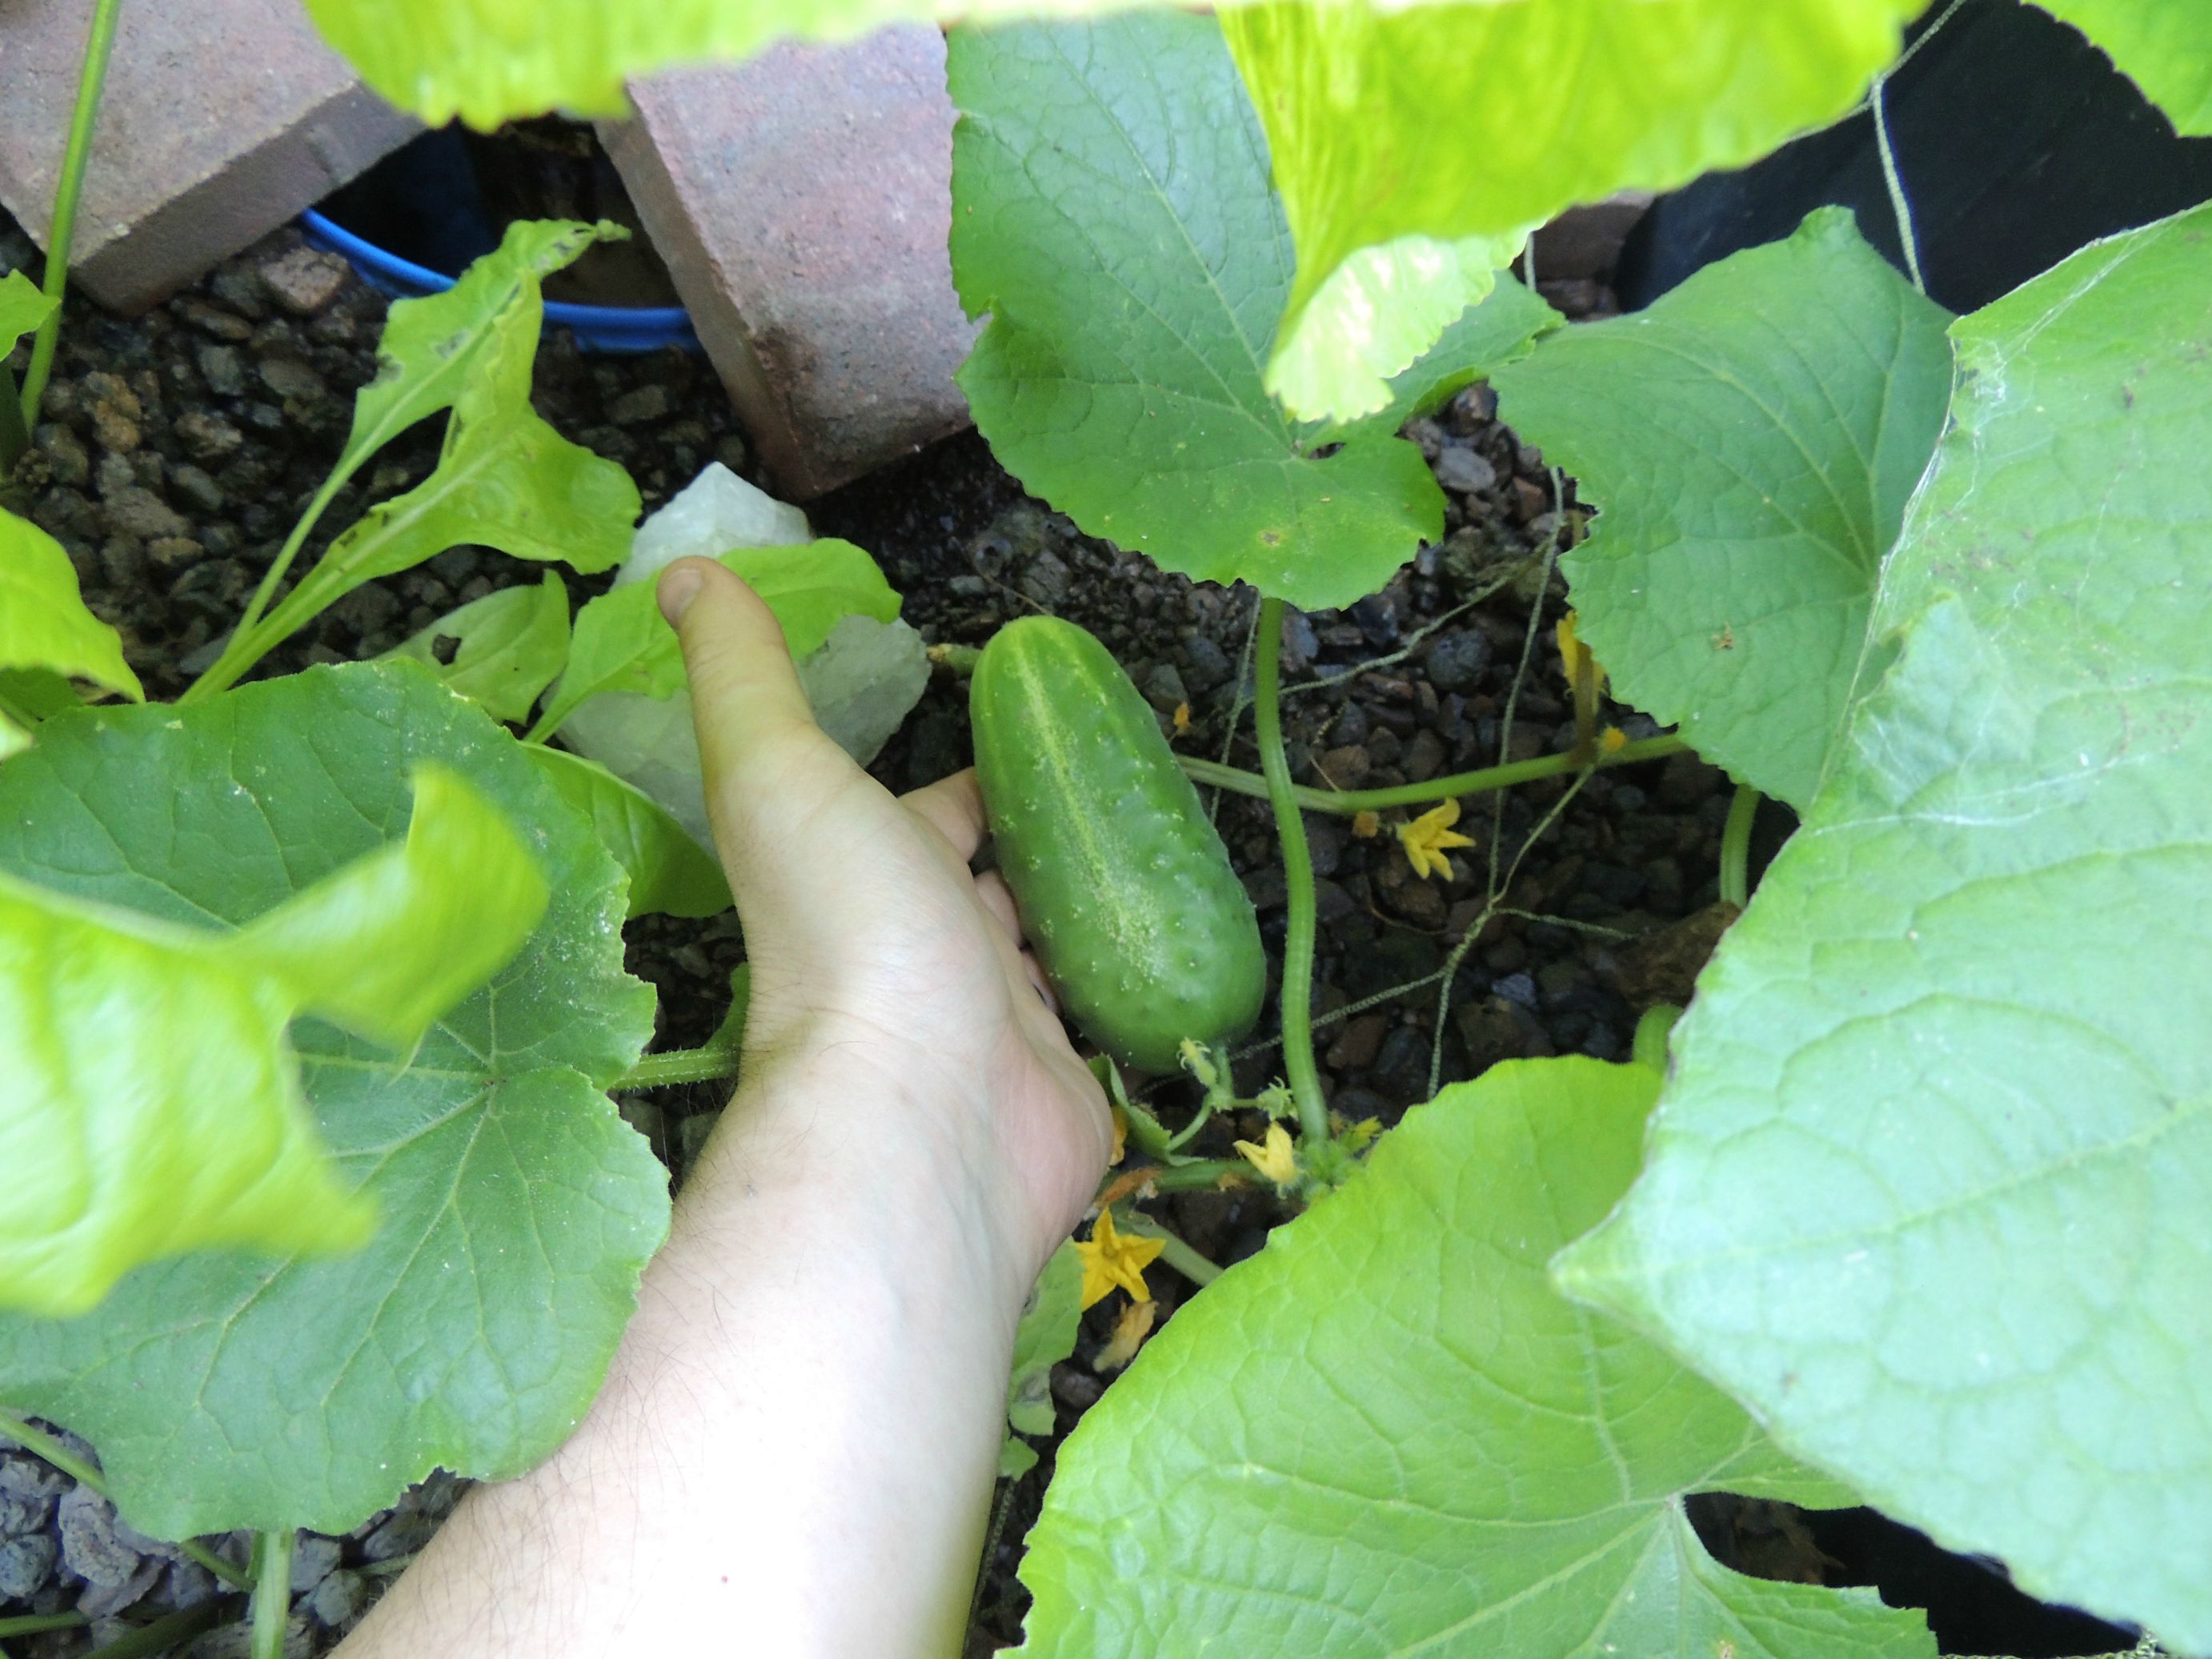
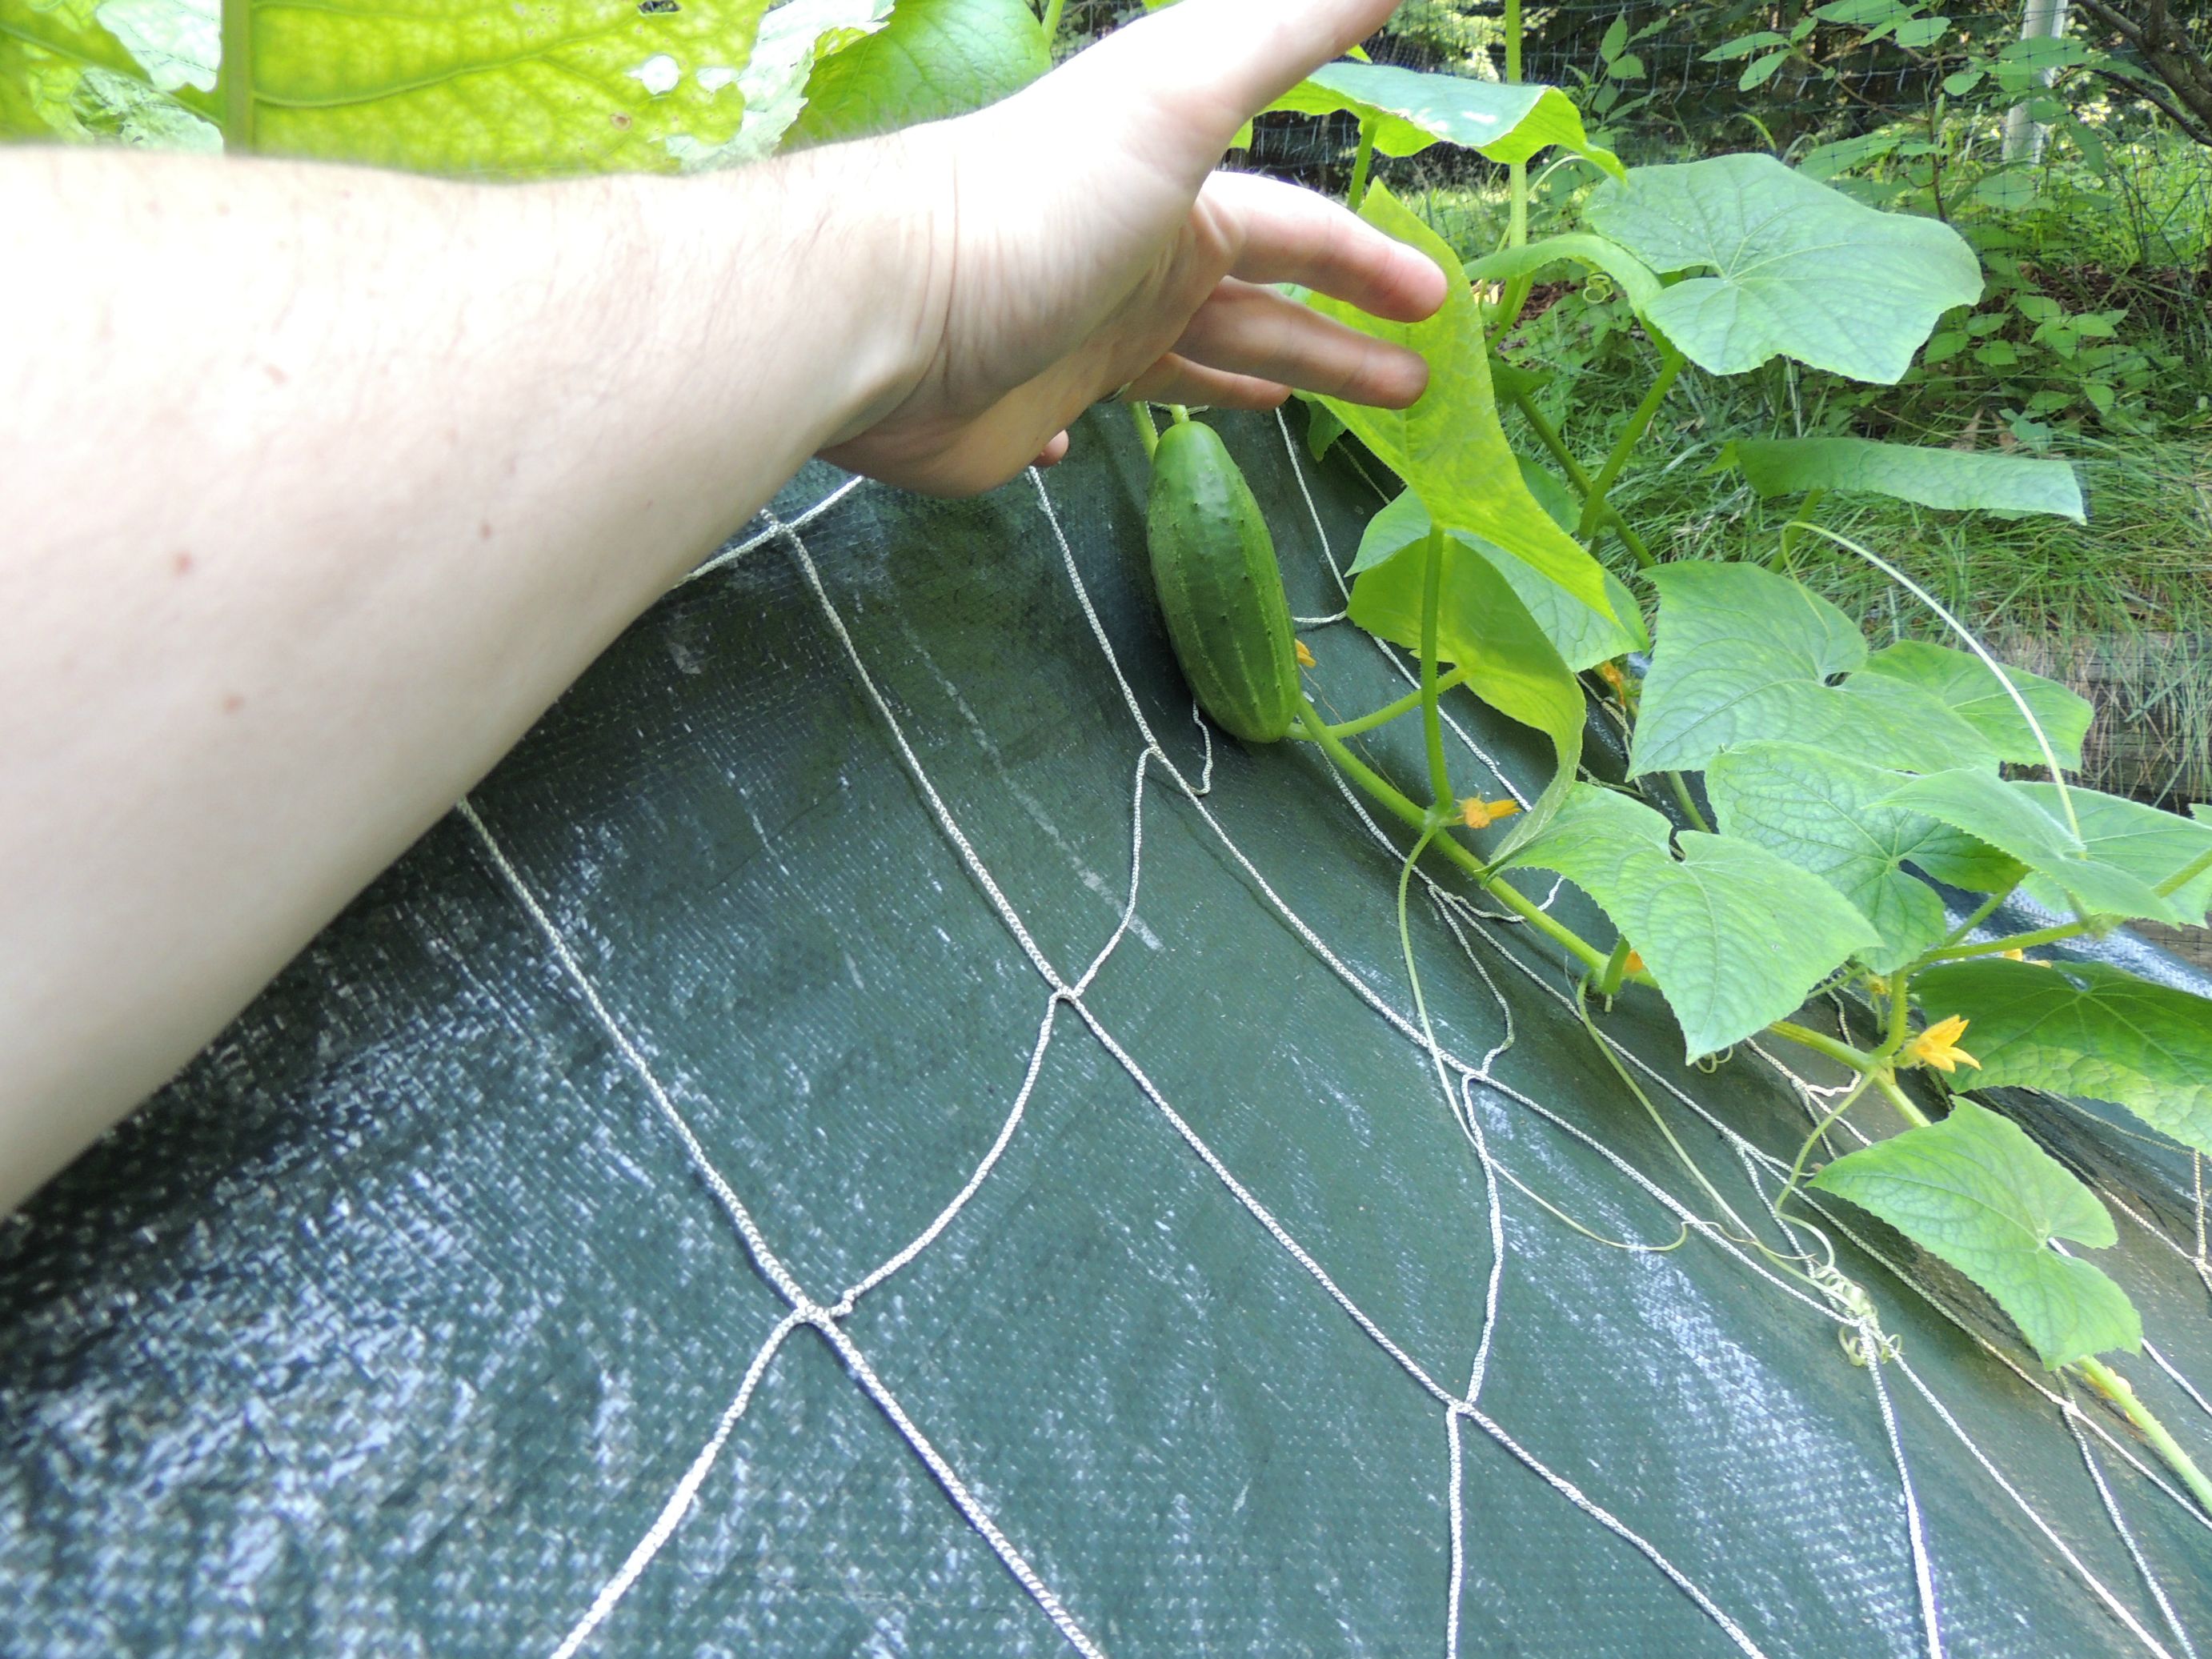
I started off with a total of 6 cucumber plants but one of them died. The following are pictures of the cucumbers from yesterday (08/09/14).
I'll eat this one today:
Small ones growing:
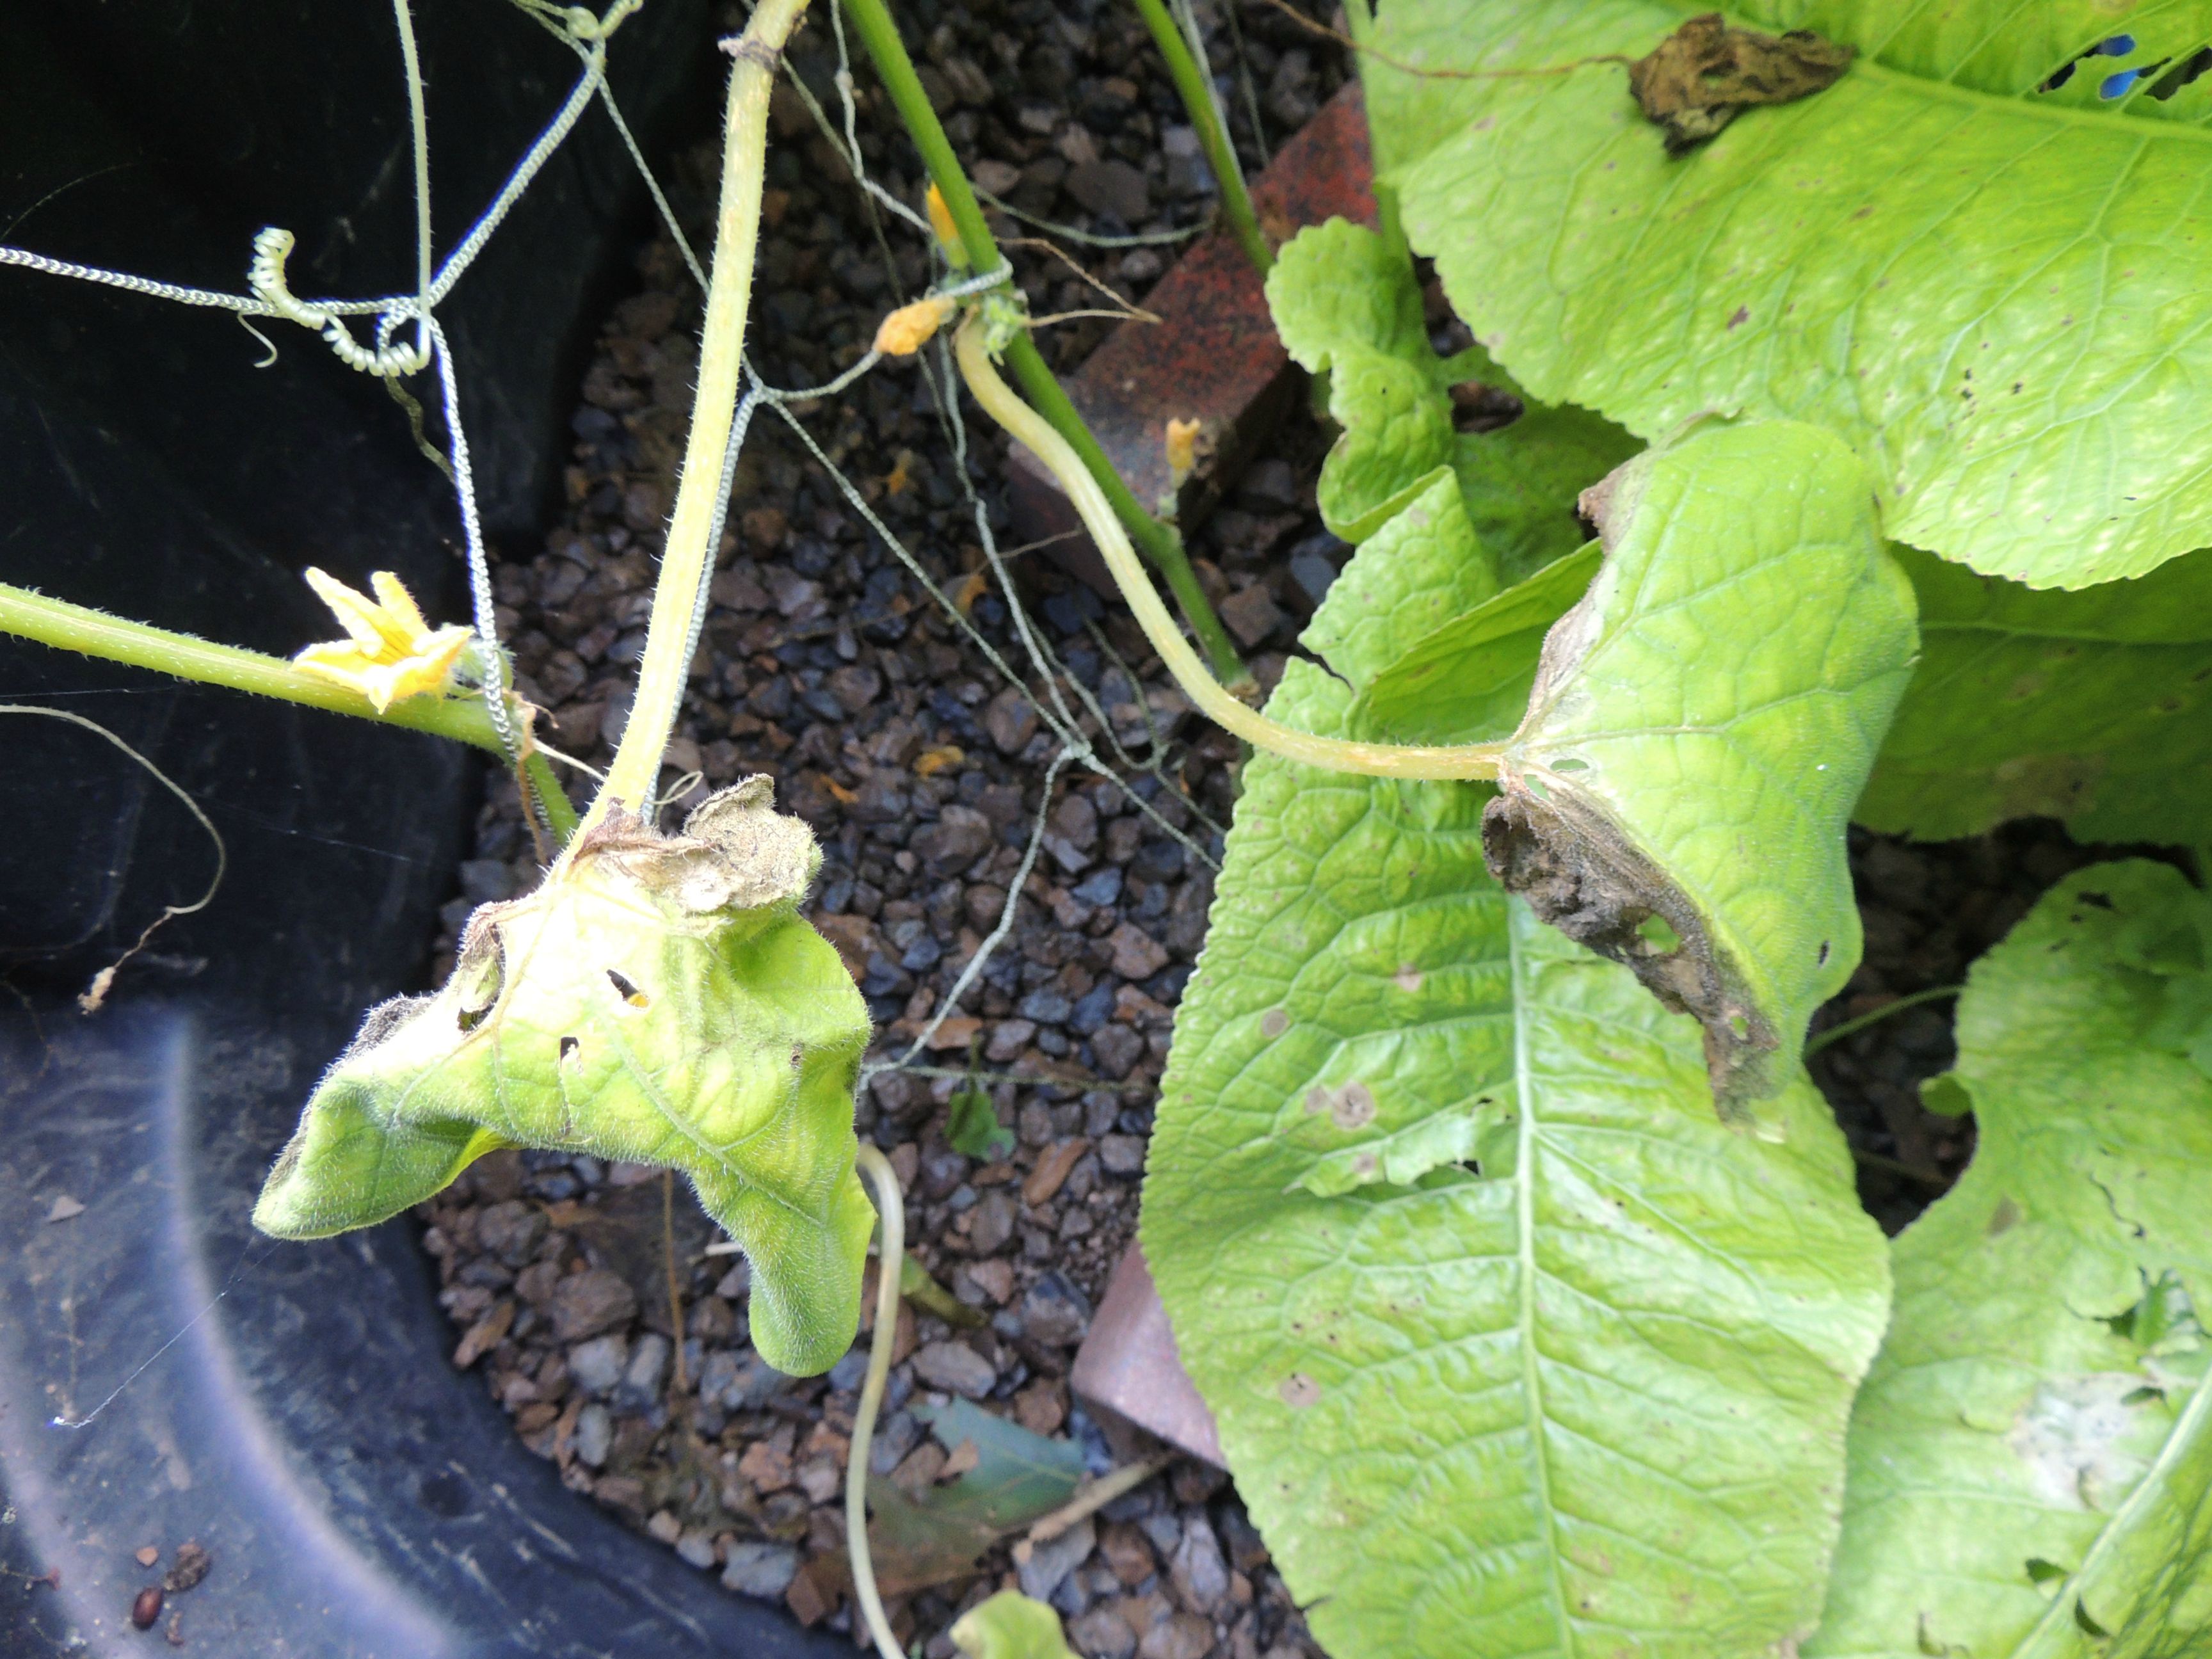
This is where the grown plants enter the grow bed. Some of the lower leaves can turn brown. I do have what I believe is Verticillium Wilt fungus throughout my garden and they can infect cucumbers, but I don't think that is what is happening here. The cucumbers are not wilting in the sun at all.
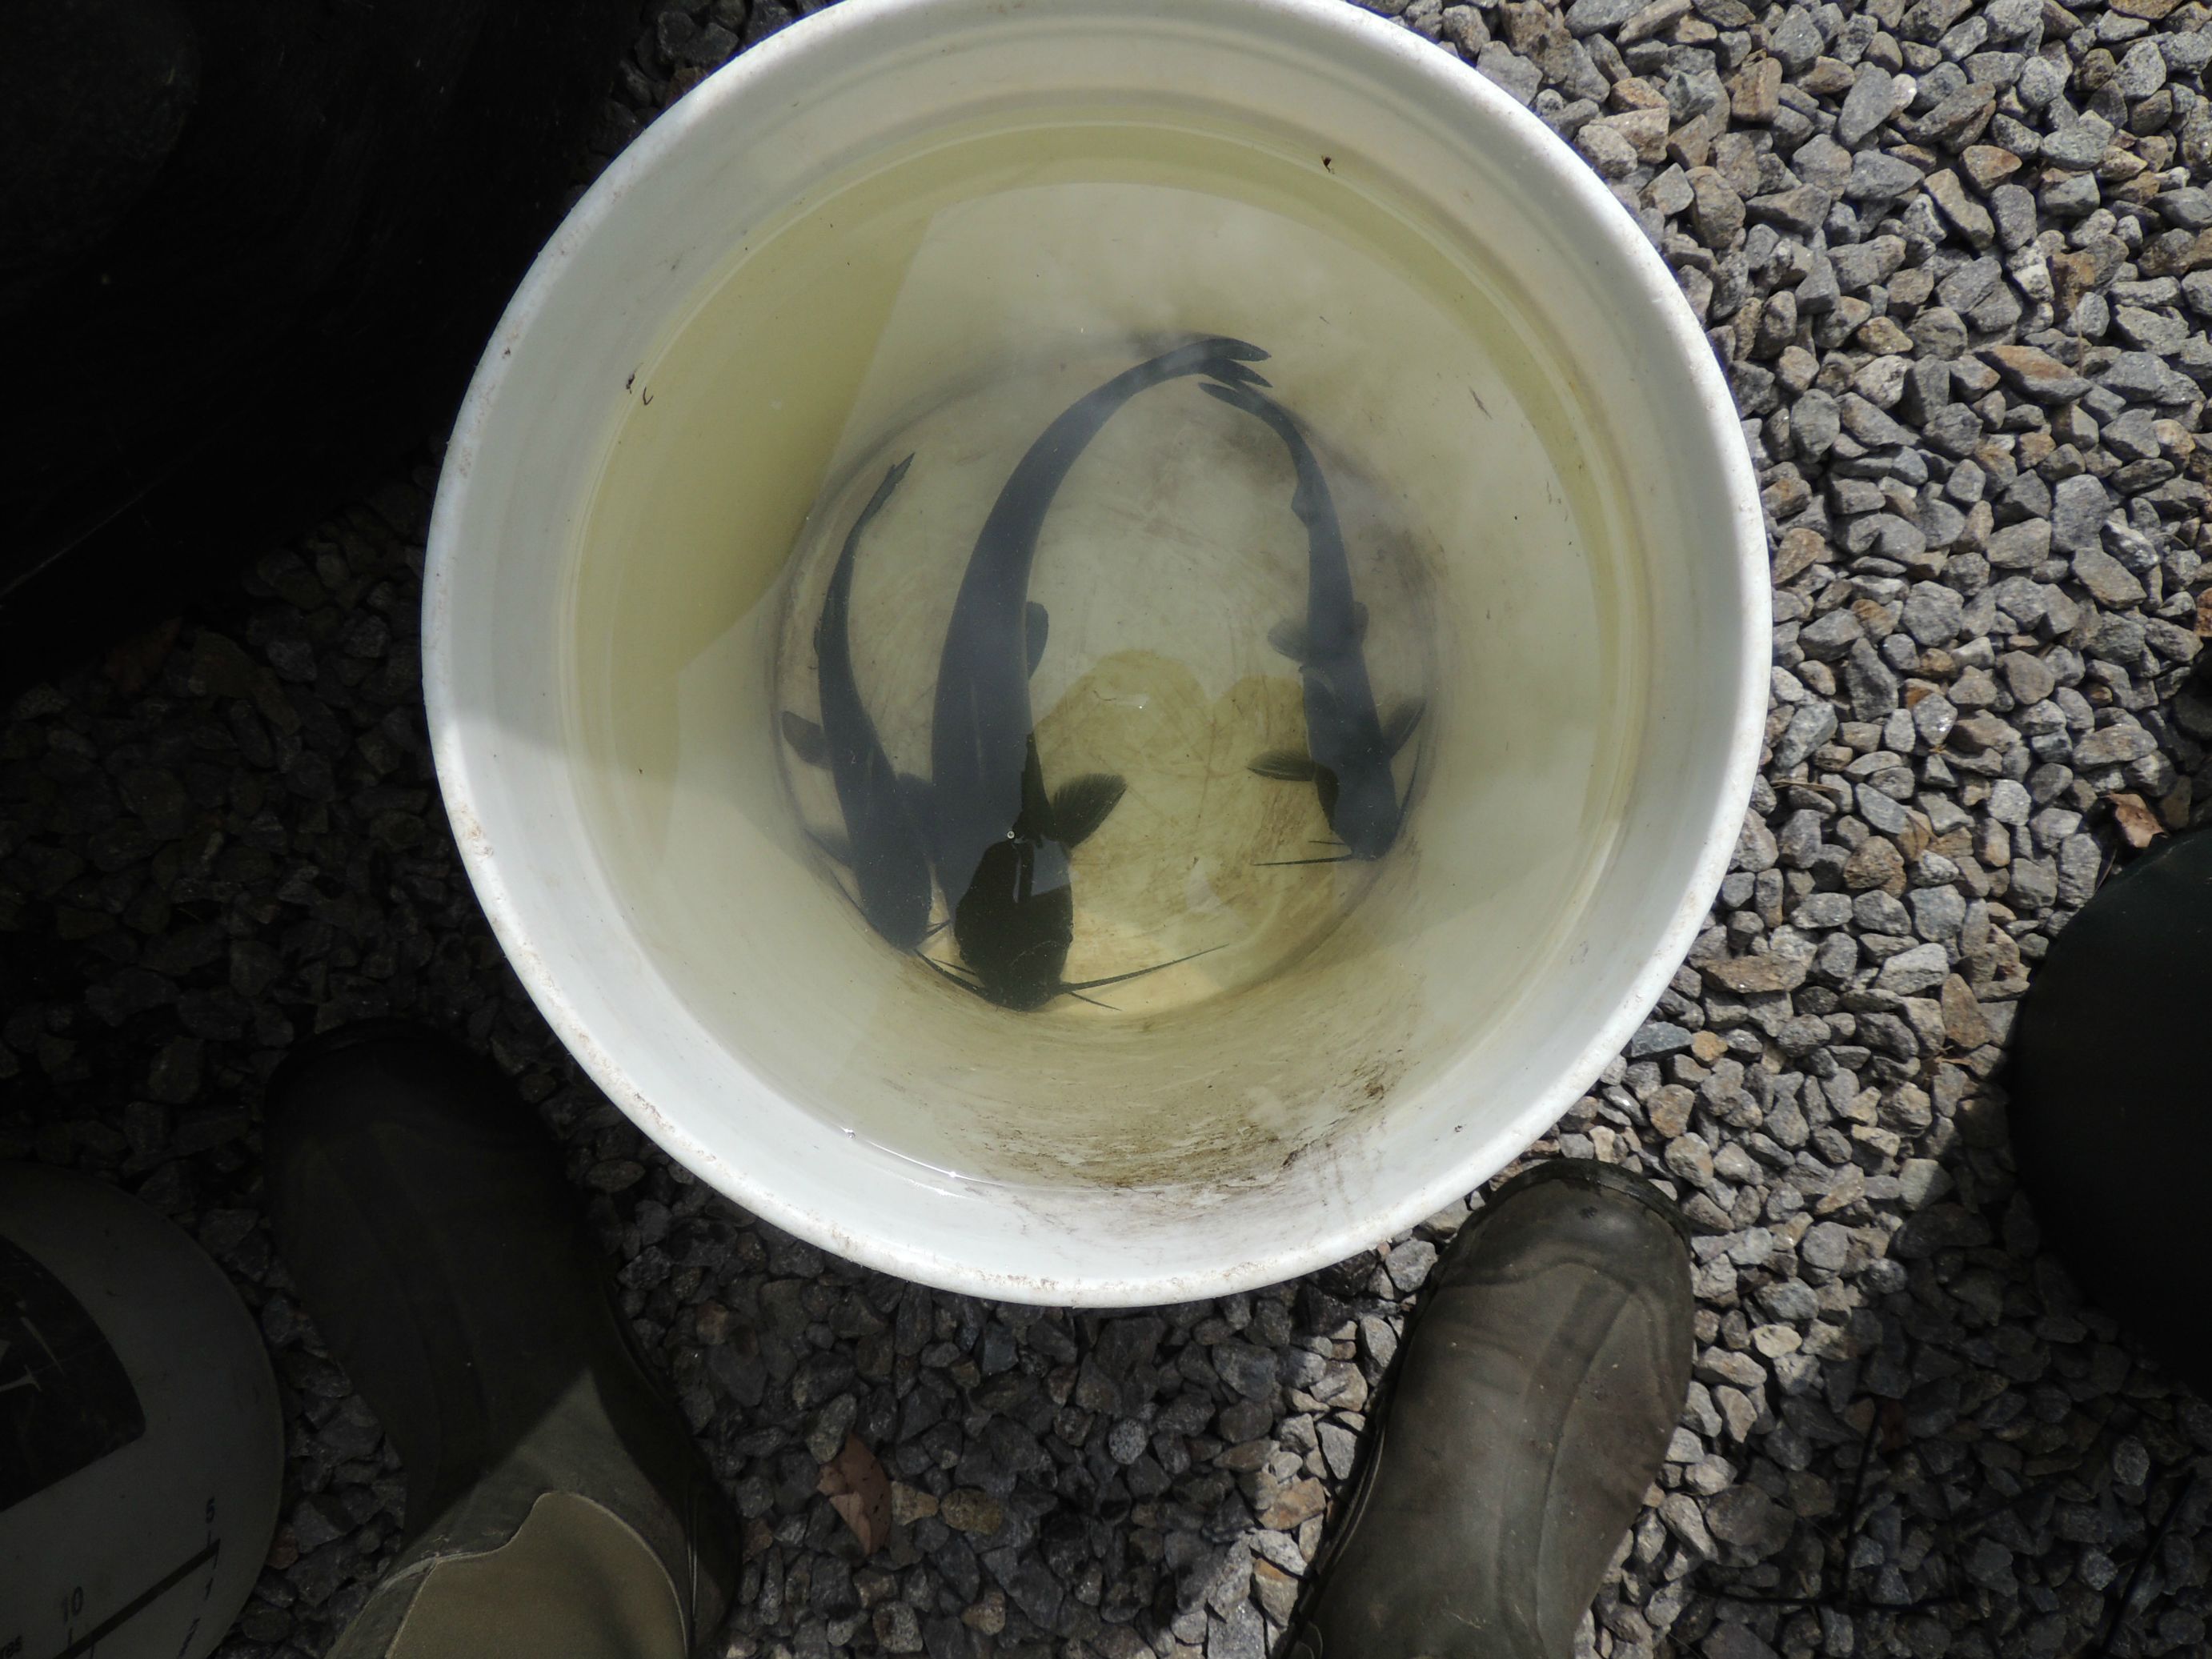
Now for the fish! These went in back in June. I only have pictures of them going into the system, and only of the Channel catfish which all went into the sump tank. It's too stressful on them to remove them from the water and weigh them mid-season. I will of course weigh them when they come out of the system. I have goldfish, Yellow Perch, White Perch and Brown Bullhead catfish and those were all weighed going in.
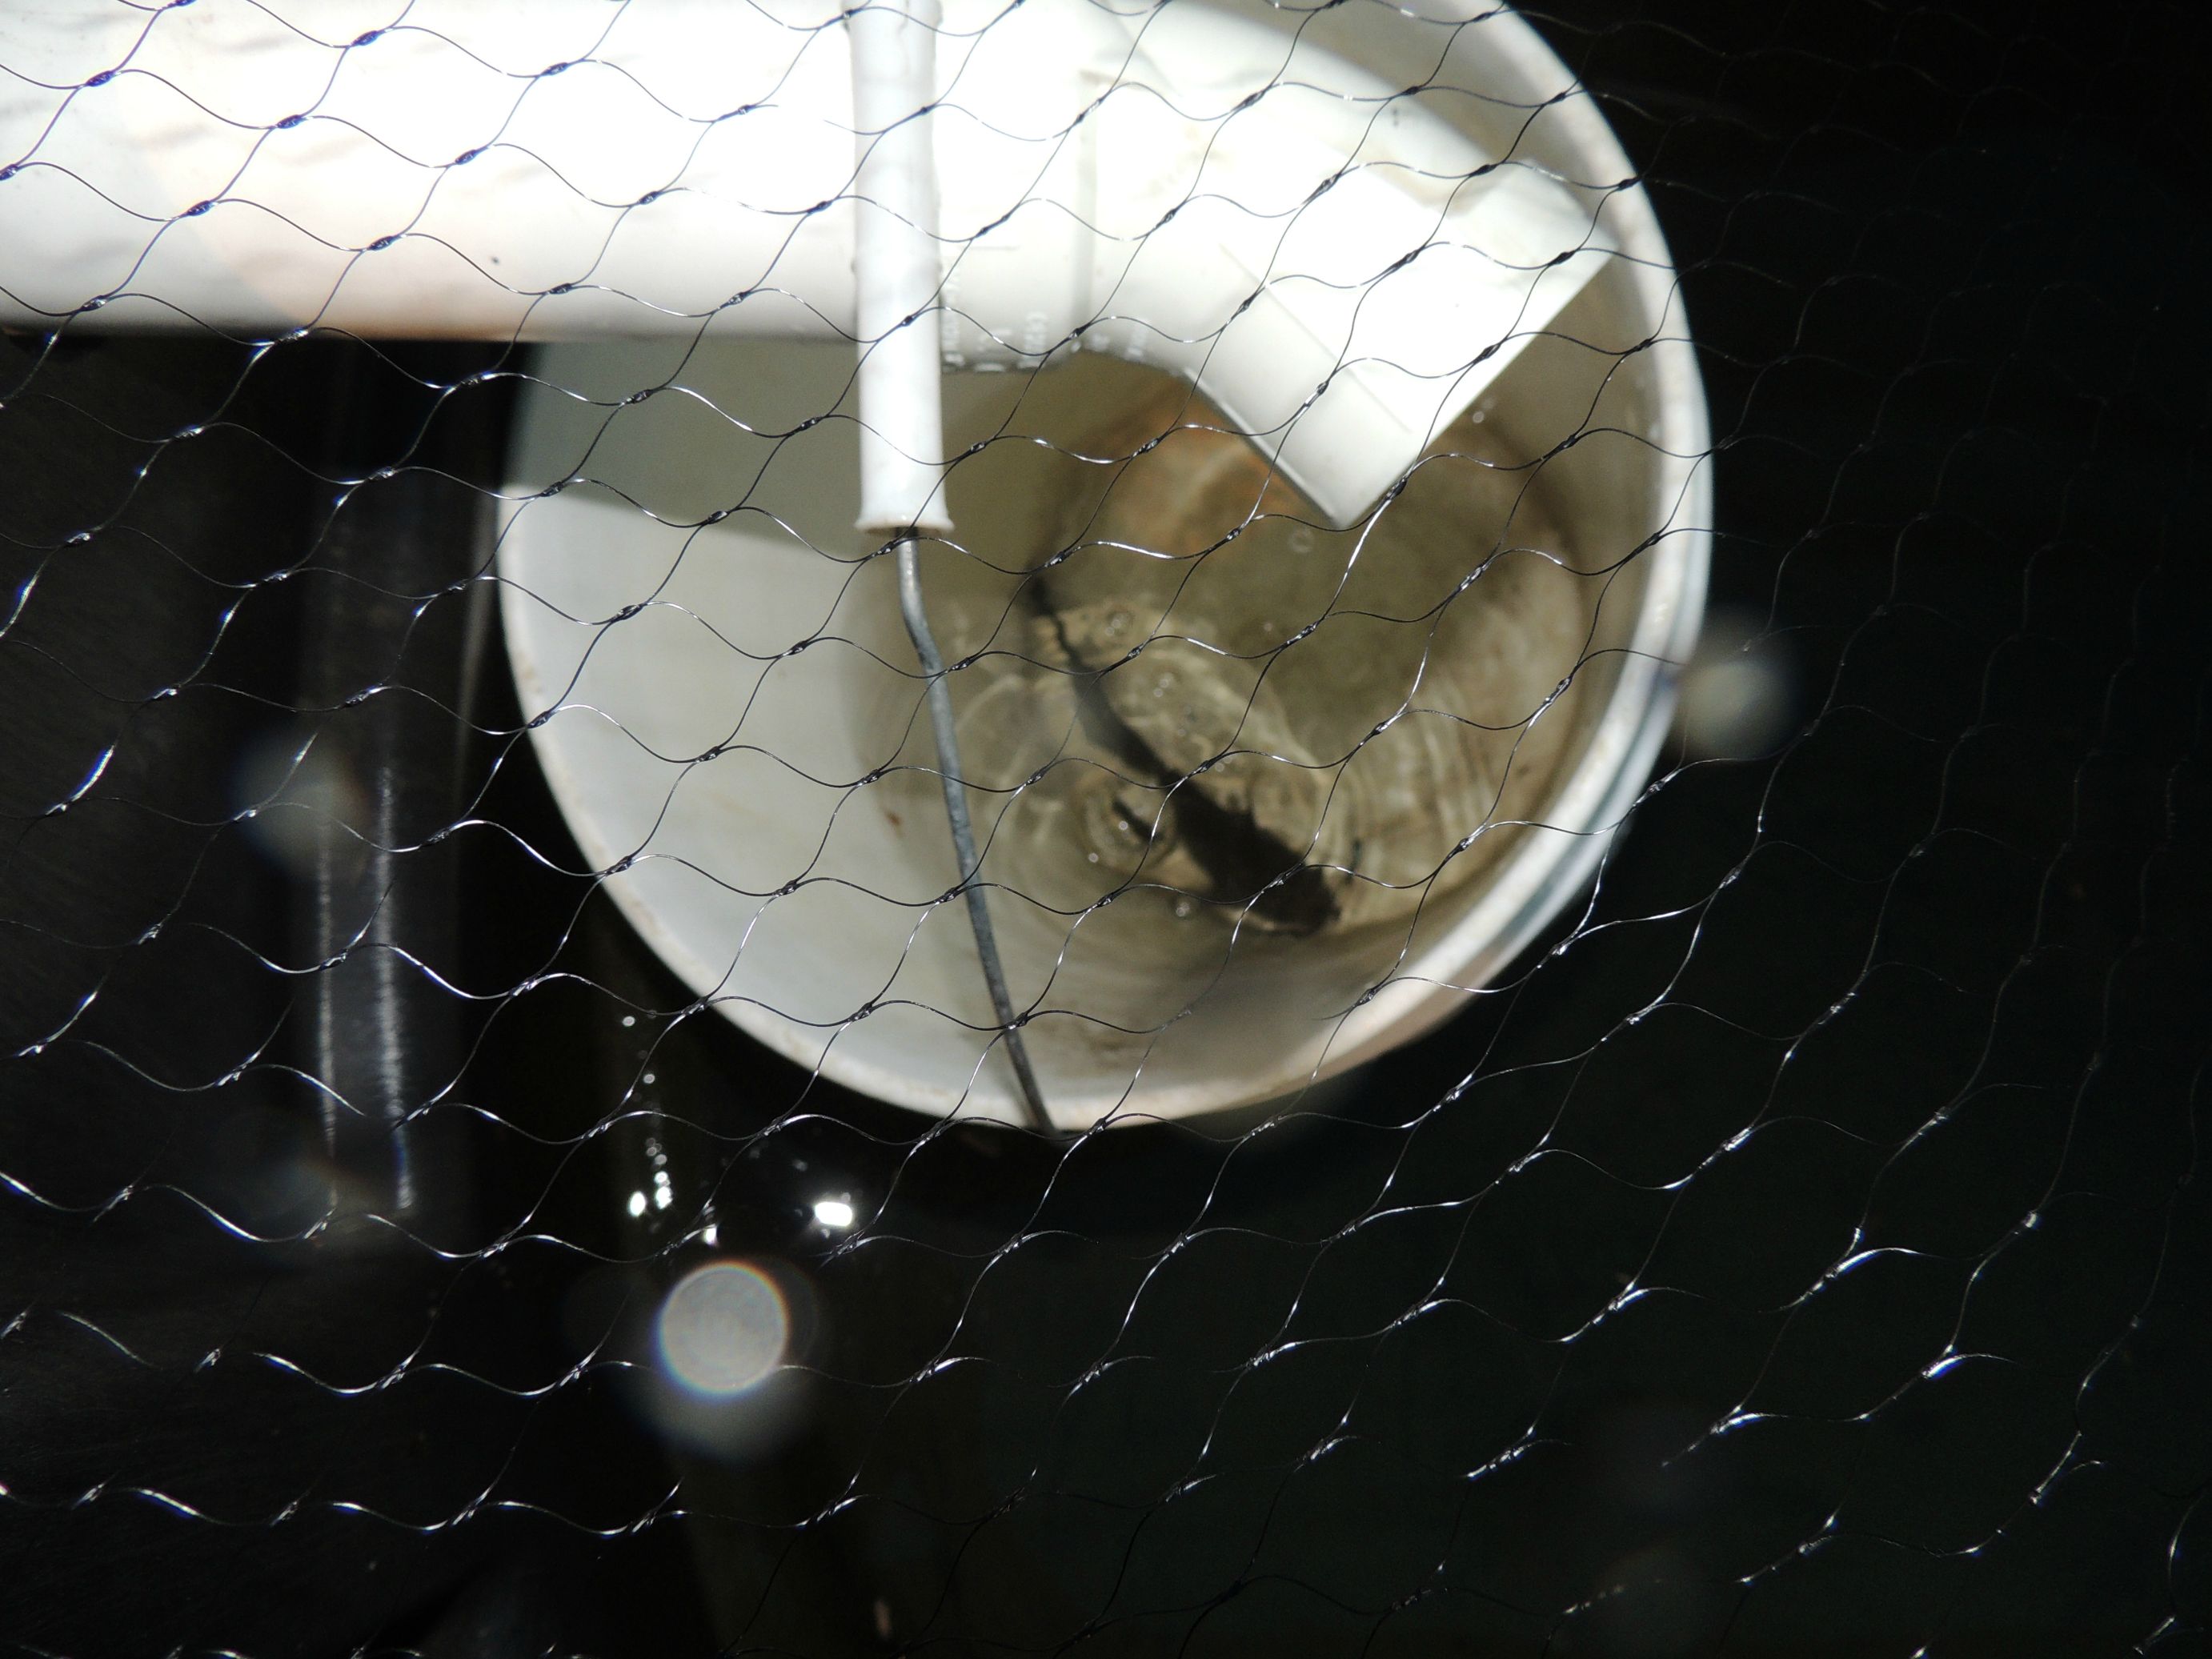
First guy to go in:
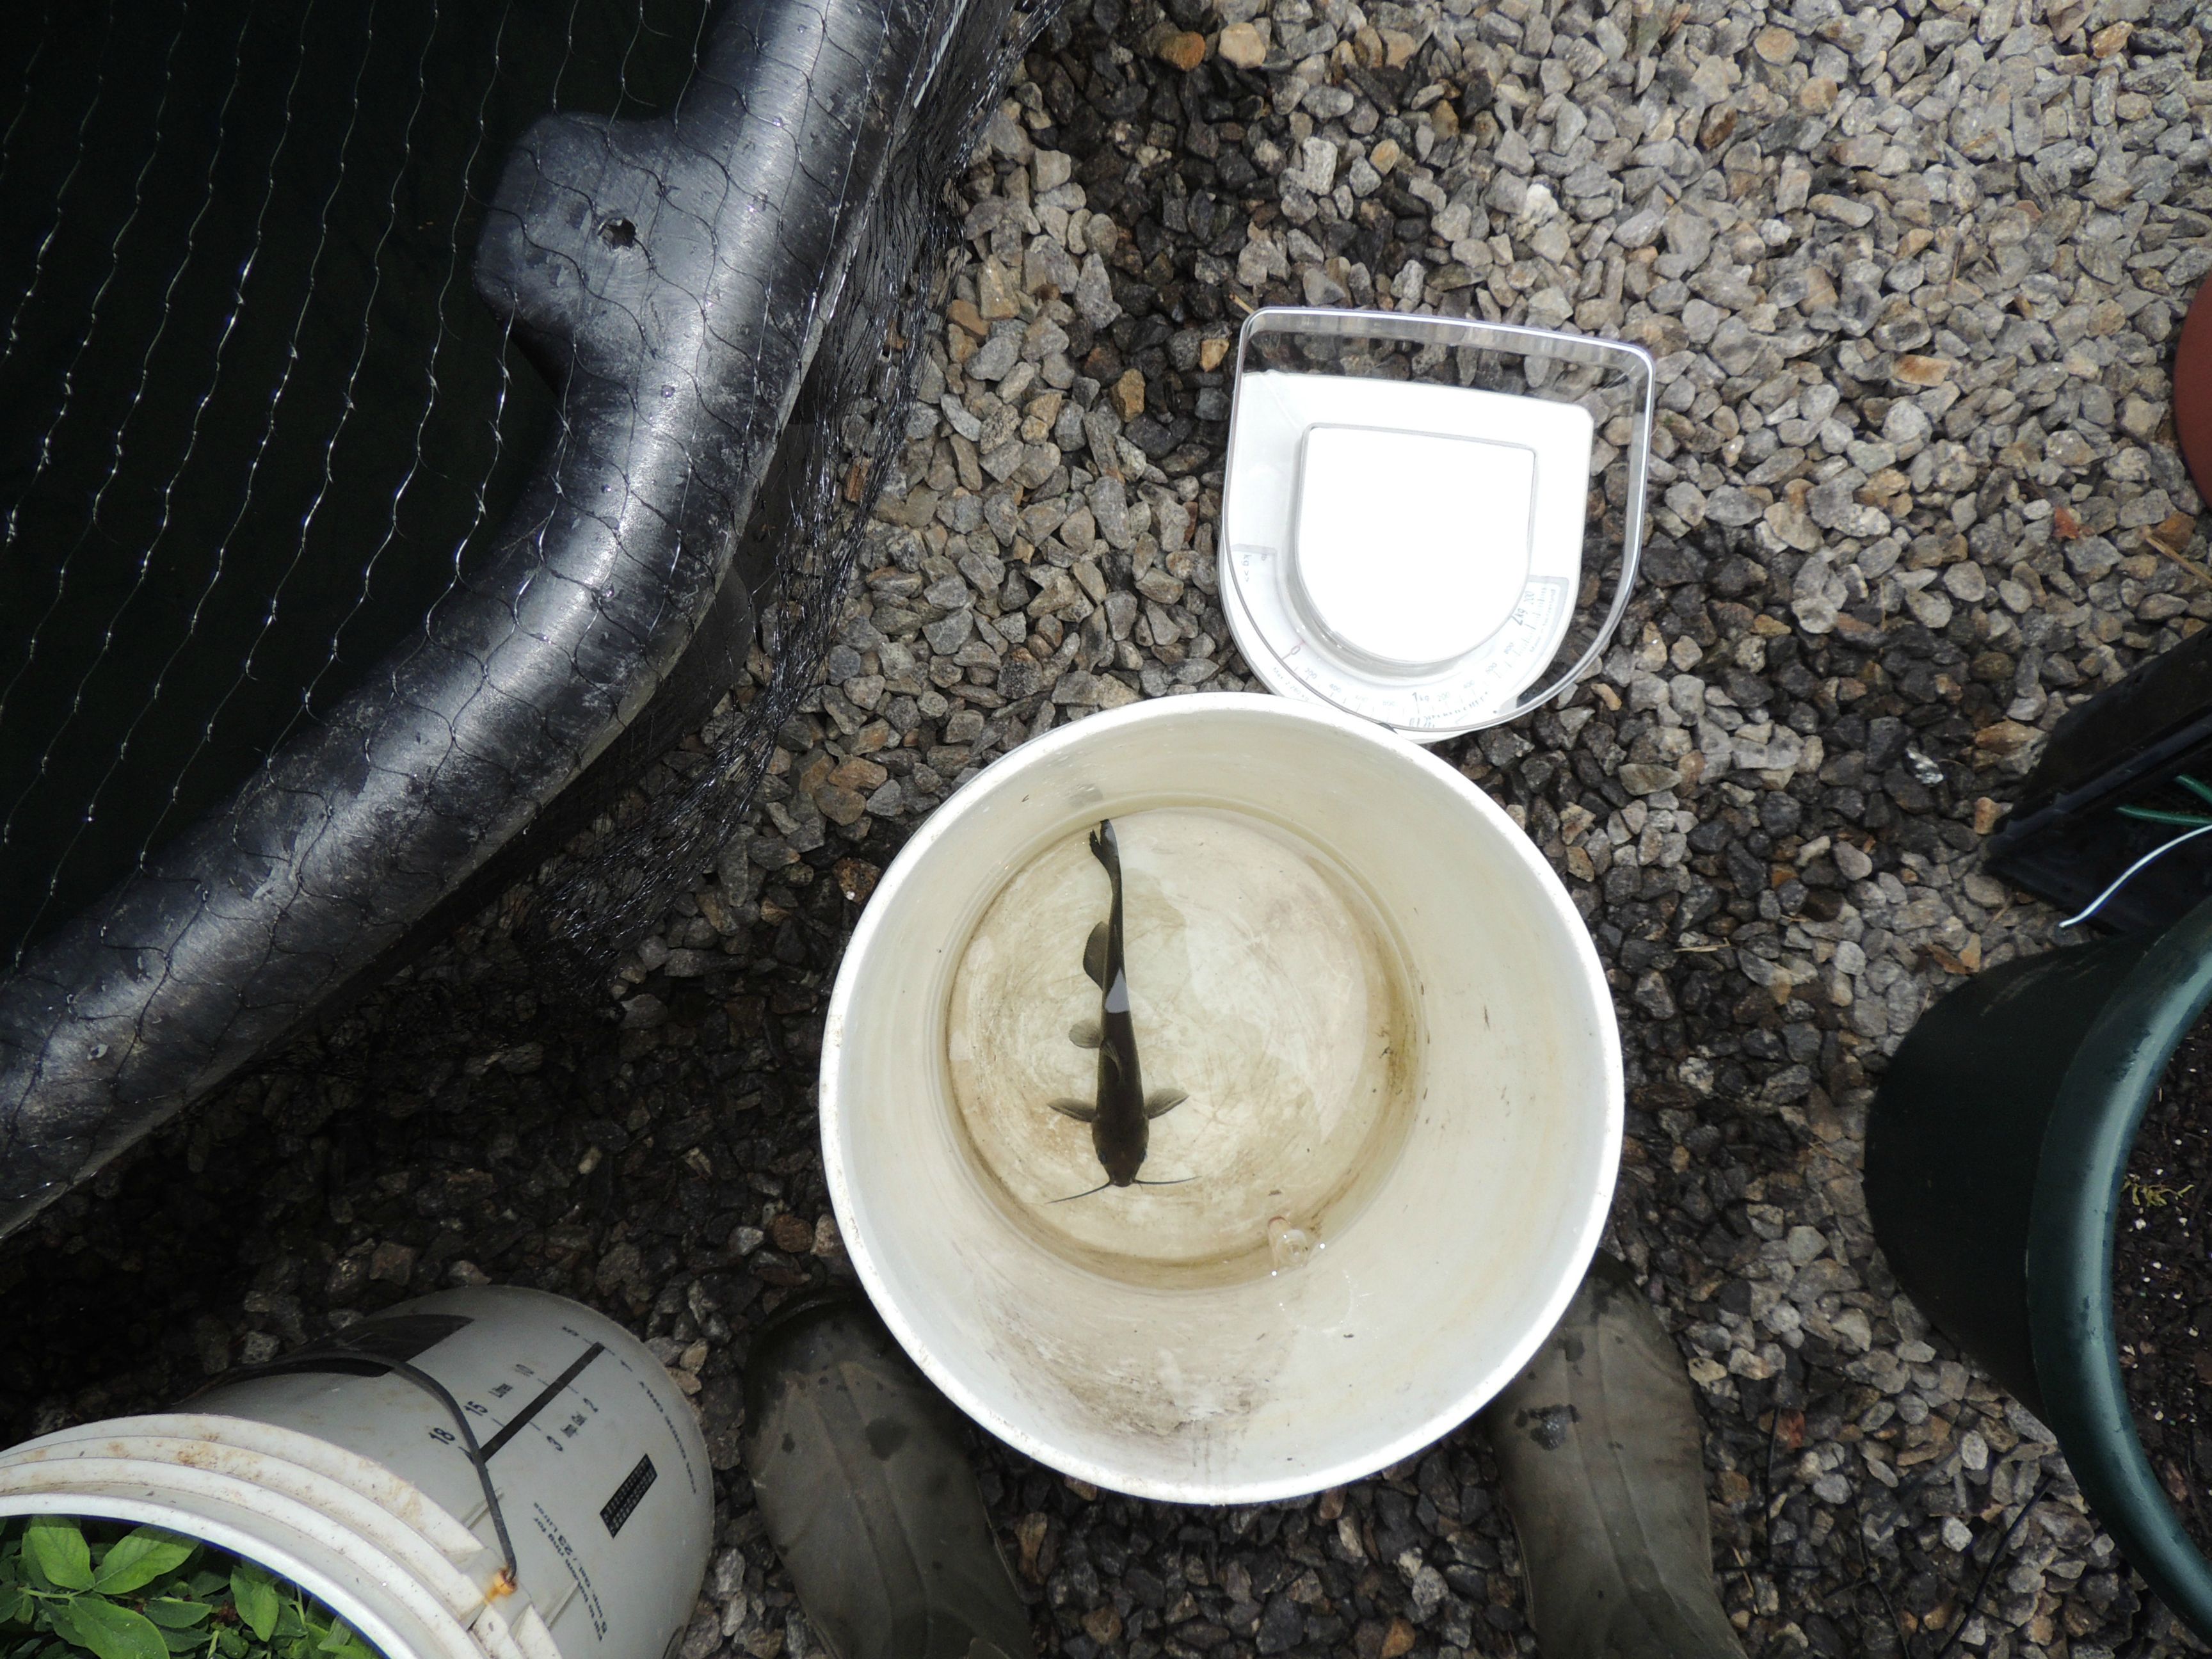
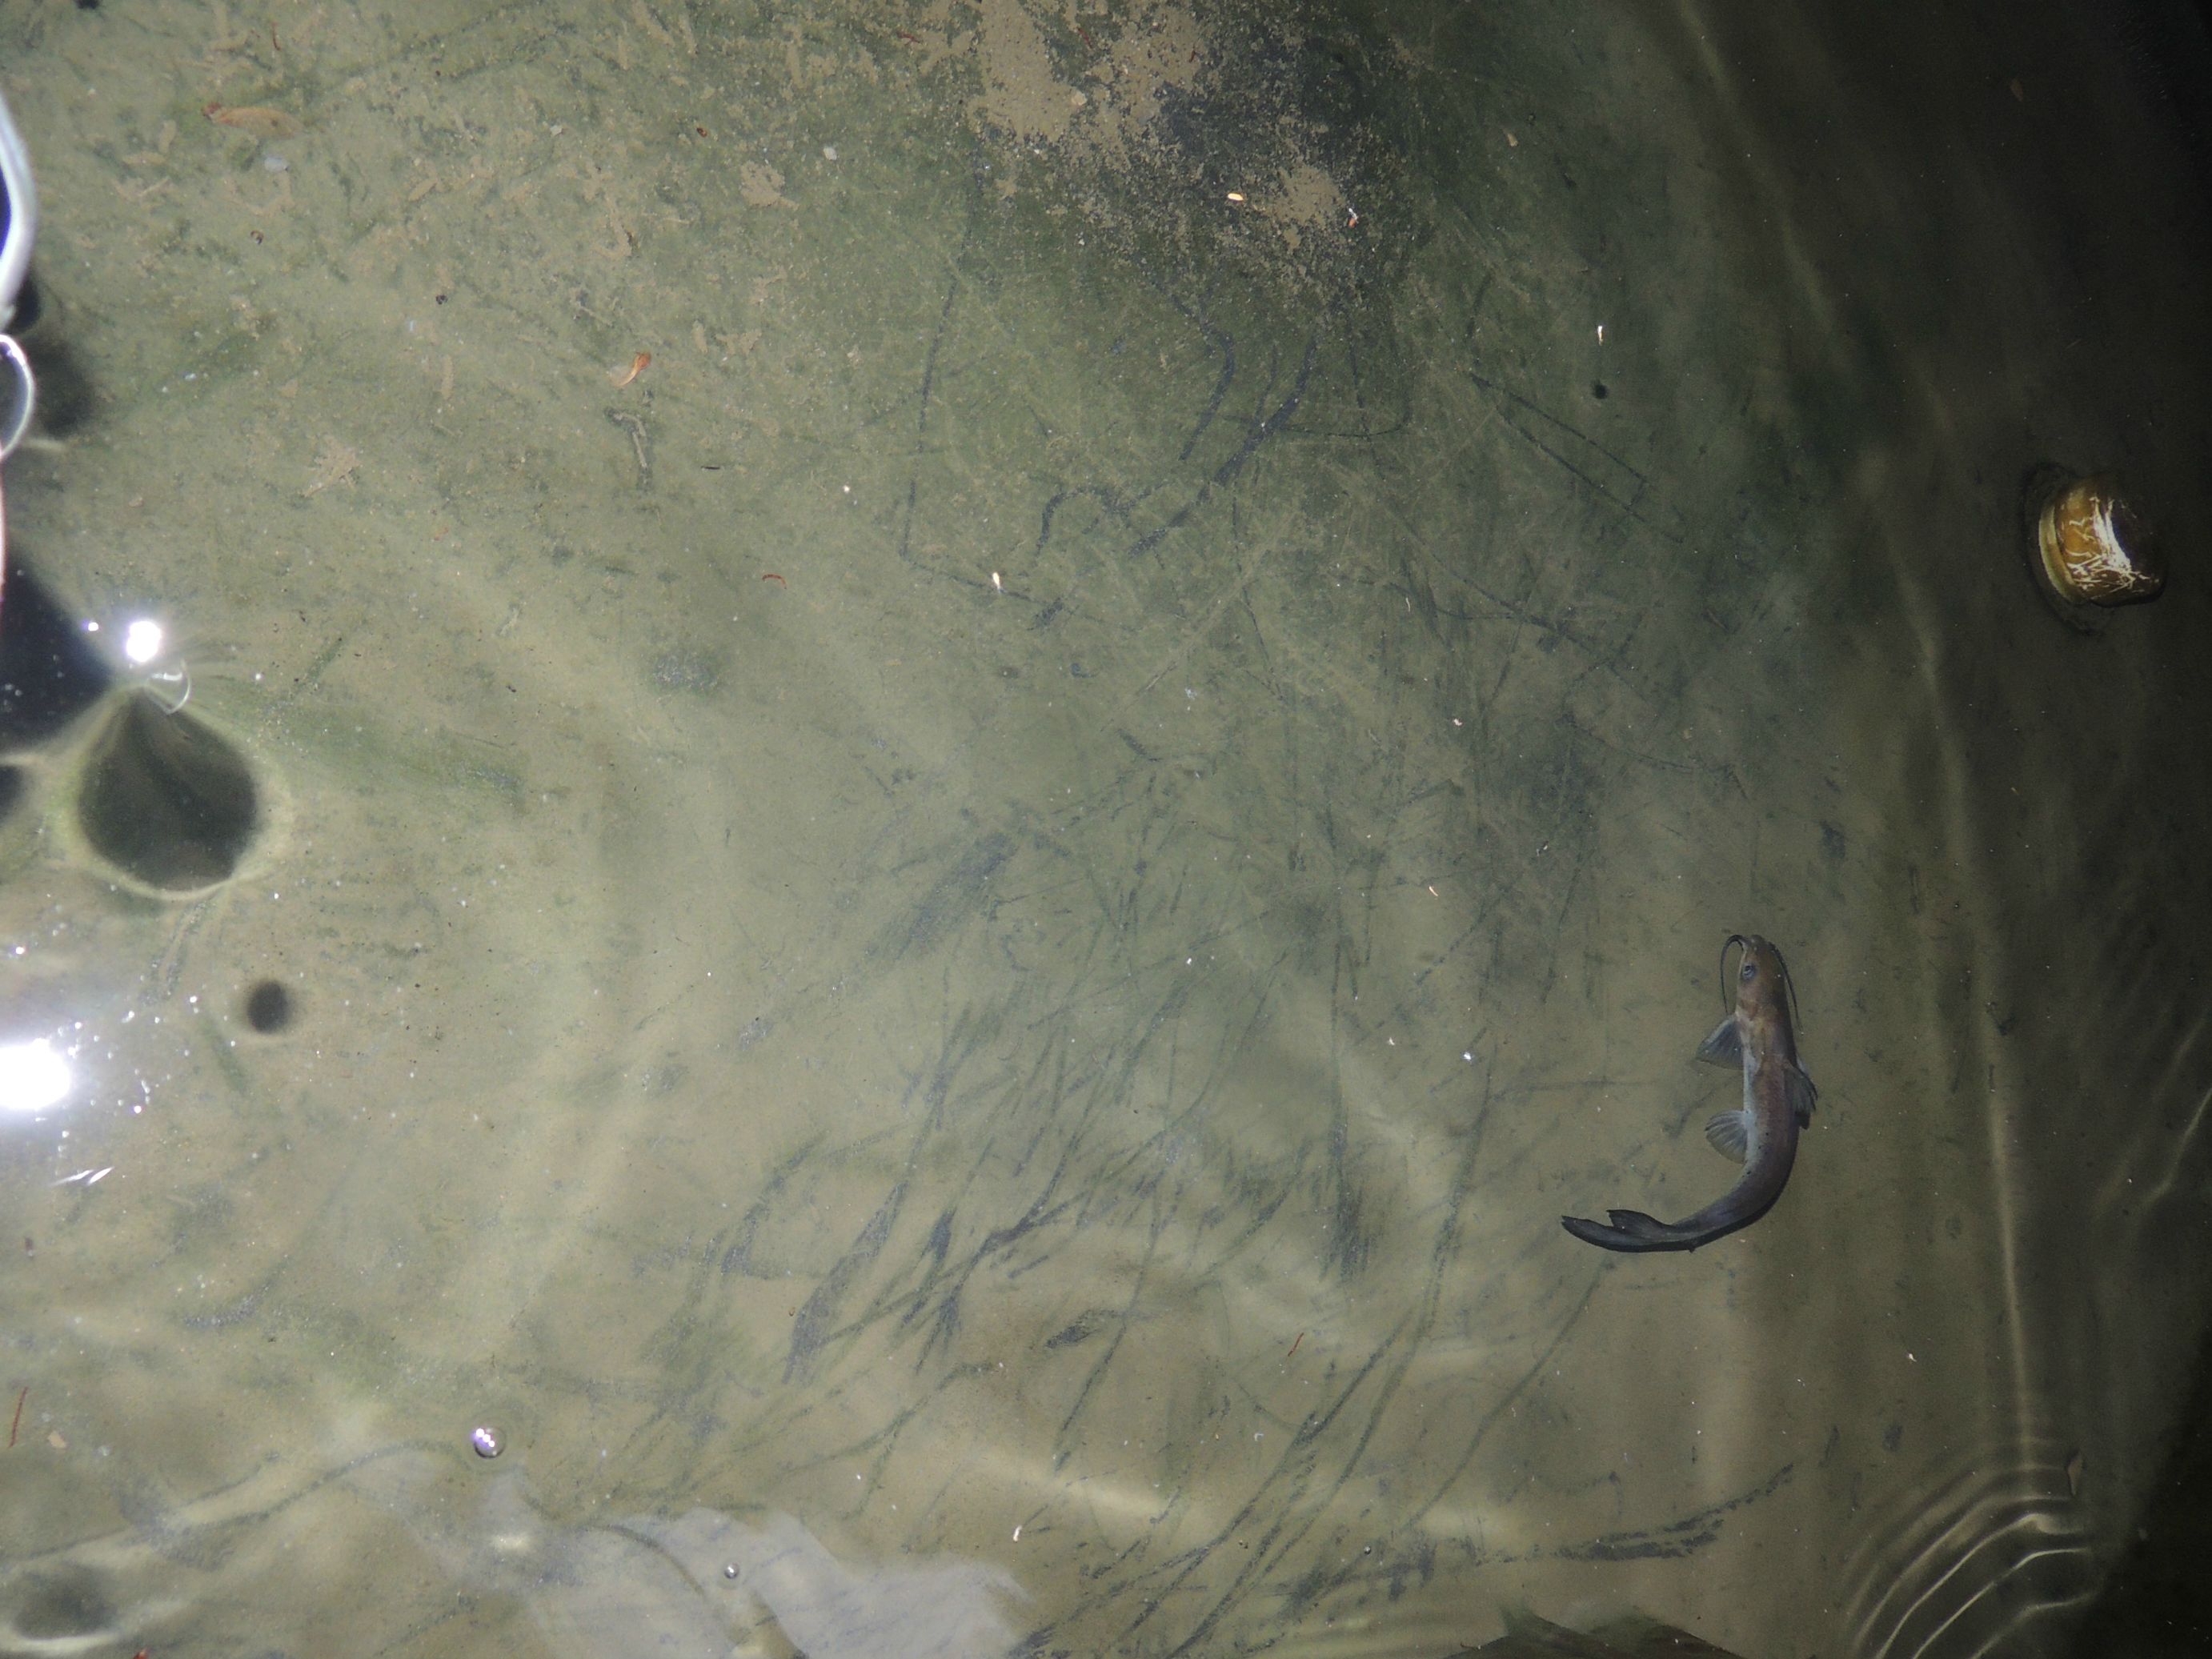
I let the water acclimatize:
The Channel catfish all weighed about 5 grams when I bought them last fall. Going into the system, they weighed between 40 grams and 300 grams. Quite a spread!
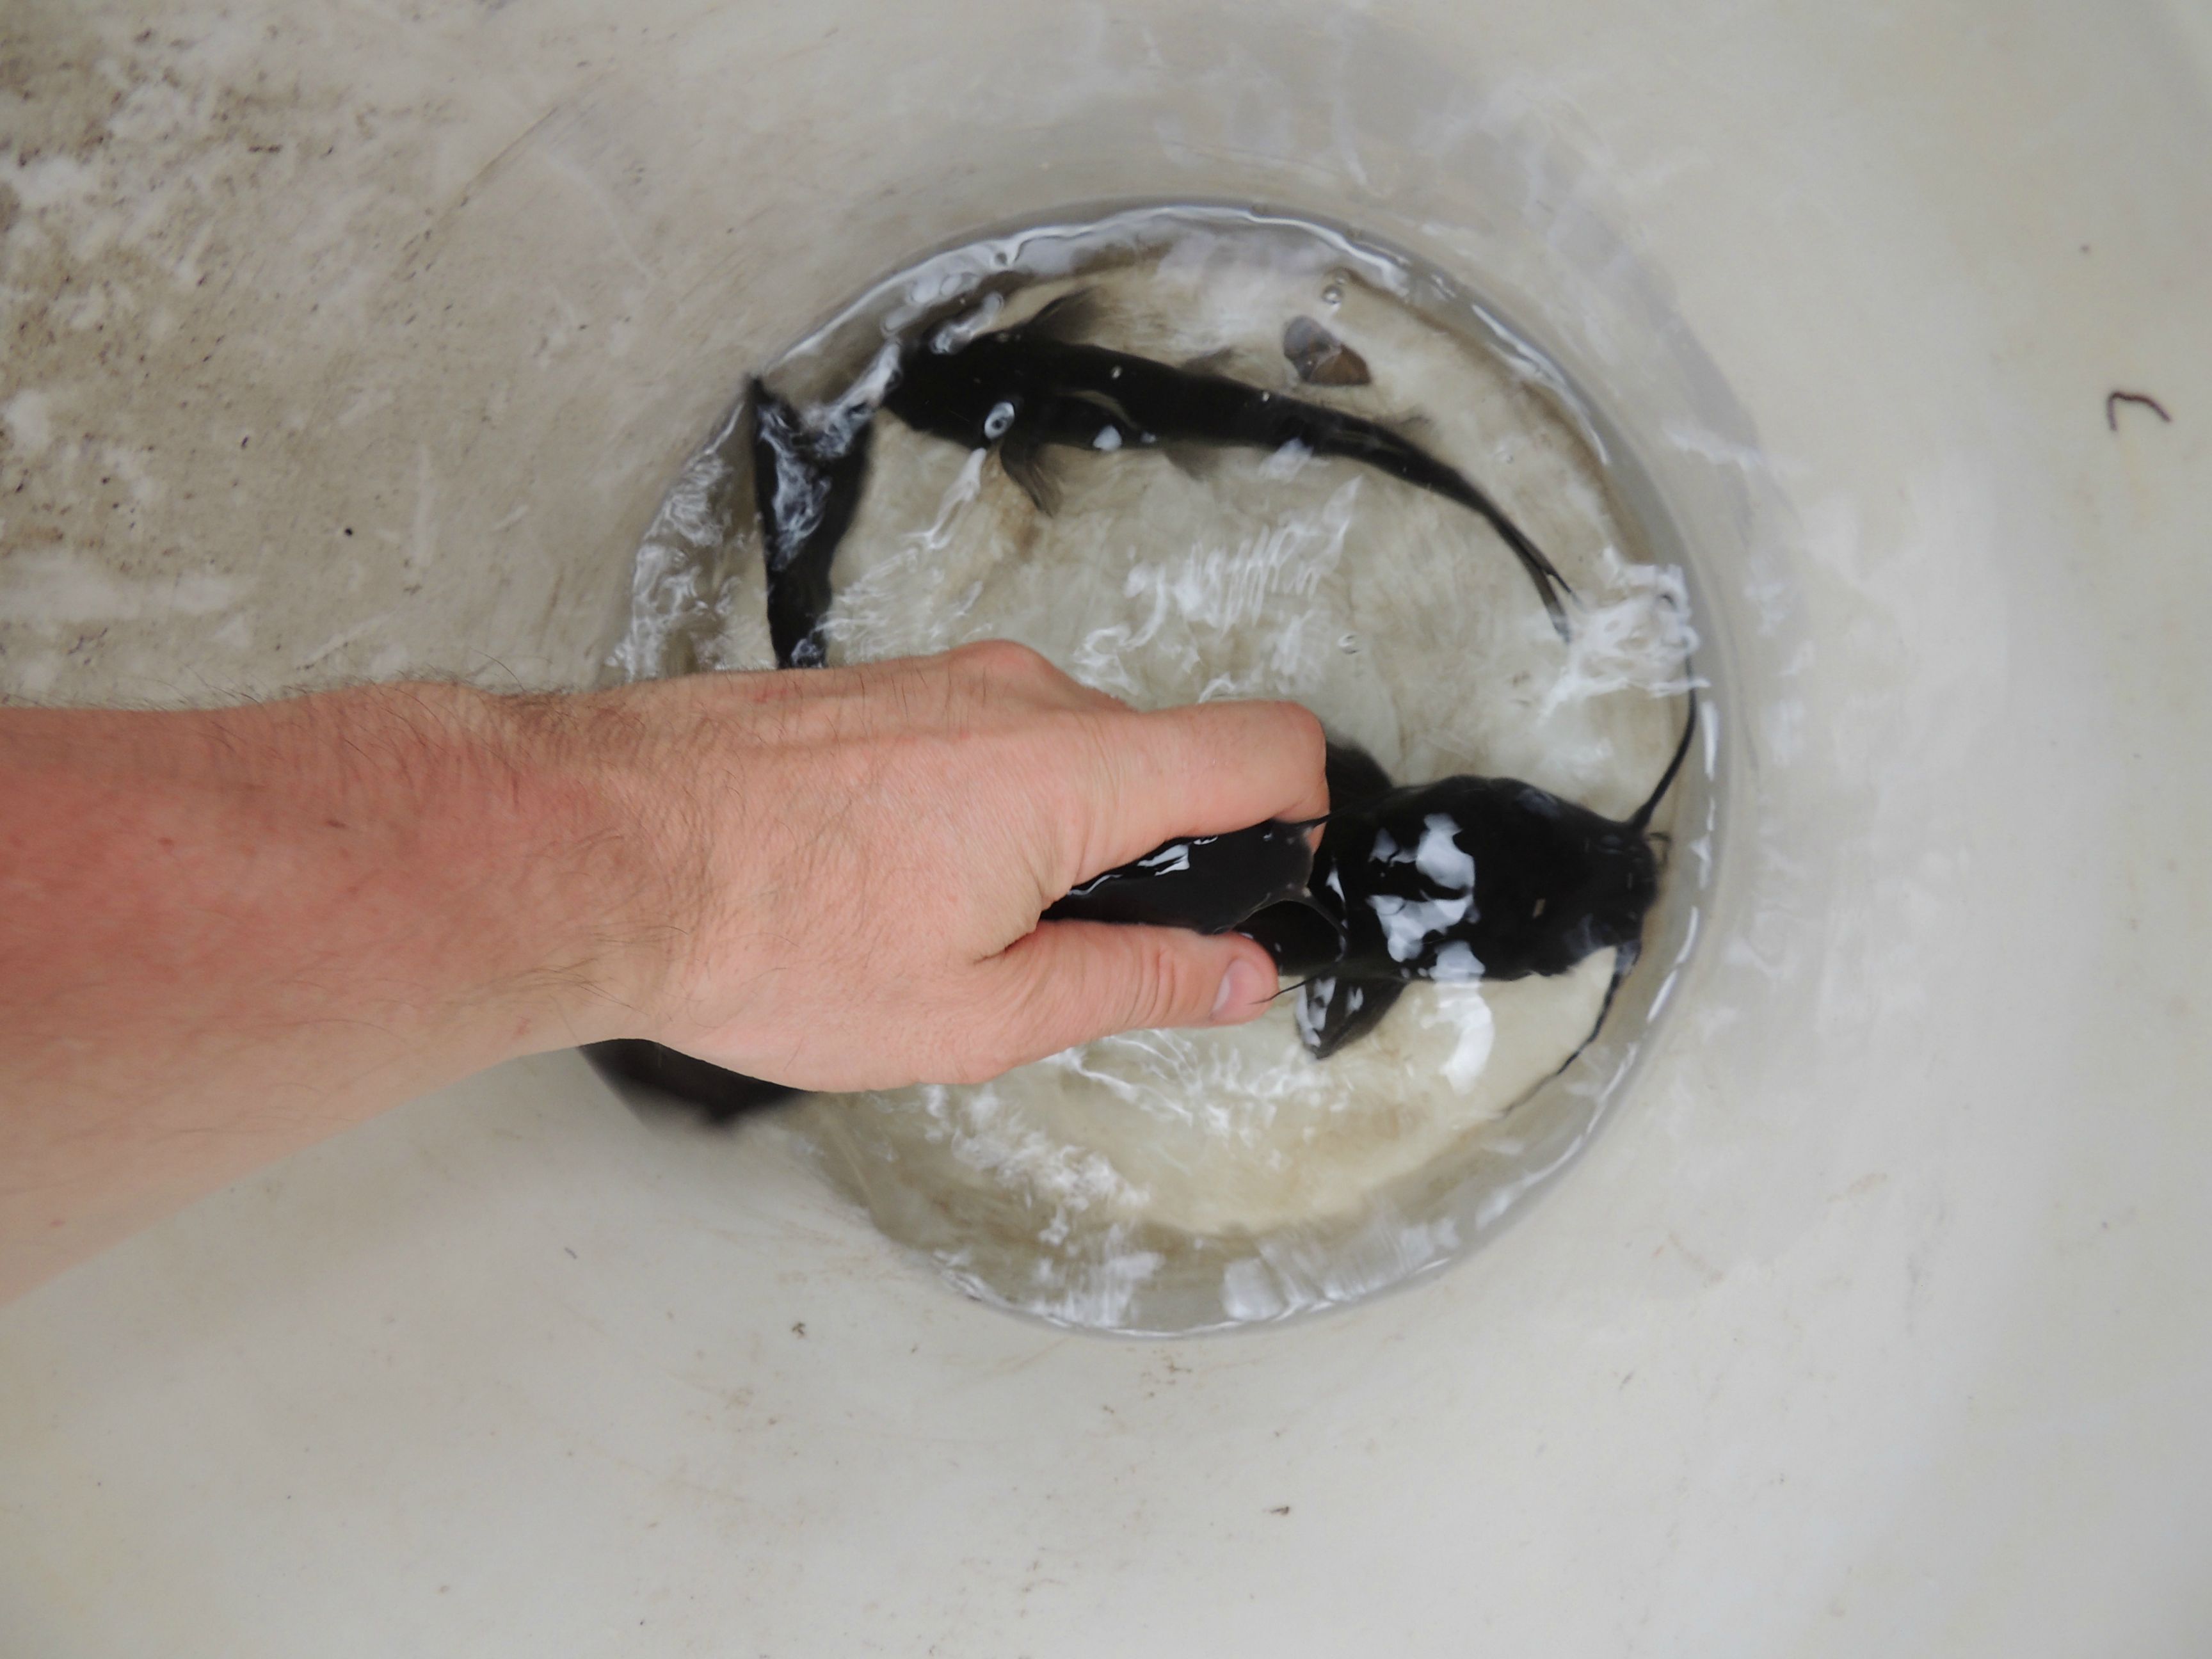
You should handle the fish by hand whenever possible as netting can often tear the pectoral fin. Also, make sure to wet your hands before grabbing them.
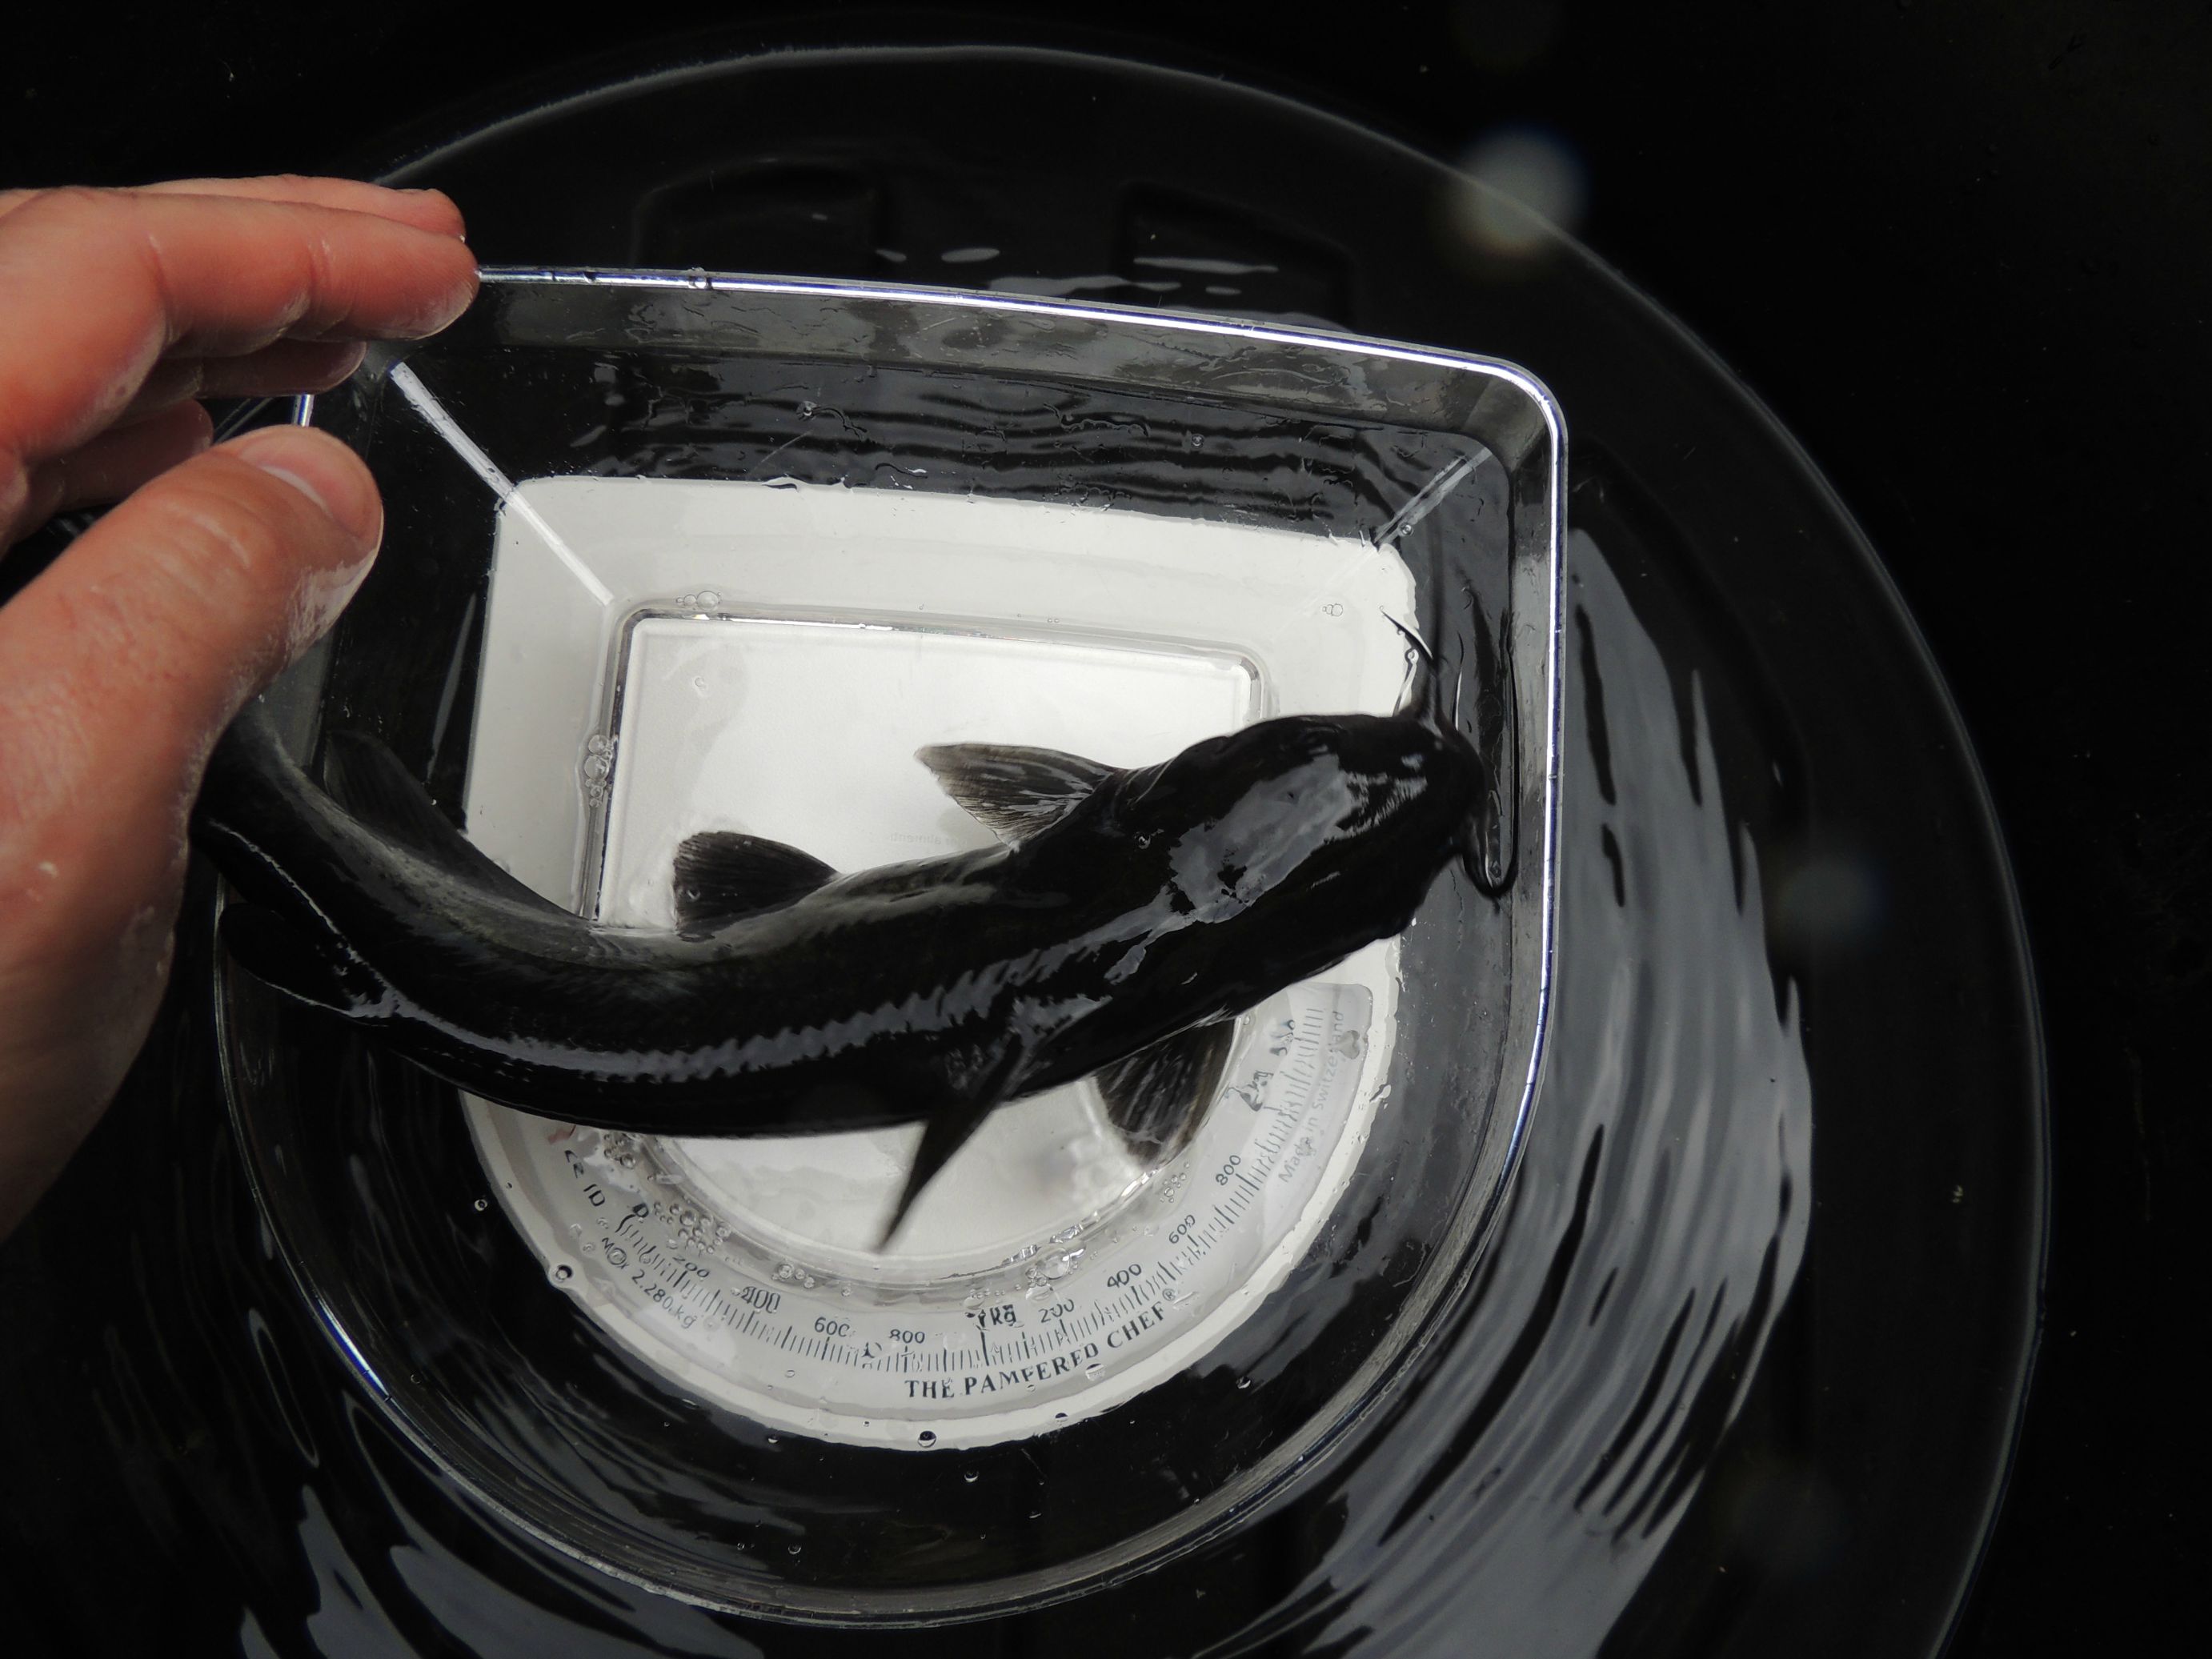
Weighing can be a challenge as they don't like to sit still! The scale is in 20 gram increments but you can usually measure down to within 10 grams. That's enough for my purposes.
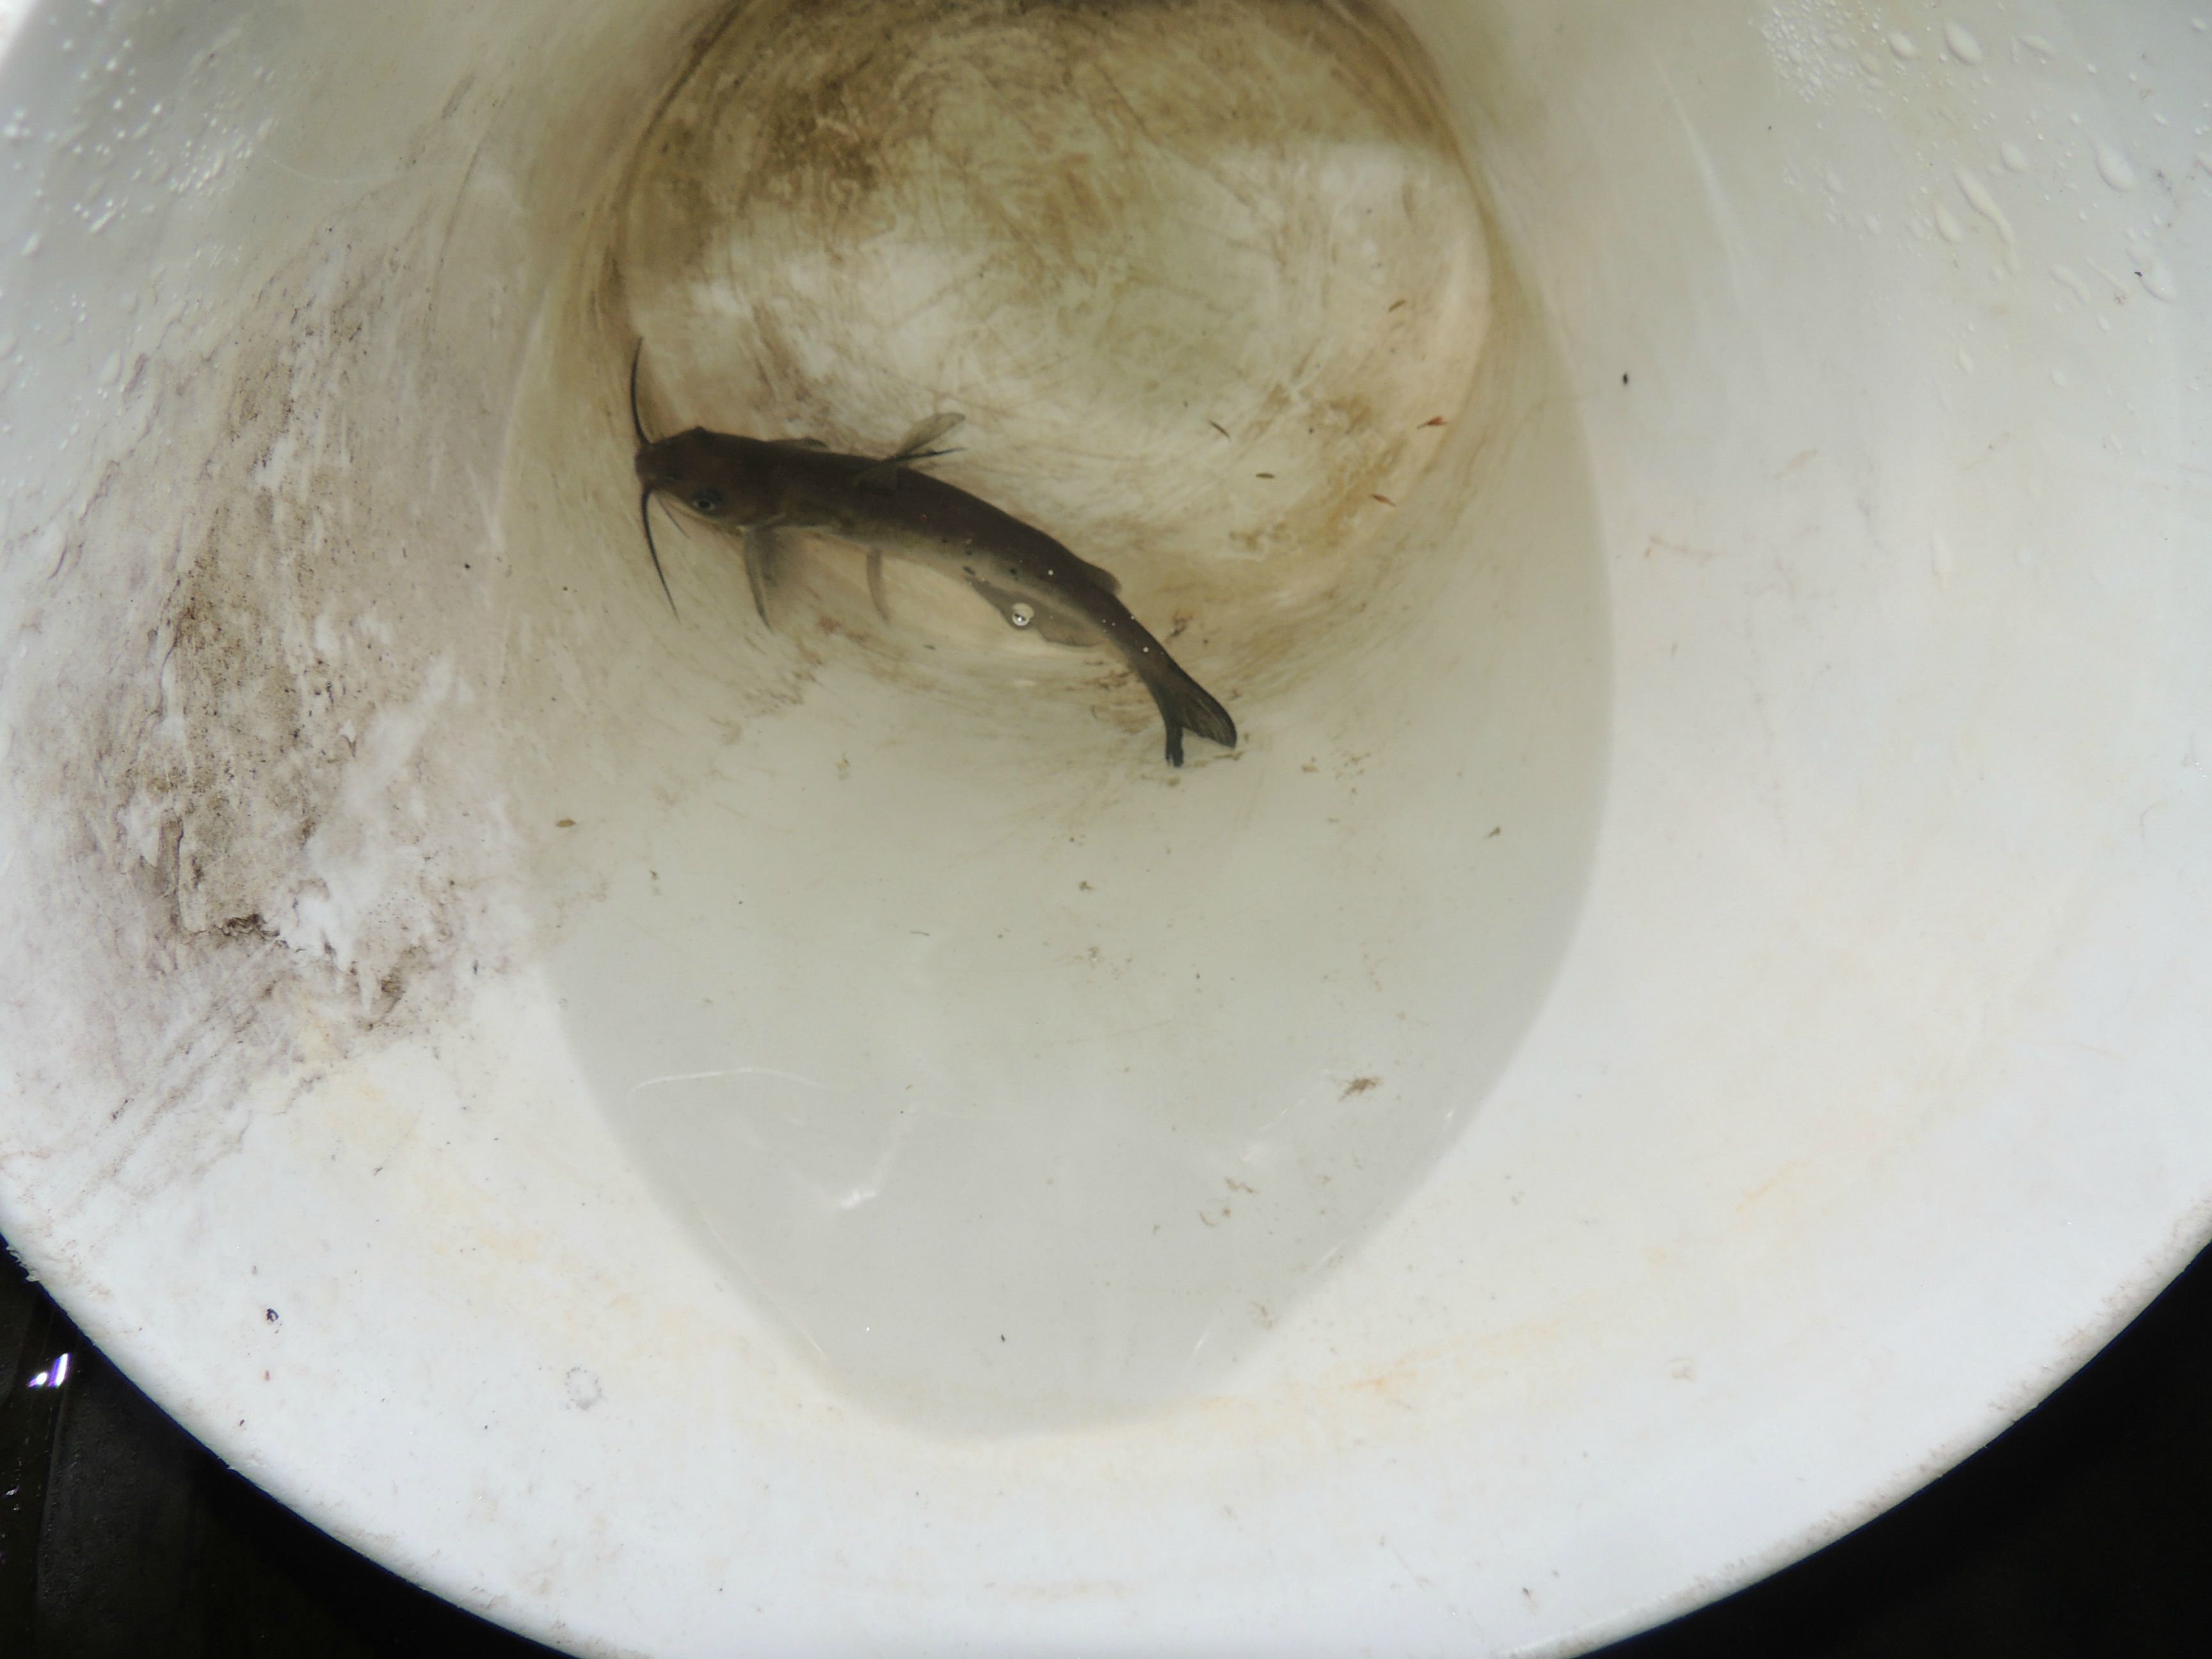
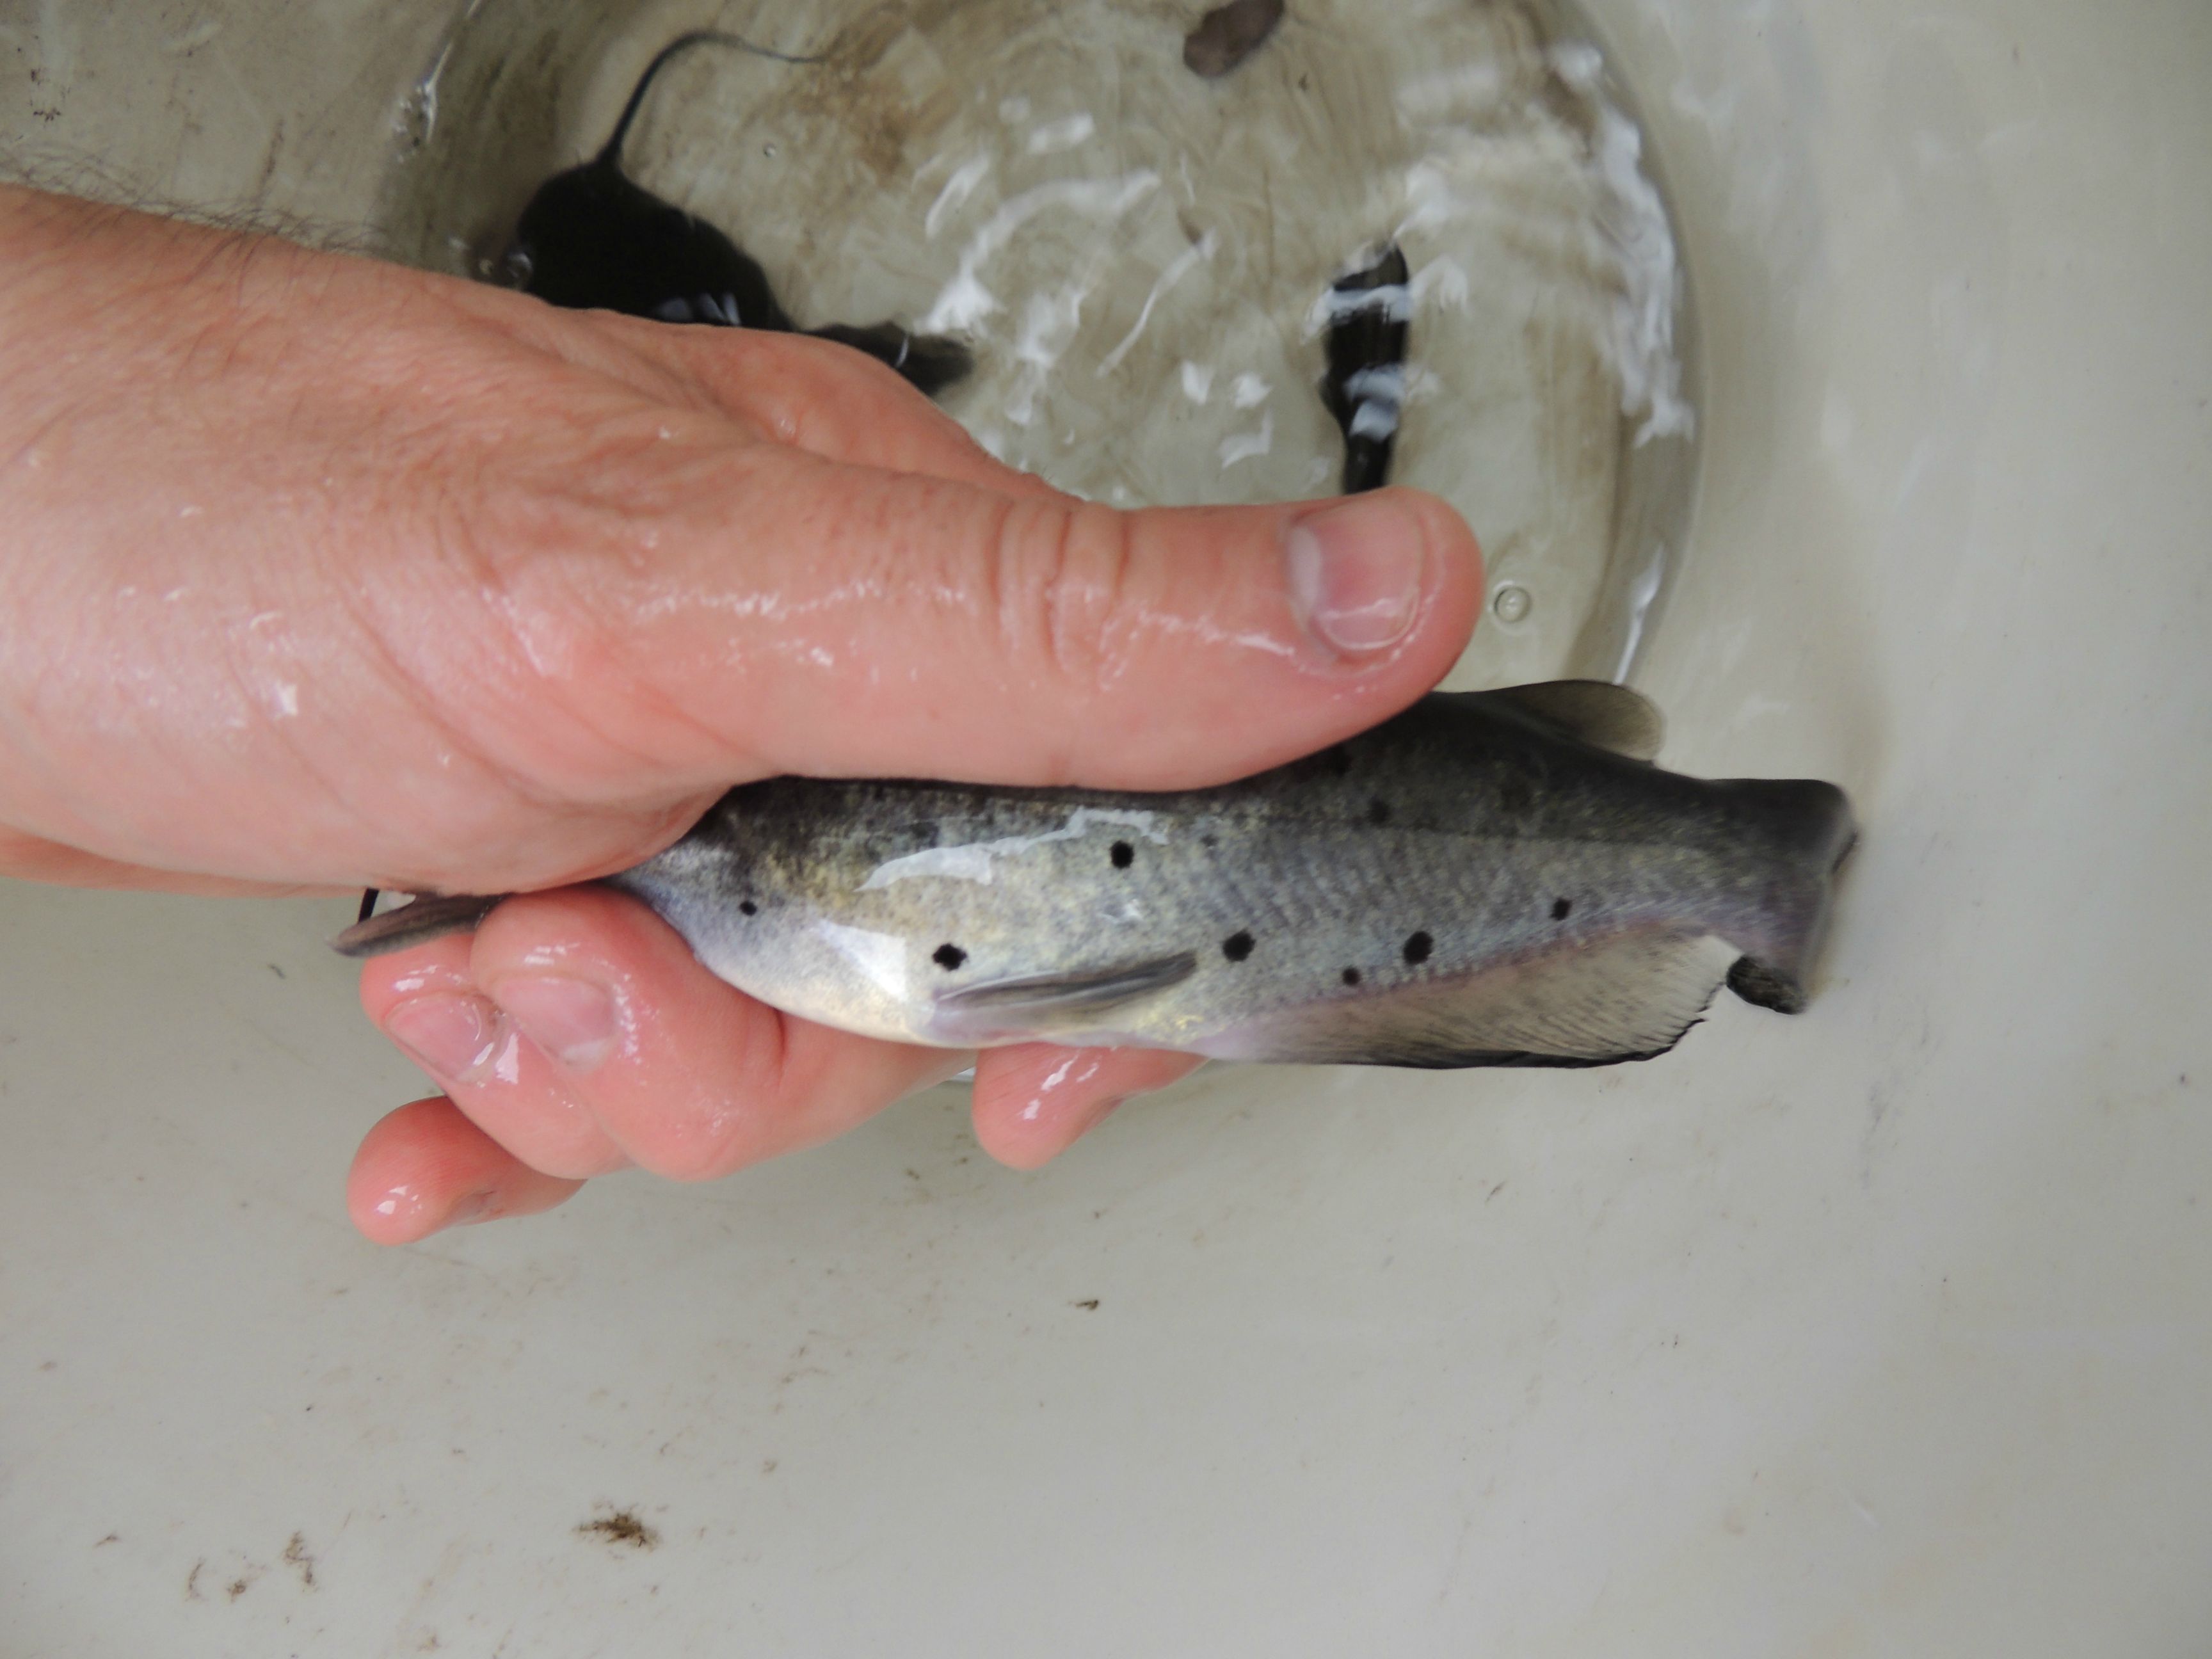
Channel catfish can be distinguised from other catfish by the deeply forked tail fin and the characteristic spots on the juvenile fish:
That's it for now. If you have any questions, please let me know.
1) The expanded shale in the grow bed had enough of a bacterial population that we could add fish to the system and be assured that any ammonia produced by the fish would be converted to nitrate.
2) The bacterial species that perform this conversion include the Nitrosomonas that converts ammonia into nitrite, and then Nitrobacter that converts nitrite to nitrate. The bacteria does this as a source of energy, using oxygen from the atmosphere to oxidize ammonia to nitrite and nitrate. Since these bacteria use inorganic substances as a source of energy, they are called autotrophes. This is referred to as chemosynthesis as opposed to autotrophic plants and algae which perform photosyntesis.
However, we are now posed with a dilemma: How do we remove nitrate from the water? Do we even need to remove nitrate from the water? The answer lies in trying to recreate as natural an environment as we can for the fish. In nature, nitrate levels are typically very low, usually less than 20mg/Liter, and more often less than 10mg/L. My well water which is the source of the water for the aquaponics system doesn't contain enough nitrate to register on my testing kit.
While nitrate is far less toxic than ammonia or nitrite, it can reach toxic levels if there is nothing removing it from your aquaponics system. The two methods that are used to remove it are:
1) Water changes. This is why aquarium hobbyists do partial water changes in their aquariums, maybe 20% of the water per week. Obviously, the amount of water change can vary depending on how heavily the fish are fed, and how many fish/weight of fish there is. The more feeding, the more ammonia is produced from the metabolism of protein in the feed, the more ammonia is released by the fish into the water, and the more nitrate is produced from the bacteria converting the ammonia to nitrate. While many aquarium hobbyists keep a certain amount of plants in their aquarium, it usually grossly insufficient to keep the ammonia levels down unless you were to keep few small fish and a large amount of plants. It would also be critical to have enough light for the plants to grow and stay healthy. While there is a role for water changes in an aquaponics system, it is much more ideal to keep enough plants in your system to absorb enough nitrate from the water to keep the level low. Ideally, this is below 40mg/L but this can be difficult to maintain.
2) The second method to remove nitrate from the water is using plants growing in the grow bed. Plants need nitrogen to manufacture proteins and other substances. Plants cannot capture nitrogen from the atmosphere and must rely on naturally occurring nitrogen such as from lightening (nitrogen oxides formed when oxygen and nitrogen in the atmosphere react at high heat), bacteria that can capture or "fix" atmospheric nitrogen gas to ammonia, etc. The process of turning atmospheric nitrogen into ammonia is called "fixing nitrogen" because you are taking the relatively inert nitrogen gas and converting it into ammonia or the ammonium ion that can then be used by the plant. Most plants actually prefer to absorb their nitrogen in the form of nitrate, but they also have ammonia transporters that can absorb ammonia also directly from the water.
The following picture illustrates the nitrogen cycle whereby nitrogen gas is fixed by bacteria, then incorporated by plants, which are in turn eaten by animals, which then excrete ammonia in the form of actual ammonia as fish do, or as ammonia combined with carbon dioxide as mammals and many animals do, or as uric acid which is the preferred method of birds and reptiles. There are bacteria that can actually break down nitrate back into it's nitrogen and oxygen gas components and I will discuss this again at a later date.
The point here is that nitrate must be removed from the water in the aquaponics system. The basis of aquaponics is to use plants to remove nitrate, thereby creating a closed-loop system. Theoretically, the only thing that is added to the system is food for the fish and enough water to replace that lost by evaporation. The end product is fish meat and either a fruit or vegetable, or the plant leaves themselves are consumed. Since some fish like tilapia will eat plants, you can even take the system one step further and feed, say, spinach grown in the system back to the fish.
Now for the plants!
This is the grow bed after cycling with bacteria. You can add plants before the cycling is finished as they can absorb ammonia, nitrite and nitrate, but I didn't do so. I did run into some problems with the horseradish as I grew them indoors and then didn't acclimatize the plants slowly enough. This led to burned leaves and the plants had to regrow outside again. Not a big deal but I probably would have planted them earlier. I chose horseradish mainly because they have done well in my system in the past two years. They have several attractive features: they grow upright and therefore save space. They produce both an edible root and also edible leaves (yes, they're edible!). They grow at a wide range of temperatures, tolerating both extremes of cold and heat, although they are known for doing well in cooler weather. They also like a lot of water. The one thing I've found with the roots is that they may develop in two ways: Sometimes they will form a nice, thick root, and other times they form a very fine, large 'hair ball'. I'm not sure what the factors are that lead to one or the other. The hair ball definitely has a much larger surface area for collecting nitrate, but the root is edible. So either way I'm happy.
This is the horseradish growing in peat after they regrew their leaves (I left them outdoors). Horseradish is extremely easy to grow from even a tiny piece of root planted in the ground.
I washed all the peat off the roots. You could certainly take the mesh off the peat and plant it directly like that in the expanded shale grow bed, but I'd rather not have any soil/peat in the grow bed.
I used steamer clam shells to mark the areas in the grow bed where I would plant the horseradish. The total number of plants was 36 if I recall correctly. I did also plant some cucumber at one end of the grow bed.
Planting completed
I didn't want the water splashing up onto the plants and the inlet for the water into the grow bed from the fish tank worked out very nicely.
The plants are in expanded shale only with no soil.
After a few weeks of growth:
View from the fish tank end:
This is a picture of the horseradish plants yesterday, 08/09/2014:
Long view:
Side view:
Close-up. Here you can see the cucumber plants:
These are close-ups of the cucumber plants from a while ago. I planted them in the grow bed after the first two leaves emerged, so all the growth you are seeing was mostly in the grow bed:
I put netting over the sump tank so the cucumber plants could climb along it:
Other side:
I started off with a total of 6 cucumber plants but one of them died. The following are pictures of the cucumbers from yesterday (08/09/14).
I'll eat this one today:
Small ones growing:
This is where the grown plants enter the grow bed. Some of the lower leaves can turn brown. I do have what I believe is Verticillium Wilt fungus throughout my garden and they can infect cucumbers, but I don't think that is what is happening here. The cucumbers are not wilting in the sun at all.
Now for the fish! These went in back in June. I only have pictures of them going into the system, and only of the Channel catfish which all went into the sump tank. It's too stressful on them to remove them from the water and weigh them mid-season. I will of course weigh them when they come out of the system. I have goldfish, Yellow Perch, White Perch and Brown Bullhead catfish and those were all weighed going in.
First guy to go in:
I let the water acclimatize:
The Channel catfish all weighed about 5 grams when I bought them last fall. Going into the system, they weighed between 40 grams and 300 grams. Quite a spread!
You should handle the fish by hand whenever possible as netting can often tear the pectoral fin. Also, make sure to wet your hands before grabbing them.
Weighing can be a challenge as they don't like to sit still! The scale is in 20 gram increments but you can usually measure down to within 10 grams. That's enough for my purposes.
Channel catfish can be distinguised from other catfish by the deeply forked tail fin and the characteristic spots on the juvenile fish:
That's it for now. If you have any questions, please let me know.
Last edited:
Share: