Assembling a 1911 - it's ON!

Joined
Jul 16, 2009
Messages
2,758
Likes
593
Feedback: 4 / 0 / 0
So several months after my "Can an idiot build a 1911?" thread, I've decided to find out the one way I know how: give it a try. I gave RemSport a call this morning, and I'll be driving down Thursday to pick up (or at least pay for) a slide, frame, and parts.

The theme of my build? Cowboys. Zombie Cowboys. Zombie Cowboys... From Space! If it looks futuristic, I'm doing it. Tactical rail, Serrated Top slide, the works. For example, I've got some Crimson Trace grips already on the way, mostly for that futuristic "WARNING: Laser!" sticker that comes with them.

Now I don't really know what I'm doing. I've owned a 1911, but I don't know anything about them, really. I don't know if I've gone and ordered a series 70 or 80 part kit, I don't know if I have all the tools I really need, and I don't know how long this will take. I don't know, well, you get the point. I'm a reasonably smart guy, and I have an engineering degree, but unfortunately, this degree isn't in firearm, mechanical, or any practical engineering discipline, so this could get interesting.

I intend to document the whole build, which hopefully will be on a compressed-schedule, with pictures, starting Thursday.
 
If there are any cat pictures in the build.................

Nice though man!!!! I am interested to see what a cowboy/zombie/space theme turns out to look like.... I see a red dot on this thing somewhere LOL :)
 
Good luck with your build, but remember 1911 are fitted together, not assembled like an AR. Take your time and learn not only how to fit the part, but how it's fitting effects other parts
 
Good luck with your build, but remember 1911 are fitted together, not assembled like an AR. Take your time and learn not only how to fit the part, but how it's fitting effects other parts

I'll keep posting as I go; and intend to be very careful. I'm hoping that people will drop in to catch these things, and because I don't think there's a "here's everything I did" guide available on the internet. I intend to create one, even if it's "Soooo, I broke that part, so I got a new one and started over." I'll probably break down and get a book at some point. Brownells has a "Building a 1911" guide, but it's all "buy this jig, then this tool, then buy this other thing" which sounds an awful lot like marketing to me.
 
Day 0: Haven't Started Yet.

So, I'm back from RemSport. It was great, and I'm pretty sure they've made a future sale, too. It seems the easiest way to get exactly the gun I want, and while expensive, it seems to be about market price for good 1911s. Tons of slides, frames, parts; I really should have brought my camera. When I get back there sometime in the future, I will.

So anyways, gun. I ended up getting a Government Style, Stainless, Series 70, with tactical rail, special cut frame, 15 dpi front and rear serrations, and top serrations.

I've also now the owner of a pile of stainless parts: the whole thing will be silver, because, well, futuristic guns should be silver. For now, at least.

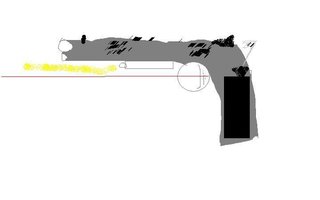
My camera isn't working, but here's about what it looks like:
attachment.php


OK, so maybe not exactly. I'll get my camera this evening and try this again.
 

Attachments

  • 1911.JPG
    1911.JPG
    13.7 KB · Views: 450
Day 1: Fire Control

Still no camera. Working on it.

So, first thing this morning, I fit the trigger. I took the trigger/trigger bow assembly (the thing that looks like a trigger, and is attached to a magazine-sized square) and pushed it backwards into the frame, to make sure it fits. It didn't go in very well because, oops, I'd forgotten to clean the inside of the frame.

So, I cleaned the inside of the frame, and while it's not totally frictionless, it fit, so I flipped it around and pushed in the trigger all the way. While it wasn't frictionless, it seemed the trigger fit pretty well! The trigger itself got pretty scratched after several pulls, so I de-burred the inside of the trigger-frame-well-thingy with a needle file.

The internet says I should get it to basically fall in and out under its own weight, and it doesn't do that. But it's pretty darn close, so I'm leaving it for now.

Next up: install the overtravel stop screw. But, really, I can't find it. I do think it's in the bag somewhere, as I have the hex driver for it, but there are enough parts that it's not immediately evident which screw or where it is. I'll come back to this, as I think the trigger will work just fine without it. EDIT: Found and installed the overtravel stop screw. Will probably have a post later about adjusting it, for now, I just guessed.

Second task: pin the hammer to the hammer strut. Only, which is the hammer strut pin? Just choose one that fits? Are all the pins the same? Time to google! EDIT2: Nope, it's not just one that fits, it's a specific pin, which I think I found. I'm not going to stake this pin, just in case it's the wrong one, but moving on for now.

Next update in a few hours.
 
Last edited:
The Internet says I should get it to basically fall in and out under its own weight, and it doesn't do that. But it's pretty darn close, so I'm leaving it for now.

Gently sand both sides of the trigger (top and bottom) using a very fine grit sandpaper. Make on pass on each end and try the fit. Keep doing it until the trigger fall in under its own weight.
 
Day 1: Continued Fire Control

So, next up is the magazine release. I've got it totally inspected and assembled (I even found the right spring!) but.... it doesn't fit in the frame. Time to go find a black marker and do my first real fitting job.

EDIT: And it's in. Still binding really tightly, so I'll keep working on it for a bit, but I think I actually fitted a part. it took a while with a #2 swiss needle file, but it wasn't rocket surgery.

EDIT2: So I've got the magazine catch fully assembled (and need to get a 1911 mag to test it). But it's the absolutely hardest catch ever, that makes me wonder if I put the right spring in (although I think it was the only one that would fit). I'm leaving this for now, but will likely re-visit.
 
Last edited:
Day 1: The First Real Hitch... and solution?
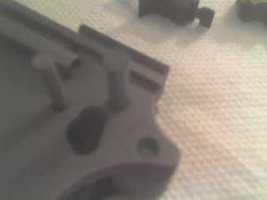
So I'm trying to fit the sear and hammer into the frame, and I've run into my first problem: I can't get the sear or hammer pin in. Going from the left side of the frame, they'll start, but stop when they hit the other side of the left frame wall. That is, they'll start, but will not go through the whole left side of the frame. It feels like they're hitting a lip, although I don't see anything there.
Cell phone camera:
DSC00053.JPG

I don't want to just hit the frame with a file.... seems drastic.


EDIT: I'm impatient. I just filed the outside of the pins. Problem solved. Hope I don't regret this soon!


EDIT: Installed my disconnector upside-down. That led to some confusion. Getting the disconnector/sear in place is tough because I don't have 3 hands nor can see through stainless steal. Note to future first-time 1911 builders: don't buy stainless or carbon steel, get transparent aluminum.
 
Last edited:
End of Day 1

DSC00055.JPG

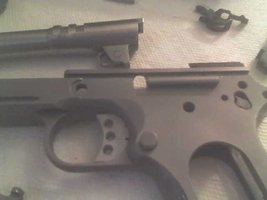
Finished Trigger and Magazine release. Messed with some pins and the sear and disconnector. The sear might not fit perfectly in the frame; it seem really tight, and I just can't get it installed with only two hands.

Next Update: 1 Week. Going on business travel, so won't be able to continue for a while. Hopefully, by then, I'll have figured out where to grow another hand [smile].
 
Hey Roland. This is a great thread. You're making me anxious to start mine.

I picked up a Remsport frame and kit, too, but I haven't started yet. I wimped out and had John do the slide and barrel for me. Now I'm waiting on the Jerry Kuhnhausen book before going further.
 
I also have a frame/slide combo from Remsport. I ordered the parts kit and I am also ready to start. I hope to get some done this weekend Great posts!! keep up the good work.
 
Hey Roland. This is a great thread. You're making me anxious to start mine.

I picked up a Remsport frame and kit, too, but I haven't started yet. I wimped out and had John do the slide and barrel for me. Now I'm waiting on the Jerry Kuhnhausen book before going further.

I had Jon do all the "hard" parts like fit the slide and barrel. I have Jerry's book, it's been somewhat useful, but not critical. Its major contribution so far has been helping me see what part looks like what.
I think it'll be handy down the line when I want this gun to run well, but for now I just want to get all of the parts in there.
 
this build has gun building, chaos, and art. im gonna park it here for a while and watch this play out!
 
Following along with my own build and having fun. I am up to the sear and hammer but Home Depot had no brass punches so I am at a stand still till I can set those pins. Fitting the parts is great fun, just slow going at times.
 
Following along with my own build and having fun. I am up to the sear and hammer but Home Depot had no brass punches so I am at a stand still till I can set those pins. Fitting the parts is great fun, just slow going at times.

It sounds like you're about where I am. How tight are your sear and hammer pins? I had to file the holes/pins a bit to get them in at all, and still have to really hammer them to drift them in (which I haven't really done yet, on account of my sear not really fitting). The Shop Reference makes it sound like they tend to be loose, but mine certainly aren't.

I don't have punches either. Haven't needed them yet.
 
Last edited:
Following along with my own build and having fun. I am up to the sear and hammer but Home Depot had no brass punches so I am at a stand still till I can set those pins. Fitting the parts is great fun, just slow going at times.

Hammer and sear pins are not to be pressed in! They slide in. If the pins don't slide in, the holes were not deburred during the machining process.
 
Hammer and sear pins are not to be pressed in! They slide in. If the pins don't slide in, the holes were not deburred during the machining process.

Good to know. Sounds like I should de-burr the holes. That, I know how to do!

EDIT: 5 minutes with a circular needle file, and the pins now can slide in.
 
Last edited:
Day 2: Ignition!
So, my business travel got bumped until tomorrow (leaving me with no way to get to the airport :-( ) but leaving me with another day to work on my 1911 before I go away for a while. I immediately got off to a good start, and went through and de-burred each hole in the receiver, both with a circular file on the inside of the holes and a flat file on the inside of the frame. This enabled me to drift the hammer and sear pins in with light finger-touch instead of hammering.

And, it enabled me to get the sear/disconnector in there properly. I think the sear is still dragging on the frame a little, but my refrain for now is "I'll come back to that!".

Next up? Hammer. The Shop Manual talks alot about dressing the hammer, making sure it doesn't catch on the slide, etc, etc. I do this, and discover my disconnector totally blocks the slide. It might be too long. But, then again, it might be the fact that I've not got all the springs in the right places, so, say it with me now, "I'll come back to that!" I move on. Hammer gets pinned. With the addition of the hammer, this now looks like a gun. I'm building a gun!

Next up: sear spring. I find out this spring goes into the rear of the grip, and assume there's some fancy retaining pin. Nope. The retaining pin is the mainspring housing. So I need to put together the mainspring housing. Finding the pins and springs is getting easier; there seem to be many less parts than when I started, so I quickly read the internet about how to put this together. I'm amazed at what I see:

"Totally impossibly without 3 hands!" says one poster.
"There are three ways to do it, all terrible!" says another."
"I shot my spring and pin all the way across the room and through my eye!" says more.
"I slipped and the mainspring assembly killed my whole family!" says one poor guy.

So basically, you have to get this spring, which is attached to two pins, into a spring-sized hole, then push the spring in far enough to get a retaining pin in. People recommend using a vice, a second person, etc. I don't have either of these. So what I did was grow a third hand:
  1. Put the mainspring and the two mainspring pins together.
  2. Put the mainspring housing between your most-dexterous toes. For me, this is my right big toe and 'pointer toe'.
  3. Put in the mainspring/two pins.
  4. Push it down with a pen and insert the retaining pin.

Done. This took about 10 seconds and was the easiest part of the build so far.


With the sear spring held in place by the mainspring housing, I can now pull back the hammer, and when I press the trigger (and press the hammer forward, as the mainspring housing is only half-on there) the hammer falls!
 
End of Day 2: Unsafe at any speed

So, following getting the hammer to fall, comes getting the hammer to not fall. This is where the real work is, I think. Fitting thumb and grip safeties is such a crime against nature that if it turns out I've messed them up, I'll probably get a smith to re-do it.

That said, I don't think I've messed them up, or if I have, not too badly. The thumb safety appears to hold the sear in place and the grip safety, well, I still haven't been able to get it to mate to the frame, so I don't know. I think I need a dermal tool in order to properly fit the grip safety, as filing is getting me nowhere.

I'll edit this post about what I did when I can type again. Done for now, and probably for the next week, in which I'm away on business.
 
Back
Top Bottom