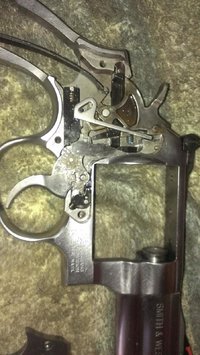
S&W 686 rust and dissesembly question...

btnh6668

NES Member
Joined
Nov 27, 2008
Messages
1,927
Likes
1,959
Location
Southcoast
Feedback: 22 / 0 / 0
I just bought a 686 thats fairly new. Its a couple years old and got it with only 40-60 rounds shot through it. I took the grips off and noticed a small area of rust which i took care of no problem. My question is whether or not you guys think i should take it down further to maybe oil and inspect the internals for rust? Im not the most mechanical person in the world so i just don't want to get in deeper than i have to. What do you guys think?
 
Do some searching on removing the side plate.
It's not hard at all just use good screwdrivers and don't force anything.
I would take a quick look inside to see if its dirty or not.
In my experience they don't get very dirty inside from general use.
When I put 500 rounds of cast through my 1911 it's covered in nasty lube and residue in every nook and cranny.
I have shot about 5k through my 625 before taking off the side plate for inspection. It looked just as clean under there as before the 5k rounds.

If it needs some lube just apply a tiny bit the needed areas and close it back up.

When I was researching wether or not to open up a s&w revolver I found the general consensus is you don't need to remove the side plate unless you're having gunsmith work done.

Thanks for the response mike. Looks like I'm leaving it alone seeing I can't get that face plate off anyway.
 
no problem. you're probably fine.
unless you have an issue no need to open it up really, other than curiosity
 
Yes, taking off and replacing the side plate can be tricky and it can cause damage if you are not careful. A S&W trained armorer taught me a trick for getting the side plate off. Remove the screws then gently tap the opposite of the revolver with a rubber or plastic mallet until the side plate lifts up. DO NOT pry it or force it in any way.

Further disassembly is not that difficult though getting the rebound spring back into position once removed can be a struggle (you can buy or make your own special tool to make that easier). Also note the position of the "hand" and how it fits in. The rest is pretty obvious.

I started tinkering with S&W K and J frames slowly and worked up to a total disassembly over time while smoothing out internals and testing our reduced power springs, etc. This was way before You Tube. I'm sure you can move up the learning curve much faster now using on line videos.

My amateur smithing paid off years later after I purchased a used by like new Model 686. It ran fine except every 40 or 50 cycles of the trigger and cylinder the hammer would stop short of fully cocking. It would lock up for an instant and then be fine. It was a range gun only so lived with that condition for quite a while thinking it was a tuning related issue. But I finally got curious and took the gun apart and found a big piece of white lint interfering with the operation of the hand. When I cleaned it out the problem went away.

Just treat you gun with a delicate touch. Worst thing that might happen is you'll have to bring the gun in pieces to a gunsmith to reassemble. But if you don't take any chances you'll never gain the knowledge of really knowing your revolver and how it works. After all, it is a hobby and should be fun. The more you learn the better it gets.
 
Last edited:
Yes, taking off and replacing the side plate can be tricky and it can cause damage if you are not careful. A S&W trained armor taught me a trick for getting the side plate off. Remove the screws then gently tap the opposite of the revolver with a rubber or plastic mallet until the side plate lifts up. DO NOT pry it or force it in any way.

Further disassembly is not that difficult though getting the rebound spring back into position once removed can be a struggle (you can buy or make your own special tool to make that easier). Also note the position of the "hand" and how it fits in. The rest is pretty obvious.

I started tinkering with S&W K and J frames slowly and worked up to a total disassembly over time while smoothing out internals and testing our reduced power springs, etc. This was way before You Tube. I'm sure you can move up the learning curve much faster now using on line videos.

My amateur smithing paid off years later after I purchased a used by like new Model 686. It ran fine except every 40 or 50 cycles of the trigger and cylinder the hammer would stop short of fully cocking. It would lock up for an instant and then be fine. It was a range gun only so lived with that condition for quite a while thinking it was a tuning related issue. But I finally got curious and took the gun apart and found a big piece of white lint interfering with the operation of the hand. When I cleaned it out the problem went away.

Just treat you gun with a delicate touch. Worst thing that might happen is you'll have to bring the gun in pieces to a gunsmith to reassemble. But if you don't take any chances you'll never gain the knowledge of really knowing your revolver and how it works. After all, it is a hobby and should be fun. The more you learn the better it gets.

Ok so you inspired me to try it and got it out. All I got to do now is figure out where the metal piece that came out with it goes lol. It least I got it off thanks guys.
 
ahaha transfer bar. i hate that thing

look on youtube for some good videos.

this is one of those projects i need to step away from before i throw it against the wall. I put the hammer block back in its correct position according to the youtube videos. I can't get the side plate to go in all the way. Are you suppose to apply pressure down or is it suppose to go in pretty freely? Any advice would be greatly appreciated.

IMAG0518.jpg
Does that look right?
 
Last edited:
I haven't done this enough but from what I recall it needs to be either all the way down or all the way up for the side plate to fit on.
The side plate should drop in pretty freely other than the last 1/16 or so from being flush. Then you give it a light tap with a rubber mallet.
It's very easy for the hammer block to get in the way.
Take a look at the side plate. It should be easy enough to see how it fits in according to the slits cut into the side plate itself.

I decided to remove the hammer block and try to put the side plate on. Even with out the hammer block it still doesn't go in with out the use of a mallet. Every video and most of what i read says it should go right in. Im just afraid of doing damage with the mallet.
 
In my experience on 3 revolvers it needed a little love to set in. They're a tight fit and have a little taper to the plate.
 
it seems counter intuitive but you need to tap the grip frame (take grips off first [smile]) on the same side as the side plate. Do not tap it from the other side.
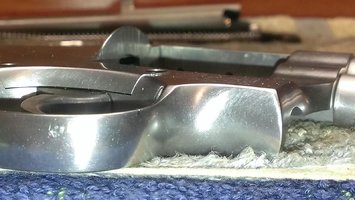
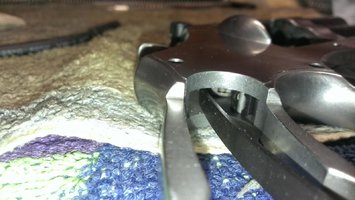
Lay the gun in your hand, and keep your thumb over the side plate, so if it pops up, you don't lose it. Do not tap too hard or you might end up spreading innards all over the place.

Once you do it, it gets less stressful.
My problem now is getting it back on LOL
 
I believe there is a tab on the side plate up by the hammer that must be angled in first, then level out the side plate and tap it into place.
 
My problem now is getting it back on LOL

Install the hammer block safety with it as far toward the top as possible. Set the plate on the revolver with the channel on the hammer block and slide it up to the top while seating it in. It should go on easily. With the thumb and index finger squeeze the bottom of the plate in the area of the central screw (#2 screw) to seat the plate.

Do not force the plate, make sure the hammer block (That is what it is NOT a transfer bar) is in place.

I get that far but then after I seat it in place it won't go flush with the frame. Do I use a mallet? Maybe ill post a pic of what it looks like in 20 mins

IMAG0525.jpg
IMAG0523.jpg
 
Last edited:
Mallet, NO Tap gently with the handle of the screwdriver if you can't push it with your hands while it rests on the bench.

Whatever you do, NEVER try to draw it down with the screws.

As a FYI, I have worked on S&W revolvers since attending the Armorer school in 1981. I have never had to beat a side plate into place.

good point. a screwdriver is plenty enough to get the side plate on. a small mallet would work, but i think the screw driver gives a better idea of what little tapping it takes to get the job done. the idea of a mallet might insist more force than is needed
 
Back
Top Bottom