• If you enjoy the forum please consider supporting it by signing up for a NES Membership  The benefits pay for the membership many times over.

One guys exploration into casting bullets...

Pastera pointed out something to me in a private message that I think would be helpful to anyone else following this thread:
A heel is the metal left in the crucible (melt pot) after a melt.
The idea is that it covers the entire bottom of the pot so heat is transferred as fast as possible but it is thin so it goes liquid quickly. This small amount of liquid then increases the surface area of heat transfer to new ingots (items) on top of the heel.
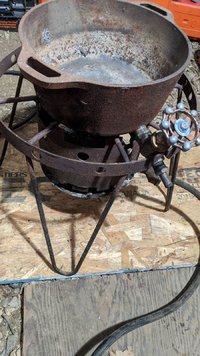
I always try to do the same thing. It really helps speed up the process.
 
Do you dry the chips from the chainsaw before you use them? I might grab some from the pile I have from the two grapple loads I just processed. Does hard/softwood matter?
 
You want soft woods. The sap is what does the fluxing
This - most hardwoods have less of the highly active oils that really flux. Do not use exotic woods as a cover or flux - a good number of them have harmful irritants in the oils that will be in the smoke.

If all you have is hardwood, then use it but add some wax at the same time. Of you are using a bottom pour pot then you can leave the char on top to keep a barrier layer. Just clean the ash off before adding ingots.
 
I am loving this thread. You are about a month ahead of me. Thanks for posting all the questions and tips.

I got the scrap lead, an old 20# propane tank, a twin jet burner from Lowe’s and face shield. I also got an old work bench on the side of the road and some casters from a yard sale. I am hoping I can assemble some sort of portable operation.

Now I just need to cut up the tank, get it welded, figure out some kind of cover and get some utensils and moulds.

Please let us know how it goes!
 
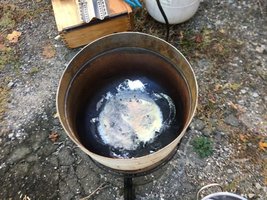
I continuously add range scrap into my melting pot even after full of molten lead. I keep my scrap in plastic buckets with lids so it stays dry. Then I use a slotted spoon and just lower it slowly into the pot. Always wear appropriate clothes and a face shield. Haven't had a problem yet. I use my wood fired melter to melt down the range scrap and separate the dirt, then transfer to another pot with spigot on a turkey fryer burner, flux and pour into molds. The turkey fryer is much nicer to pour from since the barrel is too hot to stand around for long.

Another tip, like others have said it is best to leave a small amount of lead in the bottom of the pot to speed up melting for your next session. If you do not have any left in your pot grab your handy propane/mapp plumbing torch and melt a bit of the lead to cover the bottom of the pot, takes a minute or so with the torch but really speeds up the rest of the melting.
 
I continuously add range scrap into my melting pot even after full of molten lead. I keep my scrap in plastic buckets with lids so it stays dry. Then I use a slotted spoon and just lower it slowly into the pot. Always wear appropriate clothes and a face shield. Haven't had a problem yet. I use my wood fired melter to melt down the range scrap and separate the dirt, then transfer to another pot with spigot on a turkey fryer burner, flux and pour into molds. The turkey fryer is much nicer to pour from since the barrel is too hot to stand around for long.

So I was advised at the seminar to not add to a molten pot of lead for fear of errant moisture causing an eruption of sorts. I’m planning on sticking with that and cooling the pot until the “heel” is solidified and then adding a bunch of material on top and slot bringing it back upto full melt. Mike Spangler can set me straight if I misunderstood his material.

secondly, what volumes are you working with? Starting in one pot and then shifting molten lead all over to a second pot sounds like a weak link in the chain of saftey. I’m going to be working in a significant enough volume that my goal at this point is to have a static set up with minimal movements and motions to get the job done.
 
I clean out the local indoor range one or two times a year, usually end up with 3 or 4 buckets full of lead/dirt/dust. It takes a lot of propane to heat up all this lead and dirt. I have unlimited free wood to heat it up so I made a 55 gallon drum with pot on top to pre-melt the lead, then I use a small cast iron sauce pan to ladle into my turkey fryer burner/pot setup with pour spout to clean and fill molds.

As far as adding lead to molten pot, do what you feel comfortable with. Your way is definitely the safest.
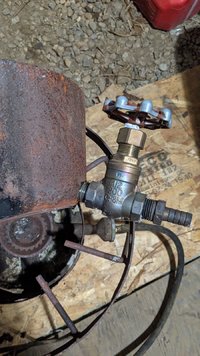
What type of "spout" are you using ? I made a bottom pour pot . It works but not to the degree I was planning on.
i would like a bottom pour pot that has a valve like the lee bottom pour. Then need to set up a way to just roll my molds along under it as i fill them. It would go quick that way.
 
It's a 1/2" gate valve, I drilled and tapped the side of a cast iron pot and screwed the valve in, put a barb fitting on the other side of the gate valve to function as a pour spout. I'll take a picture tomorrow if you'd like to see. It makes filling molds very fast and keeps the junk floating on top.
 
It's a 1/2" gate valve, I drilled and tapped the side of a cast iron pot and screwed the valve in, put a barb fitting on the other side of the gate valve to function as a pour spout. I'll take a picture tomorrow if you'd like to see. It makes filling molds very fast and keeps the junk floating on top.
pic would be great. i had a ball valve kicking around but it started to leak to much.
 
Last edited:
So I was advised at the seminar to not add to a molten pot of lead for fear of errant moisture causing an eruption of sorts. I’m planning on sticking with that and cooling the pot until the “heel” is solidified and then adding a bunch of material on top and slot bringing it back upto full melt. Mike Spangler can set me straight if I misunderstood his material.

secondly, what volumes are you working with? Starting in one pot and then shifting molten lead all over to a second pot sounds like a weak link in the chain of saftey. I’m going to be working in a significant enough volume that my goal at this point is to have a static set up with minimal movements and motions to get the job done.
You understood right. I don’t disagree with Mark at all and I often add lead to a molten pot. I always know that the lead is bone dry and or pre heated and there is no chance of explosions.
However I think it’s more of an advanced class discussion and I think it would be irresponsible of me to teach the finer points of it in the intro class.

Same goes for any hobby and any tools. You need to do what you’re comfortable with. Some guys use push sticks with saws. Some don’t. People from each group will cut their hands.
 
When I was really into casting, I used a converted LP tank and the ring I welded to the bottom had vent holes every few inches. The top acts as a lid and without the valve, I can drop individual weights through it if they are wet.
I have lots of muffin pans and use a really large ladle, probably a 30# plumbing tool for pouring really big fittings.
I have well over a ton of alloy ingots. Three hundred lbs. of lino in ingots and another fifty or so in type form. Plus a few buckets of ww and four hundred pounds of ballast lead.
I had offered to give the ballast away until the Wu hit. Keeping it all now.
 
So I didn’t get as early of a start today but I did score two buckets of assorted wheel weight scrap.

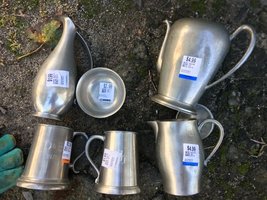
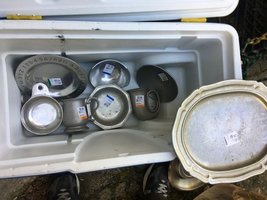
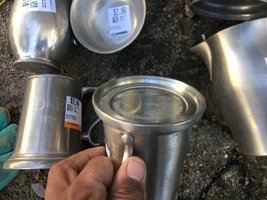
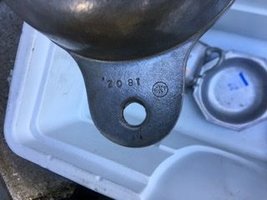
funny story: I started off strong, was able to sort out the 2/3rds of the “pewter” I have bought from Savers. I then began to melt the quality pewter I had and got it to melt quickly and started to pour little coins into mini muffin tins. Then I went back for the second pour and the laddle was missing half the scoop. It had melted And I foolishly let the rest of it to melt into the pot. Now I am Laddleless and the molten mix is thicker like cottage cheese.

im now being driven by my GF to get a legit laddle from a Legit Restaurant supply store. I don’t know what was in that ladel but the nice shiny pewter I had going is now a grey cottage cheese. It still stirs so I’m not sure what’s up w that. unless I get some good replies in next half hour I’m Just going to set aside the pewter and move onto my range scrap.

good pewter:
A9443215-0949-4CC5-BF88-30D804B572C2.jpeg

Bad pewter (
FA63A97B-0BF5-42E2-B683-2176C2AAF960.jpeg


I was able to get that to melt and get the glass bottom out Intact before any glass broke
262DF16A-AD5E-4542-887D-FAF0A5B0FAC1.jpeg

dreaded RWP logo is very prominent on this piece, many others are not pressed so far in:
E2952FA9-43A1-4453-AFF6-6E693FB790B6.jpeg
this is before the laddle melted into the mix:
06BCA2BF-CF54-4FE0-9D72-345810A52756.jpeg
 
Wow I have no clue what metal material would be used for a ladle that would melt at pewter melting temps.
very weird indeed. Where did you get the ladle?
 
Wow I have no clue what metal material would be used for a ladle that would melt at pewter melting temps.
very weird indeed. Where did you get the ladle?

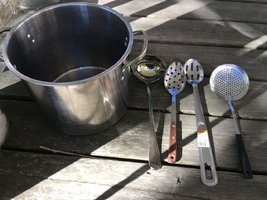
I got it at savers. It had a bit of a golden finish/plating on it that I though was just going to come off w the torch. It’s furthest to the left of the tools below:
9D5C7A81-93A7-46FA-BDF9-2C0321AD48AC.jpeg
 
I got it at savers. It had a bit of a golden finish/plating on it that I though was just going to come off w the torch. It’s furthest to the left of the tools below:
View attachment 399664
I’m wondering if it was pewter itself.
do you have pics of the mushy alloy?
I would try putting a little more heat to it and fluxing really well. See if you can clean it up.
 
Did you try more heat? Sometimes pewter has a nasty finish on the outside that tends to make a mess and needs to be fluxed out.
 
So I didn’t get as early of a start today but I did score two buckets of assorted wheel weight scrap.

funny story: I started off strong, was able to sort out the 2/3rds of the “pewter” I have bought from Savers. I then began to melt the quality pewter I had and got it to melt quickly and started to pour little coins into mini muffin tins. Then I went back for the second pour and the laddle was missing half the scoop. It had melted And I foolishly let the rest of it to melt into the pot. Now I am Laddleless and the molten mix is thicker like cottage cheese.

im now being driven by my GF to get a legit laddle from a Legit Restaurant supply store. I don’t know what was in that ladel but the nice shiny pewter I had going is now a grey cottage cheese. It still stirs so I’m not sure what’s up w that. unless I get some good replies in next half hour I’m Just going to set aside the pewter and move onto my range scrap.

good pewter:
View attachment 399653

Bad pewter (
View attachment 399654


I was able to get that to melt and get the glass bottom out Intact before any glass broke
View attachment 399656

dreaded RWP logo is very prominent on this piece, many others are not pressed so far in:
View attachment 399661
this is before the laddle melted into the mix:
View attachment 399659
I have to LAUGH!
You sir are the first I have heard of melting a laddle into the mix. Had to be a zinc or pewter laddle or you have your melt EXTREMELY hot!
Ahh the learning curve.....
We will have to add this to tips on smelting. Make sure your spoons are steel.
 
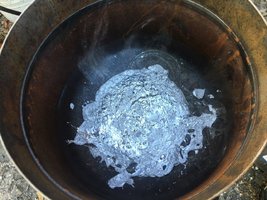
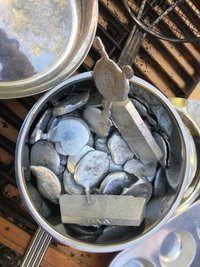
Yes I fluxed it’s all out with wax and pine shavings and seems to have gotten all the crap out and ended up with this yield of pewter. range scrap is now heating up. View attachment 399696

I find that pewter and lead flashing always seems to have a some serious nasty outer layer that always need some good fluxing and smashing it against the side of the pot with a spoon.
 
If you melted zinc into the mix, toss it all.
An ice scoop used for ice fishing is what I use to get the clips and junk out. Works very well.
 
If you melted zinc into the mix, toss it all.
An ice scoop used for ice fishing is what I use to get the clips and junk out. Works very well.

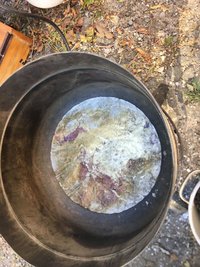
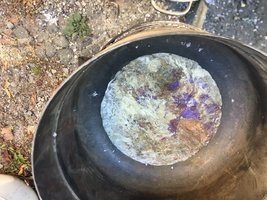
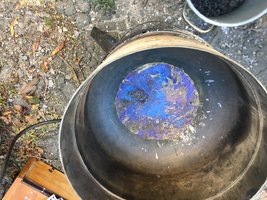
so I have 12 bars poured of range scrap. I added a bunch of wheel weights and a few coins of the pewter. Now when I get ready to pour I’m getting a tan color that then turns purple and then blue. What’s happening here...

C4F0F1FC-00E0-4D70-A98B-3EFED3FA88E8.jpeg A9F90E55-8890-46EA-BF91-DDCD716BD597.jpeg E38F2DE5-CE25-482E-8367-2C25127E043D.jpeg
 
Back
Top Bottom