Cool Survival Shelters

Joined
Mar 3, 2011
Messages
7
Likes
1
Feedback: 0 / 0 / 0
I started digging a hole for a bunker once, my plan was to have a 8ftx8ftx8ft room of cement. So I started digging a 8x8ft hole. After about 2 ft of digging I decided I would just lay down in the hole and take my chances.
 
Dont a couple of emergency shelters for practice, but didn't have a camera.

Did some work with a friend on a subterrain shelter once. It started with a pre-formed, none draining concrete Septic tank with a few rows of cinder blocks between the base and the cap to increase the height to 6' and a few days with a masonry blade in a circular saw to cut doorways between the sections. It was small - 3 rooms maybe 4' x 8' x 7' high each. Access through the round cover that would be used to pump it. Floor to ceiling cabinets on one 4' wall in that room for gear. Middle room was the "kitchen" and pantry and the last room had a bed and closets along the 8' wall from the bed to the ceiling.

After the whole thing was buried, he decide to build a shed over it, leaving an access door from the shed into the shelter. Moved the kitchen up into the shed to expand storage in the shelter, but left the bed in the shelter.

It was great until about 4 years ago when the May flood waters got so bad it started seeping through the cinder block and put almost 4' of water into the shelter area.
 
Off grid cabin for some property that I own. Having it moved this year. Basically connect 100-300 watts of solar panel and a hose to a spring or shallow well and its good to go.

That's awesome. Great job.

What was the objective? A place to go when the wife throws you out? A guest house?
 
Gomer -

Awesome job. I've seen a lot of "mini" and "micro" cabins lately. I've seen some that come with trailer kits for towing / transportation.

Do you have lighting inside? LED lighting strips off 12V DC are very easy and extremely efficient. 10 350mA LEDs on a string with a small boost converter and you could easily light up that whole place brighter than full day for about 13W. As a PWM dimmer so you can run it from 10% to 90% and you'd have lighting you could run 24-hours from a 25W solar panel on only 7 hours of sun a day.

And if you need the 12V LED driver board, look up TPS40211EVM at www.ti.com. It's web orderablt for $49 and All you need to do is add the LED string.
 
Everything in the cabin runs on 12VDC except the microwave which uses an inverter. The lights I used are LED accent lights that draw 250ma per light. They came in boxes of 12 so I stuck them all over the place.

The plans for this are based on the XS house plans offered by Tumbleweed Tiny houses. I added 12 inches to the length and the "pod" on the back which stores a propane tank, batteries, charge controller, etc. Tumbleweed houses are designed to mount on a trailer to avoid building codes etc.

Gomer -

Awesome job. I've seen a lot of "mini" and "micro" cabins lately. I've seen some that come with trailer kits for towing / transportation.

Do you have lighting inside? LED lighting strips off 12V DC are very easy and extremely efficient. 10 350mA LEDs on a string with a small boost converter and you could easily light up that whole place brighter than full day for about 13W. As a PWM dimmer so you can run it from 10% to 90% and you'd have lighting you could run 24-hours from a 25W solar panel on only 7 hours of sun a day.

And if you need the 12V LED driver board, look up TPS40211EVM at www.ti.com. It's web orderablt for $49 and All you need to do is add the LED string.
 
Gomer

That cabin is awesome! I am all so planning a off the grid home stead. Only I will be building two to three of those small cabains with a main slightly larger bunk house, that house the homestead's only kithchen. I all so looked at tubleweed's cabins, I would love to see the plans you were working off of.
 
Just went digging thru my Gmail account for the PDF document and can't find it. I may have deleted it when I sold of my last macbook.

The house plans cost me $99, I guess it was worth it just to get a starting point. However I did a lot of modifications to the plans to accomodate different size windows etc. I did not follow much of the plan on the interior. The footprint is 11x6 with a 18 inch deep pod on the back for utilities. The roof is a 12 pitch. The bathroom is a bit bigger than the plans as I wanted to fit a composting toilet and shower. The couch lets a 5'6" person sleep.

When/if I buld another I will design from scratch and use a footprint of 8x19. That will allow an open ceiling in the living area and very nice sized sleeping loft see the Lusby design at Tumbleweed.
 
10-4 I was thinking about using that same floor plan. the plan is tho elimanate the kitchen since there will be one in the main cabin. I like the idea of the composting shower and can. That is something I will defintally be looking into.
 
I've kept an eye out for ideas I could do on the cheap for when I pull the trigger on some "recreational use" space up north...

These came up on the survival podcast recently: http://www.richsoil.com/wofati.jsp

A lot of issues I have with it, but I like the premise. Basically bury a minimalist wood structure in earth with some pond liner and french drains for water proofing.
 
Everything in the cabin runs on 12VDC except the microwave which uses an inverter. The lights I used are LED accent lights that draw 250ma per light. They came in boxes of 12 so I stuck them all over the place.

Gomer,

Do you have a link to the lights? 250mA @ 12V = 4W. If they're really drawing 4W, they should be blindingly bright. Using the 13W 10 LED pannel I described above we lit up a 30' x 30' x 30' video studio
 
Everybody post the coolest survival shelters they have seen or built themselves. Urban, wilderness or whatever.
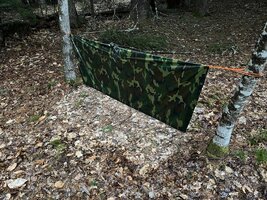
Spent last night out under a poncho tarp shelter with light rain.

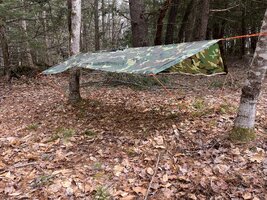
I haven't used this style shelter in many years, but it is great for dense woods and areas with heavy foot traffic - like a platoon patrol base or a Scout camp.

This shelter has worked for me very well in every clime and place that has had trees.
IMG_3380.jpg

The trees are about 7' - 8' feet apart. The ridgeline is at about waist height and for me this is a good distance as it allows me to sit up and do some work.

In the past I've written patrol orders, made map overlays, cooked food, briefed subordinate leaders, and cleaned weapons while sitting under this shelter in rainy conditions.

There are no tie outs for people to trip over.

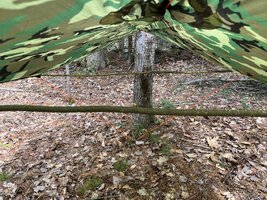
The shelter is propped open with some sticks and steadied with cordage.

For this application, spreader sticks are fairly wide. This gives a larger amount of workable space.

If the conditions warrant, the spreader sticks can be shorter - increasing the pitch of the tarp to allow for heavier rain and/or wind.

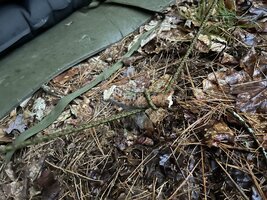
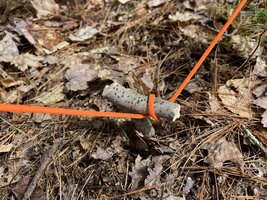
In this case I used orange paracord for clarity. (I got lucky with a small root to secure the paracord.)
IMG_3384.jpg

Otherwise, the stability cordage is secured by fabricating a stake. The round turn helps with keeping the wind from upsetting the shelter.
IMG_3378.jpg

Normally, the shelter would have been used with green paracord and small green bungee cords.

IMG_3394.jpg

IMG_3414.jpg

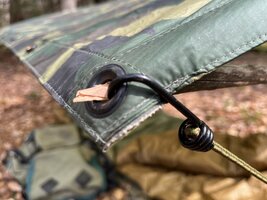
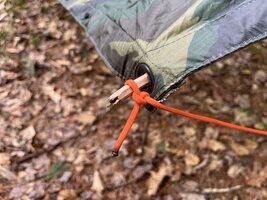
The spreader sticks are secured with a couple of half hitches or the bungee hooks.

Note how the knots and hooks are positioned to pull the poncho on to the stick.
IMG_3373.jpg

IMG_3397.jpg

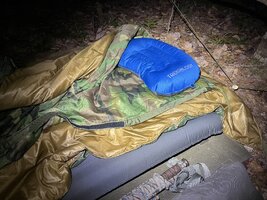
I layed out my sleep system; USGI Iso Mat, and Kifaru Doobie and did a few chores.
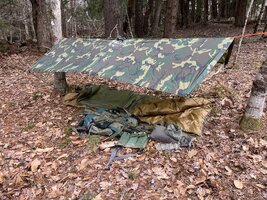
IMG_3399.jpg

I was only about 200 yards from the house and after looking at the forecast again, I decided to go get my USGI poncho liner, a pillow, and (new) ExPed DownMat Dura 8R.

IMG_3404.jpg

I bedded down around 2200 and the temp was 65*F
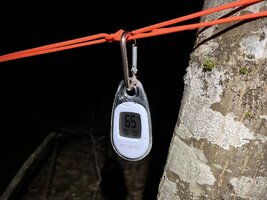
IMG_3402.jpg

At first, I just climbed in my poncho liner; it has two sides Velcroed to make a light sleeping bag.

That only lasted about an hour as the temp began to drop and I needed to cover myself in the Kifaru Doobie.

I was comfortable the remainder of the night.

A light rain was falling each time I rolled over or got up to relieve myself.

In the morning around 0600 I got up to see that the thermometer had recorded a low temp of 43*F.
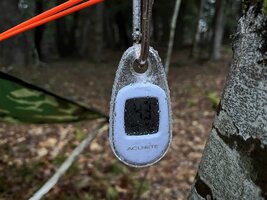
IMG_3412.jpg

You can see the protection provided from the rain by the shelter as indicated by the dry area under it.
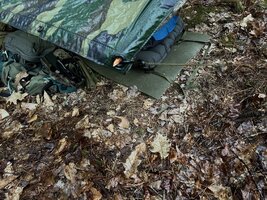
IMG_3413.jpg

The dry area was even more pronounced as I took the shelter down.
IMG_3415.jpg

All in all a good time refreshing an old shelter style and practicing some skills.
 
Last edited:
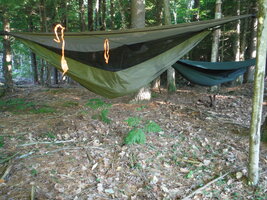
String up a hammock under there and stay off the ground
BTDT (and still do).

Hammocks have tie outs that can be problematic.

Not as much work space under a hammock tarp.

How much does your hammock weigh?

How bulky is your hammock?

Hammocks are much more comfortable to sleep in.

Hennessy Hammock 2.JPG
 
Last edited:
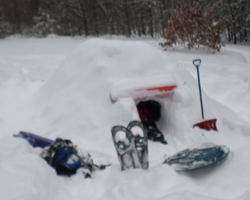
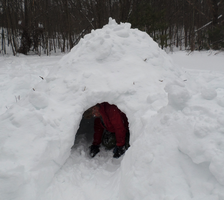
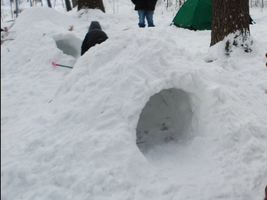
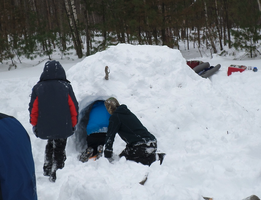
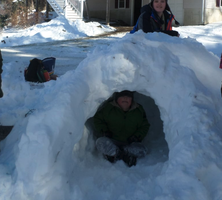
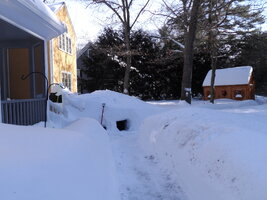
Remember Jan-Feb of 2015 when Boston set an all time record of 9 feet? I looked at the pile I had made clearing the back deck and said hmmmm.

SAM_1401.JPG

SAM_1409.JPG

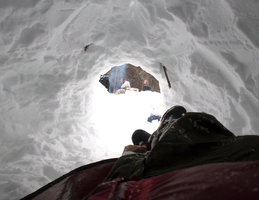
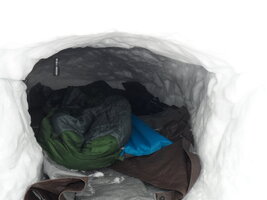
It wend down to -3F the first night I slept in it. Despite mostly blocking of the door and having a candle lantern in there, I wimped out and went inside at 4am. The next night was only in the low teens and I was fine. My big mistake was not going to the effort to make the door lower than the floor so the warm air would stay trapped.

What I found interesting was how it slowly sagged over time. Every day the ceiling was an inch lower. After a couple of weeks it was only about 1 foot tall inside.
 
It wend down to -3F the first night I slept in it. Despite mostly blocking of the door and having a candle lantern in there, I wimped out and went inside at 4am. The next night was only in the low teens and I was fine. My big mistake was not going to the effort to make the door lower than the floor so the warm air would stay trapped.
Sleep system not up to the task?
 
Sleep system not up to the task?
That too. I really don't have proper winter gear anymore. It's a fluff-filled winter air mattress, but the bag was a cheap one rated to zero, which I think really means +20F. A second sleeping bag on top might have saved the situation, but the big disappointment was how little the shelter helped because of how I constructed it. Even with me and a candle, it was barely warmer inside. I kind of took that mission failure personally but haven't had enough snow to do it again.
 
That too. I really don't have proper winter gear anymore. It's a fluff-filled winter air mattress, but the bag was a cheap one rated to zero, which I think really means +20F. A second sleeping bag on top might have saved the situation, but the big disappointment was how little the shelter helped because of how I constructed it. Even with me and a candle, it was barely warmer inside. I kind of took that mission failure personally but haven't had enough snow to do it again.
That is why backyard camping is so valuable - you can experiment and build skills.

Like you mentioned - if something goes wrong you can just go inside.

Good job getting out there and giving it a go!
 
Newspaper under the sleeping bag is the trick to stay insulated (plastic or foam pad above & plastic/space blanket below to keep dry from sweat & melting snow)
A fuzzy blanket inside the sleeping bag makes it wonderfully warm (even if it's a super-duper sleeping bag)

don't need a candle - make sure to seal the door good to keep the body/ground heat in & poke (2) 1" holes at 45deg for ventilation
 
Back
Top Bottom