Introduction
As part of my series on loading archaic cartridges we now turn to .577 Snider for use in the Snider Rifle. The Snider system was a way to convert existing muzzle loading rifles to modern breach loading rifles. The most common use of this system was with 1853 Enfield rifles by Britain. I recently acquired a Snider Enfield Short Rifle at auction and since you cannot buy ammo (without going broke) I again had to return to the loading workshop. I mostly followed the steps laid out by British Muzzleloader.As always, I am not an expert. Follow these instruction at your own risk.
Repost from my blog: Loading .577 Snider – The Life and Times of Paul Geromini
What You Need
First, you need to decide if you are going to make your own brass or purchase it. If you purchase it you can find it online (here too) or you can email Martyn at X-Ring Services ([email protected]) and ask for his current price list. I decided to make my own brass.- Get 24 Gauge Brass Shotshells, this will be the parent case we will cut down and reform.
- A cutoff wheel like this one. This will cut the brass down to size.
- A set of reloading dies. You already have a reloading press right?
- Black powder, in this case FFFg (I use Goex)
- Large Magnum Rifle Primers, I use Winchester ones. You can use non-magnum ones if you have those too.
- A bullet mold. I went with #60-530XR, .577 Snider grease groove .600” diameter 530gn RN bullet from Martyn at X-Ring Services.
- Alternatively you can get 577 Minie Bullets and use those to fireform your brass.
- A blow torch
Pre-Loading Steps
Before we get to loading we need to cast our bullets and prep our brass.Bullet Casting
The bullet was originally all lead, but you can add a bit of tin to improve the hardness of the final bullet and make it a little easier to fill the mold. I usually buy blocks with the tin and lead already mixed. You will have to work fast here as this is a big mold and it needs to be kept very hot or else you will get wrinkled bullets. In the future I am going to look at getting a hot plate to keep the mold at temperature. But for now these will suit our purposes, even if they do not look that pretty.Once you are done lube the bullets to your preferred method. I did a mix with half being just Lee Liquid Alox and the other half being 50% beeswax and 50% lard.
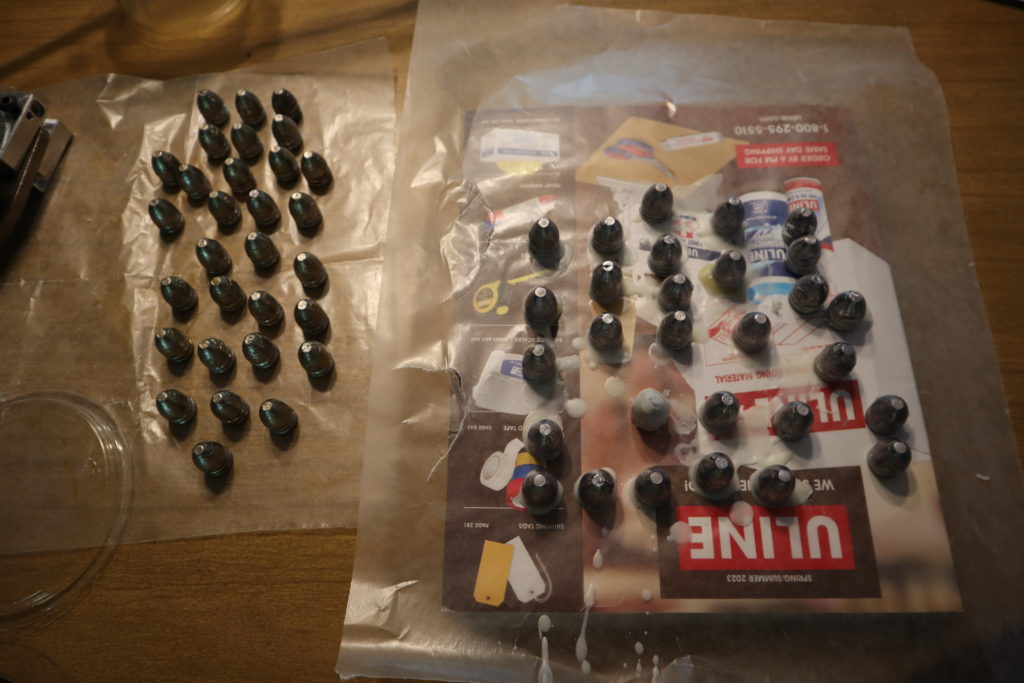
Here I did a mix (Alox on the left, traditional lube on the right). I also tried British Muzzleloader’s dip strategy (instead of pan lubing), so we will see how that goes.
Brass Prep
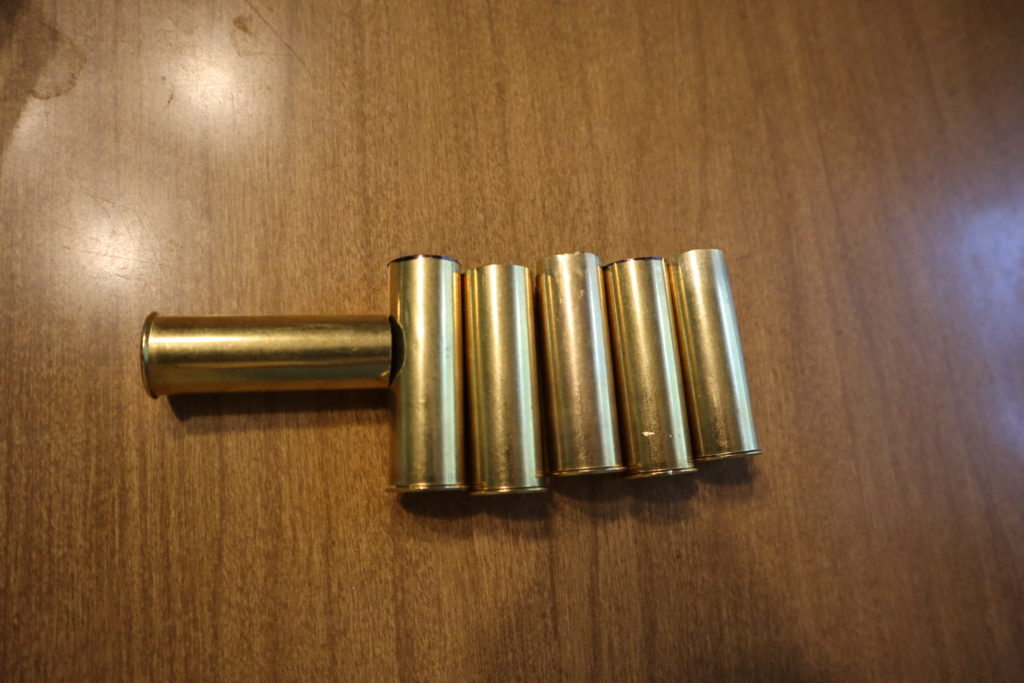
We are going to take the 24 gauge brass and cut it down to size. The original cartridge has a case length of two inches exactly. I cut a block of wood to a little under two inches (1″ 7/8) and then bored that out using a 11/16″ spade drill bit. This leaves just enough space for the rim to catch at the end of the block. You can then use the block to mark the part of the rim to be cut off or use the block as a guide when cutting. Either way this will cut the brass to two inches.Do not worry about hitting two inches exactly. As long as your are close. The cartridge will headspace off the rim so it just needs to fit into the chamber.

Once you have done this clean the rim as best you can, removing any jagged edges by using a chamfer tool.
Cases ready for annealing:
You will then need to anneal the brass so it will be easier to resize. I use a blow torch. Drop the brass into a spark plug socket and add a ratchet extender to it. This will keep your hands well away from the heat. Fire up your blow torch and hit the top of the brass for a seconds while you rotate it. You want the brass to change color. I waited a few seconds until it turned a little brown. Then dump it into some cold water right away. It is useful to watch a video on the subject to get a feel for the process.
You should get something like this:
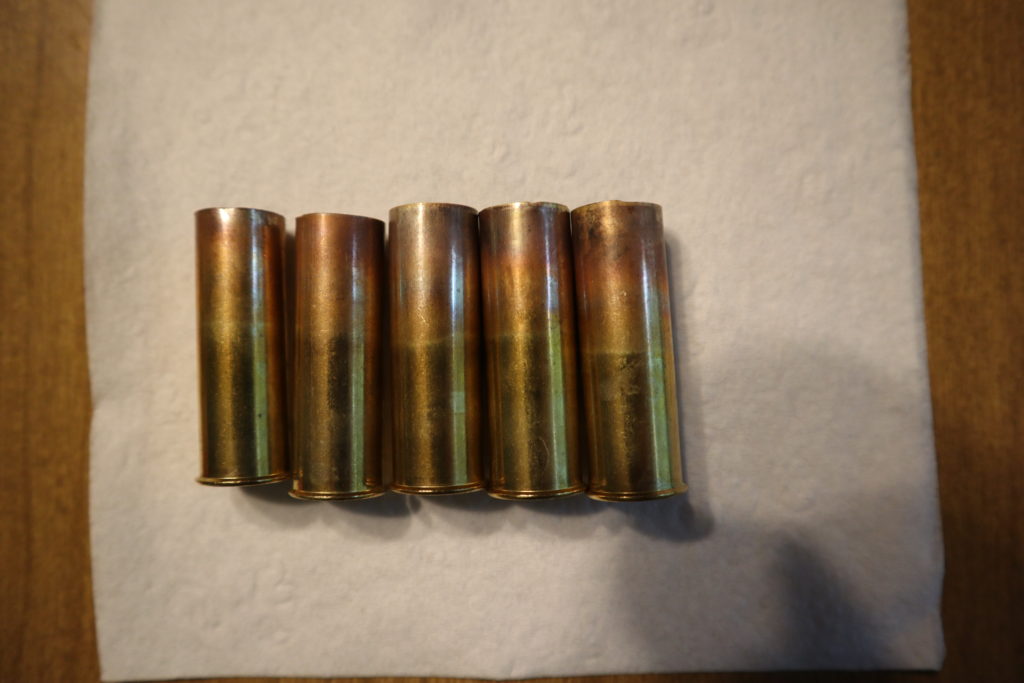
Notice the color change at the mouth of the brass.
Now that your brass is trimmed and annealed. Lube them up (I use One Shot) and run them slowly through your resizing die. Once that is done you now have Snider brass ready for loading. Double check the sizing is right by inserting a few into your snider. They should go in and out without a fuss.
Also see this post for a different brass creation process from The Goose.
The Loading Process
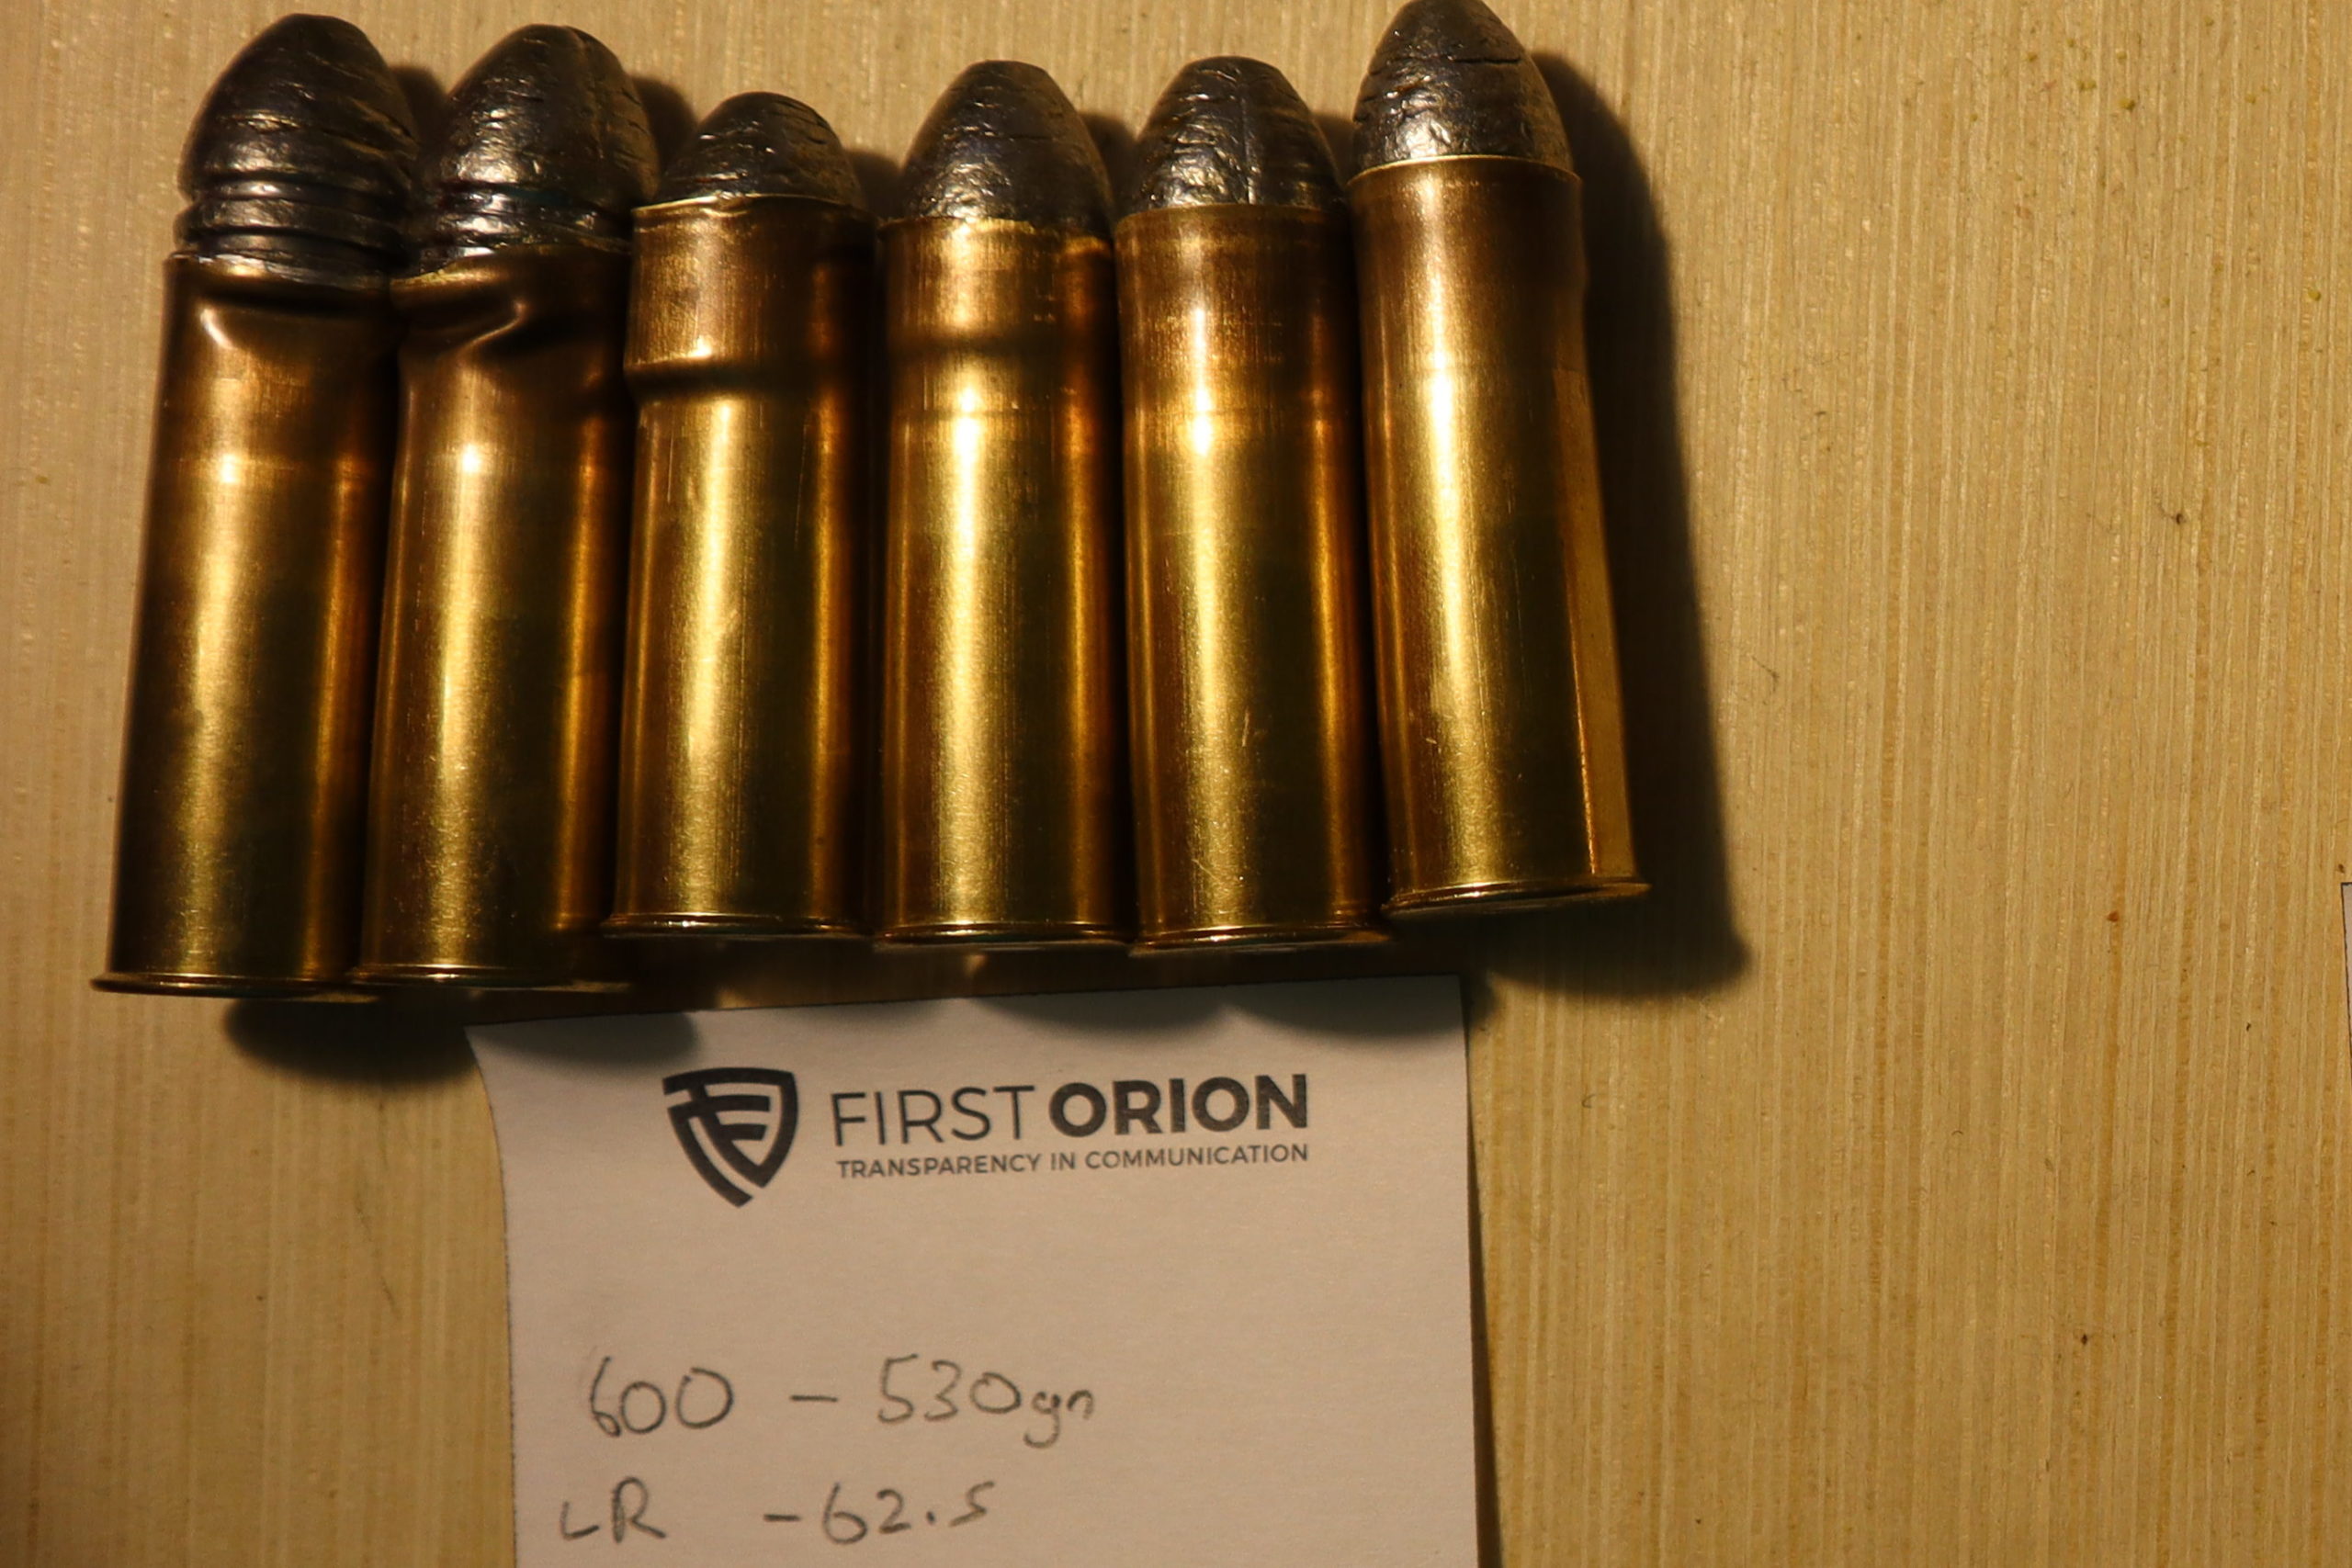
There are a lot of different charges you can use here, but I am going to use Rob’s from BritishMuzzleLoaders load, which is 62.5 grains of FFFg black powder, corn meal filler (a 2.3cc dippers worth), a wad, and then our .600 cast bullet.Final Product
Oh wait this looks awful, what happened? Those bulges! It turns out I thought I could skip a step which was incorrect. I used a .600 inch diameter bullet here (#60-530XR). I thought I could flare the mouth enough to have this bullet be accepted into our .570 inch case mouth, but you need to fireform these cases first so that they are a little bit bigger than what you get straight from the reloading die. If you skip that step the bullet is just too big for the brass so you crush the case (the two on the left) or you get an ugly weird bulge (the four on the right). Some of these do fit with some persuasion, but feel unsafe, so they will not be shot).
I made new brass and used a smaller bullet (the aforementioned 577 Minie bullet with a .580 inch diameter) that fit cleanly:
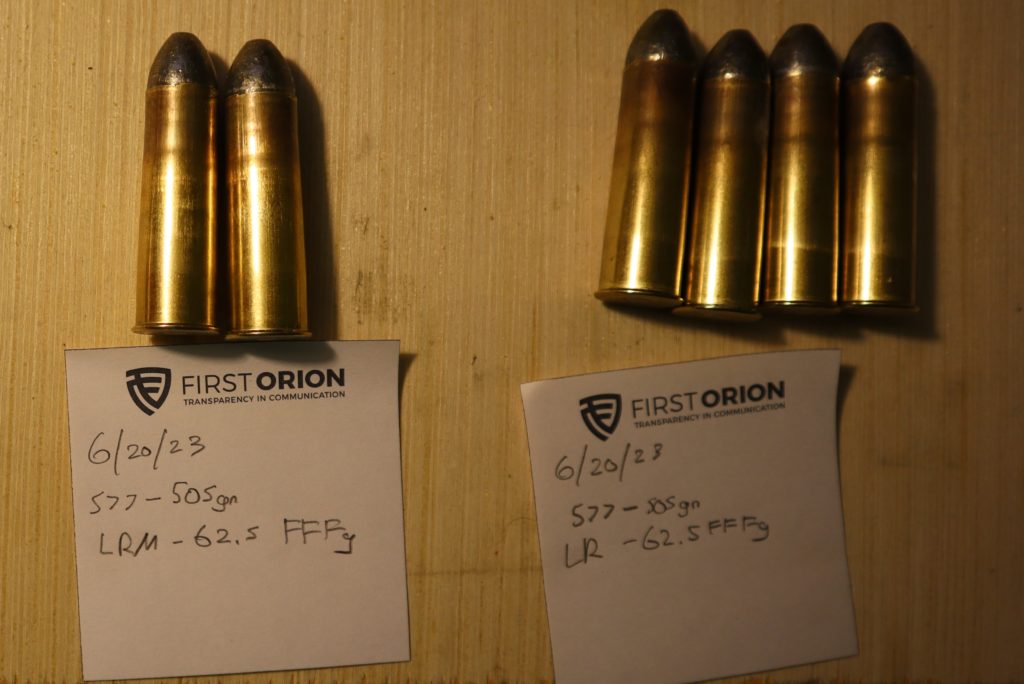
The left two are large rifle magnum primers, which I suspect will have no discernible effect, but I wanted to test them compared to the regular large rifle primers on the right.
Check the fit in your snider by carefully loading them and ensuring they fit smoothly.
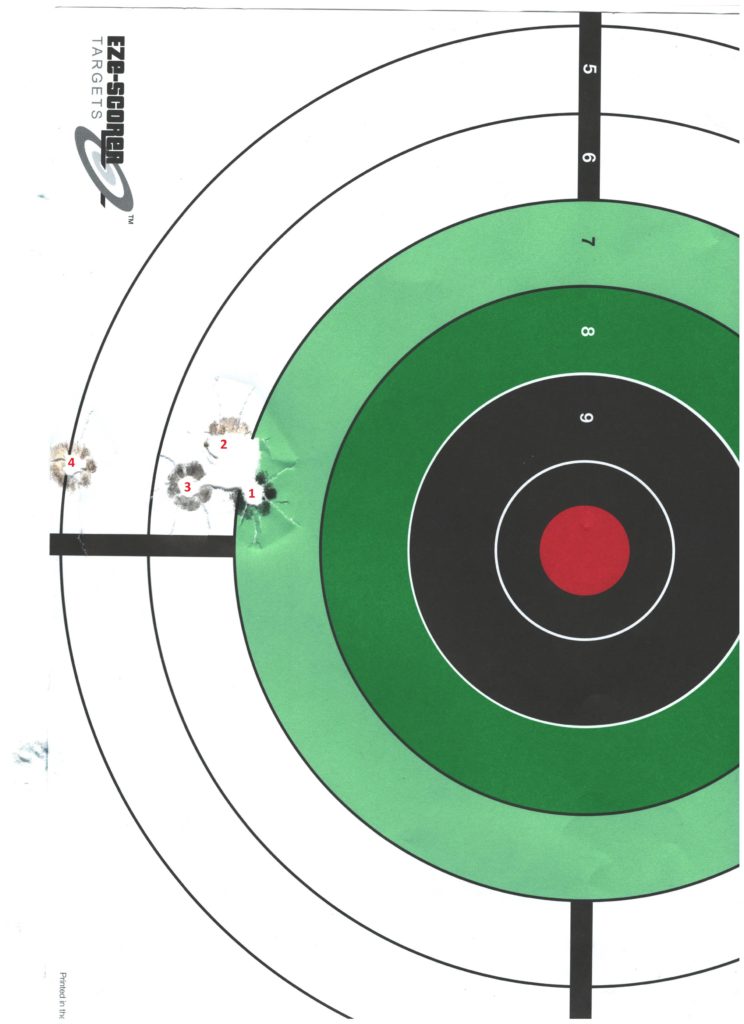
Shooting Results
Out of the four I shot at the target they were unexpectedly very good. Admittedly it would be nice to be dead center, but I am more concerned with consistent placement than accurate placement. I was expecting a lot larger group at 25 yards, but this is pretty tight. Perhaps if I stretch it to 50 or 100 it will open up significantly, but for now I am pleased. Especially since I was told the Minie bullets would be inconsistent at any range.
