I'm working on an AR10 build off an 80% lower and I decided I didn't want to use standard grips on it. So this is my first attempt at making some I like out of Walnut. As of today I'm not fully happy with what I made and will be making another more refined to my wants, but I did learn much in making my first one. Here are some ideas that may assist someone else doing this.
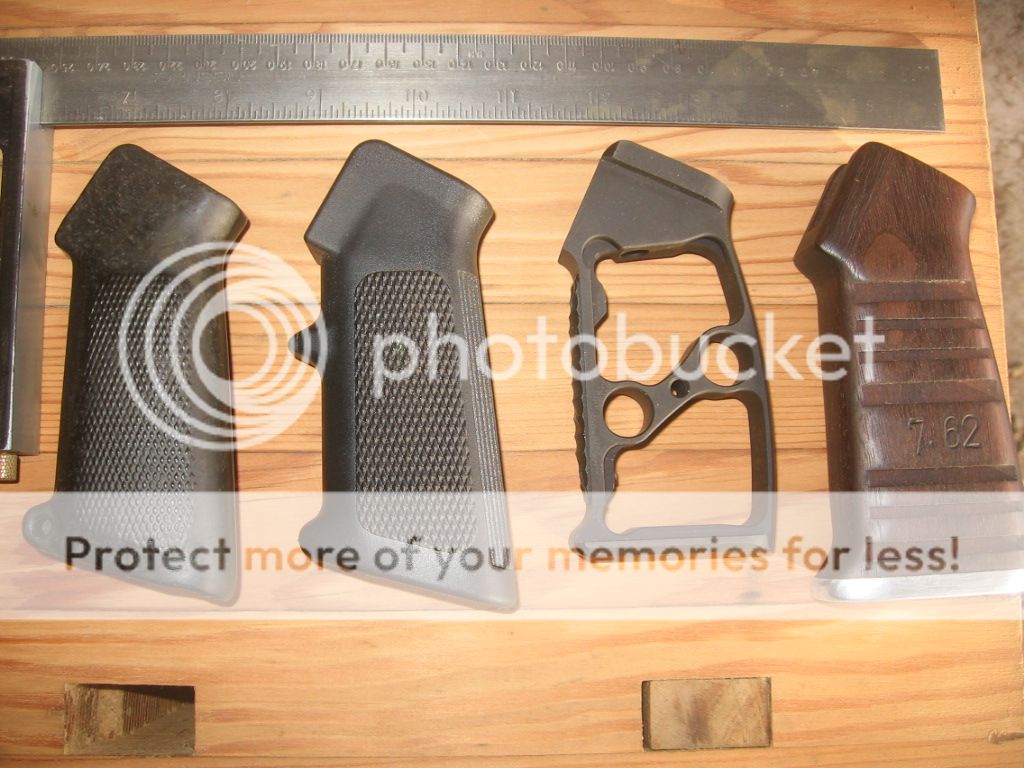
Grips: M16, M16A2, Executive Ordinance, My lump of wood.
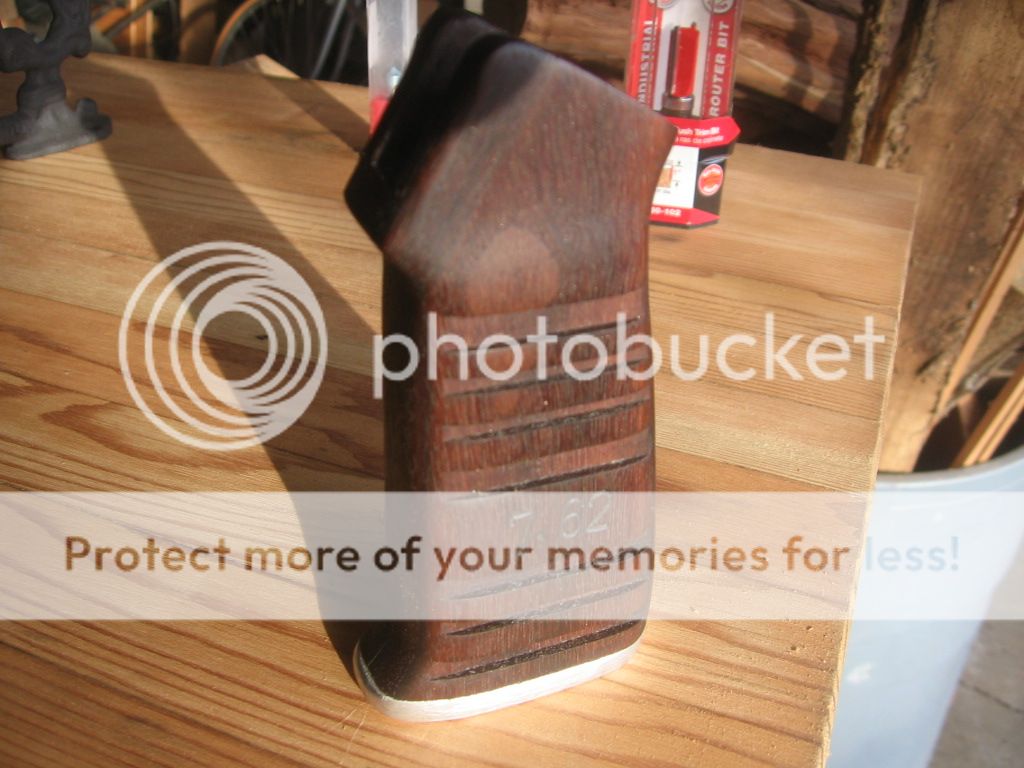
My lump of wood. While maybe not the coolest looking thing it fits my hand great, the slots provide tons of purchase when I have my gloves on, the more rectangular overall shape lends a better sense of direction than military grips (The executive Ordinance is nice this way too).
TLDR follows;
The first concern is the geometry of the top where it meets the receiver and the alignment of the bolt hole. I'm a knuckle-dragger, so figuring all this out in a rational manner was impossible, so I took a spare A2 style grip and cut it in half to see directly what was going on inside. The bolt holes are parallel to the front of the grip -important to know, check! The inside of the grip panel doesn't contact the stub on the receiver but relies on the left and right outer edge dimensions - important to know - check!
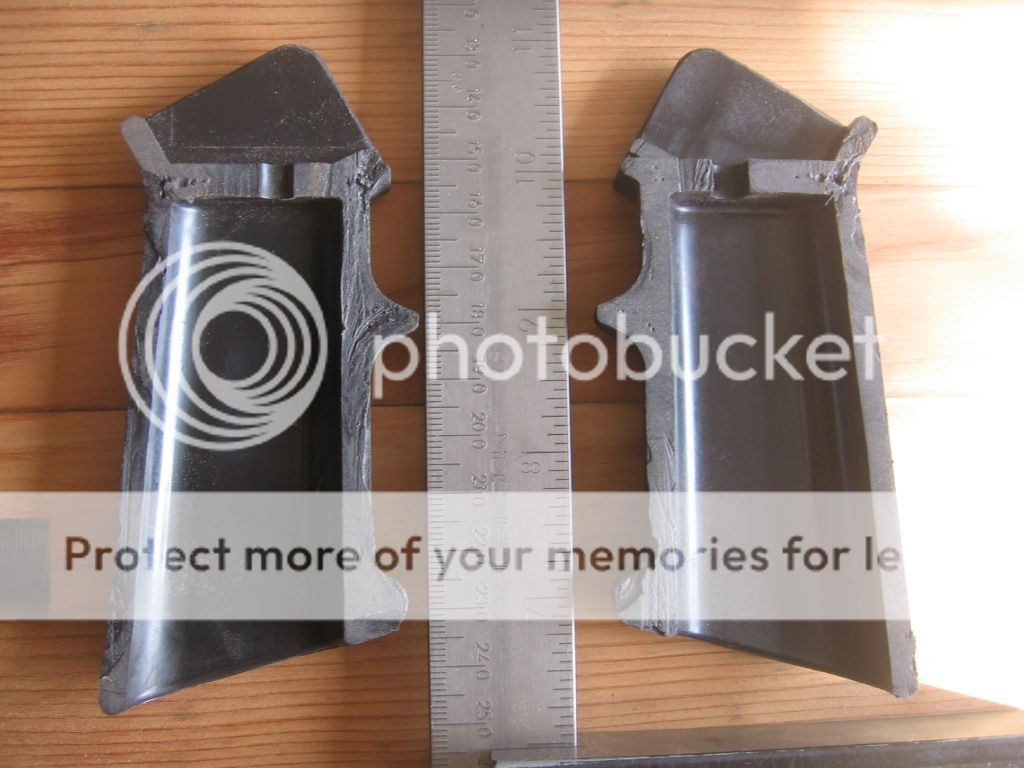
Insides of a stock M16A2 Grip. This image is perhaps the most important thing in this post. Hopefully it will save you from needing to cut a grip in half. notice scribed line in left hand side top - that's the line of the reciever stub that goes into the grip (note: this is my aftermarket 80% AR10 receiver - yours may vary). Notice also the bolt hole is parallel to the front edge of the grip.
Wood being wood I didn't want a gap inside my grip so I used one split grip half and scribed the outer edge of the receiver into it for getting my dimensions. My grip makes full contact inside left, right and bottom on the receiver.
I started with a well oversized block of wood, checked to make sure it was square on all sides. First I bored the 1/4 inch bolt hole. Then I flipped her over and used a forstner bit to bore a hole wide enough for the bolt head. both these cuts were parallel to the front edge of the grip. Next cut the top parallel to the angle of the stub edge. I then used a router to cut the slot for the receiver stub, do this while you have excess material on the block as it helps greatly in using the router. I cut fully through at the front as this area is hidden behind the trigger area but paid close attention to keep exactly on at the rear of the cut as that part of the grip will be quite thin when done. I traced the outline of the top edges from my split half and cut the excess off. Once done I bolted it on and and did my final mating edge fitting with a dremel tool. That was the hard part!
Now I have an oversize grip block solidly attached to my lower receiver. I wanted to keep The standard grip shape, but make it longer and get rid of the finger bump on the front edge. I mostly wear gloves while shooting and the standard A2 grips have always been a bit short and uncomfortable to me with gloves on. I traced my wanted shape on the block. Next I cut slots across the grip, I did this while the grip was still oversize to make the router operation easier using the flat sides of the block. Then I cut the front and rear profiles with a router freehand. Then I cut the grips to the proper width using a bandsaw. Then a 1/4 aluminum plate was secured to the base with two screws.
Now the fun part, using a sanding drum on my dremel to get the shape right. It's slow which was great as it kept me from destroying my project. Sand - test fit - sand - test fit... Finally its shape is done - it fits the weapon, it fits my hand, it fits my gloved hand. Aluminum base plate is polished ready for paint. The wood is sanded finely and given ten plus coats of 2/3ds Boiled Linseed Oil and 1/3rd Natural Gum Turpentine.
Time spent shaping - one afternoon. Time spent doing BLO - three days. Tools used - band saw, Router, dremel tool, drill press, Drill press vise, standard vise.
Biggest lessons learned - go slow - test fit often - largest hassle is fitting top end geometry tightly.
Grips: M16, M16A2, Executive Ordinance, My lump of wood.
My lump of wood. While maybe not the coolest looking thing it fits my hand great, the slots provide tons of purchase when I have my gloves on, the more rectangular overall shape lends a better sense of direction than military grips (The executive Ordinance is nice this way too).
TLDR follows;
The first concern is the geometry of the top where it meets the receiver and the alignment of the bolt hole. I'm a knuckle-dragger, so figuring all this out in a rational manner was impossible, so I took a spare A2 style grip and cut it in half to see directly what was going on inside. The bolt holes are parallel to the front of the grip -important to know, check! The inside of the grip panel doesn't contact the stub on the receiver but relies on the left and right outer edge dimensions - important to know - check!
Insides of a stock M16A2 Grip. This image is perhaps the most important thing in this post. Hopefully it will save you from needing to cut a grip in half. notice scribed line in left hand side top - that's the line of the reciever stub that goes into the grip (note: this is my aftermarket 80% AR10 receiver - yours may vary). Notice also the bolt hole is parallel to the front edge of the grip.
Wood being wood I didn't want a gap inside my grip so I used one split grip half and scribed the outer edge of the receiver into it for getting my dimensions. My grip makes full contact inside left, right and bottom on the receiver.
I started with a well oversized block of wood, checked to make sure it was square on all sides. First I bored the 1/4 inch bolt hole. Then I flipped her over and used a forstner bit to bore a hole wide enough for the bolt head. both these cuts were parallel to the front edge of the grip. Next cut the top parallel to the angle of the stub edge. I then used a router to cut the slot for the receiver stub, do this while you have excess material on the block as it helps greatly in using the router. I cut fully through at the front as this area is hidden behind the trigger area but paid close attention to keep exactly on at the rear of the cut as that part of the grip will be quite thin when done. I traced the outline of the top edges from my split half and cut the excess off. Once done I bolted it on and and did my final mating edge fitting with a dremel tool. That was the hard part!
Now I have an oversize grip block solidly attached to my lower receiver. I wanted to keep The standard grip shape, but make it longer and get rid of the finger bump on the front edge. I mostly wear gloves while shooting and the standard A2 grips have always been a bit short and uncomfortable to me with gloves on. I traced my wanted shape on the block. Next I cut slots across the grip, I did this while the grip was still oversize to make the router operation easier using the flat sides of the block. Then I cut the front and rear profiles with a router freehand. Then I cut the grips to the proper width using a bandsaw. Then a 1/4 aluminum plate was secured to the base with two screws.
Now the fun part, using a sanding drum on my dremel to get the shape right. It's slow which was great as it kept me from destroying my project. Sand - test fit - sand - test fit... Finally its shape is done - it fits the weapon, it fits my hand, it fits my gloved hand. Aluminum base plate is polished ready for paint. The wood is sanded finely and given ten plus coats of 2/3ds Boiled Linseed Oil and 1/3rd Natural Gum Turpentine.
Time spent shaping - one afternoon. Time spent doing BLO - three days. Tools used - band saw, Router, dremel tool, drill press, Drill press vise, standard vise.
Biggest lessons learned - go slow - test fit often - largest hassle is fitting top end geometry tightly.
Last edited: