Thanks in part to this thread, I decided to build a small scale water catchment system to supply my chicken coop.
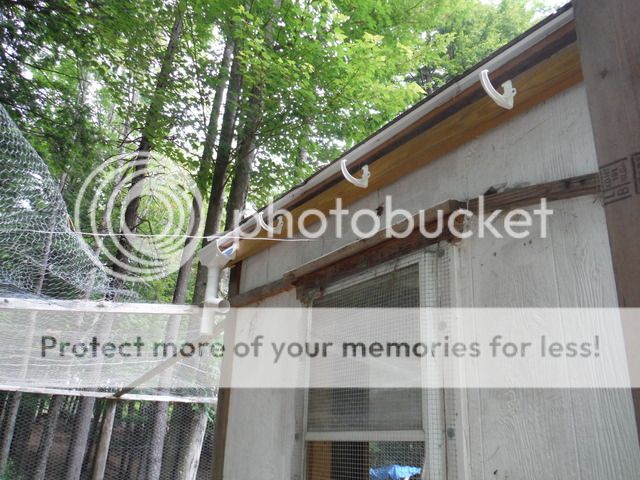
The local hardware store carries a DIY gutter product called Plastmo, but it wasn't really designed for water catchment.
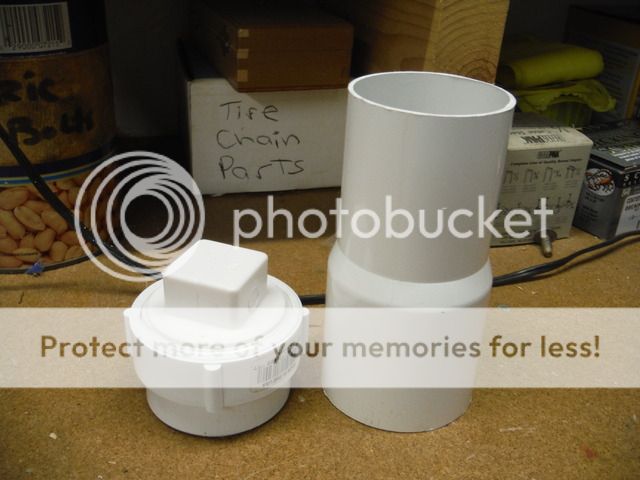
I had to think up how I wanted to do the first flush diverter. The Plastmo fittings have their own pipe sizes and they don't match up exactly with the sizes of PVC pipe.
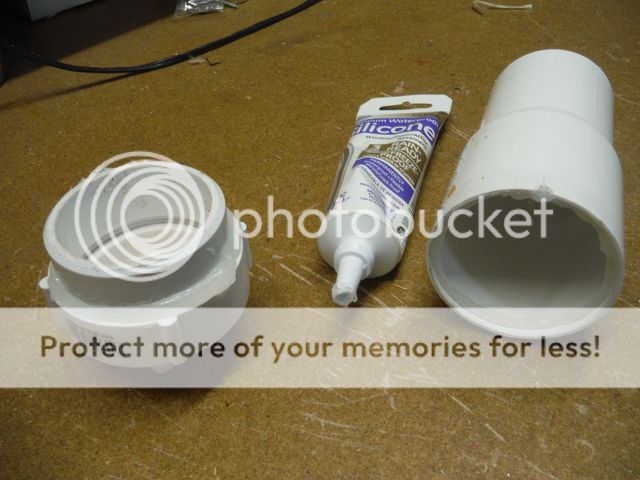
I ended up using some caulking to seal the threaded cap into the downspout to close off the the first flush pipe.
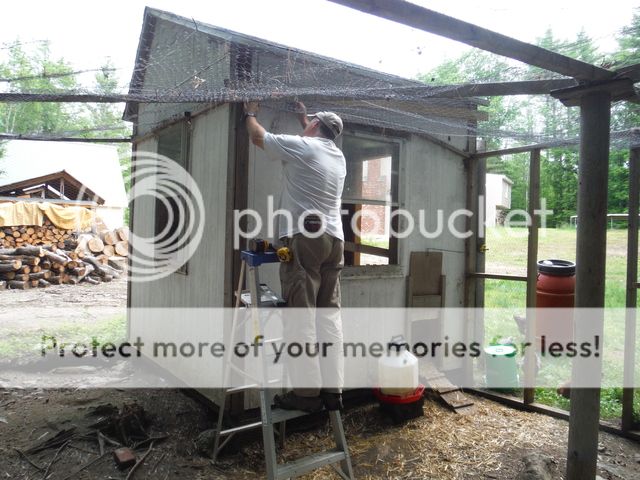
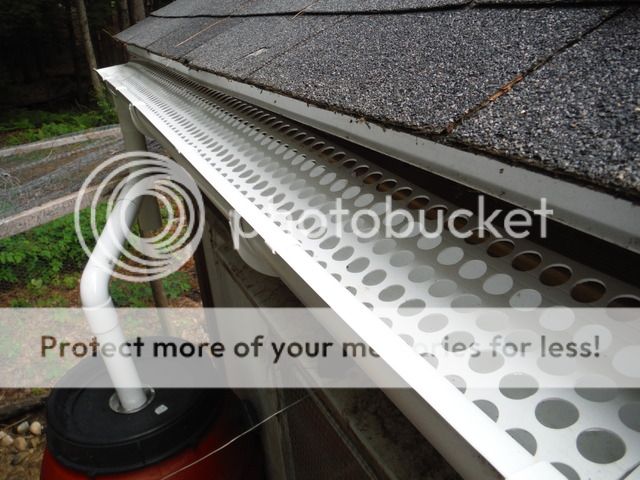
In order to install the gutter, I had to roll back the "anti-raptor netting" temporarily.
I wanted to position the Drop Outlet in a spot that would work for both the position of the storage tank and the first flush diverter.
The 75* Junction is installed unside down as the diverter so that the water will fill the that first and then the storage tank.
With that determined, it was time to hang the brackets. Plastmo recommends the slope should be ¼" per 10 ft.
After sliding in the gutter, I used the garden hose to check to make sure the gutter was positioned correctly and that the run off would flow into it.

I even tried to simulate actual rainfall.

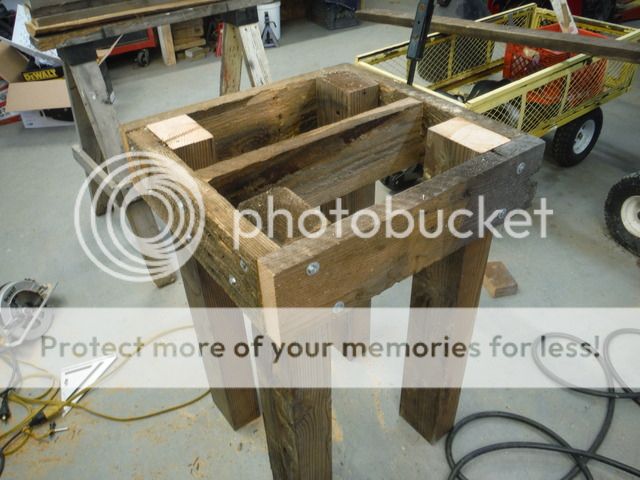
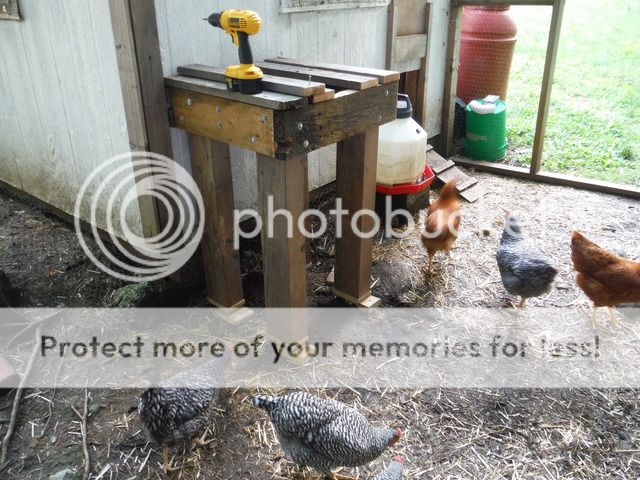
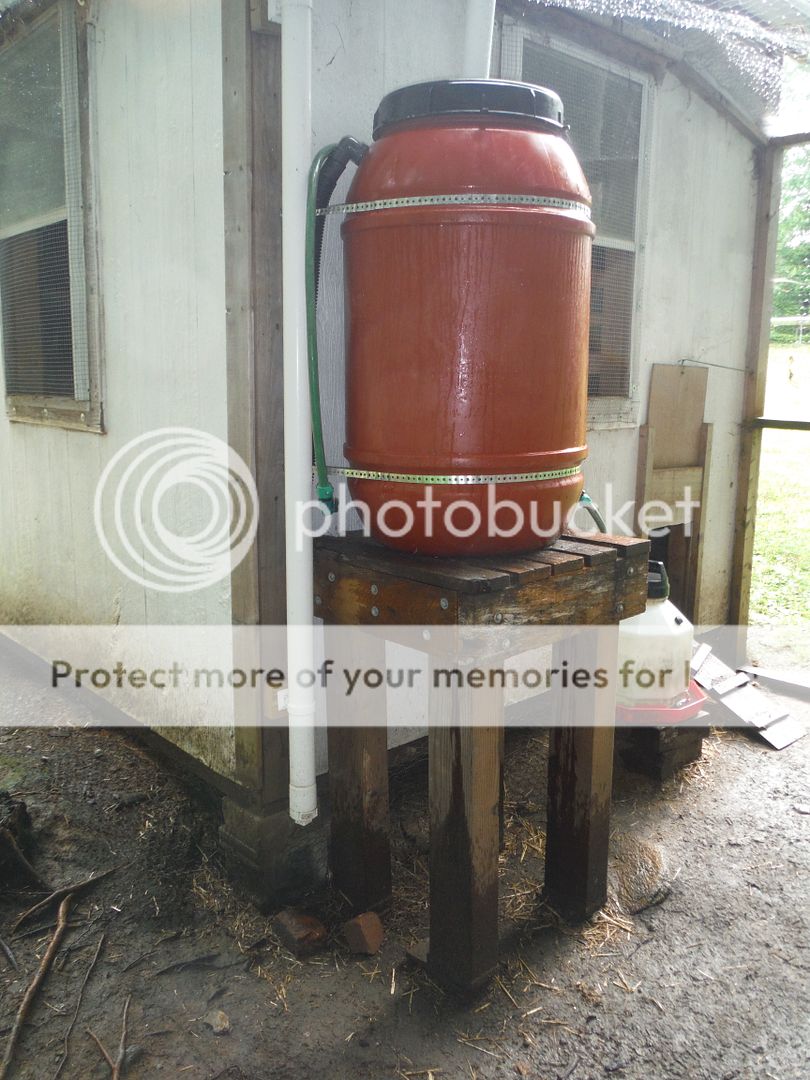
The next part of the project was building a stand to hold the storage barrel.
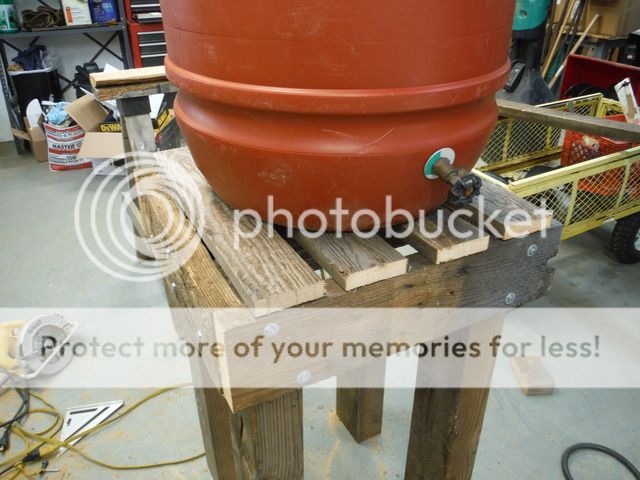
I wanted to be able to get some head pressure so that the water would flow reasonably well to both the inside and outside waterers.
I also didn't want to have to bend over to reach the valve.
With over 400lbs of water in the storage container, I also needed it to be robust enough to support the weight and last several years.

I had some lumber that was gifted to me that was up to the challenge and I put it to good use.
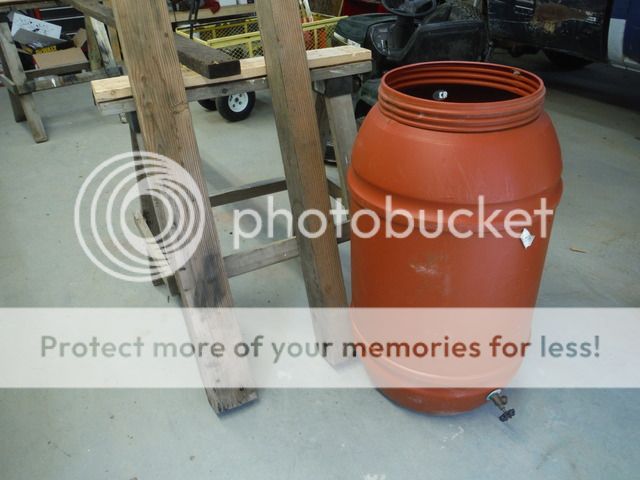
The barrel was purchased at the local Agway. I could have scrounged a barrel from my FIL, but this one already came plumbed with a spigot, overflow pipe and inlet screen.
When it came time to level the spot for the barrel stand, I discovered a BFR right under where one of the legs went so I had to get creative with some squares of pressure treated lumber to get the stand plumb and level.
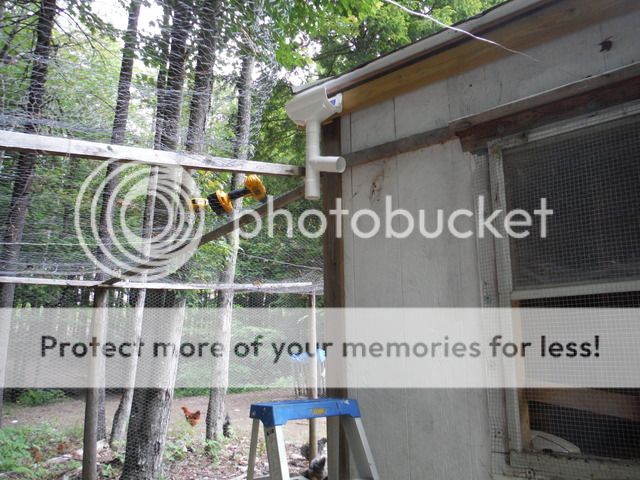
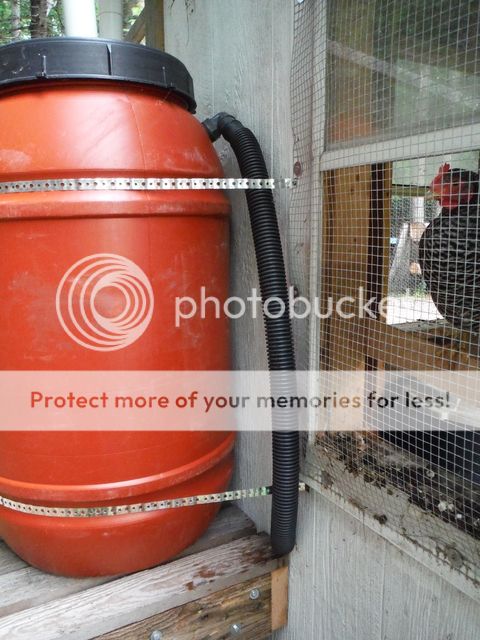
Once the stand and barrel were in place, it was time to start installing the downspout so that the rain would run off the roof and into the storage container.
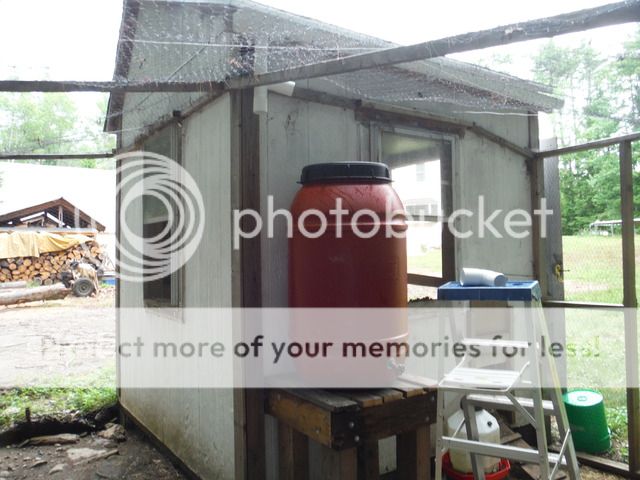
A couple of short lengths of pipe and an elbow was all it took to connect the two.
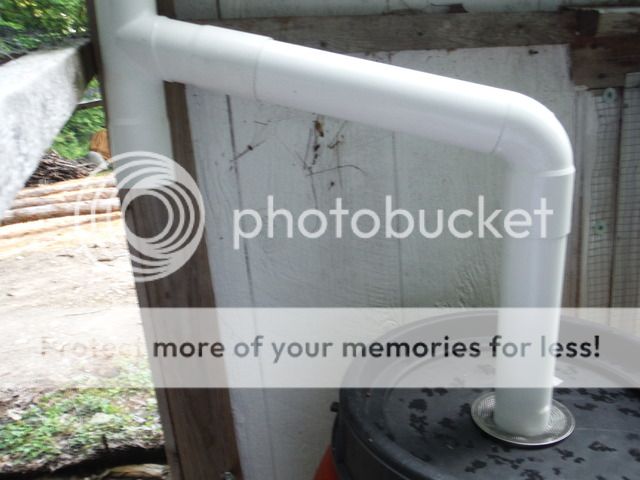
Right before closing up the "anti-raptor netting", I installed a leaf guard to help keep debris out of the barrel. There is also a screen right where the Drop Outlet meets the Down Spout.
I added two strips of metal strapping to help keep the barrel on top of the stand. It won't support the > 400# of water, but might just be enough to keep the whole thing from tipping over.
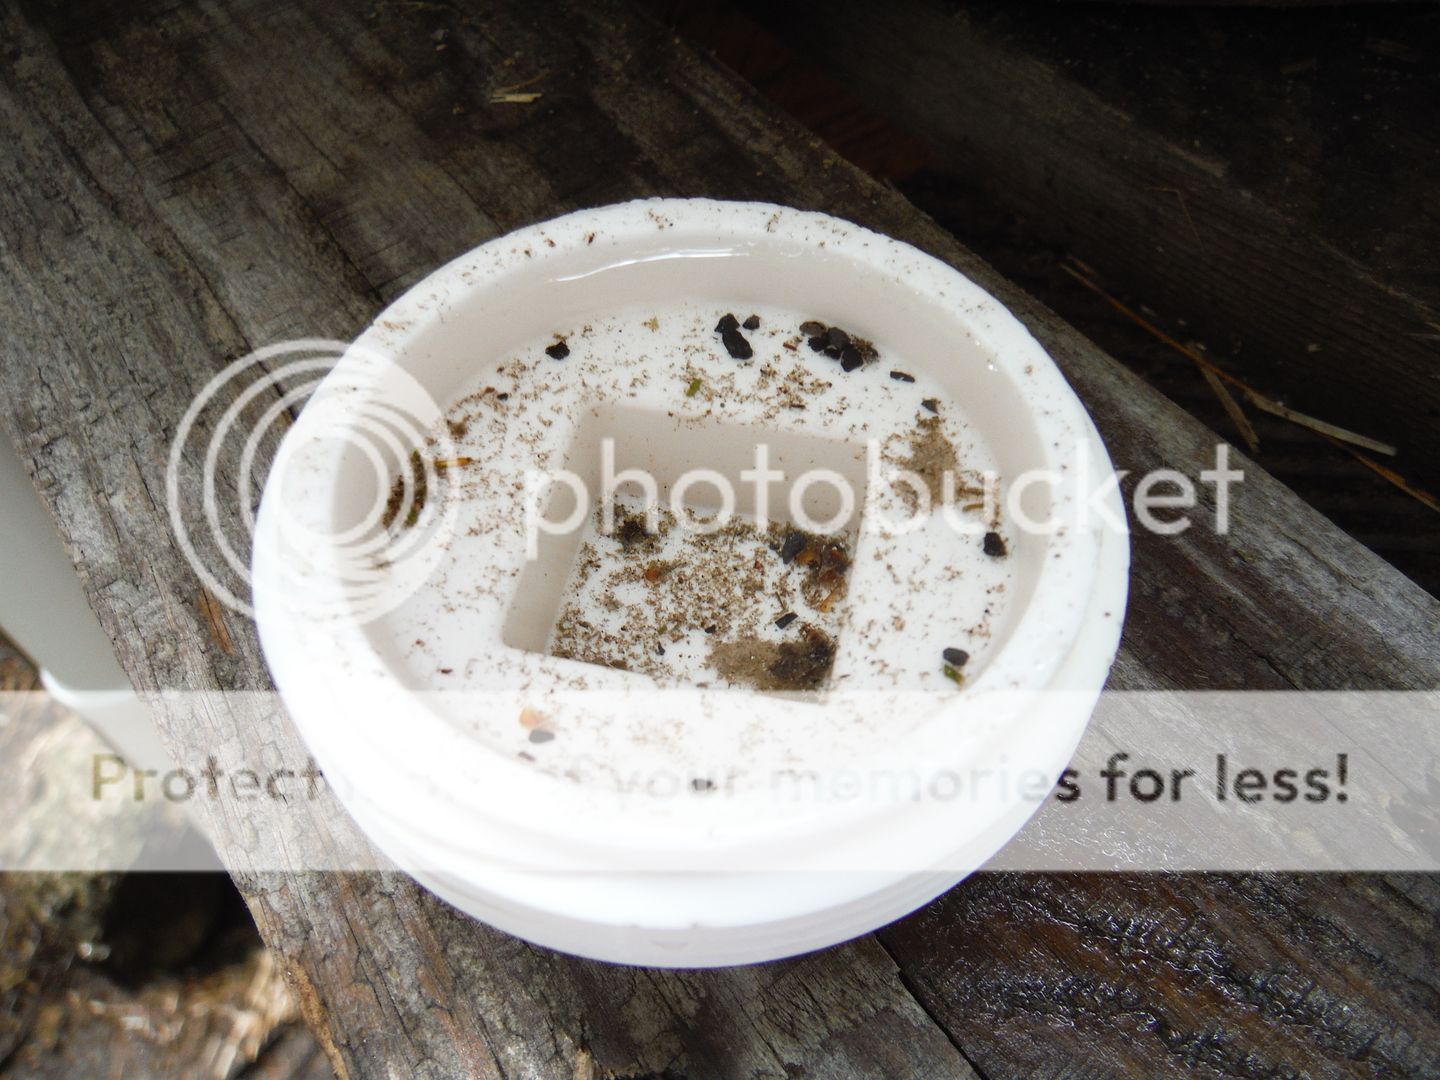
After the first good downpour, I inspected the first flush diverter and this is what was in the bottom.
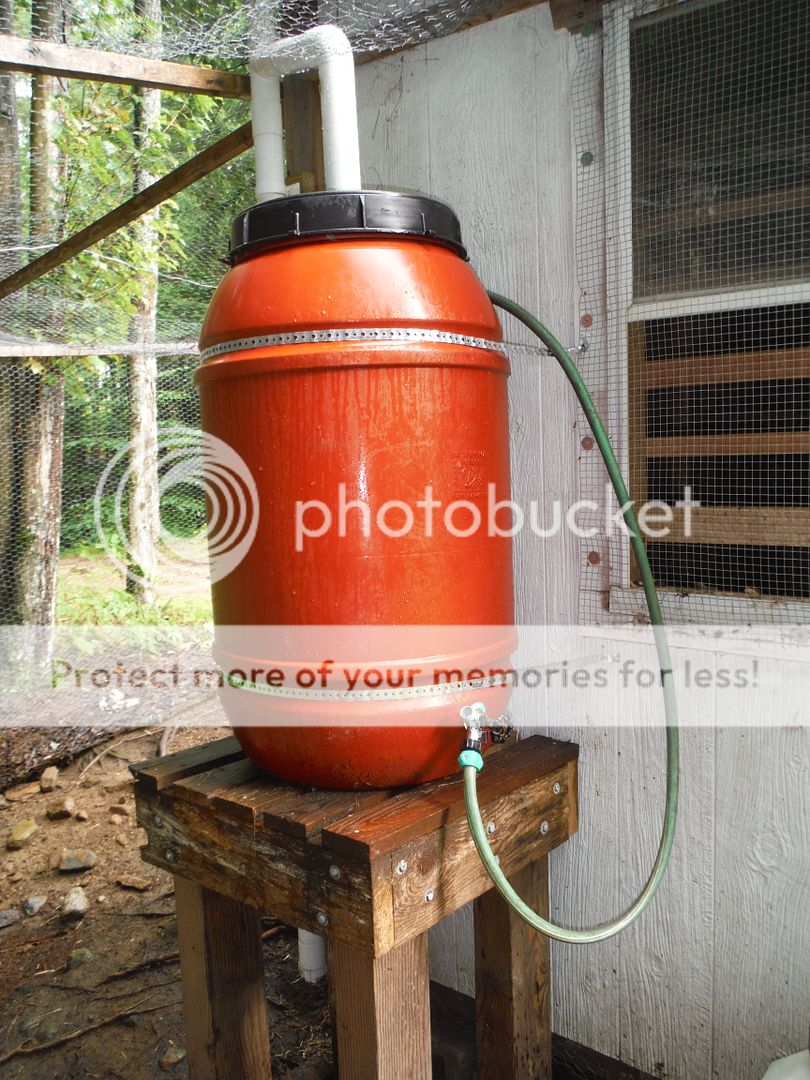
Repositioning the spigot on the barrel made it easier to use.
Another benefit is that the over flow pipe is now in a better position if I decide to add a second barrel for more storage.
The first flush storage pipe is proably too long. I will most likely shorten it so that; #1 - it takes less water to start filling the barrel. #2 - I don't have to squat down to empty the debris.
The cap is on loose enough so that it will drip a little bit and can drain itself over time.
I can check the level of the tank by simply using the end of the supply hose in reference to where the water flows out.
No water flow.

Water flow.

I added a short piece of garden hose I had laying around; it is just long enough to reach the inside waterer (through a small hole in the window screen) and the bottomless boxes if necessary.
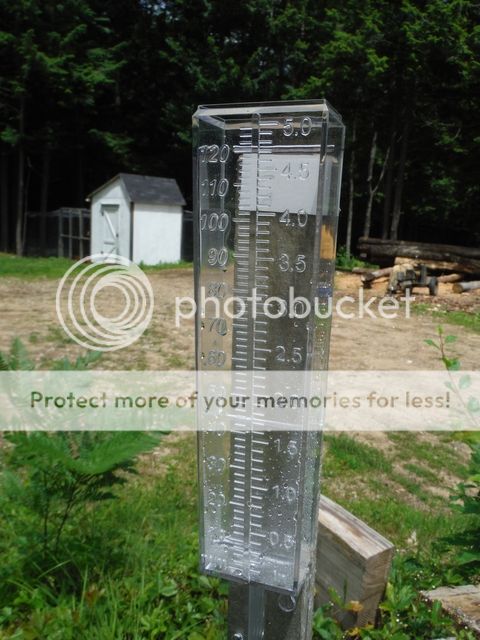
One of the last things I did was install a rain gauge in the middle of the yard to see how much rain we get and how much it takes to fill the barrel.
If all goes well with this system, I'm thinking of doing a larger water catchment off the house in order to supply the garden, reducing the amount of power/water coming from the well/
Area of the total roof; 102” x 105” = 10,710 sq” = 74 sq’
Area of the long side; 102” x 75” = 7650 sq” = 53 sq’
Area of the short side; 102” x 30” = 3060 sq” = 21 sq’
Volume of the first flush diverter: 2.5” dia x 80” length = 392 cu” = 1.6 gal
The local hardware store carries a DIY gutter product called Plastmo, but it wasn't really designed for water catchment.
I had to think up how I wanted to do the first flush diverter. The Plastmo fittings have their own pipe sizes and they don't match up exactly with the sizes of PVC pipe.

I ended up using some caulking to seal the threaded cap into the downspout to close off the the first flush pipe.

In order to install the gutter, I had to roll back the "anti-raptor netting" temporarily.

I wanted to position the Drop Outlet in a spot that would work for both the position of the storage tank and the first flush diverter.
The 75* Junction is installed unside down as the diverter so that the water will fill the that first and then the storage tank.

With that determined, it was time to hang the brackets. Plastmo recommends the slope should be ¼" per 10 ft.

After sliding in the gutter, I used the garden hose to check to make sure the gutter was positioned correctly and that the run off would flow into it.

I even tried to simulate actual rainfall.

The next part of the project was building a stand to hold the storage barrel.
I wanted to be able to get some head pressure so that the water would flow reasonably well to both the inside and outside waterers.
I also didn't want to have to bend over to reach the valve.

With over 400lbs of water in the storage container, I also needed it to be robust enough to support the weight and last several years.

I had some lumber that was gifted to me that was up to the challenge and I put it to good use.

The barrel was purchased at the local Agway. I could have scrounged a barrel from my FIL, but this one already came plumbed with a spigot, overflow pipe and inlet screen.

When it came time to level the spot for the barrel stand, I discovered a BFR right under where one of the legs went so I had to get creative with some squares of pressure treated lumber to get the stand plumb and level.

Once the stand and barrel were in place, it was time to start installing the downspout so that the rain would run off the roof and into the storage container.

A couple of short lengths of pipe and an elbow was all it took to connect the two.

Right before closing up the "anti-raptor netting", I installed a leaf guard to help keep debris out of the barrel. There is also a screen right where the Drop Outlet meets the Down Spout.

I added two strips of metal strapping to help keep the barrel on top of the stand. It won't support the > 400# of water, but might just be enough to keep the whole thing from tipping over.

After the first good downpour, I inspected the first flush diverter and this is what was in the bottom.

Repositioning the spigot on the barrel made it easier to use.
Another benefit is that the over flow pipe is now in a better position if I decide to add a second barrel for more storage.
The first flush storage pipe is proably too long. I will most likely shorten it so that; #1 - it takes less water to start filling the barrel. #2 - I don't have to squat down to empty the debris.
The cap is on loose enough so that it will drip a little bit and can drain itself over time.

I can check the level of the tank by simply using the end of the supply hose in reference to where the water flows out.
No water flow.

Water flow.

I added a short piece of garden hose I had laying around; it is just long enough to reach the inside waterer (through a small hole in the window screen) and the bottomless boxes if necessary.

One of the last things I did was install a rain gauge in the middle of the yard to see how much rain we get and how much it takes to fill the barrel.

If all goes well with this system, I'm thinking of doing a larger water catchment off the house in order to supply the garden, reducing the amount of power/water coming from the well/
Area of the total roof; 102” x 105” = 10,710 sq” = 74 sq’
Area of the long side; 102” x 75” = 7650 sq” = 53 sq’
Area of the short side; 102” x 30” = 3060 sq” = 21 sq’
Volume of the first flush diverter: 2.5” dia x 80” length = 392 cu” = 1.6 gal
![[rofl]](/xen/styles/default/xenforo/smilies.vb/013.gif "ROFL [rofl]")


