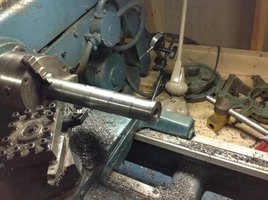
Hello,
A week or so ago I posted my first attempt at building a black powder cannon, resulting in a small .30 cannon:
http://www.northeastshooters.com/vbulletin/build-yourself/199254-step-step-fabricating-30-cal-miniature-black-powder-cannon-%2Anow-video%2A.html
After that project I knew I needed to step it up a notch. I didnt take nearly as many pictures this time so this will be a quick build-along. Total build time started and finished the same day, spanning an afternoon and night in the shop.
First, I went around my shop and located a pretty hefty chunk of steel. This hunk is an odd oblong shape with a diameter of about 2.5" wide by 1.75" high and the length of the usable steel is around 6"..perfect!

I then bandsawed off the scrap portion, squared up the ends on the mill and sprayed it with layout fluid:

Luckily, .50 is pretty easy to drill into steel with a milling machine so I drilled a bore about 4" deep:

This left 2" behind the bore. I planned to do a 7/16" full-through trunnion and 2" allowed room for this while still maintaining a 1:1 between bore size and surrounding metal to keep things safe.
Here it is with a 1/8" fuse hole drilled at a 5 degree angle back and the 7/16" trunnion hole straight through:

Off it went to the 2X72" belt grinder. The steel I was using was pretty pitted and dented so i started cleaning up the grinds:

I wanted nice, uninterrupted grind lines front to back like this:

Here is the last pic I took before moving to a finer finish but pretty much looks how it ended just before adding a bevel around the edges and final countersinking of the bore and holes:

Behind it you can see the norton blaze ceramic belts I use. These things EAT steel. They dont even pull off sparks as they cut so well they just throw a steady stream of metal filings downward.
Next post will be final pics with the carriage I made for it
A week or so ago I posted my first attempt at building a black powder cannon, resulting in a small .30 cannon:
http://www.northeastshooters.com/vbulletin/build-yourself/199254-step-step-fabricating-30-cal-miniature-black-powder-cannon-%2Anow-video%2A.html
After that project I knew I needed to step it up a notch. I didnt take nearly as many pictures this time so this will be a quick build-along. Total build time started and finished the same day, spanning an afternoon and night in the shop.
First, I went around my shop and located a pretty hefty chunk of steel. This hunk is an odd oblong shape with a diameter of about 2.5" wide by 1.75" high and the length of the usable steel is around 6"..perfect!

I then bandsawed off the scrap portion, squared up the ends on the mill and sprayed it with layout fluid:

Luckily, .50 is pretty easy to drill into steel with a milling machine so I drilled a bore about 4" deep:

This left 2" behind the bore. I planned to do a 7/16" full-through trunnion and 2" allowed room for this while still maintaining a 1:1 between bore size and surrounding metal to keep things safe.
Here it is with a 1/8" fuse hole drilled at a 5 degree angle back and the 7/16" trunnion hole straight through:

Off it went to the 2X72" belt grinder. The steel I was using was pretty pitted and dented so i started cleaning up the grinds:

I wanted nice, uninterrupted grind lines front to back like this:

Here is the last pic I took before moving to a finer finish but pretty much looks how it ended just before adding a bevel around the edges and final countersinking of the bore and holes:

Behind it you can see the norton blaze ceramic belts I use. These things EAT steel. They dont even pull off sparks as they cut so well they just throw a steady stream of metal filings downward.
Next post will be final pics with the carriage I made for it


![Thumbs Up [thumbsup] [thumbsup]](/xen/styles/default/xenforo/smilies.vb/044.gif)


