My Experience Loading Lee 1oz 12 Gauge Slugs
BEFORE you read this you must understand that it is MY journey. It is based on my experience pieced together with what I learned in instruction manuals, reloading manuals, many forum posts, and personal experience along the way. Given the lack of information I found on this topic during my quest, I thought this would be useful to someone, someday.
What got me on the idea of loading slugs? Like much ammunition in 2009 it was available on an intermittent basis or very high priced at best. So I thought…”I already load 9mm, how hard can it be?” (ha ha, the joke is on me)
I started by searching for actual slug “bullets” that I could load. I figured I could buy some slugs and the rest would work itself out. The only slugs I found were specialized hunting slugs and very expensive:
http://www.midwayusa.com/viewProduct/?productNumber=557135
http://www.midwayusa.com/viewProduct/?productNumber=382704
Pouring over the different slugs, wads, overshot cards, nitro cards, under wad cards, fillers and components I thought “man this might just be way too much to handle…” I continued my search for some “hidden secret” and stumbled on equipment to make your own bullets. My first thought was “no way do I have time to cast my own slugs.” So I gave up for a couple months.
The idea brewed until one day I had a moment to explore the possibility again. I rifled through forum posts and looked at powder manufacturer data, trying to get an idea of what steps and equipment would be involved to make this work. I was reading a lot about “casting”. Casting involved quite basically melting lead and pouring it into molds to create bullets. Back to Midway I went. I just took it one step at a time. What caught my eye was the Lee 1oz slug mold.
http://www.midwayusa.com/viewproduct/?productnumber=770274
I even got lucky on a bunch of wheel weights from a local tire place. I ordered the slug mold the same week and figured I would collect some lead and have the mold for when I was ready. My goal was to start SLOW and keep the cost LOW in case it did not work out. At this point I hadn’t even chosen a recipe or purchased a reloading press. All I had was the mold, some lead and about 100 empty Remington 12ga Slugger hulls.
Carbon in a Can was recommended by the kind folks who reviewed the Lee slug mold…I never had a problem releasing a slug and I blame that success on this product:
http://www.midwayusa.com/viewproduct/?productnumber=763758
But how to get the wheel weights turned into clean lead I could put through the mold? I learned that going from scrap lead to casting is best done as a two-step process. Step one being melt the scrap into ingots and later use the ingots to cast.
Not wanting to get too deep into the project financially I decided to go on the cheap. Going on the cheap can be as gratifying as it is frustrating. Improvising needs to be done to get to the same place one can get to by simply shelling out the bucks for the “right equipment”.
A short trip to the dollar store for $24 got me a 2 quart pot, muffin pan and slotted stainless steel spoon. At home I had a camp stove that runs on gas or camp fuel – so I decided to use that. It’s not great at controlling temperature but it worked for the moment. I set up the stove, pot and filled the bottom inch with wheel weights. It took 20 minutes on a 30 degree day, but the lead started melting. Skimming off the crap (dross) that floats to the top was strange, it’s an odd feeling. You feel like you are caught on something but you aren’t because the liquid lead is so heavy. Anyway, I kept skimming off the dross and tapping the spoon in a plastic bucket, careful not to waste too much lead or splash myself. Careful too not to inhale any TOXIC vapors. Then per much advice I tossed in about ½” piece of white candle wax. That is called fluxing. After that the lead was nice and shiny. BY THE WAY…I was dressed in an insulated full-body mechanic suit with goggles, a mask and gloves. Finally I had enough lead to pour out some “lead muffins”. Each muffin was about 2 pounds, enough for about 30 slugs.
NOTE: The Lee mold instructions say NOT to use wheel weight lead as wheel weights have other alloys and the metal can stick to the mold. Using Carbon in a Can I did NOT have this problem, YET.
Along came Christmas and it was too cold and snowy outside to cast or play with lead. I’m told you CANNOT GET WATER NEAR MOLTEN LEAD as it will erupt in a showering, spitting inferno of spattering lead. I don’t wanna test the theory so DON’T MIX THEM!
I decided to research recipes so I could buy other components. A slug recipe has 5 components: EMPTY HULL, POWDER, WAD, PRIMER, SLUG. Based on your hull, you will need to find a recipe for a powder and wad to fit in the hull…then a primer per the recipe and finally the slug. Not all primers are alike. I was told a few primers “can be” interchanged…but research that yourselves. Some are hotter and that is why you cannot interchange them.
Here are the problems I ran into…
PROBLEM 1: I had a specific type of hull I was looking to reload. Why a problem? I could not find ANY reloading data for these shells. I called Remington and they said “we don’t have any reloading data on those”. After a LOT more research I decided that logically I could treat these as any other tapered Remington hull of similar application. This is not common logic in the reloading world mind you, this is MY logic. After inspecting several Remington hulls I found that my hulls were not only sturdier than most other Remington hulls but even Alliant treated all the Remington hulls as one “hull type” for their recipes. So I decided to treat it as a Remington STS or Gun Club for recipe selection purposes. Even THIS is a huge departure from proper reloading protocol. I accepted that risk and made an informed choice.
Here is the Alliant data:
http://www.alliantpowder.com/reloaders/RecipeList.aspx?gauge=12>ypeid=3
Other places I looked for recipes and information:
http://www.fcs-texas.com/Choosing_a_shotshell_recipe.htm
http://www.leeprecision.com/cgi-data/instruct/SM 3529.pdf
http://data.hodgdon.com/shotshell_load.asp
PROBLEM 2: I wanted to use a specific type of powder but I could not find any recipes using that powder. I won’t bore you with the weeks of trying to rationalize substituting powder to guys in the forums and getting the crap smacked out of me for bringing it up. Bottom line, I did not have a shot shell recipe with this powder…I could not use it.
PROBLEM 3: The recipes that came with the slug mold would seem the most logical to use, right? Not for me. I did not have easy access to the listed powders – and my whole premise for reloading is to make ammo cheaper and more accessible. Other recipes for Lee slugs were also calling for 2 other powders, one I could get the other not. Those loads were also too hot for my tastes.
I needed to find a recipe for the powders I could GET. The problem wasn’t finding recipes. The problem was these recipes were for MEASURED SHOT not SLUGS. Apparently there is debate in the reloading community about substituting SLUGS for SHOT in a recipe listed specifically for shot. Some folks say, “you don’t do it.” Other folks say, “it’s okay to substitute on low power recipes.” Some argue “a shot column compresses upon firing making a unique profile and coefficient of friction down the barrel and affects pressure. A slug would change that dangerously.” Others say, “slugs have less flexible surface area than shot and would create a rigid column with less friction and balance out pressure change with easier travel down the bore.” Who was I supposed to trust my face and fingers to? In the end, I could only trust my judgment.
It wasn’t but for a few brave souls who shared their experiences substituting slug for shot that I gained a rare insight into the little documented area of slug loading. I decided to accept responsibility for my OWN actions and substitute a slug for shot with two requirements. Recipes had to be light and other components had to match exact.
Before other problems, let me share my first casting experience.
One night I had an hour to kill. Not wanting to cast inside due to the fumes I opened the bulkhead a few inches and setup in there. I figured hot air would rise carrying fumes outside at the top and cool air would enter the bottom keeping me ventilated. While the lead was melting I cleaned the mold with acetone on q-tips then sprayed it with carbon. I bent the hell out of an old stainless serving ladle to make a ladle. Holds about 2 ½ ounces of lead and best part is, when it’s full it floats on top of the molten lead where it stays warm until I need to pour again. I read the mold instructions three more times then set to it. Took about 6 slugs before I realized the mold was too cold and then really took off. The first time it took 1 hour to get 13 slugs. The second time, I got 45 in an hour.
TIP: Measure EACH slug after casting to assure it is indeed ONE ounce.
So now I had slugs…that meant actually buying components.
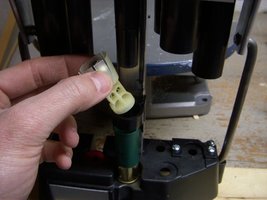
PROBLEM 4: The wads I ordered for the recipe I chose did not fit the Lee slug. The slug was wider than the diameter of the darned shot cup and when I put the slug in the cup the petals bowed out. Now from what I’ve learned this is very bad for several reasons. The Lee slug is smaller than a shotgun barrel. You can actually drop it in one end and catch it coming out the other. The wad petals are supposed accompany the slug down the barrel and take up the difference in space between the slug and the barrel so it rides snug, but not TIGHT. This darn thing with the petals distorted wouldn’t even fit IN the barrel. If I used this wad I SURELY would’ve blown my self up. This is where I learned the value of TEST FITTING EVERYTHING in the gun you will be shooting it out of. A very wise man said to me, “IF IT DON’T FIT, GO NO FURTHER!” Of course the solution to this problem was to choose another recipe so I swallowed my pride and did just that.
At my gun store I noticed they had Windjammer wads. http://windjammer-wads.com/Template.php?-p=Products&-rid=236 It also seems that Windjammer had a recipe to fit my EXACT components…substituting the slug for 1oz of shot. I got a lot of well deserved flack about the substitution, but as I said above I was willing to take the risk. If I was wrong it was my fingers that would pay the price after all. So I took a molded slug and the recipe down to the gun store to test fit the wad. It fit perfectly.
For a press I chose the Lee Loadall II, for it’s simplicity in operation and price. Plus the reviews are all very good. You can see the product here and a video from Google too of someone loading slugs:
http://www.midwayusa.com/viewProduct/?productnumber=436640
http://video.google.com/videoplay?docid=-2997336516648660322#
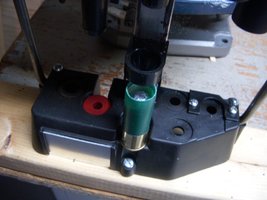
I found the press VERY easy to setup and mount…was ready to go in an hour, and that included triple testing the weight measure dropped by the correct powder bushing.
PROBLEM 5: Remember those good ole Remington Slugger hulls I said I would be using? Yeah…those. Well those have a factory ROLL CRIMP. If you don’t know what a roll crimp is, like I didn’t…then check this out:
http://www.ballisticproducts.com/bpi/articleindex/articles/rollcrimp/rollcrimping.htm
The Lee Load all 2 produces a star-fold crimp like you see on most shot shells. Despite my best efforts I could NOT get the Load All to put a star crimp on previously roll crimped shells. So now I was off in ANOTHER direction. Roll crimping. After a week or so I learned what it was, how to do it, the benefits and draw backs.
http://www.midwayusa.com/viewproduct/?productnumber=730142
Once my roll crimper arrived. I got the hang of it quickly enough, but…
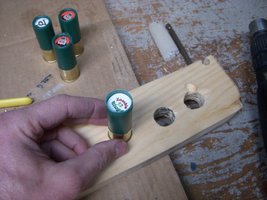
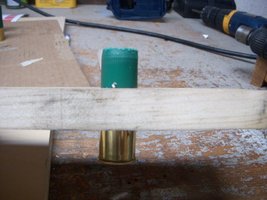
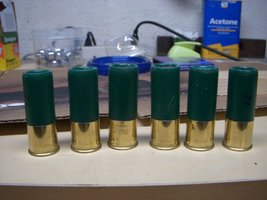
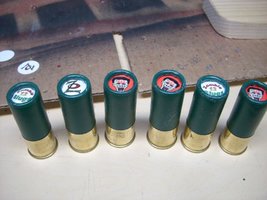
PROBLEM 6: The problem was on my factory crimped shells, Remington Slugger crimps use WAY MORE plastic than my crimp tool does. Factory slugs crimp down about ½ way down the length of the slug. In MY shells the slug sits in a wad cup surrounded by petals between the slug and hull wall. Those petals are in the way of a deep crimp and there is no way to get the plastic past them without deforming the crimp AND the wad. My crimps looked good but were too tall. Common sense said, “that is way too much plastic to have bunched up on top of that slug.” Back to the forums where I sent pictures and garnered all sorts of advice. I called BPI who makes the crimp tool and Lee. Both confirmed I needed to TRIM plastic off the case. So I researched how to do that with a hull vice and trimmer. My hull vice is a piece of ¾” PVC trimmed to the desired finished length of my trimmed hull. When I insert the hull, extra plastic sticks out. My jigsaw takes care of that quickly, a little sand paper and she’s good to load. With an overshot card sitting on top of the slug I was able to get a good, tight crimp about 1/8” tall.
http://www.midwayusa.com/viewProduct/?productNumber=188808
Suffice to say after all this every load I tested performed really well. I learned that picking up any old 12ga shell at the range won’t cut the mustard. Each hull VERY different and needs its own specific wad and powder measure. They are right when they say, find ONE recipe like and stick with it. If you insist on collecting shells from the range you must also collect different wads, powders, possibly primers and definitely a bunch of different recipes.
The following wads will hold the Lee 1oz slug:
Windjammer http://windjammer-wads.com/Template.php?-p=Products&-rid=236
WAA12SL http://www.midwayusa.com/viewProduct/?productnumber=862303
WAA12 http://www.midwayusa.com/viewProduct/?productnumber=845988
FED12SO http://www.midwayusa.com/viewProduct/?productnumber=733985
Midway lists Claybuster CB1118-12 is a direct substitute for WAA12SL. CB1118-12 does NOT fit the Lee 1oz slug. The Lee 1oz slug will not fit in a Figure 8 wad either.
In this thread are all the sources I used to assemble the recipes I used. In assembling them I had to make a substitution of slug for shot, which is VERY dangerous. When it comes to recipes please research your own, decide for yourself, don’t take my or someone else’s word or experience as gospel. BE SAFE and GOOD LUCK!
Special thanks to:
DukeInMaine
mac1911
Madball13
BIG GUN
Gammon
Timberwolf
coastie

![Wink [wink] [wink]](/xen/styles/default/xenforo/smilies.vb/002.gif) Deal! Thanks for all your help Duke, your help and guiding slaps in the head came in handy as I worked it out.
Deal! Thanks for all your help Duke, your help and guiding slaps in the head came in handy as I worked it out.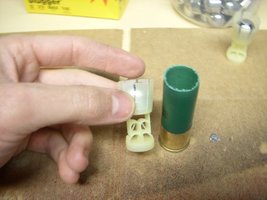
![Thinking [thinking] [thinking]](/xen/styles/default/xenforo/smilies.vb/010.gif)