• If you enjoy the forum please consider supporting it by signing up for a NES Membership  The benefits pay for the membership many times over.

It's ON (1911 story) Pic heavy

Urj

Joined
Nov 2, 2006
Messages
658
Likes
24
Location
North Shore
Feedback: 13 / 0 / 0
I finally got around to ordering a bunch of parts to start the customization of my SW1911PD last week. They finally arrived this morning and I've been spending the day gunsmithing! I just finished fitting everything so that the gun functions, I need a break before I go back and polish everything up. [smile]

First Here's a pic of the gun as stock:
PIC-0083.jpg


A smattering of custom parts!
parts1.jpg


Ponder that for a few while I resize and upload pictures of the days work.
 
Last edited:
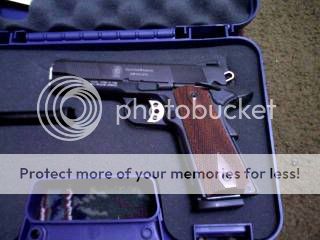
Here's a shot of the full gun:
fullgun1.jpg


A shot from the top down over the slide:
topdown1.jpg


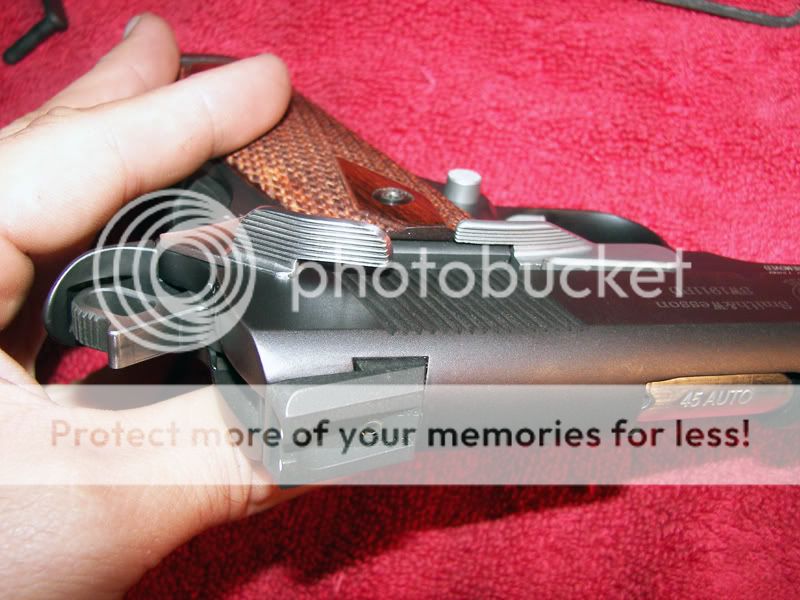
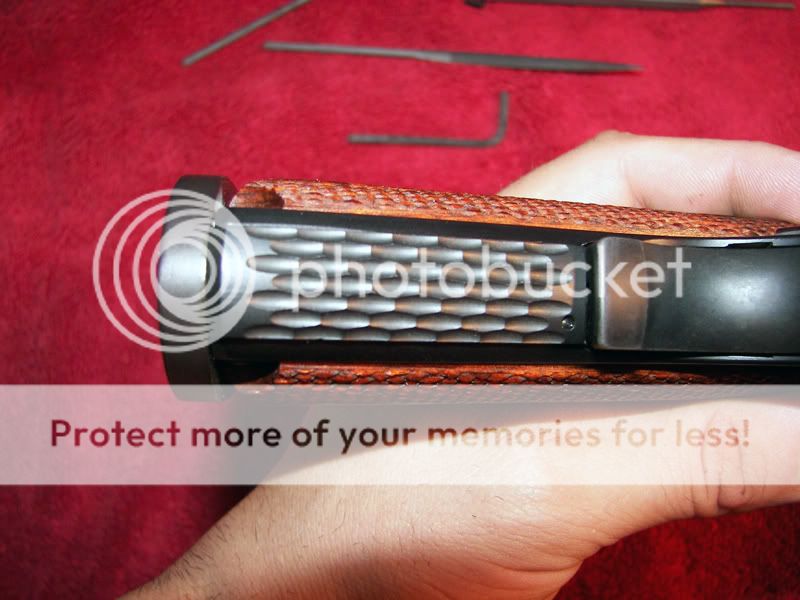
A couple pics of the MSH:
msh2.jpg

MSH1.jpg


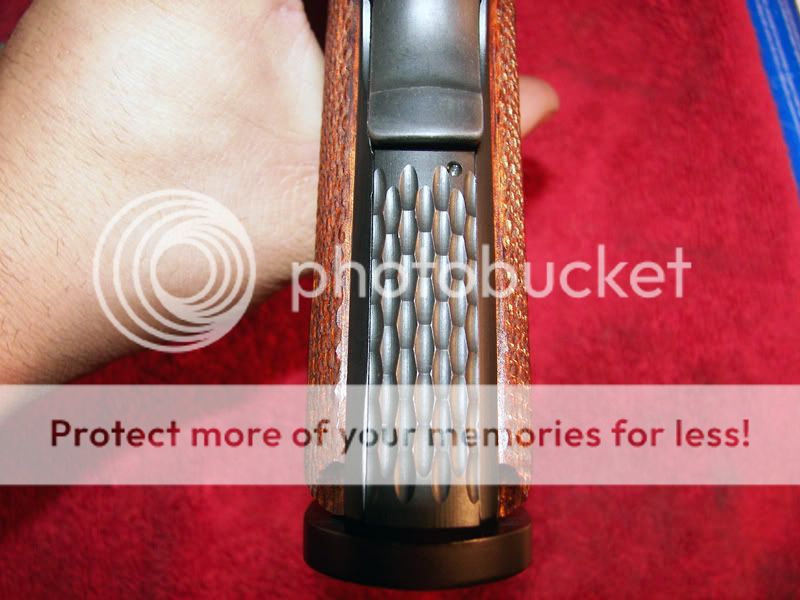
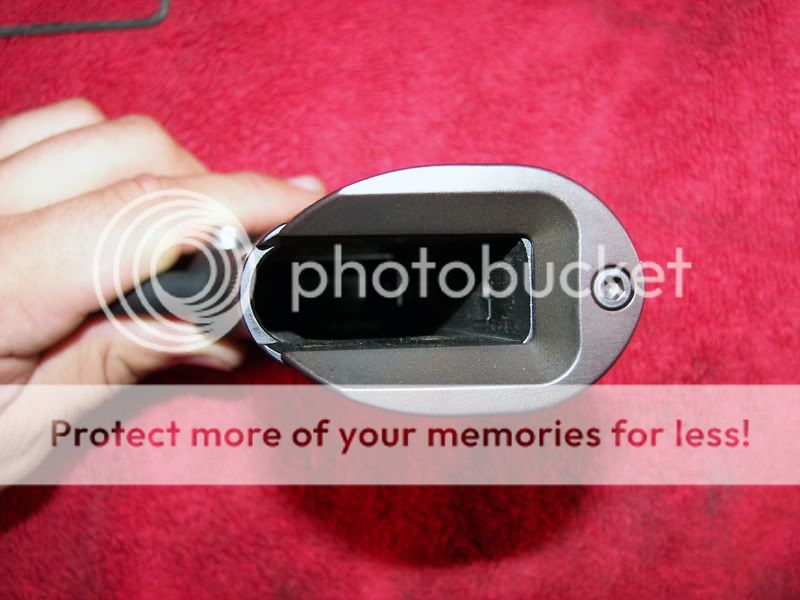
And a shot of the inside of the magwell:
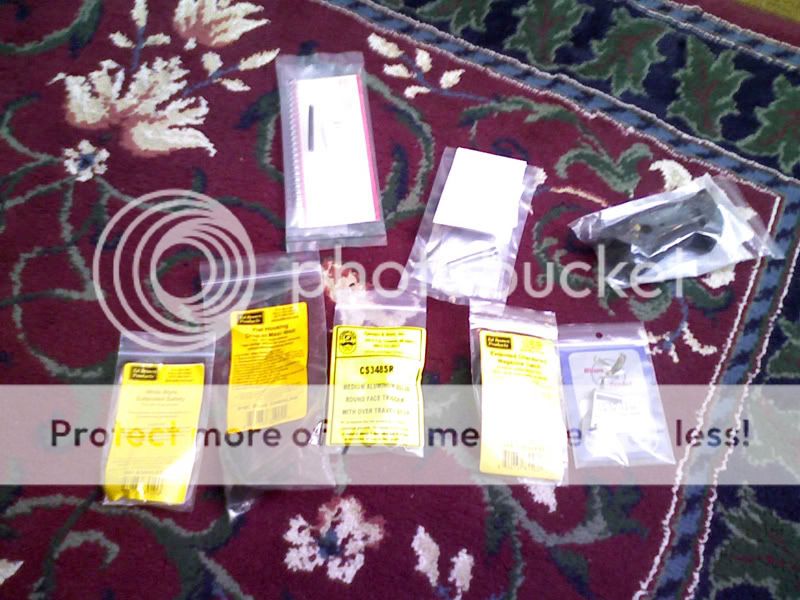
magwell1.jpg


Parts list -
1 - Cylinder and Slide Medium solid aluminum round face trigger
1 - Ed Brown blue chain-link MSH with maxi-well
1 - Wilson Combat extended slide release - stainless
1 - Ed Brown wide style extended slide release - stainless
1 - Ed Brown extended checkered magazine catch - stainless
1 - Wolff 16 lb recoil spring and firing pin spring

Notes:
I LOVE the feel of the chain-link MSH. The stock MSH had some crazy small checkering that was painful on my hand. I wasn't expecting the thumb safety to be polished stainless so it will get bead blasted satin when I have some other work done. The thumb safety also needed a TON of fitting, took about 90 minutes of work to get that fit.
I'm extremely happy with the trigger itself - I have to take a moment to brag here as the fit is excellent. There is no movement side to side or up and down at all, not even a hair could slide in the gap. That being said it is still super smooth and doesn't bind at all. I have yet to set the over travel screw so I'm sure it will only get better.

Next up is a stainless Ed Brown memory groove beavertail grip safety, an action job, bead blasting of the slide, night sights, and cutting the barrel flush with the bushing and adding an aggressive crown.
 
Replacing the trigger was not difficult. As long as you know how to detail strip and reassemble the pistol you'll be fine.

The method I used was to lay a sheet of 600 grit wet/dry sandpaper on the desk, wet it with some oil and then carefully, making sure not to change the geometry of the surfaces, dragged the bottom and top of the trigger across the paper. I alternated the top and bottom every other stroke and kept them even. Keep pressure directly on the middle of the top of the trigger shoe, not on the trigger bow.

Do this a couple times and then drop the trigger into the frame. When t slips all the way in on its own it is finished (or nearly so pending polishing and sticky spots)
 
How tight was the trigger before you started sanding it down?

It would slide into the trigger opening on the frame so that about an 1/8 inch was sticking out the front so it was pretty tight.

I'm planning on making my own flat bottom custom shaped grips for it. I'll probably start on that pair tomorrow.
 
gorgeous pistol.

i've been looking for a 1911 (in 4") for a while now. (<3 the titanium / black finish). its a shame the majority of them are WAY out of my price range :(
 
Sir, that pistol is dangerous! I emplore you, for your own saftey,
give it to me![smile]

Seriously, that is beyond cool!

Will you show pics with the new grips?
 
Haha thanks

I'll show pics with the new grips when they're on. They'll be like the Kingwood grips I made before except I'm going to change the shape of them so that they're flat bottomed against the magwell and look a little more substantial across the frame.
 
Back
Top Bottom