• If you enjoy the forum please consider supporting it by signing up for a NES Membership  The benefits pay for the membership many times over.

First camo job comments welcome. New photo's just added on page 1

Joined
May 26, 2005
Messages
739
Likes
60
Location
MA
Feedback: 4 / 0 / 0
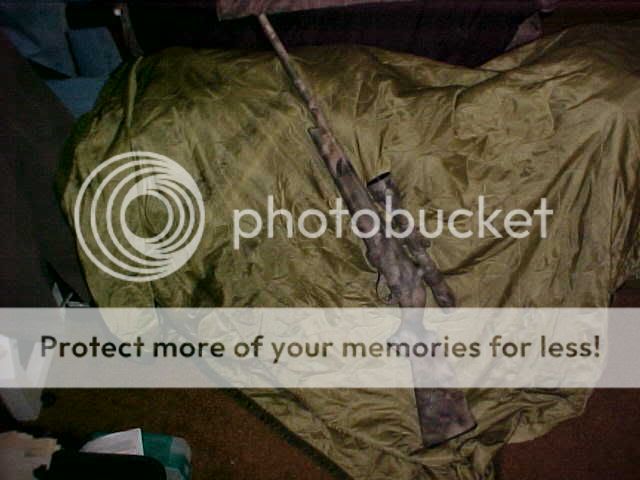
Took a Rem 597 and used it as my test rifle for this camo job before I did up my Rem 700. Comments welcome but be nice this is my first camo job ever.

camo1.jpg


Camo2.jpg


Camo3.jpg


Camo4.jpg


Camo5.jpg


Camo6.jpg


Camo7.jpg


I know some of you guys were looking for me to take it outside to see what it looks like in the bush but seeing I get home after dark from work I thought I would try the next best thing. And use a old poncho liner from the Marine corp days as a background so you can get a taste. Sunday I will take it out and get some photo for you guys enjoy these for now. Also just did a wet sand on the paint seeing it had a ruff feel when I would get stock weld. Now she is as smooth as a baby butt.


Camo1-1.jpg


Camo2-1.jpg


Camo3-1.jpg


Camo4-1.jpg


Camo5-1.jpg


Camo6-1.jpg
 
Last edited:
Looks really nice... but, you should take a pic of it outside with some background foliage.

Camo blends much better with leaves, bark and mulch rather than dorm room carpeting. [smile]
 
Yeah I would take a photo of it with some background foliage but I don't have that much in my back yard and seeing I live in a city and this is Mass taking it to the tree line will tend to get you arrested in this state. But I will try to take some photo of it in my backyard and post them in a day or two.
 
Yeah I would take a photo of it with some background foliage but I don't have that much in my back yard and seeing I live in a city and this is Mass taking it to the tree line will tend to get you arrested in this state. But I will try to take some photo of it in my backyard and post them in a day or two.

Excuses, excuses....[rolleyes]....looks good [grin]
 
After another look, that's fantastic! You should do it for other NESers!

You know, I was thinking just that. It doesn't look anything like the established camo patterns yet it almost looks more likely to fade into the background than more traditional patterns would. It's the smoothness of the color transition. Doesn't leap out at you like wood/camo or even digital. Well done.

RD
 
Hey guys thanks for all the kind words. I did spend 7yr Marine infantry. So I guess I can thank the Corp for the skills. I just took my time took maybe 1 hour or a little more free handing it. I will take it out in the yard and take some photo's and post them. Thanks again for the support and for the person that asked if I wanted to camo other peoples rifles let me do a few more of mine and see how they turn out.

But it is hard to mess up with the paint you just keep hitting with the tan color in any area's you make a mistake and start over.
 
I really like the work on both and know who to call when I need some done. My talent lies elsewhere.
 
How did you prep the surface. Did you clean all the oils and stuff off first? Sand surface with anything?

Cleaned everything that was going to get paint with paper shop towels and denatured alcohol. That was all the prep needed. If you had a wood stock you would have to take the finish off the stock. After 24 hours of drying I just hit it with some wet sand paper to get a smooth feel to the stock and that is all there is too it.
 
FWIW you can always use an adhesion promoter. Thats what I use in the body shop for getting paint to stick to platsic parts. Just about 99% of all plastic out there has mold release agent imbedded into it that helps it pop out of molds after its poured. Its an oil that seeps out of the plastic as its heated, or over time it just seeps out naturally.
Washing with dish detergent before painting works well along with scuffing with an SOS pad.
The most common adhesion promoter you can find is by Bulldog and works well on plastic and synthetic parts. Its also good on painted surfaces and under most paints because it adds a flex additive to prevent flaking and cracking when parts are flexed or put under pressure.
 
Back
Top Bottom