• If you enjoy the forum please consider supporting it by signing up for a NES Membership  The benefits pay for the membership many times over.

DIY home anodizing

Golddiggie

NES Member
Joined
Dec 9, 2012
Messages
15,605
Likes
7,503
Location
Pelham, NH
Feedback: 48 / 1 / 0
As some of you know, I've been working to anodize aluminum here at home. I've gone through a couple of configuration, and process, tweaks and have it working really well. I started off with looking to use sulfuric acid for the electrolyte. But after reading up about the hazards involved, I decided to not go that route. Instead I was able to use sodium bisulfate (info found here) for the electrolyte.

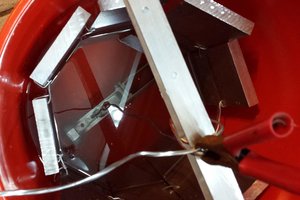
I ended up using 3.5 gallon buckets (thanks Gator9329) for the etc, and dye tanks. A 5 gallon bucket is my anodizing tank due to getting a better cathode setup. For the water, I'm getting it from the filtration system under the sink (goes down to .2 micron) which is sent through a DI filter before being used. Couple that with an old Craftsman battery charger (from the early 80's) and I have a working system. You won't be able to use a newer battery charger due to the protection circuits inside them.

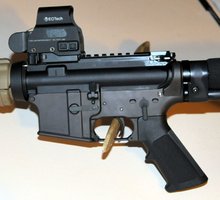
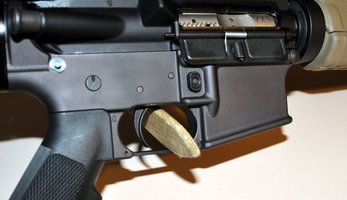
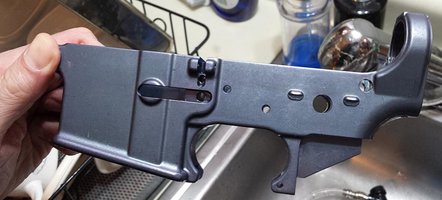
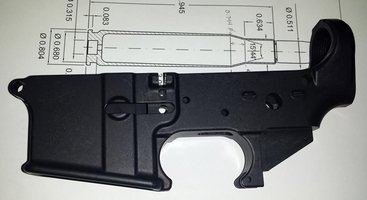
Last night I re-anodized the lower for my 300 Blackout pistol. I had previously anodized it without any dye bath. It was ok initially, but after seeing more lowers, and what other people have done, I decided mine needed some color. So, after stripping the LPK out of it, giving it a quick cleaning and soak in denatured alcohol, I set it into the etch tank. That's a 2-4% solution of sodium hydroxide. After about 7-8 minutes in that tank, the previous anodizing was removed. Removed from that tank, rinsed with DI water, and then put it into the anodizing tank. Connected the battery charger up to the cathode and anode and set it to run. After about an hour the reactions had stopped, which means all that can be done has been done. Removed, rinsed again with DI water, and set to sit in the dye bath. I checked on it at 20 minutes, not the color I wanted, back into the pool. At ~45 it still needed some more. I started the sealing water to boil (had previously gotten it up to temp, then stopped when it became clear I would need more time in the dye bath). Checked after about an hour total and it was looking really good. Added the sealing solution to the boiling water, mixed fully and then placed the now dyed lower into the pot (after rinsing the lower with more DI water). Let it boil for 20 minutes, removed, rinsed with more DI water and then set to dry overnight.

Result:
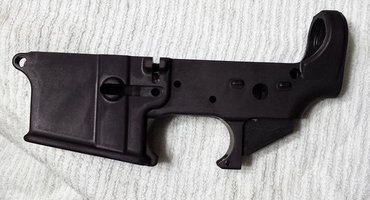
re-anodized_300_blackout_pistol_lower_1.jpg

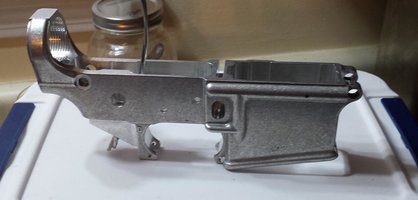
300 Blackout pistol before Saturday night:
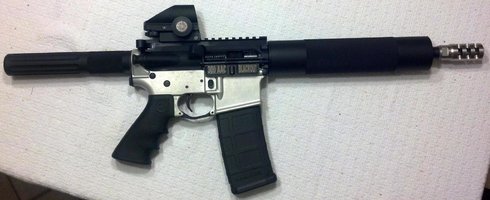
300_Blackout_pistol_completed.jpg

300 Blackout pistol this morning after anodizing/dyeing last night:
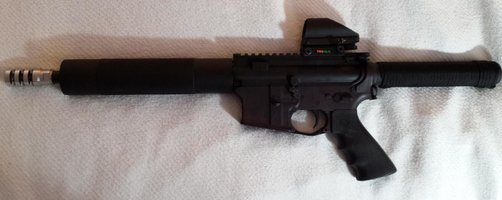
300_Blackout_pistol_completed_final.jpg

Since the first picture I had also wrapped the pistol buffer tube with paracord. Just to act as padding between the metal tube and me when doing a cheek weld (easier for me than putting to my shoulder).

Technically you can dye the aluminum any color you can mix up. You can get dye from Caswell if you want, or use Rit dye from the fabric store.

I did reserve the sealing solution this time. I have a good amount of what you add to the water, but figured why not save it. I should be able to get at least a few more lowers out of the same batch. I have found that stripping anodizing off of parts fouls the NaOH solution pretty fast. But, it's easy to mix up more. If you mix it on the stronger side, put it near a fresh air source and put a loose lid over that bucket. The part will turn a dark grey when the NaOH has done it's job.
 
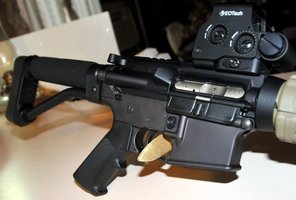
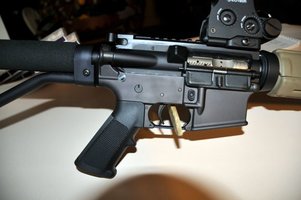
I thought I'd throw my AR into this thread. I anodized the lower at Goldiggie's house under his excellent tutelage. Every lower he does he gets better. I like mine just fine and I think it's great for a first time 80% lower. The color is just as good as many retail units. If you look super close you can see imperfections but this is a 100% home job.

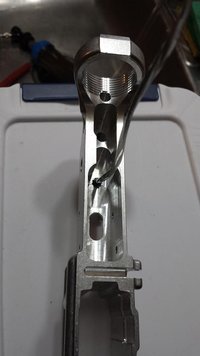
1. 80% Lower 100% machined at my house by me, anodized and colored by me at Goldiggie's house.
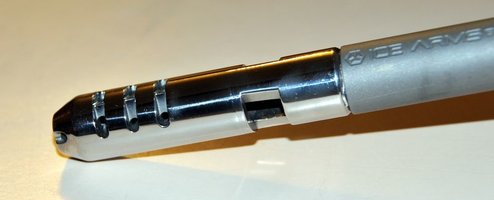
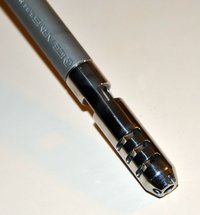
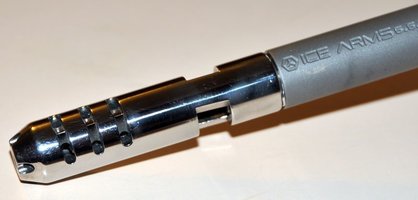
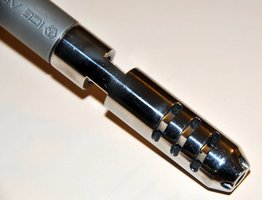
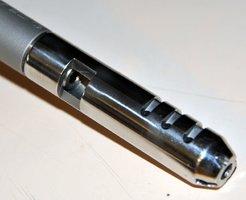
2. Ice Arms Nitride coated 14.7 in barrel with welded and pinned muzzle device for a total barrel length of 17 inches. The compensator was 100% manufactured at my house by me. Pinned and welded by me at my house.
3. Ace stock
4. MagPul fore grip
5.EcoTech sight
6. Zero Fail Nitride coated bolt group

DSC_4196.JPG DSC_4196-001.JPG

Here are a few more photos of the comp and the lower. These photos cover no sins so you can see both items as they are.

DSC_4212.JPG DSC_4214.JPG DSC_4223.JPG DSC_4213.JPG DSC_4203.JPG DSC_4224.JPG DSC_4204.JPG DSC_4222.JPG
 
Last edited:
Just a curiosity, how much did your setup cost? I've seen small-scale kits for about $500 on the interwebs.

Far less than that... I have 4-5 plastic buckets (3.5 and 5 gallon), old battery charger (you could get a 12v power supply, minimum would be 2A out), cathode made from plates I got from another NES member (check scrapyards in your area for some 6061 stock). The chemicals (sodium hydroxide and sodium bisulfate) are pretty cheap (Amazon has both). You'll also need to either use distilled, or deionized, water for everything. All the rinsing, the solutions, etc. Distilled is ok, but I think DI is better.

I could try sourcing the items out for you, if you want a list. Biggest issue with the power supply is you don't want one with the protection items in it. It will think the anodizing tank setup is a short/fault and kill the power to it.

If anyone wants to come over and see the setup, and how it works, shoot me a PM...

BTW, the ONLY point where you need to add any heat is the sealing boil. So the kits you see with all these heating elements are more items than you'll use.

I could totally do that, because I've had dreams of a purple AR pistol and I'm not spending $500 on a matched upper and lower!
 
I could totally do that, because I've had dreams of a purple AR pistol and I'm not spending $500 on a matched upper and lower!

If you get the dye, we can just do it here. Depending on the handguard, that might be more tricky. I'd need to mix up more solution if we hang it vertically.

At least you don't want to do pink... Or put rhinestones on it. [rofl2]
 
If you get the dye, we can just do it here. Depending on the handguard, that might be more tricky. I'd need to mix up more solution if we hang it vertically.

At least you don't want to do pink... Or put rhinestones on it. [rofl2]

Hell, even my wife won't do pink! And I'd only be doing a stripped upper/lower.
 
Very cool. Not sure how concentrated your NaOH solution is but if left open it will pick up CO2 from the air and could change the solution concentration. Might be best to make it fresh.

Any idea how other ions affect the process/coloring? Distilled water should be pretty pure and might be cheaper to use if you don't have access to a deionizer.

I close the buckets of mixed solutions when done anodizing for the day (or when I won't be using it again for more than a few minutes). I dumped the last batch of NaOH since it was getting a bit gnarly in there. I have plenty to mix up more. I'm using a 2-4% NaOH solution at present.

Everything I've read says to use as pure a water as possible. Since I was given the DI filter by another NES member, it's easy/cheap to do. I run the water through my 3 filter system first, then it flows through the DI filter. It actually looks like the initial media in the filter is about exhausted. So, I'll need to change it either for the next run, or soon after. The NES member gave me a good supply of the media too.

Figuring it out took at bit of work. I tried another power supply that just failed to product enough juice. So I grabbed the old battery charger and went with that. I might try to use a computer power supply at some point (I have several spares to play with). I'll need to get clips to connect the feed to the anode and cathode, but that should be pretty cheap. I also have a good amount of wire to use, or I'll just get some fresh. Cheap either way.

Hardest part, not, is picking what color to use. I went with black first since it's universal for evil and super-killy. It terrifies moonbats and fuds within 1000 yards radius. [rofl2] I do plan to mix up the grey dye I have for the next session.

If people really want, I'll take pictures during the process next time. At the outside, that's planned for Thursday.
 
Sweet deal. A few of us have just started finally milling our 80s. I'd imagine Wayne Douglas has a lower or two that need the anodizing treatment [rofl]


Sorry I couldn't resist. Never forget the RAPE
 
Sweet deal. A few of us have just started finally milling our 80s. I'd imagine Wayne Douglas has a lower or two that need the anodizing treatment [rofl]

Sorry I couldn't resist. Never forget the RAPE

You're just now starting to work on those lowers?

The treatment his 'lower' would get would involve the same solutions and electricity, but it wouldn't be treating aluminum. Hell, I could sell tickets to that and make a mint. [rofl2]
 
You're just now starting to work on those lowers?

The treatment his 'lower' would get would involve the same solutions and electricity, but it wouldn't be treating aluminum. Hell, I could sell tickets to that and make a mint. [rofl2]

Yea just starting. There's been a lot of other projects and I wanted the new garage done before winter. I've got one done with a lpk in it.

I'll provide the tank and the old school jump box on wheels for Wayne. Sorry I couldn't pass up a good ole ares post without bringing him up.
 
Yea just starting. There's been a lot of other projects and I wanted the new garage done before winter. I've got one done with a lpk in it.

I'll provide the tank and the old school jump box on wheels for Wayne. Sorry I couldn't pass up a good ole ares post without bringing him up.

We can laugh at it (for the most part) now. I have my second Ares/wayne lower to anodize still. I might do that one in grey, since I've mixed the dye up (yesterday).

I try to not get into the entire Ares/winter group buy these days. There's enough butthurt still being felt over it. I just wish we could inflict more on that jackhole from Maine.
 

Alright smart-ass...

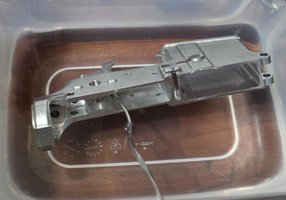
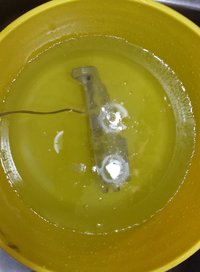
Lower with wire to connect to anode/hanger:
wired_up.jpg wired_up2.jpg

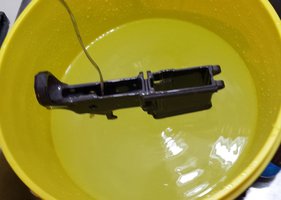
Soaking in denatured alcohol:
Denatured_Alc_soak.jpg

In NaOH soak (picture taken at the start):
in_NaOH.jpg

At end of the NaOH soak:
Out_NaOH_Soak.jpg

At the start of the anodizing process:
Anodizing_start.jpg

After anodizing:
Anodizing_done.jpg

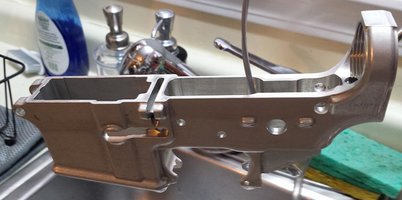
After soaking in the grey dye for about 1-1.5 hours (grey dye used needed more time to infuse the part), and boiled in the sealing solution for 20 minutes:
Anodized_dyed_sealed.jpg

So, before: wired_up.jpg and after: Anodized_dyed_sealed.jpg

Happy?? [smile]
 
that's pretty bad ass. Is the finish just as durable? Nice job on that set up.

Won't know about how durable for a while. I do plan on getting a different power supply in the next few days. Basically, one that I can adjust as well as see how much power it's pushing out.

Generally speaking, we're not in a military situation here. So I think this is a strong enough coating to do the job. Worst case, it's a good base treatment for Cerakote. [laugh]

BTW, the color the lower gets from the NaOH bath goes away within a few seconds of going into the Sodium Bisulfate solution.
 
Very cool. I will add to my list of things to do. If I get my hands on an unanodized lower could you show me the process ?
 
Last edited:
Very cool. I will add to my list of things to do. If I get my hands on an unanodized lower could you show me the process ?

If you ask real nice, I could show you with one of the lowers I still have to anodize. I need to drill the side holes in one (selector, hammer and trigger pin holes), but the other is almost ready to be treated.
 
Latest run done yesterday/last night... The new power supply I ordered popped it's small fuse after only a moment connected. Got more fuses on their way (due today). Time in the anodizing tank was about 90 minutes (+/-), then about 60-90 minutes in the dye tank. I skipped the sealing step since I didn't feel like boiling the solution. I have some info feelers out to see IF I can use that solution at room temp or not. Since I also have a heat stick, I could use that to increase the temp of the sealing solution to something higher. Not sure if it will get up to a boil or not.

Picture:
latest_anodize_test.jpg

If you look close, you can see some dimples on the magwell, making up a word... This was one of the 'malfunction' lowers (from the Ares ass-ache affair). Still, a good way to test out the system. [smile]
 
Yup .

Could you do like a tie dye?

There is talk of 'painting' with the dye, but not sure if I'd want to get into that. Might be able to do some color banding effect, but it would be more involved. IMO, Henry Ford had it right... "Any color you want, as long as it's black."

Oh, and tie dye is for hippies... And I KICK hippies... [rofl2]

I was thinking black with blood spots or different shades of green for a camo effect .
 
I was thinking black with blood spots or different shades of green for a camo effect .

That would be far easier with Cerakote...

Besides, the only colors I have (right now) are black and a light grey. I plan on getting a darker grey in the near future. Other colors would need to be obtained, along with buckets to hold them.
 
Back
Top Bottom