Hey Guys,
By now I'm sure you've seen Hanwei and Underwhere's great designs for the pocket and OWB holsters made out of kydex. Having been working on an IWB design, I figured I would share some experiences in the event you want to try and make your own.
Supplies:
12x24 sheet of .6 kydex from knifekits.com
.6 Rivets and hand rivet set kit
Chicago screws
Belt loops (I chose to use the ones from Comp-tac these because they are sturdy, thick, and also drilled for multiple settings. You can use other designs (including leather) or make your own.
Equipment:
Scrollsaw (or bandsaw or even a hand coping saw will work. I would not use a jig saw)
Dremel
Heat Gun
Drill and bits
Sander (I used my 90' air sander with different grits only b/c I had it and I hate sanding. Sandpaper, sponge, or anything else will work)
Razor Blade
Ruler
Instructions:
First I made my press. You can buy a press or make your own very easily. I started with 2 12" square pieces of 3/4 plywood. I then cut strips off my wife's yoga mat (don't tell her) and used spray glue to attach 2 pieces to each piece of plywood. Then I attached 1 piece of 1 1/2" thick foam to each board. It looks like this:

Now that the press was done I pre-heated my oven to 300` I cut 2 8x12" kydex strips with the razor blade and snapped them off. Then I placed them on baking sheets w/ tinfoil underneath and into the oven for 5 min. While they were heating up I set 1 piece of the press on the floor and figured out how I would orient the gun. I also taped a pencil on the top of the gun over the sights. When the kydex forms, I found that the pencil helps leave plenty of space for the sights to clear - even when you have to bend the sides. Once the timer went off I took 1 sheet out, placed in on the foam, set my gun, put the other piece of kydex on top and added the top of the press. Then you stand on it (can't be easier than that). Stay standing on the press for 3-4 minutes. The end result is the gun is completely covered in kydex (top to bottom). The kydex form will still be plyable at this point so gently start to shape the wings. Once it was completely cool I separated one side and removed the gun. Next step is to draw out the design with a pencil. I went for a high ride in the back so that the gun wouldn't be directly on my skin.
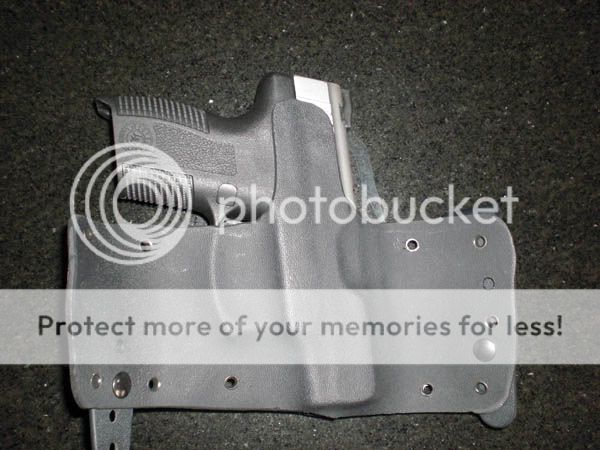
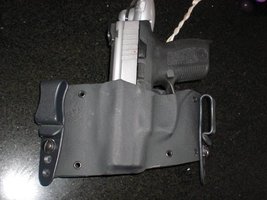
From here I took the whole thing to the scrollsaw. Following my pencil marks I cut the whole holster out using the high ride pattern. I also opted to cut the rear side on an angle upwards which you can see in the pictures. The reason I did this was I found through trial and error that the more I could remove from the rear side, the less it interfers with taking my wallet out of my back pocket. Once Now that I had my rough shape, I decided where the front side would be cut and used the dremel for that task. I found that leaving some of the trigger guard exposed offered the opportunity to get a positive grip on the gun when drawing.
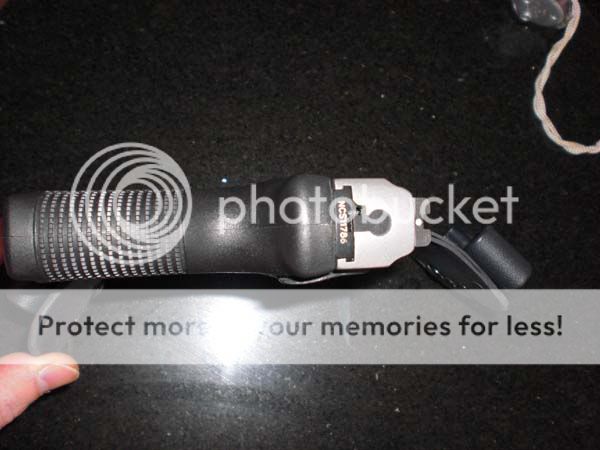
Next come the rivets. Using a 3/16 drill bit, I made holes all around the outside. One thing to note here: I would not set a rivet closer than an 1-1.5" from the top opening. I found that if you do it creates too much tension and drawing suffers. The kydex needs to flex and open a bit when taking the gun out and it can't move with rivets any closer. Oh, I'll also mention how to use the hand setting kit. The kit has 2 parts, the punch and a little coin. The rivet has 2 ends - one already curled and one straight. The coin is used on the straight end for best results. Once the holster is riveted then you decide where you want the belt loops. I found that the top of the belt loops should make a line right across the trigger guard. This seems to provide just the right ride height for me. Drill the holes and use the chicago screws to set the loops.
Final step is to use the heat gun to shape the wings accordingly. I went with a really wide design both for better weight distribution and so that it didn't interfere with my wallet. Sand all the edges and you are done. Its really not that bad to do.
My next design will incorporate some leather for the wings and to hold the belt loops. I think this will make it much easier as shaping the kydex wings to fit the body is a PIA.
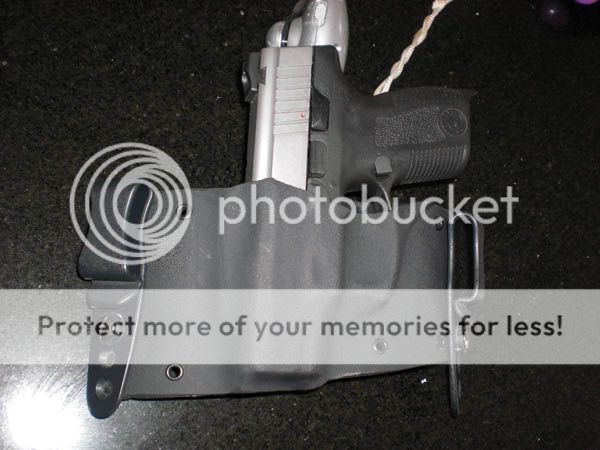
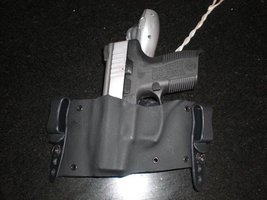
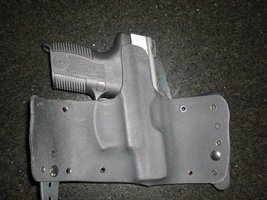
Here is my end result. Its super comfortable and holds the gun great.
By now I'm sure you've seen Hanwei and Underwhere's great designs for the pocket and OWB holsters made out of kydex. Having been working on an IWB design, I figured I would share some experiences in the event you want to try and make your own.
Supplies:
12x24 sheet of .6 kydex from knifekits.com
.6 Rivets and hand rivet set kit
Chicago screws
Belt loops (I chose to use the ones from Comp-tac these because they are sturdy, thick, and also drilled for multiple settings. You can use other designs (including leather) or make your own.
Equipment:
Scrollsaw (or bandsaw or even a hand coping saw will work. I would not use a jig saw)
Dremel
Heat Gun
Drill and bits
Sander (I used my 90' air sander with different grits only b/c I had it and I hate sanding. Sandpaper, sponge, or anything else will work)
Razor Blade
Ruler
Instructions:
First I made my press. You can buy a press or make your own very easily. I started with 2 12" square pieces of 3/4 plywood. I then cut strips off my wife's yoga mat (don't tell her) and used spray glue to attach 2 pieces to each piece of plywood. Then I attached 1 piece of 1 1/2" thick foam to each board. It looks like this:
Now that the press was done I pre-heated my oven to 300` I cut 2 8x12" kydex strips with the razor blade and snapped them off. Then I placed them on baking sheets w/ tinfoil underneath and into the oven for 5 min. While they were heating up I set 1 piece of the press on the floor and figured out how I would orient the gun. I also taped a pencil on the top of the gun over the sights. When the kydex forms, I found that the pencil helps leave plenty of space for the sights to clear - even when you have to bend the sides. Once the timer went off I took 1 sheet out, placed in on the foam, set my gun, put the other piece of kydex on top and added the top of the press. Then you stand on it (can't be easier than that). Stay standing on the press for 3-4 minutes. The end result is the gun is completely covered in kydex (top to bottom). The kydex form will still be plyable at this point so gently start to shape the wings. Once it was completely cool I separated one side and removed the gun. Next step is to draw out the design with a pencil. I went for a high ride in the back so that the gun wouldn't be directly on my skin.
From here I took the whole thing to the scrollsaw. Following my pencil marks I cut the whole holster out using the high ride pattern. I also opted to cut the rear side on an angle upwards which you can see in the pictures. The reason I did this was I found through trial and error that the more I could remove from the rear side, the less it interfers with taking my wallet out of my back pocket. Once Now that I had my rough shape, I decided where the front side would be cut and used the dremel for that task. I found that leaving some of the trigger guard exposed offered the opportunity to get a positive grip on the gun when drawing.
Next come the rivets. Using a 3/16 drill bit, I made holes all around the outside. One thing to note here: I would not set a rivet closer than an 1-1.5" from the top opening. I found that if you do it creates too much tension and drawing suffers. The kydex needs to flex and open a bit when taking the gun out and it can't move with rivets any closer. Oh, I'll also mention how to use the hand setting kit. The kit has 2 parts, the punch and a little coin. The rivet has 2 ends - one already curled and one straight. The coin is used on the straight end for best results. Once the holster is riveted then you decide where you want the belt loops. I found that the top of the belt loops should make a line right across the trigger guard. This seems to provide just the right ride height for me. Drill the holes and use the chicago screws to set the loops.
Final step is to use the heat gun to shape the wings accordingly. I went with a really wide design both for better weight distribution and so that it didn't interfere with my wallet. Sand all the edges and you are done. Its really not that bad to do.
My next design will incorporate some leather for the wings and to hold the belt loops. I think this will make it much easier as shaping the kydex wings to fit the body is a PIA.
Here is my end result. Its super comfortable and holds the gun great.
Attachments
Last edited:
![[grin]](/xen/styles/default/xenforo/smilies.vb/041.gif "Grin [grin]")
![[wink]](/xen/styles/default/xenforo/smilies.vb/002.gif "Wink [wink]") I don't know what would make someone win... but it'd be great to see everyone trying their hand at making holsters ... if anything just to see all of the cool designs people come up with
I don't know what would make someone win... but it'd be great to see everyone trying their hand at making holsters ... if anything just to see all of the cool designs people come up with ![[smile]](/xen/styles/default/xenforo/smilies.vb/001.gif "Smile [smile]")