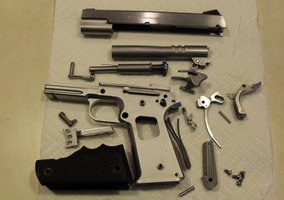
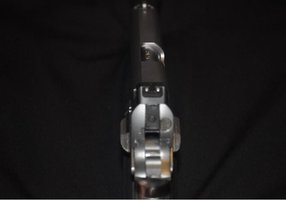
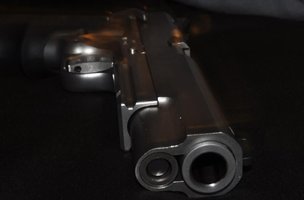
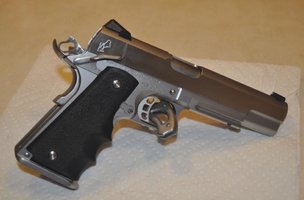
Ok, I'll be up front, There's not much done here in photos, but I will share what I have and how my process went. Bought a whole buncha nice parts, and played with them a bit. Here's the shopping list, and were procured courtesy of midway:
--Cylinder and Slide Screws and Bushings, firings pin, trigger pull set @4.5lbs and strut High Grip tactical ambi safety.
--Pieces from Wilson Combat were a High Ride Beavertail Grip safety, Shok Buff kit, Combat ejector, Full length guide rod and Reverse Plug.
--For the sights I got Novak Front and Rear tritium sights.
--Parts from Ed Brown were a Firing pin stop, Rebuild Kit, and Barrel Link.
--From Kimber a nice stainless Extractor, my mitts go around some Hogue Wraparound Grips,
--Trigger is a Nighthawk Custom Match Aluminum trigger, and the hot lead all comes soaring out of a SVI 5" ramped Bull Barrel. Think I got the Barrel from somewhere else, not sure where at the moment...
All parts are stainless except the trigger and the sights.
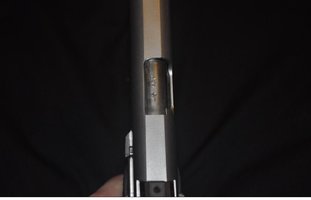
I went to a smith and pushed the sights myself, hand fitted the slide stop, did about 95% of the fitting for the thumb safety, filed down the edges of the trigger for free glide when in the frame, took it down and built it up about numerous times, reamed the chamber myself, and put those crazy springs in their places, gah, mainspring housing and retainer pins... pain in the butt.
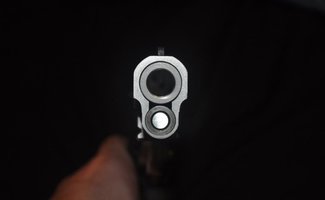
There is quite a bit that goes into building a 1911 and I think I lucked out on getting a good smith, charged me a pittance for checking the lock up, the timing, lug cutting, etc. Not sure how much extra work he really did or if all the quality parts actually fit as nice as they seem... I dunno if I am ready to invest in all the tools to do build up one of these guns from the bottom. Reamers all the gauges, there's quite a bit that you need... The most hair raising part was using the reamer and the go and no-go gauges. On this pricey SVI barrel, I knew if i overdid it it would become a paperweight, so when they say 1/8th of a turn on the reamer... they mean it! Its all together now though, it shoots nice, and will publish range reports soon! My reloads are shooting ok as well got a chrony and things seem to be working pretty nicely! Feel free to add comments and or anything else thanks for looking guys!
--Cylinder and Slide Screws and Bushings, firings pin, trigger pull set @4.5lbs and strut High Grip tactical ambi safety.
--Pieces from Wilson Combat were a High Ride Beavertail Grip safety, Shok Buff kit, Combat ejector, Full length guide rod and Reverse Plug.
--For the sights I got Novak Front and Rear tritium sights.
--Parts from Ed Brown were a Firing pin stop, Rebuild Kit, and Barrel Link.
--From Kimber a nice stainless Extractor, my mitts go around some Hogue Wraparound Grips,
--Trigger is a Nighthawk Custom Match Aluminum trigger, and the hot lead all comes soaring out of a SVI 5" ramped Bull Barrel. Think I got the Barrel from somewhere else, not sure where at the moment...
All parts are stainless except the trigger and the sights.
I went to a smith and pushed the sights myself, hand fitted the slide stop, did about 95% of the fitting for the thumb safety, filed down the edges of the trigger for free glide when in the frame, took it down and built it up about numerous times, reamed the chamber myself, and put those crazy springs in their places, gah, mainspring housing and retainer pins... pain in the butt.
There is quite a bit that goes into building a 1911 and I think I lucked out on getting a good smith, charged me a pittance for checking the lock up, the timing, lug cutting, etc. Not sure how much extra work he really did or if all the quality parts actually fit as nice as they seem... I dunno if I am ready to invest in all the tools to do build up one of these guns from the bottom. Reamers all the gauges, there's quite a bit that you need... The most hair raising part was using the reamer and the go and no-go gauges. On this pricey SVI barrel, I knew if i overdid it it would become a paperweight, so when they say 1/8th of a turn on the reamer... they mean it! Its all together now though, it shoots nice, and will publish range reports soon! My reloads are shooting ok as well got a chrony and things seem to be working pretty nicely! Feel free to add comments and or anything else thanks for looking guys!
Attachments
Last edited:
![[smile]](/xen/styles/default/xenforo/smilies.vb/001.gif "Smile [smile]")