After getting banned for trolling, here is contribution to redeem myself (how do these "Infractions" scores work, anyway?)
![[troll]](/xen/styles/default/xenforo/smilies.vb/016.gif "Troll [troll]")
Before we get into this, I want to be up front and say I was well aware that the claim that this XLP Adams Arms gas block would fit under ANY free float handguard was not the most accurate, but I also know how to run a mill, so this was not a concern. I certainly don't blame Adams Arms because I've always been more of a problem solver than a complainer. I was also aware of the fact that the Parallax Tactical rail is super snug. I was feeling lucky, and the gamble paid off.
Needless to say - if you don't know what you are doing, don't try this at home.
Also, I should add that I have ATF approval to build a SBR.
With that all being said, lets get started:
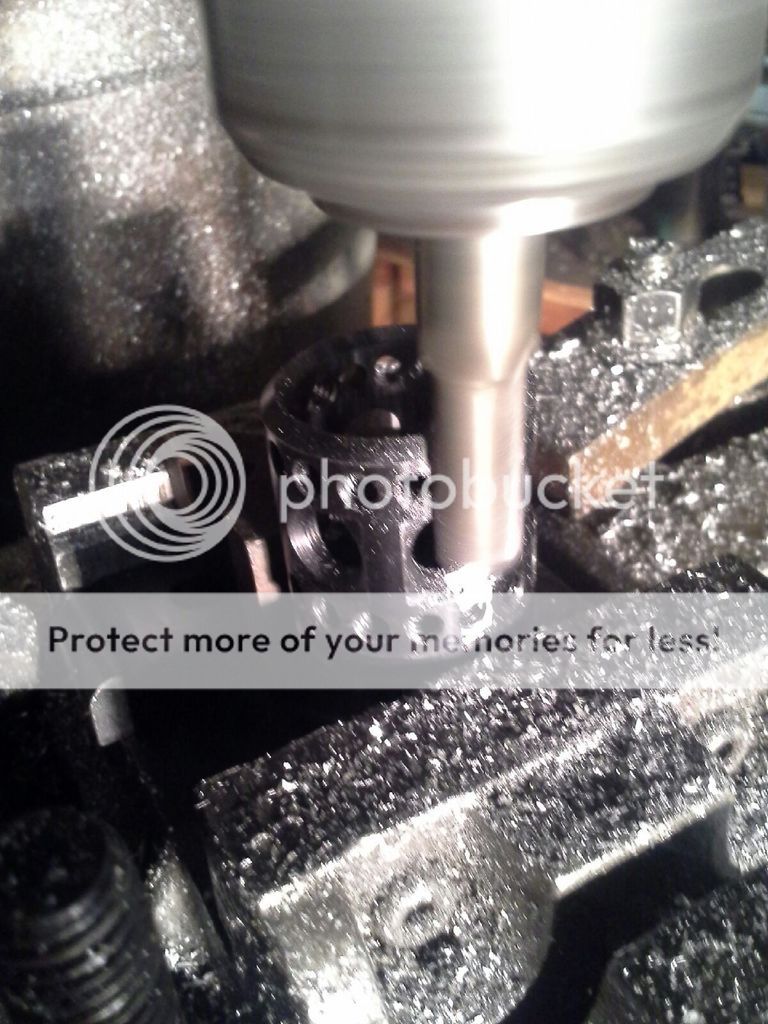
The first thing you'll need to do is install your barrel nut. Once installed, I marked where the drive rod passed the top of the barrel nut with whiteout. You can see a bit of the whiteout underneath the endmill. Next, I measured the thickness of a stock barrel nut and scratched off the whiteout beyond this width so I would not mill too deep. I used blocks to chuck it in a vise in the mill. The vise I used was not ideal, but it got the job done, and was what I had at my disposal. I used an endmill slightly larger than the diameter of the drive rod bushing.
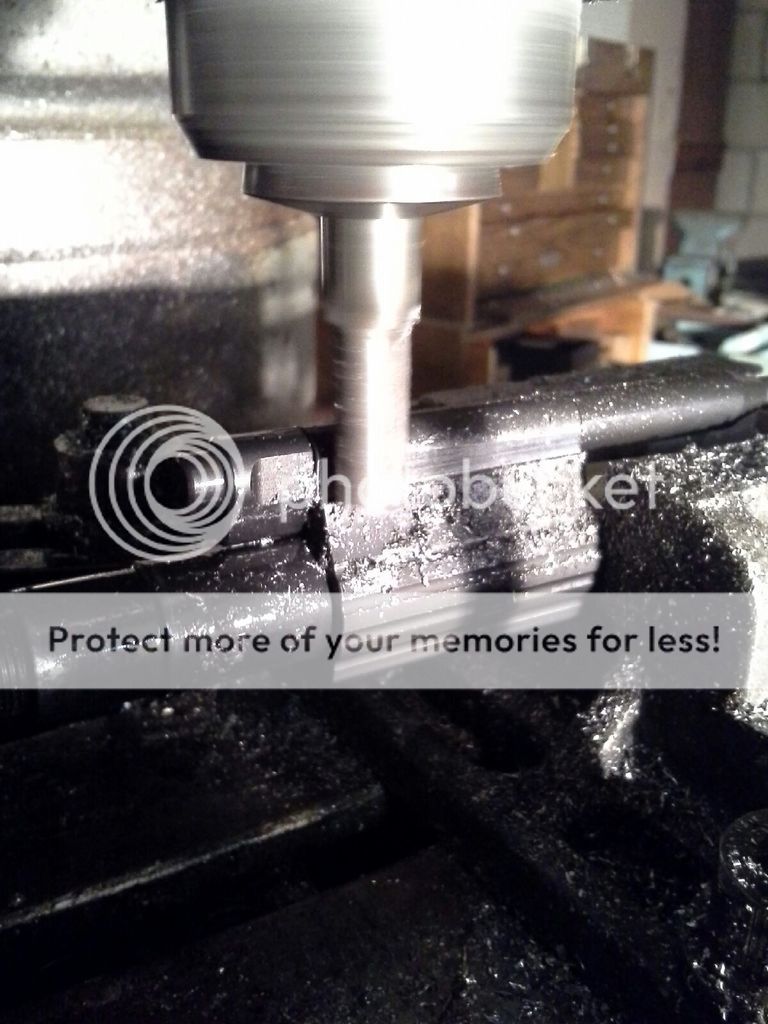
The next piece I had to modify was the XLP gas block. I need to give a shout out to Cody at Adams Arms for helping me get my hands on one. I originally had a standard picatinny kit and was planning on milling down the handguard, but was anxious to see if I could get the entire assembly under such a snug handguard. Awesome customer service. Anyway, even though the gasblock was small, the inside of the handguard rode on the very edge of it. I chucked the installed gas block in the vise and removed just enough metal to run parallel to the outside diameter of the drive rod. (for the machinist nerds out there, I will mention this was a second pass)
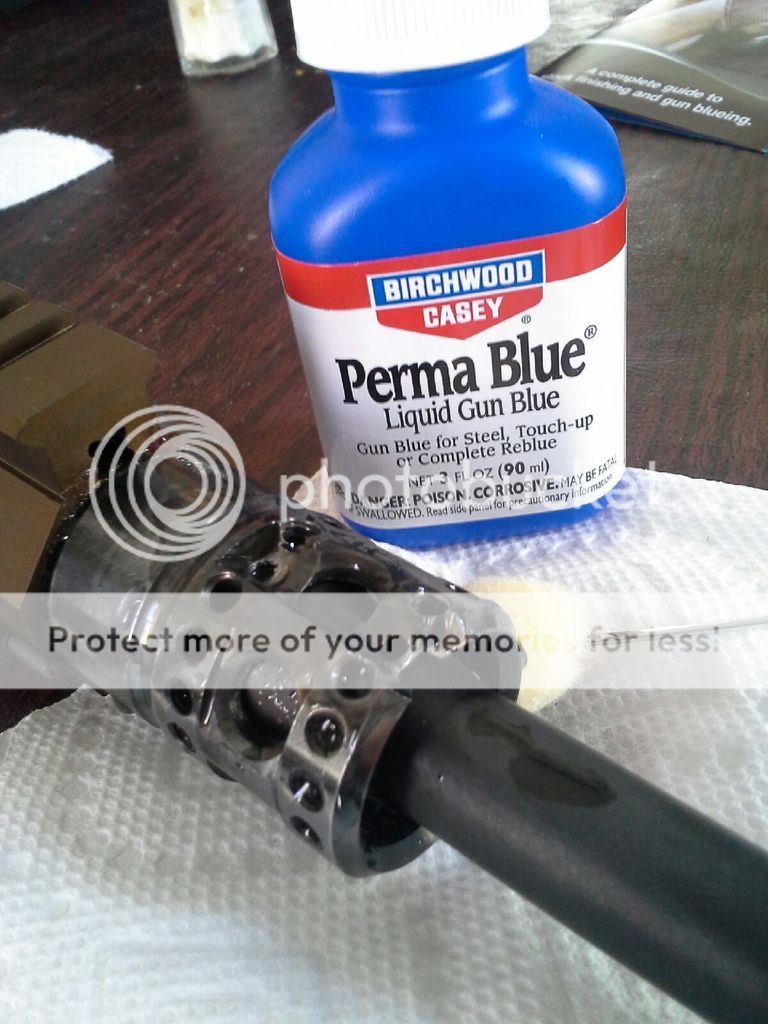
After I finished all the machine work, everything fit perfectly. Raw steel is never a good idea, so I figured I'd try Perma Blue. I followed all the steps and it worked amazingly well on the barrel nut - almost a perfect match to the original finish of the barrel nut. The gas block didn't take so well - almost as if it were a different alloy or something. I put a healthy supply of grease on it till I figure out how I'll treat it, for now.
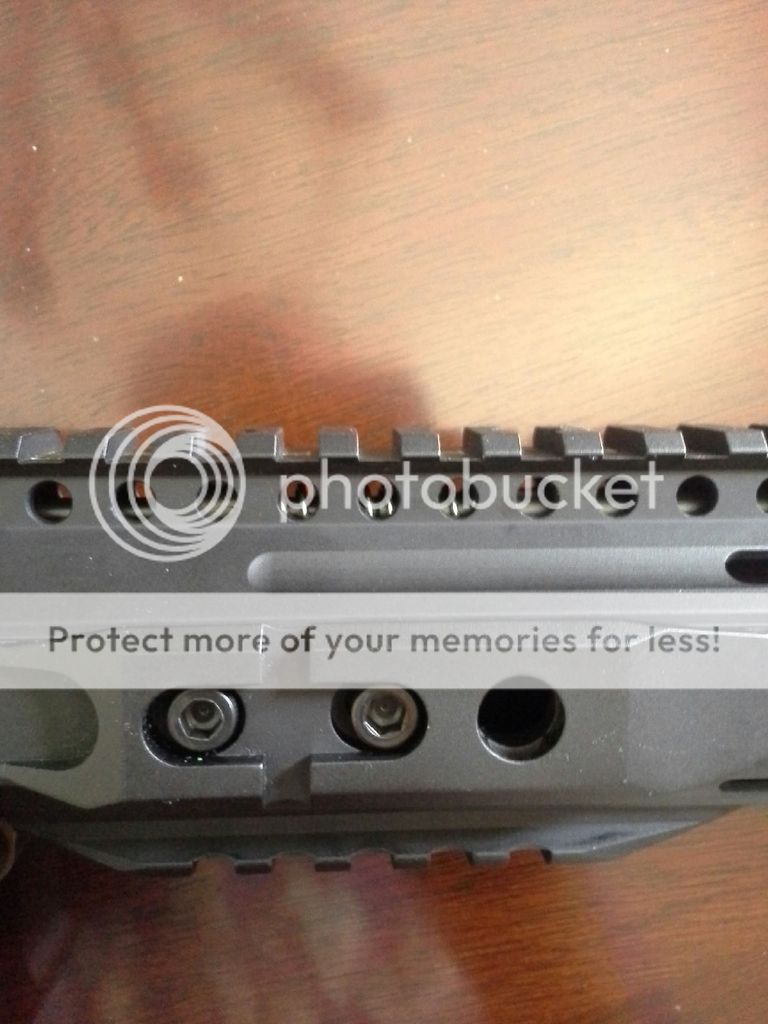
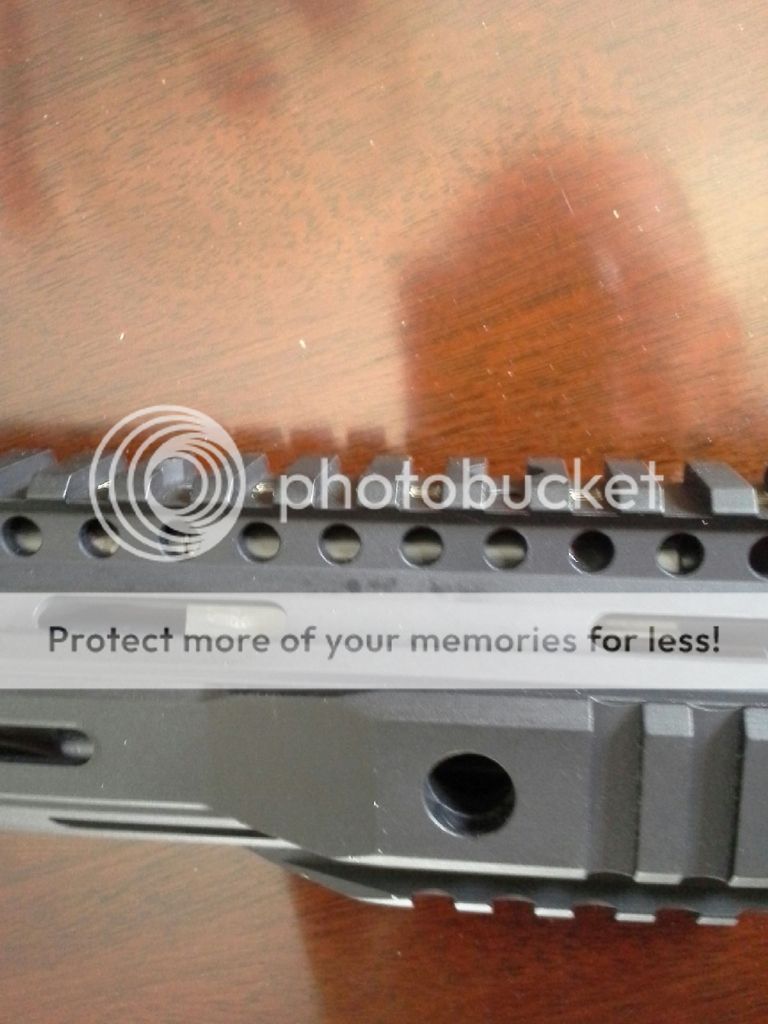
Here you can see the drive rod, drive rod bushing, and drive rod spring. It looks pretty cool through these holes of the Parallax rail - almost like they were made to go together!
Here you can see the perfect fit of the gas block underneath the Parallax rail after trimming the gasblock down to size. All of the cut metal is hidden by the rail, so you can't even tell the block has been modified.
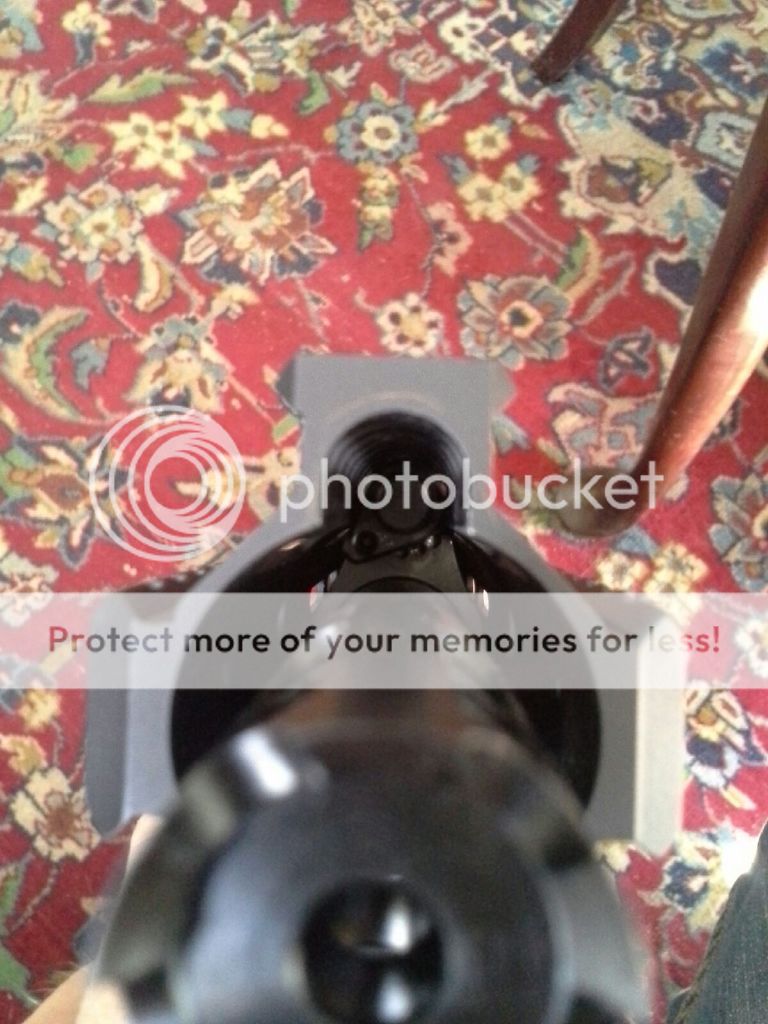
The adjuster for the gas block has a full range of motion. Here it is adjusted to max flow.
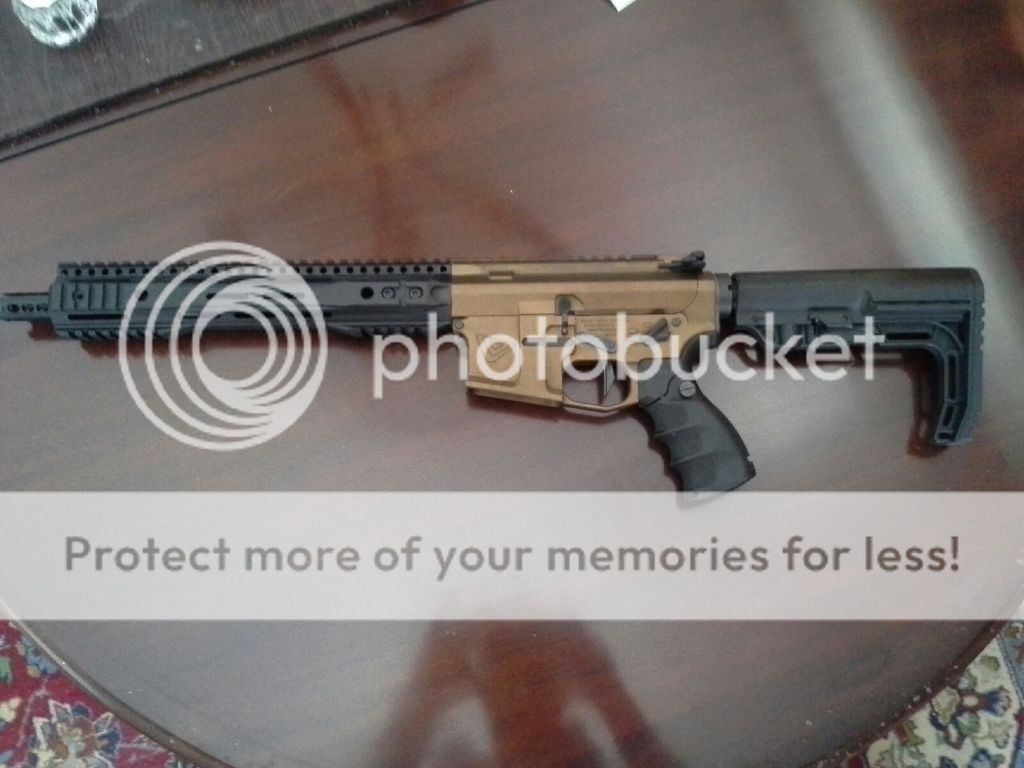
All put together. Billet Rifle Systems receiver set, if you were wondering. Lots of fancy goodies in this build.
Here's a terrible quality video of it in action in the hands of my friend Nate up at Bobs - Wednesday night rifle night:
[video=youtube;o3nxvzoppjQ]https://www.youtube.com/watch?v=o3nxvzoppjQ[/youtube]
(if someone can tell me why my ****ing embed video code doesn't work, that would be swell)
Before we get into this, I want to be up front and say I was well aware that the claim that this XLP Adams Arms gas block would fit under ANY free float handguard was not the most accurate, but I also know how to run a mill, so this was not a concern. I certainly don't blame Adams Arms because I've always been more of a problem solver than a complainer. I was also aware of the fact that the Parallax Tactical rail is super snug. I was feeling lucky, and the gamble paid off.
Needless to say - if you don't know what you are doing, don't try this at home.
Also, I should add that I have ATF approval to build a SBR.
With that all being said, lets get started:
The first thing you'll need to do is install your barrel nut. Once installed, I marked where the drive rod passed the top of the barrel nut with whiteout. You can see a bit of the whiteout underneath the endmill. Next, I measured the thickness of a stock barrel nut and scratched off the whiteout beyond this width so I would not mill too deep. I used blocks to chuck it in a vise in the mill. The vise I used was not ideal, but it got the job done, and was what I had at my disposal. I used an endmill slightly larger than the diameter of the drive rod bushing.
The next piece I had to modify was the XLP gas block. I need to give a shout out to Cody at Adams Arms for helping me get my hands on one. I originally had a standard picatinny kit and was planning on milling down the handguard, but was anxious to see if I could get the entire assembly under such a snug handguard. Awesome customer service. Anyway, even though the gasblock was small, the inside of the handguard rode on the very edge of it. I chucked the installed gas block in the vise and removed just enough metal to run parallel to the outside diameter of the drive rod. (for the machinist nerds out there, I will mention this was a second pass)
After I finished all the machine work, everything fit perfectly. Raw steel is never a good idea, so I figured I'd try Perma Blue. I followed all the steps and it worked amazingly well on the barrel nut - almost a perfect match to the original finish of the barrel nut. The gas block didn't take so well - almost as if it were a different alloy or something. I put a healthy supply of grease on it till I figure out how I'll treat it, for now.
Here you can see the drive rod, drive rod bushing, and drive rod spring. It looks pretty cool through these holes of the Parallax rail - almost like they were made to go together!
Here you can see the perfect fit of the gas block underneath the Parallax rail after trimming the gasblock down to size. All of the cut metal is hidden by the rail, so you can't even tell the block has been modified.
The adjuster for the gas block has a full range of motion. Here it is adjusted to max flow.
All put together. Billet Rifle Systems receiver set, if you were wondering. Lots of fancy goodies in this build.
Here's a terrible quality video of it in action in the hands of my friend Nate up at Bobs - Wednesday night rifle night:
[video=youtube;o3nxvzoppjQ]https://www.youtube.com/watch?v=o3nxvzoppjQ[/youtube]
(if someone can tell me why my ****ing embed video code doesn't work, that would be swell)
Last edited: